


Likes
Comments
Share


@bongbong
Follow
a little light and heat stress occured. but photoperiod plants are so strong. they kept growing.

Likes
18
Share


@Bluntblazer66
Follow
Mar 31st
Week 16
Changed nutrients to straight Dense Bud Compactor 1 gram/ litres @ 900-1000 ppm for 2 days
CR # 1 showing signs of root wrought
I removed the slimy parts of the roots and will watch closely
On April 2nd I will add the rest of the nutrients to the existing solution
April 2nd
Fresh nutrients today, all nutrients added
8 litres of fresh water + 6 litres of the existing Dense Bud solution @ 1100 ppm
CR # 1 is dying due to root wrought
I removed most of the roots today. I changed all the water today with this one.
I’m hoping to get it to harvest, but things don’t look good.
I will probably flush this soon to harvest what I have.
CR # 2 is doing fine as far as roots. Buds are smaller on this one but may fill out more with the Dense Bud Compactor.
April 6th
Switched CR # 1 to flush solution
Root wrought was sever and unfortunately 90% of the root mass had to be removed
Time to save what I have

Likes
37
Share


@Mr_Motalovah
Follow
Hello growers and tokers! 👋 👩🌾 🧑🌾.🔥💨
Settled great after last week's transplant.
Start giving her grow nutrients this week and she got a nice stretch.
I also topped her at the beginning of the week.
These photos are from when I topped I couldn't get any pictures done at the end of the week.
She took the topping nice and is growing fast.
Unfortunately this is her last week in veg, next week I flip to 12/12 because all the other ladies are ready.
Stay tuned for updates on this little one.
If you like what you see check out the other strains sharing the tent.
Have a great Cannafam!

Processing
Likes
43
Share


@Jack_Greenstalk
Follow
I topped both plants once thus far, cleared their lower nodes up to the 3rd node on "nemo" and 4th on "v" names are easier then saying seed 1 and seed 4. added pics and video of day 34/35 for these two. hope y'all can stand the slight off hue from grow light. pics/vids are taken on phone camera thru grow room glasses, when watered the 3 gal pots are heavy and not easy to yank out for a picture.

Likes
6
Share


@organicman
Follow
harvested
hb2,ww1,ob3-2nd,gc1,ww2,bg1,bg3,bg4,sp1,hb2,bg2-2,ob1-2
see all results in fotos
____________________________________________
light- and watering schedule: see photos
now:
12 plants
2 x Auto Orange Bud > Dutch Passion (early80's)
2 x Haze Berry Automatic > Royal Queen Seeds (2018)
2 x Auto Bubblegum > TH Seeds (late 80's)
2 x Original Auto BubbleGum > Fast Buds Company (late 80's)
1 x Strawberry Pie Auto > Fast Buds Company
1 x Gorilla Cookies Auto Seed Stockers (2015)
2 x Auto White Widow x Big Bud > Female Seeds
setup + strategy:
18 seeds
3 x Auto Orange Bud (early80's)
3 x Haze Berry Automatic (2018)
3 x Auto Euforia (late 90's)
2 x Auto Bubblegum > TH Seeds (late 80's)
2 x Auto Bubblegum > Fast Butts (late 80's)
2 x Strawberry Pie Auto
1 x Gorilla-Cookies Auto (2015)
2 x Auto White Widow x Big Bud
setup:
18 x gronest 2 liter
60 cm x 120 cm x 180 cm (2 x 4) growtent
4 l humidifier
25 watt axial fan
15 watt clip fan
ro-filter
bath room with a 50 watts room fan (-> carbon filter not necessary)
...and a lot of odds and ends.
grow strategy:
max yield by stressing with:
1. tiny shoes (2 l fabric pots standing on 3 plastic rings (4 cm) for max oxygen)
2. tiny growspace (18plants on 0.72 sqm)
3. many strains (8 strains)
4. annoying neighbourhood (mixing old - i.e. bubblegum (late 80's) - with young- i.e. hazeberry (2018) - genetics)
5. no stress by light or food or water
6. unintentionally too much food
plus:
- no lst - no hst - just leaf tucking
- positioning bigger strains (euphoria, orange bud, haze berry) or just bigger phenos on less intense light spots (end of tent + edges)
- music-rotation: 24 hrs reggae (for sativas) - 24 hrs classicals (because it's scientifically proofed) - 24 hrs traditionals from the hindukush region (for the indicas)
max efficiency (min electricity - max yield):
- light: 23 h on - 1 h off
- keeping the distance of 18" (45 cm) and dimming to the right par (lux) - value depending on growing stages (see sheet: beginning 185 par ( 10000 lux/100 watt )/end 340 par ( 18000 lux/175 watt )) => ends up in approx. 170 watts in average over max 15 weeks
temperatur management:
- using approx. max. half of what the lamp can do keeps temperature low:
my tsl 2000 is pulling max. 360 watts of the wall - i need only 175 watts, results in less temperature than using a 175 watts lamp
- adjusting the temperature by using a humidifier outside of tent:
blown in humidity is soaking degrees and is transported out by fan, works much better than doing the same with pure air
summer extreme: no humidifier: 36°C / 35 rh - with humidifier: 29°C / 65 rh
works for 1-2 weeks of real hot summer days, no mould, no signs of stress in two summers
germination:
seeding in waterglass
spraying "basic"-water: ro-water (22 ppm) + calmag to 180 ppm every 4 - 8 hours until sprouted
man versus fungus gnat:
5 days before seeding i'm running the tent with "basic"-watered pots as if there were plants inside - led on, fans on, humidifier on. Fungus gnats coming with the soil might take the chance to come out now for breeding. i'm waiting with a 9 mm rifle. in the past i found 6 gnats in 2 of 8 x 50 l biobizz lightmix bags coming out of the soil. i could eliminate every single gnat successfully ;)
rotating harvest:
the little ones will be harvested completely when ready. at this point only the top branches of the big ones will be cut...and the new (basic-watered) pots of the new grow will move into the tent. 2-3 weeks later the secod half of the big ones will be cut and the second half of the new grow will move in...
nutes:
biobizz / soil: biobizz lightmix
bloom,grow,topmax,activera,algamic
+ aminopower instead of bio heaven (too expensive)
individual feeding schedule/once a week:
veg: 200 - 600 ppm
bloom: 600 - 900 ppm
water:
ro-water with:
veg: 100-150 ppm calmag
bloom: 150 ppm calmag


Likes
7
Share

@DogDoctorOfficial
Follow
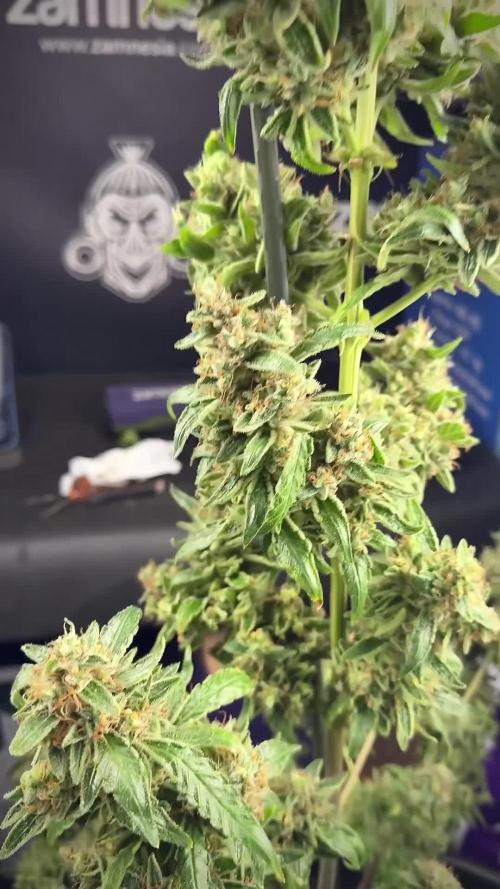
# LSD Zamnesia Tripping 🙂 | Harvest Day — Week 14 From Seed
Well…
This one became something special.
Week 14 from seed, harvest day officially arrived for our LSD girls, and honestly, standing in front of these plants during harvest felt a little surreal. The entire room had that strange mix of excitement, silence, stickiness, exhaustion, curiosity, and gratitude growers probably know very well.
This run taught us a lot.
Before diving into the harvest itself, a quick recap for everyone joining now:
These plants were grown under 12/12 from seed. No traditional long vegetative phase. No giant bush-building period. No months of shaping before flowering. The idea behind these runs has always been curiosity:
- observing morphology,
- understanding structure,
- exploring how genetics behave under flowering conditions from the beginning,
- and learning how much expression comes naturally when we interfere less.
And honestly?
The morphology on these LSDs became fascinating.
For a mostly indica-leaning hybrid, they absolutely did not develop the way many people would expect from a classic “indica structure.” Instead of short dense bushes, these girls built massive central colas with strong vertical expression and incredible flower stacking all the way through.
Not the tallest plants in the world…
…but the flower mass?
Serious business.
You can actually see it clearly in the photos where I’m standing beside them, holding them, comparing them to speakers, equipment, and studio gear. The scale becomes obvious immediately. The plants may not dominate a room vertically, but the density and flower production are honestly impressive.
Huge colas.
Heavy structure.
Beautiful stacking.
Outstanding resin production.
And the closer harvest came, the more unreal they became.
Of course, before chopping everything down, we had to bring them into the studio one final time. Some plants deserve proper portraits before the end, and these girls definitely earned that treatment.
The studio sessions were incredible:
- dramatic lighting,
- macro photography,
- behind-the-scenes moments,
- live videos,
- giant cola shots,
- resin closeups,
- and all the tiny details that are impossible to appreciate properly with the naked eye alone.
This is also where macro photography becomes something really special.
Macro photography is not just “zooming in.”
It’s about revealing another world hidden inside the flower:
- trichome heads,
- resin texture,
- pistil coloration,
- gland development,
- frost layering,
- microscopic color changes,
- tiny resin rivers running across sugar leaves.
And harvest time is honestly one of the most beautiful phases for macro work because the plant is at peak expression:
- swollen calyxes,
- mature trichomes,
- fading leaves,
- curling pistils,
- oily resin everywhere.
The flowers almost stop looking real under proper magnification.
And speaking about resin…
Oh my God.
The finger hash during harvest was absolutely insane.
Or technically, since we are talking about live fresh material, this would be closer to charas than classic dry-trim finger hash.
And there is actually a difference.
Traditional finger hash usually comes from handling dried or partially dried flowers during trimming, while charas is collected directly from fresh living material. The resin profile, texture, aroma, and even effects can feel noticeably different because the compounds are still fully alive and fresh inside the plant material.
This sticky dark resin has been used traditionally for centuries, especially in places like India, where charas still holds cultural, medicinal, and spiritual importance today. Even Lord Shiva is historically associated with charas in many traditions.
And honestly, after handling these plants during harvest… it becomes very easy to understand why humans have respected this resin for such a long time.
The flowers were unbelievably oily.
Not dry frost.
Not sandy frost.
Not airy resin.
Proper greasy, sticky, living resin.
The kind that coats your gloves instantly and keeps building layer after layer while working. At some point during harvest, you stop trimming and start realizing you accidentally created little resin sculptures on your fingertips. 😄
We also froze around 800 grams of fresh material for future washing and extraction work.
And this is only the beginning.
Future reports will cover:
- washing,
- ice water extraction,
- separating grades,
- drying techniques,
- collection,
- curing,
- and the entire process from fresh frozen material into final concentrate.
So definitely stay tuned, because that part of the journey is going to be incredibly interesting too.
The remaining plants are now hanging whole for drying.
Instead of aggressively breaking everything down into tiny branches immediately, we chose to dry the plants mostly whole to slow the drying process naturally and preserve quality as much as possible.
Current expectation:
- around 7–12 days drying,
depending on how each plant behaves individually.
Because at this stage, patience matters.
Drying too quickly can destroy weeks and months of work surprisingly fast:
- aroma loss,
- harsh smoke,
- terpene degradation,
- uneven curing,
- brittle flower texture.
Harvest is not the finish line.
Drying and curing are part of the grow too.
And honestly, some people underestimate just how important these final stages truly are.
Now let’s talk trichomes for a moment, because this is always an important conversation.
For me personally, harvest timing is all about trichome maturity.
This run was harvested with:
- the majority cloudy,
- a small but important touch of amber,
- and a few still transitioning.
That is personally where I believe the plant reaches peak balance.
Cloudy trichomes usually represent peak cannabinoid maturity and expression for the type of effect I personally prefer:
strong,
complex,
alive,
euphoric,
full-spectrum.
Amber absolutely has value too, and I encourage people to experiment with later harvest windows if they enjoy heavier, more sedative effects. But in my experience, once too many heads become amber, part of the energetic complexity starts shifting toward degradation pathways and more CBN-heavy expressions.
That can be wonderful medicine too.
Just different medicine.
This is why harvest timing becomes deeply personal for every grower eventually. There is no universal “perfect harvest day.” There is only observation, intention, and preference.
And these girls felt ready.
The fading across the leaves confirmed it beautifully too:
- yellows,
- pale greens,
- orange pistils,
- swollen flowers,
- fully expressed resin,
- end-of-life coloration everywhere.
The plants looked alive and dying at the same time in the most beautiful possible way.
Mr. Baggy, of course, stayed with us throughout the entire process helping along the way 😄 and we included a few behind-the-scenes moments because honestly, those moments matter too. Sometimes the chaos around the grow becomes part of the story itself.
And next week?
Next week becomes another important chapter:
- trimming,
- curing updates,
- smoke review,
- washing process,
- extraction updates,
- and the final transformation of everything we have been nurturing for all these weeks.
This harvest actually happened a while ago already, which gave us enough time to let the drying and curing process evolve properly before discussing final quality. We wanted the next report to feel complete instead of rushed.
And finally…
Thank you.
To Zamnesia for the genetics.
To Plagron.
To F.O.G.
To the LEDs and all the gear involved.
To GrowDiaries.
To the community.
To the longtime followers and OGs.
To the new curious visitors.
To the supporters.
To the skeptics.
To the silent viewers.
To the people who stayed since day one.
To the people who just discovered this run now.
To the lovers and even the haters 😄
If someone spent even a few moments here sharing this journey with us, then they deserve some gratitude and positive energy in return.
Wishing everyone healthy plants, peaceful minds, sticky fingers, beautiful harvests, and a little curiosity on their own journey too. 🌱
📡 DELETED @ 1K Please stay tuned.we never quit https://www.youtube.com/@TheDogDoctorOfficial NEW 🙏 Thank you for your patience and continued support.
FOR DISCOUNT CODES AND MORE JUST FOLLOW THE LINK https://website.beacons.ai/dogdoctorofficial
📲 Don’t forget to Subscribe and follow me on Instagram and YouTube @DogDoctorOfficial for exclusive content, real-time updates, and behind-the-scenes magic. We’ve got so much more coming, including transplanting and all the amazing techniques that go along with it. You won’t want to miss it.
GrowDiaries Journal: https://growdiaries.com/grower/dogdoctorofficial
Instagram: https://www.instagram.com/dogdoctorofficial/
YouTube: https://www.youtube.com/@dogdoctorofficial Deleted by Youtube - https://www.youtube.com/@TheDogDoctorOfficial NEW
Vimeo : https://vimeo.com/dogdoctorofficial Under construction stay tuned ⸻
Explore the Gear that Powers My Grow
If you’re curious about the tech I’m using, check out these links:
🔆 Lighting & Environmental Control
• Future of Grow — Advanced LED lighting technology
https://www.futureofgrow.com/
DISCOUNT CODE: DOG20
• Lumiflora — Under-canopy LED lighting
https://lumiflorade.com/
• TrollMaster — Environmental controllers and automation gear (past collaboration)
⸻
Genetics
• Zamnesia Seeds — Genetics used in this project
https://www.zamnesia.com/
⸻
🌱 Soil, Substrates, Boosters & Root Support
• Plagron — Substrates, bio mixes, and supportive products
https://plagron.com/en/
⸻
🎒 Storage, Curing & Preservation
• Grove Bags — Curing and storage solutions
https://grovebags.com/
⸻
📸 Photography Equipment & Tools
(Not sponsors, but part of my creative toolkit)
• Sony A6700
• Sony full-frame macro lens + few more
• Stacking photography workflow - learning
• iPhone (for behind-the-scenes shots)
We’ve got much more coming as we move through the grow cycles. Trust me, you won’t want to miss the next steps, let’s push the boundaries of indoor horticulture together!
As always, this is shared for educational purposes, aiming to spread understanding and appreciation for this plant. Let’s celebrate it responsibly and continue to learn and grow together.
With true love comes happiness. Always believe in yourself, and always do things expecting nothing and with an open heart. Be a giver, and the universe will give back in ways you could never imagine.
💚 Growers love to all 💚
📸 P.S. – The Eye Behind the Lens
All photos in this diary (for now — except for the ones showing the camera, which I took with an iPhone) are taken with a Sony A6700 paired with a Sony full-frame macro lens and a few more.
Photography is part of the story — it’s how we share the fine textures, the glow, and the quiet details that words can’t always capture.
I’ve also started experimenting with photo stacking — a technique where multiple images, each taken at a slightly different focus point, are layered together to create one perfectly sharp image from front to back.
It’s not digital enhancement or AI; it’s pure photography — a way to reveal the plant’s beauty in microscopic depth, from trichome to petal.
You’ll even see a few shots of "ghost me" capturing the shots — camera, lens, setup — because every grow deserves not just to be cultivated, but documented like art.
FOR DISCOUNT CODES AND MORE JUST FOLLOW THE LINK https://website.beacons.ai/dogdoctorofficial
NEW DISCORD - Official Server Invite Link : https://discord.gg/ksjAkA5T74

Likes
1
Share

@Grow4meds20
Follow
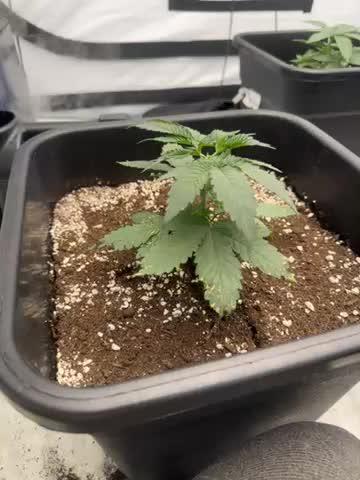
Repotted a day after the last update I today they have been topped and two main leaves taken off to open up sites to some more light. The two jaw breakers at defiantly two different phenotypes one is going to be more of a sativa style tall big intenrodal spacing and very open where the other will be slightly less tall and more bushy leaning towards indica all the cherry poppers so far are seeming to be the same phenotype atleast through veg they are growing at the same pace and all look pretty much identical Leon cherry gelato so also looking healthy and growing at the same rate. Spotting has stopped on the papaya now it has been repotted I feel like it may have been the solo cup but it seems all the new growth is healthy and no more spotting

Likes
4
Share


@Brentb2607
Follow
10 days of darkness during the flush begins. Had great results with Wanda and her genetics. Blessed for a first grow. Cut Wanda down at the end of the week. She’s now drying. I will be giving a thorough review for my harvest diary. Excited to share what I’ve experienced and learned from this grow.

Likes
19
Share


@ZombieKushAddicted
Follow
we will carry out this cultivation under the sponsorship of Mars Hydro with an FC-E 4800 lamp ,
to view this lamp or any other marshydro product go to: https://instagram.com/marshydro_aliexpress?igshid=YmMyMTA2M2Y=

Likes
170
Share


@Master_weeda
Follow
Bonjour à tous les padawans et les maîtres jedis
Jour42 ma plante entre bien en floraison je pratique sur elle une defolliation pour permettre aux têtes de prendre la lumière
La floraison des plantes de cannabis
La plante de cannabis passe par différentes étapes de vie avant de parvenir à la récolte. Ces étapes sont : la germination, la pré-croissance, la croissance et la floraison.
Pour les autofloraisons il n'est pas nécessaire d'avoir de changer le cycle de lumière elle entre en floraison automatiquement voilà d'où elle tient son nom "d'autofloraison"
L'origine de l'auto-floraison vient de la sous-espèce "cannabis sativa ruderalis" , qui à l'origine produit de très faibles niveaux de THC. C'est en croisant cette variété de marijuana avec d'autres qui produisent des niveaux de THC plus élevés qu'à vu le jour ce magnifique compromis que sont les variétés auto-fleurissantes avec des taux de THC très satisfaisants. En parallèle, cela a permis d'améliorer la production de ces variétés, qui initialement étaient exceptionnellement basse.
Pour des résultats optimaux, en culture Outdoor (extérieur), je recommande que la germination des graines de marijuanaAuto-flo se fasse entre avril et août.
En culture Indoor(intérieur), la photopériode idéale que ce soit pour la croissance comme pour la floraison est de 20h de lumière. N'oubliez pas que ces graines ne sont pas tributaires de la photopériode pour passer en floraison.
Il est préférable d'utiliser des pots d'une capacité de 10 à 20L dès le début, étant donné que leur cycle de vie est réduit, les auto-flo n'ent pas besoin de plus de volume pour se développer. Vu sa petite taille (et la discrétion) elle fait l'objet d'un bon choix pour la culture de cannabis sur balcons.
La première variété de Lowryder auto-floraison a été créé à partir de cannabis indica sativa croisé avec des génétiques de cannabis sativa rudelaris par la banque de graines de marijuana "The Joint Doctor". Puis vinrent la White Dwarf de "Buddha Seeds", la Roadrunnerde "Dinafem", l' Auto Stoned d' "Autofem", la Speed Devil de "Sweet Seeds" , la Maxi Gom de "Grassomatic", la Flash, la Gnomo de Kannabiaet bien d'autres.
Jour42 defolliation (video)
Avant toute chose n'oublions pas de bien désinfecter ses outils et bien ce laver les mains.
Quesque la defolliation ?
LES CULTIVATEURS AMATEURS, PRENEZ GARDE, MAIS NE PRENEZ PAS PEUR
La défoliation consiste à retirer les feuilles des plants de cannabis en intérieur afin d'accroître le rendementfinal. Le cultivateur amateur doit faire preuve de vigilance lorsqu'il commence à appliquer cette technique de taille. Malgré le débat sans fin entre ceux qui prônent cette technique et ceux qui la dénigre, il n'y aucune raison pour qu'un amateur ne s'y essaie pas afin de voir si ça lui convient ou non.
COMMENT DÉFOLIER
Que vous tailliez les feuilles ou les branches des plants de cannabis, il vaut mieux utiliser un sécateur stérile qui est confortable en main. Arracher des feuilles à la main manque de finesse et engendre souvent par accident, l'arrachement des couches d'une tige en plus de la feuille. L'objectif principal de la défoliation est de permettre une meilleure pénétration de la lumière et de promouvoir la production de plus grosses têtes. Les feuilles éventails qui font de l'ombre doivent être retirées. Tailler la tige principale et/ou les pousses secondaires n'est pas de la défoliation.
La règle d'or lorsque vous donnez à vos plantes un rafraîchissement est de commencer avec les feuilles nourricières les plus grandes et les plus larges, en taillant du bas vers le haut. Il est important de retirer les feuilles stratégiquement et non pas au hasard. Pensez également qu'il vous faut limiter votre rafraîchissement à approximativement 10 à 20 % des feuilles totales de votre pied. Il est très facile de s'emporter durant la taille et de se retrouver avec des plantes chauves. Un excès de taille de feuilles empêchera la photosynthèse et paralysera vos plants.
QUAND FAUT-IL DÉFOLIER
Il est assez rare d'appliquer la défoliation comme seule technique pour obtenir un fort rendement. La taille des feuilles est généralement associée à d'autres méthodes de tailles et de palissage pour un meilleur rendement telles que le topping ou étêtage, le FIMming, le LST, le manifolding, le supercropping et le ScrOG. Les cultivateurs utilisant la méthode ScrOG auront besoin de retirer toutes les croissances inférieures ainsi que les feuilles et les tiges se trouvant sous le filet.
Les plants de cannabis peuvent être défoliés dès lors qu'ils sont passés de la phase de plantule vers la phase de croissance végétative. Cependant, il est recommandé aux cultivateurs amateurs de laisser aux plantes 1 à 2 semaines de croissance végétative avant de s'attaquer à la défoliation de celles-ci. De plus, certaines variétés sont plus sensibles à la taille que d'autres et de ce fait, seront plus stressées par la taille des feuilles. Surveillez minutieusement le comportement de vos plants après la taille. Une période de convalescence de minimum 3 à 7 jours avant de recommencer la défoliation est fortement recommandée pour éviter trop de stress aux plants. Les cultivateurs peuvent également défolier pendant la phase de floraison, ce qui permettra à l'énergie de la plante d'être concentrée vers la production de têtes tout en limitant l'ombre et l'excès d'humidité. Néanmoins, il est important de ne pas défolier trop tard sous peine de simplement blesser ses plants inutilement.
LES AVANTAGES DE LA DÉFOLIATION
Évidemment, l'avantage numéro un de la défoliation, c'est l'augmentation du potentiel de rendement de cette technique de taille pour tous types de cannabis allant de la photopériode aux variétés autofloraison. Ce n'est pas un secret que les fleurs qui reçoivent plus de lumières deviennent plus grandes et larges que celles dissimulées dans l'ombre des feuilles. De plus, retirer les feuilles intérieures des plants touffus aide à prévenir toutes menaces de moisissure. Les plants très feuillus avec un feuillage intérieur dense produiront une quantité importante de têtes pop-corn. Dans le pire des cas, les branches de têtes et les têtes qui sont denses succomberont au pourrissement.
Si vous observez des gouttes d'eau se former sur la surface des feuilles, il est grand temps de penser à faire de la défoliation. Libérer la zone inférieure et médiane des feuilles est un excellent moyen d'améliorer la circulation de l'air.
LES DÉSAVANTAGES DE LA DÉFOLIATION
Les plants de cannabis en intérieur bénéficient de la défoliation pour deux raisons. La première est parce qu'ils reçoivent la lumière d'une source stationnaire au-dessus d'eux, et la deuxième est parce que les conditions environnementales sont contrôlées par le cultivateur et non Mère Nature. Les plants d'extérieurs eux, n'y gagnent pas beaucoup, car les cas échéants se vérifient pour eux. Le soleil traverse le ciel, illuminant sur sa route, différentes portions de la plante de son lever à son coucher.
Les cultivateurs en extérieur n'ont pas besoin de manipuler les plantes afin qu'elles se développent en adoptant une structure plate puisque le soleil est infiniment plus puissant que n'importe quelle lampe de culture et qui plus est, il est toujours en mouvement. Tailler les feuilles des plants extérieurs les rend également plus vulnérables aux conditions humides et brise leurs barrières naturelles contres les nuisibles.
De nombreux cultivateurs d'intérieur peuvent, et malheureusement, c'est souvent le cas, réduire le rendement final à cause d'une défoliation faite au mauvais moment et/ou excessive. Tailler les plantules n'est pas conseillé et engendre souvent des plants nains. Scalper les plants matures est encore pire, et au lieu d'obtenir de longues branches de têtes, vous obtiendrez probablement encore moins de fleurs. De même, tailler des plants malades ou en mauvaise santé à n'importe quelle période de la croissance risque de paralyser la croissance plutôt que d'encourager la formation de fleurs denses.
Jour44 Arrosage une fois sur 2 topmax de biobizz
Jour46 arrosage avec de l'eau ph6.3 à laquelle j'ajoute 0.8g par litre d'eau de feeding enhancer greenhouse.
Jour47 léger arrosage.
Jour48 léger arrosage
Likes
2
Share
@Chrisandweed
Follow
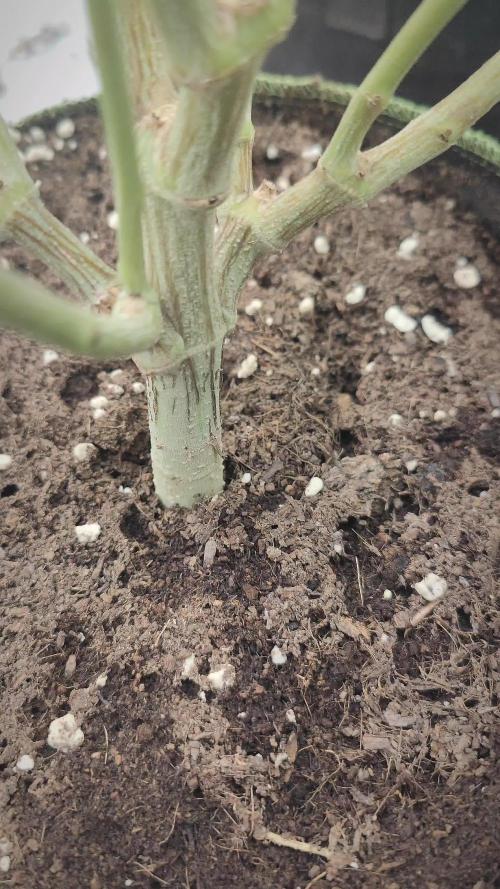
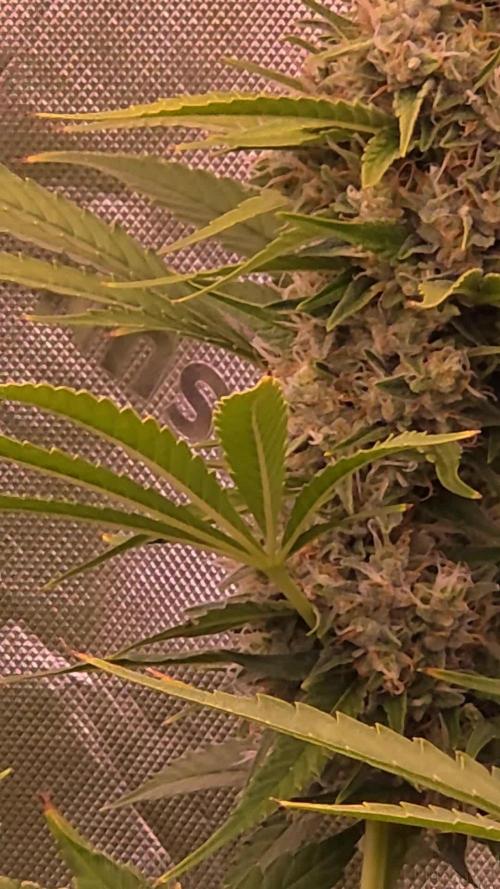
Pues de van viendo mas gordas las pelotas de golf que tiene esta planta por cogollos y no tan mal oye jajajajaja. El olor es muuuuuy muuy muy dulzón y la resina se siente muy abundante a estas alturas. Con esta variedad juraría que le queda un riego mas con encimas, y ya despues paso a arrancar un lavado de raices de 2 semanas y corte... No lo tengo aún claro porque lo dicho, se están resistiendo jajajajaja pero es inevitable que les vaya quedando menos.
Os juro que es absolutamente asqueroso subir un video a la plataforma, seguramente no suba mas videos, son como 15 minutos de tener el telefono con la pantalla encendida en esta pagina mientras se sube, con todo absolutamente bugeado y funcionando fatal, así por cada video que pueda subir, cuando antes no era así ni de lejos y se que no es mi conexión porque hasta conectándome por cable con un hub tira bien, y el teléfono que uso un mi11 ultra, no será de los mas modernos a dia de hoy, pero no deja de ser un pepino de telefono.


Likes
11
Share

@gentlegiantgrows
Follow
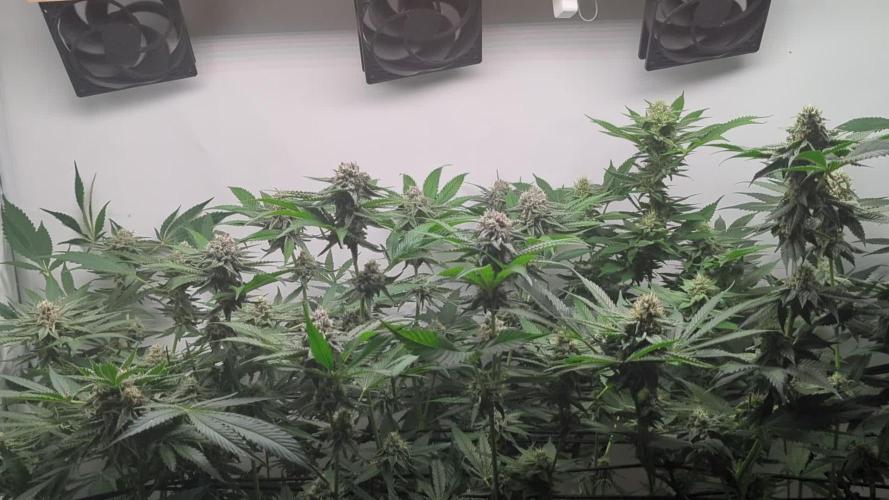
Just cruising at this point. Got them all on the same moisture level again. Slight infestation with gnats, but nothing to worry about at this stage. Will start giving a bit less water soon and have a big last defol in a week or so.
They got their mix of mycos, trichs, bacteria and molasses again, seem to love it.
Slight discoloration on the top OGT buds, but they're the tallest and receive 1100 ppfd, so I won't adjust anything.


Likes
16
Share


Likes
16
Share


@GutterHoe
Follow
So the week went well. She loves to be naked. I trim her small fan leaves daily to keep it clean and shock low. SUGAR is just everywhere. I'm using 1tsp of tiger bloom in 2 quarts for two waterings then one just water. Ended the week with huge buds forming everywhere. Zoom in

Likes
8
Share


@ZalySk
Follow
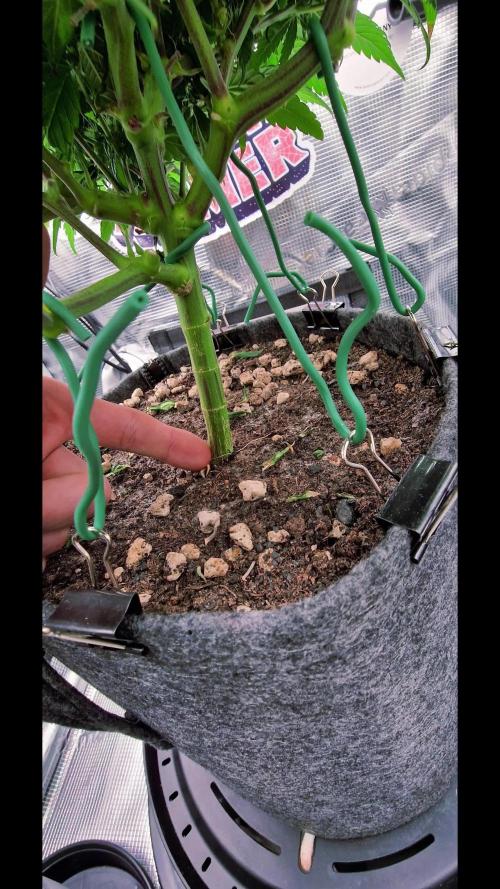
D37: gave the little gal a hair cut. Trimmed off the reveg leaves to let light in. There are so many nodes that could branch out, I wish I would have lst'd it from the beginning.
Branches grew about an inch last week on top.
Likes
14
Share


@concentrate_on_coco
Follow
12/19 - Plants stayed a little too damp, had to let them dry out a bit.
12/20 - RO water only @ 6.1ph
12/21 - Feeding nutrients today @ 6.2ph RO @ 6.1ph
12/22 - Feeding nutrients today @ 6.2ph RO @ 6.3ph
Performed a runoff test on the Critical, White Widow, and Wedding Cake 2. I need to bring the ph up. (i had a feeling)
12/23 - Feeding 1 gal of nutrients @ 6.7ph
12/24 - Feeding 2 gal nutrients @6.7/6.8ph and @6.4ph
12/25 -Feeding 2 gal nutrients @ 6.6ph and @6.3ph


Likes
25
Share


@Esoteric_growing
Follow
This strain is total fire, in organic soil it was amazing and now in coco it looks just as good but bigger buds. Beautiful bud colour, chunky buds and unique smell. Top shelf bud🔥

Likes
11
Share


@Blaze_Quell
Follow
Been hard sourcing everything I have needed for this room with the current situation. Fortunatly everything seems to bouncing along and are comfortable in the new tent.
Likes
4
Share

@Rangaku
Follow
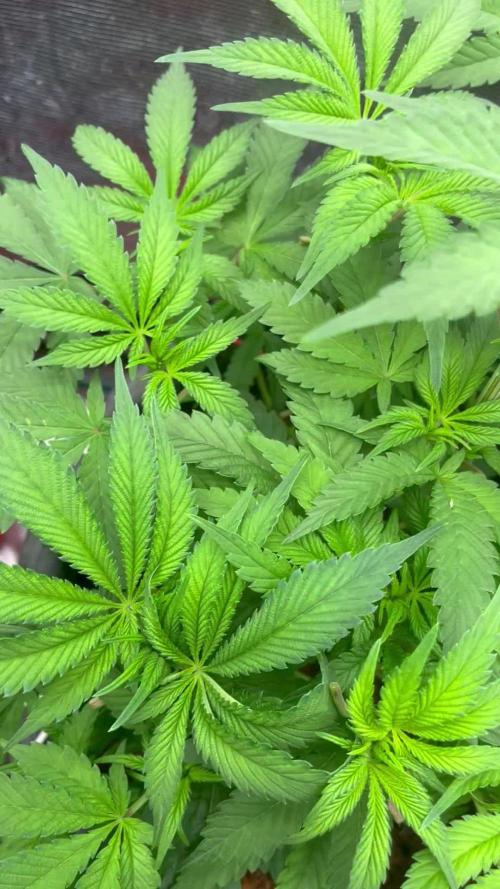
First week of flower was in tune , got some stretch and plenty of bud sites popping up . Hoping they double in size next week and I think it’s capable the grow has gone great with each week she has done everything right .
Upside down chai spiced pear and almond cake with a ginger an infused caramel glaze .
