




Likes
20
Share


@Hanfstadt_Hamburg
Follow
After drying, the hydro plant's bud smelled a little different. Considering the small amount and the bud rod that was cut away previously, I didn't want to risk anything and threw it away. So the harvest is just about the soil plant.
I dried the whole plant except larger fan leaves. As this was an outdoor-ish grew I don't have any specialised equipment. It just had to dry in the room, which averaged 24°C and 60% humidity, probably not ideal. After 10 days it was trimmed and finally weighed. Might still be a little wet though.
Final dry weight was 42g, after weighing in wet and untrimmed at 294g.

Processing
Likes
4
Share


@RobinHoodGrows
Follow
Nothing new to report, plants are growing well.
I'm giving the plants filtered water at ph 6.0. I don't know the PH of my soil or my run off etc.
This is my first grow so I'm not too far into the weeds (pun intended) on the PPM and those particular factors.

Likes
16
Share


@HowtoBubatz
Follow
Defoliated again the leaves which were growing over Bud sites
The streching phase has begun. I am corious how tall the plant will go.

Likes
3
Share

@FourTwenty_Plants
Follow
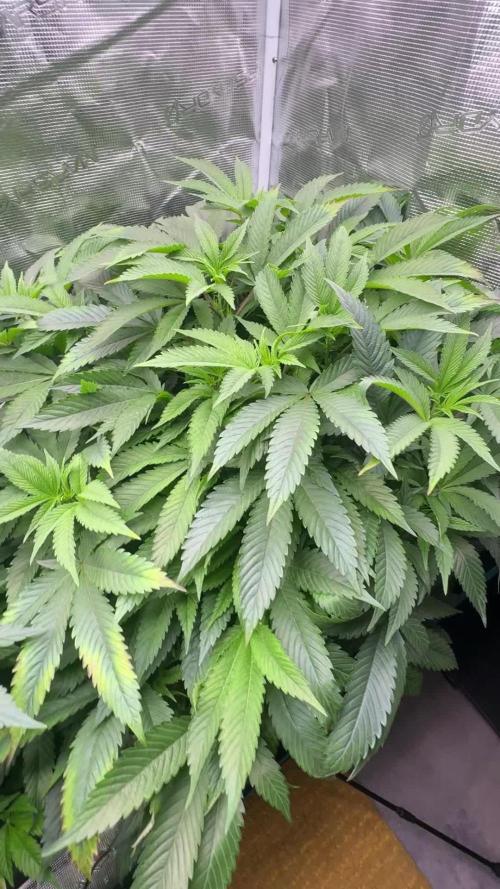
Finally switched her into flower and introduced the transition gently with Bud Ignitor. She responded perfectly so far.
Growth is super dense and bushy, with a thick and even structure all across the canopy. The LST really paid off—tons of healthy tops pushing upward at the same height, creating a nice sea of future bud sites.
She’s still extremely thirsty and drinking heavily every day. Gave her one feeding mainly focused on the roots without any additives—just the base Advanced Nutrients Micro, Grow & Bloom—and she handled it like a champ.
Really excited to see how she stretches over the next days.

Likes
22
Share


@Changman
Follow
Wow week 8 and Pineapple Express#2 Fem seems to be flipping to flower.Our Elixir CBD Auto is in full flower and continues to give off these peppermint vibes, this is definitely a medical strain and even though shes so small i have learnt alot from being sure to keep your Autos in full sun at all times during the vegetative stage ro ensure maximum yeild.From what ive gathered is that the strain itself isnt a big yeilder and due to the fact that she has not had enough sunlight we will end up with the small head you see here.The Good news is i still have one seed of hers left and next time i will be planting her will be in season😁.Our Hindu Kush Auto continues to flower beautifully and her smell? Nothing short of incredible😍..Our Purple Kush CBD Auto has impressed me most of all, she seems to have reacted so well to the training and the nutes as well as the minimal sunlight conditions.She stands at about 17 cm in length and her side stalks are about 10 cm in length..Our Girlscout Cookies Auto has exploded and is overtaking her grow bag rapidly, hopefully her training and folage removal has worked in allowing her to grow even larger now...Our Blue Cheese and Granddaddy Black are growing up quick and with all our strains having now received some light folage removal i expect they will use that extra energy to really bust out.


Likes
7
Share


@MadeInGermany
Follow
Hey everyone 😃.
Today it continues with the
Flowering day 49
Today the tent was cleaned, the humidifier refilled, and the health of the plant checked.
Flowering day 50
Today she was watered with 1.2 l (see fertilizer table), and checked for her health.
Flowering day 51
Today fresh oamose water was poured into the tanks and the plant was sprayed.
Flowering day 52
Today was a pure control day where all the technology was checked.
Flowering day 53
Today the room was cleaned, the tent cleaned and the humidifier filled.
For this purpose it was poured with 1 liter today.
Flowering day 54
Today was again a pure control day :-).
Flowering day 55
Once again the plant was checked for health and sprayed.
The tent was also cleaned.
I wish you all a lot of fun with the update, stay healthy 🙏🏻 and let it grow 🍀
You can buy this Strain at
https://thecaliconnection.com/original-sour-diesel.html
You can buy this Nutrients at
https://greenbuzzliquids.com/
Type:
Original Sour Diesel ( Clone )
☝️🏼
Genetics:
Fem seeds- Original Sour Diesel to Original Sour Diesel BX3 RVSD Male
Reg seeds- Original Sour Diesel x Original Sour Diesel BX3 Male
👍
Vega lamp:
2 x Todogrow Led
Quantum Board 100 W
💡
Bloom Lamp :
2 x Todogrow Led
Cxb 3590 COB 3500 K 205W
💡💡☝️🏼
Soil :
Canna Coco Professional +
☝️🏼
Fertilizer:
Green Buzz Liquids :
Organic Grow Liquid
Organic Bloom Liquid
Organic more PK
More Roots
Fast Buds
Humic Acid Plus
Growzyme Big Fruits
Clean Fruits
Cal / Mag
Organic Ph - Pulver
☝️🏼🌱
Water:
Osmosis water mixed with normal water (24 hours stale that the chlorine evaporates) to 0.2 - 0.4 EC. Add Cal / Mag 2 ml per l water every 2 waterings . Ph with Organic Ph - Pulver to 5.8 .

Likes
81
Share


@MOSS_FIGURE
Follow
week 5...Turn on a portable air conditioner, add a co2 bag to under the light because use heat to melt the gas inside. Co2 weighs more than air, it will be fall down below.
{Activities}
(Day 29) Use the nutrients.
(Day 30) Turn on a portable air conditioner
(Day 31) watered 3 lites per a plant
(Day 32) n/a
(Day 33) Add a co2 bag by Lung Khong (uncle Khong) made in Thailand and watered
(Day 34) n/a
(Day 35) Watered
(Hope you like and enjoy my diary)
Thank you so much for checking out my grows. Feel free to leave a comment, push the like or give the follow.

Likes
23
Share


@DeepRootsGrowTrees
Follow
MATARO BLUE by KANNABIA
Week #18 overall
Week #4 Flower
She's doing great this week looking good and her buds are starting to dense up she's getting nice trichome coverage as well. Stay Growing!!
Kannabia.com
MATARO BLUE
Likes
8
Share


@farmerjim
Follow
Plant 1: This was the highly trained and defoliated plant. It stayed the shortest and doesn't have very dense nugs likely because of its distance from the lights given the height of plants 2 and 3. Ended up with 2.5oz after 9 days of hanging.
Plant 3: This was the second most highly trained plant. Not as much tying down so has some height. Nugs are more dense than plant 1. Ended up with 3.2oz after 10 days of hanging.
OMG!!! Plant 2: dried and jarred. Final weight... 10.6oz!!! that's a total of 16.4oz for 3 autos! I'm so pumped...🤯😍🤘🤓📉00

Likes
14
Share

@Chubbs
Follow
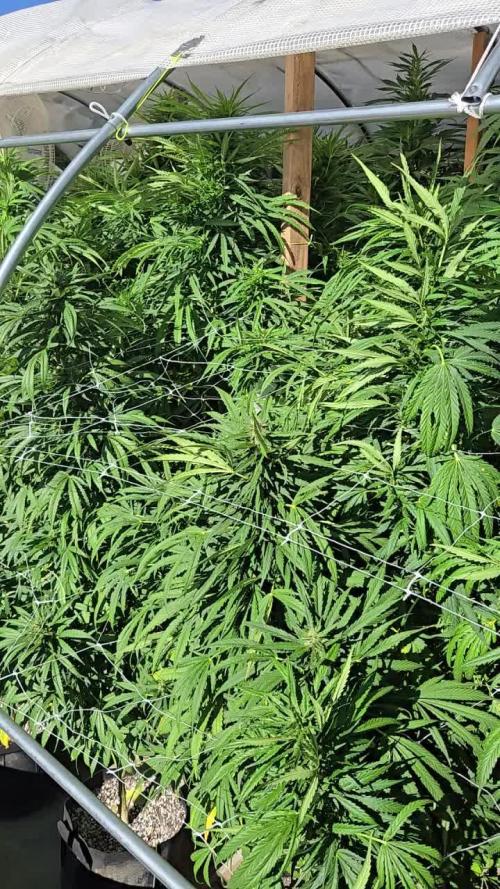
This week has been wild. I had to cut the sides of the greenhouse as the plants had it bursting at the seams. These girls are all flowering beautifully and starting to frost up. Happy Growing.

Likes
Comments
Share


@Alejangrow
Follow
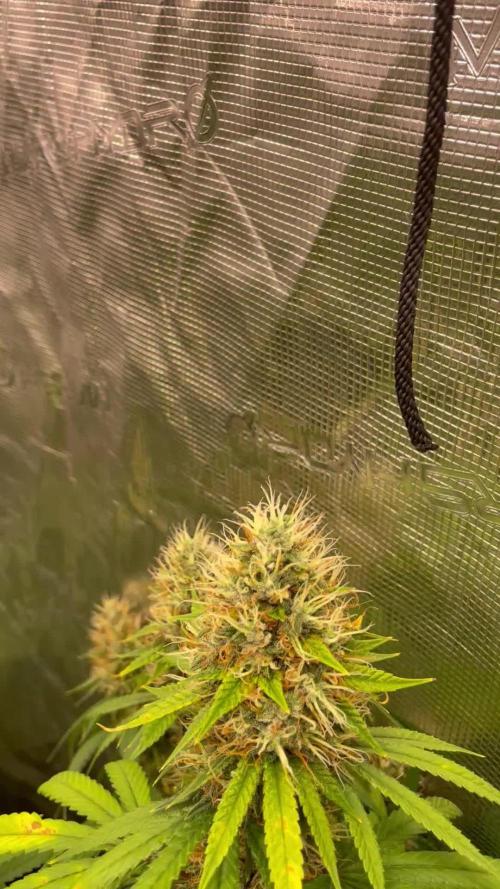
This is definitely an express strain. These girls are growing rapidly and seem very good for new growers based on their resilience. They are Very forgiving plants but hard to grow with other strains due to differing growth rates. I topped these once and have been doing some lst to try to let the kabul express catch up but it seems my efforts are of no use. 🤷♂️🏽🌿


Likes
49
Share


@masterofsmeagol
Follow
7/18 Plants are looking great. I was able to rearrange the plants so they have a little bit more space and so I can get around every plant. I have small random pest damage (i.e. I caught a four lined plant bug while hunting jpn beetles) but not enough h to warrant treatment. I will probably spray before flower. Sun's out amd plants were praying. I rotated a couple and it only took a few hours for them to "straighten out." I went to look again rhis morning and made the final determination to expand the cage. I'm looking for the 2x4's and the wire in the next couple days. The work that ive done now will but me sometime. I wonder how this rain impacted my soil.
7/19 Plants are looking fantastic. The stretch is starting. One purple punch looks like it's beginning to flower. I think I'm entering the transition period. Jpn beetle damage is evident but not significant. I defoliated a leaf with a a leafminwr or something in it. It's so much easier to get around the plants now. I'm seeing some chunks missing sporadically though. Went to the roses out back and found TONS of jpn beetleson top of each other reproducing. They destroyed that rose bush. I'm going to keep it as a trap plant. My dad's girlfriend wanted to spray it but that doesn't make sense as theflowers are all gone. Dad's grabbing the materials to extend the cage today I think. Right now I can get around every plant but the two big ones in the back. I just cant get to the backs of them and they are huge. Almost reaching the top of the cage. A 4'-6' extension will do wonders in flower. Can't wait.
UPDATE: Dad got the 2x4's and we assembled the extension and attached it. He's grabbing the wire as I type this. This worked out beautifully. I had no idea how big the blueberry cheese in the 50 gallon was! This extension (4ft i think) is PERFECT! Then I can get a little extra wire and pull it out if I wanted to. I think I have another 2x4 that I'm going to use in the middle. Lots of great pics and a video I'll upload tomorrow. Hot af today and humidity still super high. Even the commercial dudes was surprised I don't have wpm l and that judging by some of my plants structure that I may do better than I think. I certainly hope so. I WATERED 3 GALLONS OVER THE WHOLE GARDEN. The blueberry cheese in smart pots were drooping. They drink far more water than tje others. I would've given more but we are supposed to have thunderstorms. I left my back tarp off for the night. It will increase airflow and wind is down. I feel like this is going to be my year.
7/20 I updated and loaded everything on the app but notjing would save. Did it again in the website hopfully this saves
i didnt put it all up. Didn't water the plants today. Bags seemed okay weight wise. Good thing I did the extension yesterday because those three plants were drooping they were so thirsty. I focused most of the water yesterday on those plants that needed it. The others were somewhat dry but still had some weight. Like i said the blc drinks much more water than any of the other plants. I'm impressed with the growth I'm seeing. Especially since I have been being very stingy with the water and I've only fed like twice and that was just the kelp me/you and big bloom in negligible amounts. I'm watching for deficiencies. I'm just not seeing them. I'm picking up the wire and finishing the extension and then rearranging things. I'll update.
UPDATE: WATERED 4 GALLONS CONCENTRATING ON THE PLANTS THAT WERE DROOPING THE MOST. FINISHED ENCLOSURE AND INCREASED PLANT SPACE. TRELLIS WILL GO UP THIS WEEK. VIDEOS WILL BE UPLOADED TOMORROW.
7/21 I should've watered more volume last night. I noticed two plants that seemed much lighter than the rest. After some deliberation I gave them each a half gallon of water. One was the purple punch in the 10 that's huge amd the other was that huge blueberry cheese. I think I'm going to swap places with them, take out a pallet and get some other way to elevate that ONE plant and I'll have even more room. Then I'll add my supports. It's a dream working in there now. I noticed some small interior leaves being used up and dieing. I defoliated them but it was only a couple. I'll need to start nutes at some point. Doesn't need it yet though. I'm going to add some kelp me/you for the heat stress. I need to get the watering down better but it's more difficult when they each have different needs. I kinda have to read the plant. I'd rather be overwatered than underwatered. I tried to upload what I could but some won't.
UPDATE: I went over to clip off some fencing that was doubled up AND just to check on tge girls. Found two caterpillars (small but hairy so they were older not the inch worms and possibly what has been contributing to damage on those plants. Things are spread out so it will be harder for insects to move from plant to plant and I have better air flow. I worry that leaving my tarp off might lead to high winds and plants not able to take it buf I digress. I'll add supports later. Plants are huge and drinking far more water than I've been giving them. When I got there several were drooped right over and dry as a bone. The bags are essentially all roots now. I mixed up 8 gallons of water and split it between the plants. I gave less to the two Co trainer plants that weren't drooping and the 10 I watered yesterday that wasn't drooping but for the most part the ones that needed if got at least a gallon or more. The others a little under a gallon. It might rain A LITTLE tonight too. Oh, and since it's been so hot I added 1/2 tsp per gallon of kelp me kelp you to help the plants deal with heat stress. I also noticed that some of the very bottom interior leaves are being used up. I have a feeling ill need to switch to nutes pretty soon. Plus I need to suppirt those plants if I'm going to leave that tarp off and Gove them air. Took a video. But it won't upload here. I'll have to wait till tomm.
7/22 Didn't have much timevthis morning bit I dod a video. Boy those plants loved that water and that kelp. This morning everyone was standing straight up at attention. Supposed to get rain last night but didn't. Good thing I watered. I think I'm going to up the water next watering and then again to the 10% mark if necessary. Especially with the Blueberry cheeses. I'm noticing that a FEW INTERIOR leaves are showing nute deficiencies so I'm probably going to have to start feeding soon. I'll update later.
UPDATE: Went back over and cut off the extra wire. I'm going to need to water more volume. Specifically on two plants. The two huge blueberry cheese in 20 gallon smart bags dries out much faster than the rest. I'll have to out that on a different schedule or increase the amount given. Next watering will be 1.5 or 2 gallons a plant and it might be tomorrow from what I was seeing. It's super hot and with the added airflow the bags dry out faster. I also went through EACH plant looking for pests and defoliating old leaves that needed it. Plants are still nice and green but a VERY few older interior leaves are showing deficiencies. I know this is Normal especially since they are trying n g to transition to flower. I also saw pest damage on a couple plants. Four lined plant bug. I already found the one on the other plant and killed it but I'm considering doing a spray before flower. I'm thinking either captain Jack as a "catch all", BT which works great but mostly just on pillars or the organocide bee safe 3 in one pesticide. I also have pyrethium and other things. Thus far picking things off manually has been good enough. At the very least they will get an application of BT very soon.
7/23 Held off on watering this morning. Supposed to get thunder storms I DID split a gallon with two blueberry cheese that were the lightest in the 20 gallon smart pots. Thet drink way more. My water volume is going to need to increase. We haven't had nearly enough rain. I'm going to bump it up to 1.5 to 2 gallons each plant which will be 10% for the 20s and a little less for the others. I'm still seeing various pest damage. Nothing bad but I found another couples leaves that were chomped on by a four lined plant bug so I'm debating applying something tonight when I water. I'm also noticing old leaves being used up and some interior leaves showing slight deficiencies. It will be time to start nutes soon. I'll update as I go.
UPDATE: GOT THE FEELING I NEEDED TO CHECK THE PLANTS. SOMETHING DODNT LOOK RIGHT ON THE CAMS. WENT OVER AND EVERY PLANT BUT THE TWO I SPLIT A GALLON WITH AND THE PLANT IN THE 50 WERE DROOPED RIGHT OVER. LIFELESS. I SHOULD'VE WATERED THIS MORNING BUT I DIDNT HAVE TIME. I FIGURED THEY COULD WAIT UNTIL NIGHT. EACH PLANT GOT 1.5 GALLONS AT LEAST. I USED SIXTEEN OR SEVENTEEN GALLONS ON THE GARDEN. I GAVE EACH CONTAINER PLANT ONE GALLON AND GOT RUN OFF FROM BOTH. IM NOTICING SKIGHT FADING IN LEAVES BUT IM NOT INTRODUCING NUTES TO UNDERWATERED PLANTS. I THINK 10% IS GONNA BE TGE MAGIC NUMBER. 2 GALLONS EACH. EVEN THE 10 GALLON SMART POT. ALMLST AS BIG AS THE 30S BUT DRIES OUT QUICKER.
7/24 Plants looked fantastic this morning. Defoliated a few leaves that needed it. Showed my commercial buddy and he said things looked fantastic. Since the soils still holding nutes and I'm not seeing many deficiencies I may hold off on feeding. I'm starting early flower now. I will be using nutes soon. I think ive got the watering schedule pretty much down.


Likes
119
Share


@Roberts
Follow
Divine indica is growing great. She is looking really healthy, and happy. She looks like she is getting ready to start bulking soon. I have not done any training this week. Nothing more to report. Thank you Spider Farmer, and Divine Seeds. 🤜🏻🤛🏻🌱🌱🌱
Thank you grow diaries community for the 👇likes👇, follows, comments, and subscriptions on my YouTube channel👇.
❄️🌱🍻 Happy Growing 🌱🌱🌱
https://youtube.com/channel/UCAhN7yRzWLpcaRHhMIQ7X4g

Likes
25
Share


@KushKeeper420
Follow
On flower day 60, it was finally time. Three days before the final cut, I did a last light watering with plain water. The last 36 hours, the lights stayed on. In the end, I had around 20–30% amber trichomes. I'm super happy with the result. Trim jail was exhausting but totally worth it. The harvest is now right in the middle of curing.
As for the smell: a sharp, earthy, leathery diesel mix with hints of lemon. The fuel note is, to my delight, much stronger than expected.
Incredibly sticky buds. Sparkling flowers.
Thanks so much for following along with the grow journal! Maybe it'll help someone with planning or give a general preview for a future grow of this strain. Much love and happy growing!


Likes
59
Share


@Ganjagrandaddy
Follow
Day 70: The Bluedreamatic went to go big and it is all I can do to keep them happy.lol The #1 los girl is yellowing off on her top leaves but had an amendments the other day to try and address it . Could be the intense lighting still but is isn't affecting her badly so fat bud wise. #2 is getting very big mow and needed moving over to a better spot in the room for wider coverage of her budsites. #3 who was inside with the crammed in girls has some very nice fat tops on her canopy and when I look deeper into her body , can see so many developing sites too. She has been moved to a better position too now and should get 2-3 weeks to soak up some lumens.
They have been put onto shogun Dragon force and boost for their finish now so let's see if they swell up as I expect they will. I am convinced that these ladies will be heavy yielders by the look of them now. They smell of fresh pineapples when disturbed too. so beautiful. at least 2 weeks to go with them I think. roll on the chubby icy buds.