




Likes
10
Share


@HegauHillsFarmers_M11
Follow
Tag 7 - Ende der 1. Woche.
Die Pflanze wurde bisher nur mit Wasser besprüht.

Processing
Likes
10
Share


@BodyByVio
Follow
This week I Supercrop all the plants and spred them out over both lights. One more week of Veg and they are ready to explode
Check me out on Instagram @growmorestressless

Likes
Comments
Share

@Lf1190
Follow
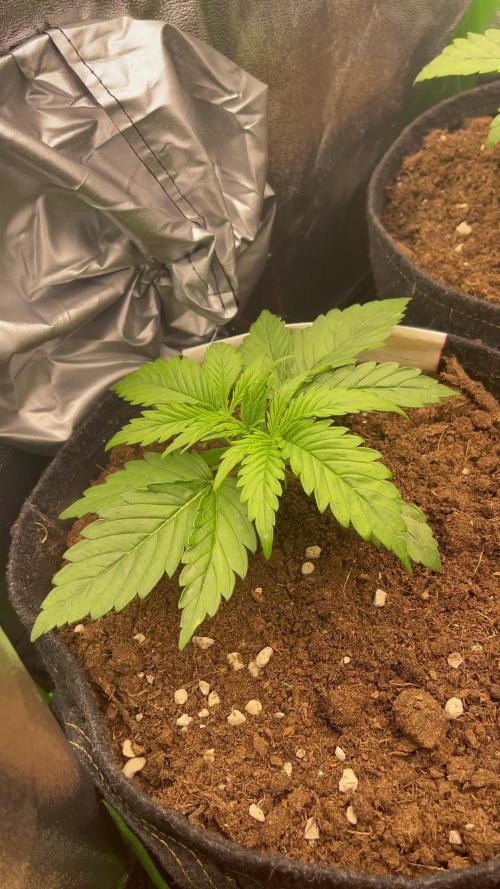
I can’t recall the details across those vegetation cycles lol, so I searched for things I didn’t know about cannabis to make it more interesting so curious facts about cannabis.
In the late 1990s, scientists planted industrial hemp inside the 30 km Chernobyl Exclusion Zone specifically to decontaminate the soil. Through a process called phytoremediation, cannabis roots pulled radioactive isotopes (like Cesium-137 and Strontium-90) and heavy metals directly out of the irradiated dirt.
Cannabinoids are Actually Toxic to the Plant Itself
THC and CBD are cytotoxic, meaning if they leak into the plant's internal cell tissue, they cause programmed cell death and kill the plant's own leaves. To solve this, the plant evolved capitate-stalked trichomes, which act like biological hazmat suits. The plant manufactures the raw precursor compounds inside the head of the trichome, exports them outside its own living cell walls, and constructs the resin head as an external balloon. The sticky crystal are designed to keep the plant from poisoning itself!

Likes
8
Share


@mikearon
Follow
May 4th - Day 77 : Big day today. Decided to prepare for flowering stage.Reduced the light schedule to 16 hours and brought down the humidity down to 55% for 2-3 days to see if i'd get some flowers popping. I also defoliated quite heavily in order to bring down the humidity levels in the tent (pics taken before defo). I'm here all week so will update wednesday.


Likes
6
Share

@bkickstand
Follow
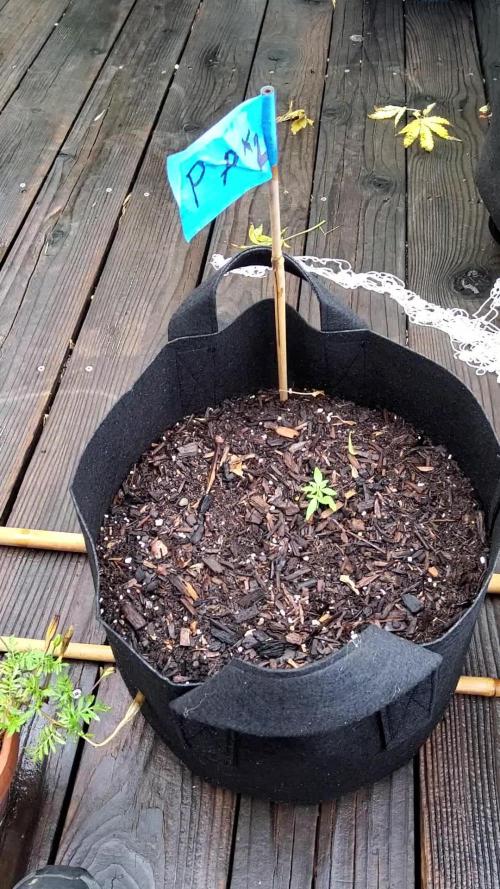
Week 4 Journal Update: New Autoflower Batch (NL1, NL2, & PPX2)
* Overview: The second round of autoflowers—planted directly into 5-gallon fabric bags at the start of July—is hitting week four with distinct variations in growth speed across the trio.
* NL1 (Northern Lights 1): Showing strong, healthy vigor with lush green fan leaves developing nicely and a sturdy stem established in its 5-gallon container.
* NL2 (Northern Lights 2): Sitting under the trellis remnants, this seedling is a bit smaller and taking its time establishing early vegetative growth compared to its sibling.
* PPX2 (Strawberry Nugget x Pink Panama): Marked clearly with its blue flag, this autoflower is showing steady early leaf development and settling into its deck routine.

Likes
22
Share


@drgreentips
Follow
I feed water till the day 10 mark now shes had the chop filled the smell proof weed dryer and the was left hung for drying

Likes
9
Share


@Call_Me_Vaan
Follow
Day 36 😋
- Defoliationed 20% (Start from below)
💪ROUGH FEED SCHEDULE💪
VEG
Week 1 (day 1-6) : Just 6.5Ph balance H2O
Week 2 (day 9) : ( 1ml Micro , 1ml Grow , 1ml Bloom , 2ml B-52 , 2ml Voodoo Juice) / 1 lite H2O
Week 2 (day 14) : ( 2ml Micro , 1ml Grow , 1ml Bloom , 2ml B-52 , 2ml Voodoo Juice) / 1 lite H2O
Week 3 (day 19) : ( 4ml Micro , 4ml Grow , 4ml Bloom , 2ml B-52 ) / 1 lite H2O
Week 4 (day 23) : ( 4ml Micro , 4ml Grow , 4ml Bloom , 2ml B-52 ) / 1 lite H2O
FLO
Week 5 (day 32) : ( 4ml Micro , 4ml Grow , 4ml Bloom , 2ml Voodoo , 2ml Bud Candy , 2ml Sensizym)/ 1 lite H2O
Week 5 (day 38) : ( 4ml Micro , 4ml Grow , 4ml Bloom , 2ml Voodoo , 2ml Bud Candy , 2ml Big bud , 2ml Sensizym)/ 1 lite H2O
(👉one time per 5-7days👈)
😏EQUIPMENT USED😎
- QB288 v2 Powered by Samsung LM301B LED (240watt) 💪
- Mars Hydro grow tent (1mx1mx1.8m)
- 6" Duch fan HF-150P
- The Aroma diffuser
I'm a beginer grower 👽
Please LIKE 👍 & FOLLOW ME 🙌
Likes
1
Share

@all_about_420
Follow
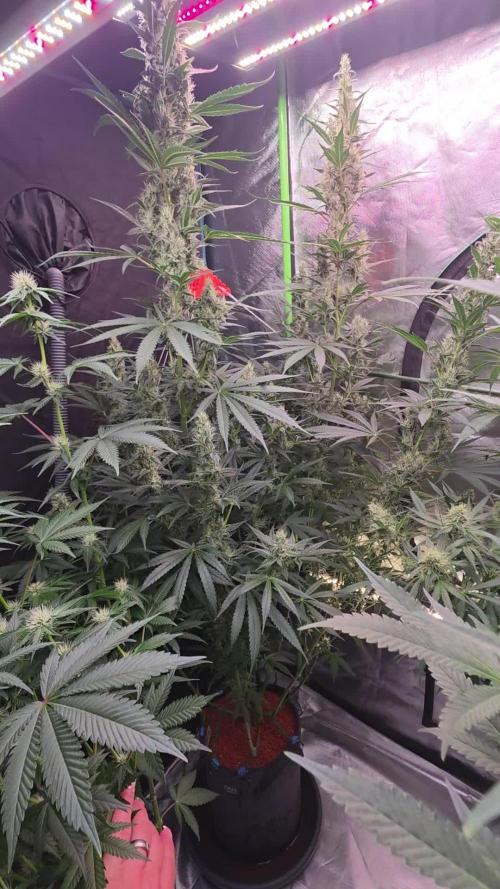
Ein phänomenaler Schwellprozess hat in der fünften Blütewoche bei dem Junky 99 Projekt von Brothers Grimm Seeds eingesetzt. Der extreme, viel zu krass ausgefallene Stretch, der definitiv viel zu lange ging, hat die beiden Pflanzen mittlerweile komplett über den Kopf wachsen lassen – selbst die Lampe, die bereits so hoch wie nur irgendwie möglich gehängt wurde, haben die obersten Triebspitzen teilweise schon passiert. Doch trotz dieser räumlichen Herausforderung, mit deren Gegebenheiten ich mich nun eben arrangieren muss, ist der blütentechnische Fortschritt auf den Bildern schlichtweg atemberaubend: Die Buds schwellen massiv an und formieren sich zu extrem langen, imposanten Colas. Das werden zweifellos extrem dicke Dinger! Um die zunehmende Last der entstehenden Blütenpracht sicher abzufangen, wurden die Pflanzen abermals mit dem Stringy-Thingy gestützt. Diese Stabilisierung ist teilweise jetzt schon bitter nötig und wird in den kommenden Wochen bei diesem rasanten Zuwachs an Blütenmasse erst recht unverzichtbar sein. Die Harzproduktion zieht spürbar an, die weißen Blütenhaare stehen dicht an dicht und die beiden Ladys strotzen trotz des immensen Höhenflugs weiterhin vor purer Vitalität.

Processing
Likes
5
Share


@Creatorknbsland
Follow
Salve salve! Sema 7 e elas estao ficando roxas com uma cor de neve por cima das folhas e flores! Colhi uma delas essa semana! Teve um inicio de pulgao branco ! Bom semana pra noix
Processing
Likes
2
Share


@Grower_Zuko
Follow
Defoliated a little bit this week, because the plants were getting really bushy.
Froze the defoliated leaves so I can add them to my smoothies.
Also added some bone meal since the plants are definitely flowering now and could use the extra phosporus.
Stress killer (back) is still stretching as is to be expected seeing as I probably set her back for a week or so by nearly killing her.
Gorilla (front left) is looking really pretty but extremely bushy.
Solomatic (front right) is looking fine but small.
Likes
179
Share


@StarLorr
Follow
Welcome to my Øpium diary.
In this diary:
Seeds: sponsored by Ðivine Șeeds
Media: Promix HP
Nutrients: Advanced Nutrients, Diablo Nutrients.
Light and Weather: Şun☀️and Mother Earth.🌎
___________________________
Feeding:
Tue 23Jul: 4L nutrients pH'd 6.5 and 4L water not pH'd
Wed 24Jul: 10L water not pH'd
Thu 25Jul: 4L water not pH'd
Fri 26Jul: 8L water not pH'd
Sat 27Jul: 4L nutrients pH'd 6.5 and 2L water not pH'd
Sun 28Jul: 10L water not pH'd
Mon 29Jul: 8L water not pH'd
*please note that most water only feedings are 2L at the time throughout the day in bottom saucer*
___________________________
What a beautiful summer that we're having. Just one day last week it was cloudy and colder and got some rain, rest of the week sublime weather.
My Ðivine Ladies are pre flowering and hopefully will be blooming soon, next week update should be FLO fingers crossed😄
______________________________
Øpi was found with a spider mites nest..squished the squatter with my thumb and index... all 3 Ðivine Gals got the spa treatment, soap insecticide
spray 2 litres each soaked them real good, before flowering it was a smart move😉
______________________________
Thanks for stopping by, likes and comments are appreciated!👊🏻😎
Keep on growin!
Keep on tokin!!!
😙💨💨💨💨💨

Likes
4
Share


@Nookandplant42o
Follow
Plant with rustic 3-pointed leaves demanding in nutrients, from what I see about this genetics it is to be taken as normal even with high amnesia it always takes time even with ruderalis, very strong citrus scent, more demanding plant in PK, just water without flushing Watch out for trichomes and see more fattening.
😚

Processing
Likes
10
Share


@zombikush81
Follow
they grow healthy and strong, after the stress caused by the repotting has started to grow very quickly, it has really excellent genetics no problem encountered. It has an excellent structure with well distributed branches. But we will see all its potential in bloom as it explodes. After all, the gorilla and a very beautiful bitch.



Likes
32
Share


@Bread_n_Buds
Follow
The Zenviations have been processed specifically differently I must say that they are both beautiful but one suffered the attack a little more even if he has very dignished flowers. The low one has a few beasts as you but you seem to end up great, hopefully good
Likes
7
Share


@Northstar_cannabis
Follow
What a come back from this plant, it started small but it's definitely caught up.
Processing
Likes
24
Share


@MadeInGermany
Follow
Hi everyone 🤗.
They continued to develop well this week 👍.
Slowly they stop growing and put their energy into flower production.
So that this energy is not wasted, the lowest shoots on which only popcorn buds grow anyway have been removed.
Next week the new update will follow as usual, stay healthy 🙏🏻 and let it grow 🌱
You can buy this Strain at :
www.Zamnesia.com
Type:
Runtz
☝️🏼
Genetics:
Zkittlez x Gelato
👍
Vega lamp: 2 x Todogrow Led
Quantum Board 100 W
💡
Bloom Lamp : 2 x Todogrow Led
Cxb 3590 COB 3500 K 205 W
💡💡☝️🏼
Soil : Canna Bio
☝️🏼
Nutrients : Canna Bio
☝️🏼🌱
Water: Osmosis water mixed with normal water (24 hours stale that the chlorine evaporates) to 0.2 EC. Add Cal / Mag to 0.4 Ec Ph with Organic Ph - to 6.0 - 6.3

Likes
21
Share


@ImAGrowerNotAShower
Follow
At the beginning of the week I found many leaves with spots on them. I think I might have had some mites. I removed almost all of the leaves and sprayed the ladies twice with CannaCure.
Now everthing looks ok again at it should be only a few days until the first ones will come down. Checking trichomes everyday.

Likes
24
Share


@Firepharmer
Follow
Rock hard buds Miicrobialmass for the win and the new led is killer. The knobs like knots grow out of the sides of the buds are something to look at wow !!! Monkey berries is in flushing mode , slurricane won’t be far behind in the next week or 2 I’ll flush


Likes
1
Share


@Bud_vista
Follow
She’s getting bigger and bigger buds. They begin making a nice “frosty” look. Today my vipaspectra P600 arrived and I directly installed it. The p600 is Running on 75% at 18cm away from the main bus. She kind of loves the light for the first hour.