


Likes
1
Share


@EUROGROW
Follow
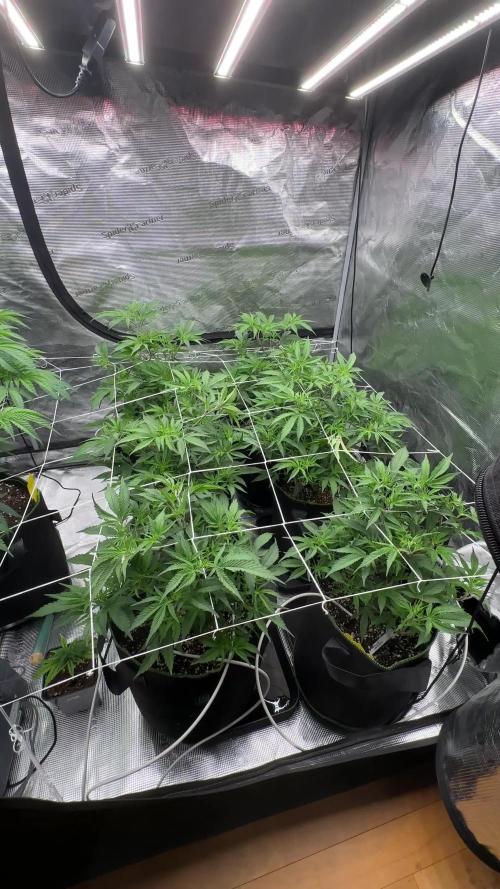
WEEK 3 ! They grew like fu*k this week and all started to look healthy again since the first set of leaves were kinda bleached. it was most def PH issues, I think I found my sweet spot at PH 6.
Tonight I will raise the LED to 500w and start adding Co2. I also added an extra pot full of coco and nutrients under each pots since the roots were already popping through my Air Pots.

Likes
7
Share

@The710Garden
Follow
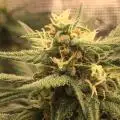
Good yield,good terpprofil on Both phenos Crazy trichome Productions!
I will Look what she will she will do it i dial her in in a next run,theres so much potential in this genetic!

Likes
1
Share

@StillBlazin
Follow
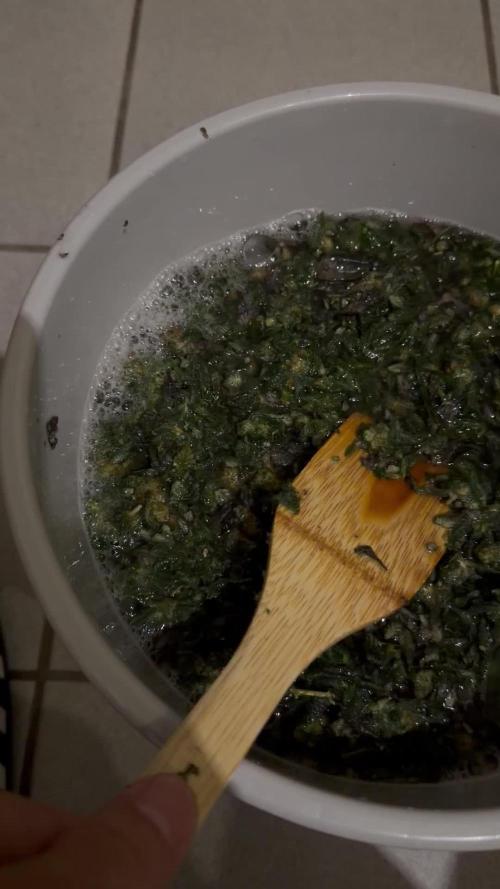
Ich bin sehr zufrieden, aber manche trinken nicht so viel wie andere leider

Likes
6
Share


@HAN_GROWER17
Follow
Esta semana a estado marcada por un excelente desarrollo, ya esta culminando el desarrollo de los capullos para dar inicio al proceso de engorde de las flores.

Likes
Comments
Share

@Samsationalseeds
Follow
the two BPP R3 in soil went into bloom. the dwc are starting to enter bloom slowly as well
36-42
The veg and seedling cycle on the three gallon pot was short and it's gone into bloom with very little stretching. All of the plants look healthy, they look fine, no nutrient. Or PH issues
Only one banana purple punch has been in bloom for about two weeks.Two out of the other four are about to finish stretching and go into bloom, and the fourth one is still a little stunted.And delayed.
The cherry lemon gelato in the deep water culture just entered bloom.
The gorilla z is still in veg

Likes
24
Share


@Dingle
Follow
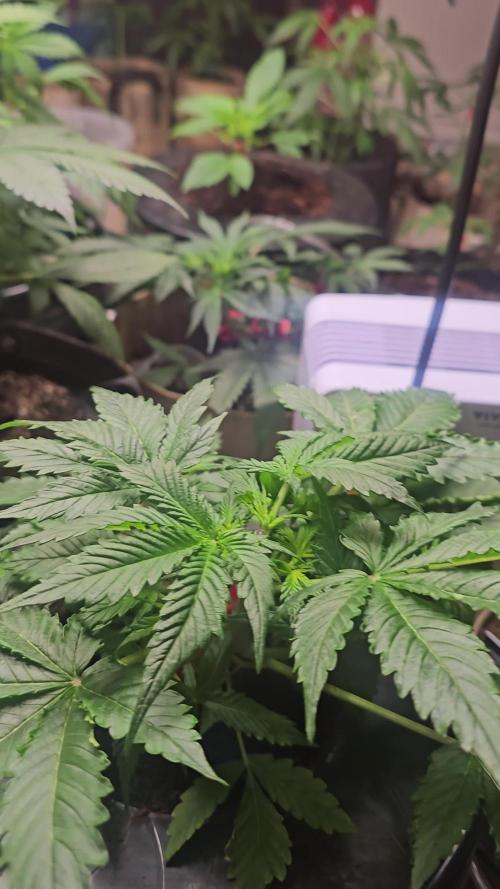
Excited see this strain develop their bud structures now.
They are definitely a lot hungrier this week and seem to showing a ton more trichomes.
More defoliation and lst to help spread airflow and light.
Still no major issues.
✌️

Likes
9
Share
@Thedibber
Follow
26/08/25 - Watered 3L Ph 6.0 😺
27/08/25 - Watered 3L Ph 5.95
28/08/25 - Super busy today luckily the girls have enough water to keep them going until tomorrow. Spiderfarmer delivered my free cable organiser or whatever you would call it 😆 Thought it would be pointless but I can see how its going to improve my space and allow better cable management. Ill use this board to control both tents 3x3 using Ac infinity then the 4x2 using the GGS controller when it arrives 😸
29/08/25 - Watered 3.5L Ph 6.0
30/08/25 - Watered 3L Ph 6.0
31/08/25 - Watered 3L Ph 6.0
Likes
1
Share

@LokalGrenz
Follow
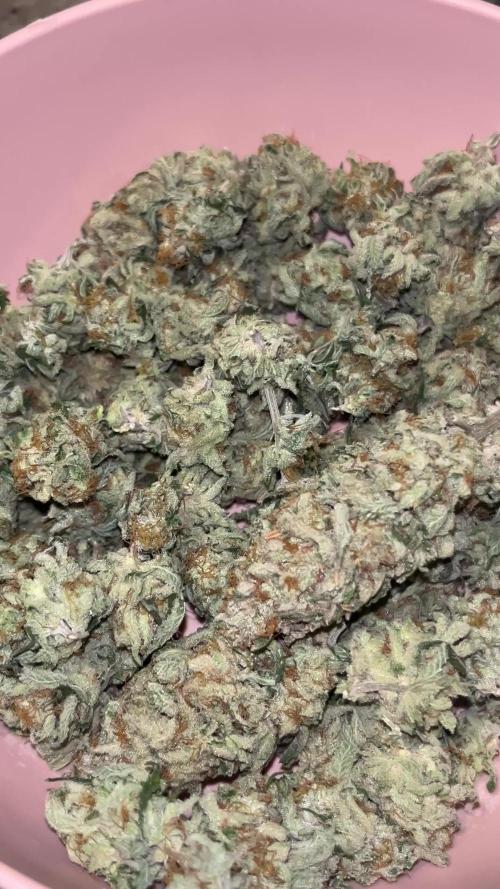
Cut down 9/6 will hang for week or two will give me detail up dates late
9/16 branches snapping so I cut down and trimmed
Not to happy with the amount but I am really happy with the quality thing is sticky frosty wish I could take better pics

Likes
24
Share


@GrowGuy97
Follow
Day 21 - Ladies are looking nice & healthy! Everything seems to be going great, one is still growing a little slow but all in all extremely happy with this grow so far! Thanks for following & happy growing friends!✌️🏼🌱
Day 22 - They are really starting to take off now😍😍
Day 23 - not sure if it’s the pheno type or the nutrient but the plant that is getting the Technaflora Nutrients is starting to get a little bigger🤷♂️🏼
Day 24 - Babies are really starting to take off😍😍 got my New420GuySeed gear in today as well👍🏼🙏🏼
Day 25 - Starting to really grow now, the smaller of the 3 I starting mainlining today to do another comparison at harvest time!
Day 26 - Another good day of growth! Thank you for following & happy growing friends!🌱✌️🏼
Day 27 - End of the week & these ladies just keep looking better & better😍

Likes
6
Share


Likes
5
Share


@OnlyTomatoes
Follow
[ Introduction ]
Welcome to my first ever grow journal! I have been growing medically for the past couple years, documenting some of my grows on my Facebook and Instagram (@OnlyTomatoes) pages, as well as several cannabis cultivation subreddits. I've found that I do a lot of things differently than other growers, so I'd like to share a full cycle publicly in case I have the answers to somebody's questions.
[ Updates ]
Day 4 - Lights have been lowered to 18 inches off canopy, dimmed to 25%. They've recovered from both their transplant and their topping, new growth looks almost perfect. I'm going to keep the accidental sunflowers for a few more days and see if there's any significant difference between plants. They all received a foliar spray of neem, kelp, and a bit of calmag before lights off yesterday. I expect to be able to remove the remaining damaged leaves by the end of this week.
Day 7 - Lights increased to 30%, C02 increased to 800ppm, getting ready for week 2 of veg. Fed today, fairly low EC (<1.5) blend of Silica, Calcium, Kelp, Molasses, and Tribus Grow in a mixture of R/O and tap water. Very little runoff at 1gal per pot. Will most likely foliar again before lights off with a light fish hydrolysate mixture to help with any nitrogen issues. Any dead or dying leaves you see are from pre-transplant, I'm just waiting a few days longer for the existing rootballs' ph levels to swing back to a healthy range before removing all that unsightly growth. I'm really not sure when I'm going to remove the sunflowers growing in some of the pots, I've seen no negative effects yet. I could flip group 1 into flower if I wanted, the canopy is level and beautiful, however group 2 will take a while longer to fill a canopy.
[ Grow Details ]
Plant Count: 64 (Clones)
Mother Age: 17 Months
Strain: Gelat.OG (Phenotype 5)
Breeder: Seedsman
Hunter: OnlyTomatoes
Veg Time: 3-5 Weeks
Flower Time: 65 Days
Training: Multiple Toppings
Final Pot Size: 5 gal (Fabric)
[ Room Details ]
Room Size: 21'x9'x11' (190sqft, 2100cuft)
Canopy Size: 10'x9' and 5'x9' (135sqft)
Lighting: Grower's Choice ROI-E720 x6 (dimmed to 25% power during veg)
Cooling: Cooper&Hunter 36k BTU Minisplit
Dehumidification: Quest 225
Equipment Controllers: TrolMaster (Lighting, Cooling, and Dehumidification controls), AutoPilot (C02 Controls)
Watering System: Manually controlled drip irrigation, x2 1gph drip emitters per pot
[ Pre-Veg ]
These poor clones have lived an abused life during 2021, sitting around in solo cups for over 2 months waiting for a new home. Normally I would never allow pre-veg plants to have such obvious deficiencies, but constant hand watering led to some poor nutrient decisions on my part. They've been in their final pots for a few days now and were topped on day 0 of veg. I plan on lowering the lights to 18"-24" within canopy around day 3, I'm just allowing some extra time for the roots to really dig in. I've found that a batch of dirt that was used had sunflower seeds in it, possibly winter food storage from an outside rodent, so I'm debating how long I will let these sunflower seedlings grow alongside my plants. They do make a good cover crop with amazing root systems, I just don't think that really applies in pots of this size where plants can choke each other out.

Likes
4
Share


@SmileyIndica
Follow
I’m loving the Trichome development on this, Nana glue! Probably got a couple more weeks on her .im Definitely a couple weeks plus on the Hindu.

Likes
25
Share


@EBxAH
Follow
Still just a waiting on the light shift, lol. This is what's left, Black Widow! My neighbor took the Banner and botched it. The Skywalker in the ground died. This is all that's left, lol. I hope it turns out decent! I been cultivating, with my wife, some Early Miss, Wedding Cake, Gelato, Fucking Incredible. We've harvested 1 early miss, 1 wedding cake,and 1 gelato so far. We have 1 fucking incredible coming down in a few weeks and waiting on 4 more early miss, 1 gelato, 2 fucking incredible, and 1 wedding cake. Obviously plus the widow.


Likes
209
Share


@Rock_n_Roll_Randy
Follow
CHANGED MY EMAIL ADDRESS ON GROW DIARIES AND IT WONT LET ME DO A CONFIRMATION FOR MY NEW EMAIL, SO NOW I CANT LIKE ANYTHING, COMMENT ON ANYTHING OR CHAT. SORRY MY FRIENDS. I HOPE GROW DIARIES TEAM WILL HELP ME OUT SOON🙏🙏🤞🤞
Day 128 for the 54 plant grow. 42 different strains of photoperiods and 12 different autoflower strains in the:
8X8 GROW TENT WITH THE NEW FC-E6500, FC4800 AND TSW2000 AND THE NEW 5X5 GROW TENT WITH A TSW2000 👍and they are being fed GREEN BUZZ LIQUIDS all organic/vegan fertilizers🤘.
I only pinched the tops on 2 or 3 plants but I defoliated every plant ALOT. it slowed the vertical growth alot but it's exactly what I wanted. I can keep track of the plant sizes, how they grew, how healthy they were, how easy they were to grow and how good the final product is👍 every plant was given the same strength of GREEN BUZZ LIQUIDS and I'm keeping track of which plants were happy with the suggested amounts and which plants seemed to want more or less🤘
ALL THE AUTOFLOWERS ARE NOW CHOPPED.
I chopped 22 photoperiods at 125 days of growing. I'm impressed with how good my mars hydro gear is. Always gets em nice and frosty and everything stinks alot.
VERY HAPPY WITH GREEN BUZZ LIQUIDS. I've used lots of brands and this is my NEW favorite brand. And with it being vegan/organic, it makes it even better. Joints burn soo clean👍
The girls are loving their 8x8 MARS MANSION and THE 5X5 INLAW SUITE and everything is doing good and looking nice and getting bigger👍 They are all starting to finish now and the bud sacs are swelling and they are all getting nice and frosty and starting to stink ALOT. MARS HYDRO ALWAYS GETS EM FROSTY👍.I AM NEVER DISAPPOINTED With how awesome these lights are🤘. KEEP KILLING IT MARS🤘👏👏
BREEDERS AND SEEDS:
DIVINE SEEDS:
MAZAR, OPIUM, WHITE WIDOW, OG KUSH, PABLO ESCOBAR, DIVINE INDICA.
AUTO WHITE WIDOW
AUTO PABLO ESCOBAR
AUTO WHITE RUSSIAN
AUTO FRACTAL
AUTO MONTREAL
AUTO OPIUM
AUTO KABUL
AUTO MAZAR.
WEEDSEED EXPRESS:
GREEN CRACK, GHOST TRAIN HAZE, LITHIUM OG, CHEESE.
DOCTORS CHOICE:
DC KUSH, AUTO NIAGARA, AUTO ROCK MACHINE.
EXOTIC SEEDS:
HIPPIE BERRY, MALASANA GELATO, EXOTIC ANIMAL.
GENE/MEME SEEDS:
BLACK HELL.
ORIGINAL SENSIBLE SEEDS:
PURPLE PUNCH COOKIES, WEDDING CAKE, PURE KUSH, GORILLA COOKIES.
SWEET SEEDS:
BLACK JACK, GORILLA GIRL, SWEET ZKITTLES.
EMERALD TRIANGLE SEEDS:
GORILLA GLUE, MASTODON KUSH.
SEEDSMAN SEEDS:
BLACK SUGAR, PEYOTE FORUM, PEYOTE WIFI, BADAZZ COOKIES OG, PURPLE GHOST CANDY, STRAWBERRY BANANA GRAPE, L.A. PEYOTE KUSH, PEYOTE WIFI CBD, FUEL DOG, CRITICAL PURPLE KUSH.
AMSTERDAM MARIJUANA SEEDS:
GIRL SCOUT COOKIES EXTREME, GREEN CRACK.
QUEBEC CANNABIS SEEDS:
BRUCE BANNER, GREEN CRACK, QUEBEC CBD 20:1.
I 💚 GROWING MARIJUANA:
SKYWALKER OG, BANANA KUSH, BLUEBERRY CBD.
FOR EVERYTHING MARS HYDRO VISIT:
www.mars-hydro.com
www.marshydroled.ca
PROMO CODE: rocknroll
VISIT THE ALIEXPRESS STORE:
@marshydro_aliexpress
Instagram: @marshydropenny
https://youtube.com/channel/UChU5ZWwNi-DvnO3oWVU3ceA
https://greenbuzzliquids.com/
#greenbuzzliquids
@GreenBuzzLiquids
https://greenbuzzliquids.com/en/shop/
PROMO CODE: rocknroll
https://www.youtube.com/watch?v=8hEqyS1jPpI
https://growdiaries.com/diaries/112437-grow-journal-by-rock-n-roll-randy/week/593118
Thanks for taking the time to read and check out my diary🤜🤛
FC-E6500 LED GROW LIGHT:
FC-E6500 grow light with 3978pcs OSRAM BridgeLux Diodes & Moso Driver, market-leading PPF 2.7 µmol/J, Max 2.5g yield/watt with 30% higher Average PPE, more cost-effective when compared to same style type lights. Only consumes 650W, perfectly cover 5x5ft (personal), 4x4ft (commercial) grow space. Innovative Precise Uniform Lighting-Built-in removable bars interval & dimmability enable the exact & dynamic PPFD control over each of the plant growing stages, FC-E6500 detachable bars deliverSuperior Heat Dissipation: Real Aluminum heatsink together with 6 slim profile passive cooled bars (THINNER & LARGER surface) and detachable Meanwell Driver, create less heat. save 50% hydro than other old grow lights! Driver can be mounted remotely on the side of a grow tent/rack or on an adjacent wall to remove heat from grow space. Full Spectrum UV IR LED: With Yield Max spectrum (660nm Osram enhanced Deep Red,2800k-5000k,730-740nm IR,380-410nm UV LEDs), Average PPFD the FC-E6500 LED grow lamp enables cultivators to produce BIG FAT Dense Buds, perfect for full-cycle hydroponic, soil, grow tent/grow room.
Dimmable Commercial Grow Light: Cost-efficient, easy dimming & daisy chain With a max up to 20 lights, IP65 Waterproof, master light easily controls the rest. Perfect for commercial & home horticulture.
FC4800 LED GROW LIGHT:
GET THE MAX FROM MARS👍: Welcome one of the newest members of the Mars Hydro family🤜🤛🤘. The Mars Hydro FC 4800 480W LED Grow Light can accommodate up to a 4' x 4' area for flowering. It has OVER 2000 LED chips consisting of the best selling Samsung LM301B diodes which has a Luminous Efficacy of: 220 lm/W
0.2 W, 3 V mid power,
Osram 660nm Diodes, Infrared light and UV LIGHT👍. It boasts the incredible efficiency of 2.8 µmol/J, maximum 2.5gram yield per watt with 30% higher Average PPFD. This High-intensity spectrum is beneficial for plants at all stages - from veg to bloom, and creates Big dense Buds👍. achieve 50% higher yields & quality compared with the old lights! Only consumes 480W for 4x4ft personal grows, and 3x3ft for commerical grow. It comes with a dimmer and daisy chain function with a maximum of up to 15 lights, the master light controls the rest👍. Wide 6-bar design offers even & wide canopy coverage and can maximizes your grow space. slim 180° FOLDABLE DESIGN... YES I SAID FOLDABLE🤘🤣 , making it compact and easy to install, it's IP65 WATERPROOF and will give you no worries while growing in a humid environment and makes it a flexible high performance commercial grow light for enormous SUPER FROSTY yields.😛😛😛. MARS GETS EM FROSTY BOYS👍
AWESOME HEAT DISSIPATION: The Low energy consumption FC4800 growing light has 6 passive-cooled bars and an aluminum heat-sink a removable driver you can upgrade later or have it outside your tent. with zero noise you can save up to 50% in your electricity bill compared to HID's or HPS lights!
It also has a removable driver so you can upgrade it in the future or have it outside your grow space for better heat control in your growroom👍
UPGRADED FULL SPECTRUM: Yield Max Spectrum with enhanced red (Top-Bin Samsung 3000k-5000knm, Osram 660nm Deep Red), speed up blooming & fruiting, perfectly suited for full-cycle growing. The FC4800 LED grow lamp was born for Big Buds, perfect for commercial, grow tent, grow room, hydroponics, and all soil grows.👍
THE BEST SAMSUNG DIODES: THE FC4800 has Top Bin genuine Samsung Osram Diodes, combined with remarkable 2.8 µmol/J Efficacy, 30% higher Average PPFD, 50% less energy consumption, to maximize your yields. They give you a TRUSTED 3 years warranty 100% Satisfactory guaranteed!!!
X2 TSW2000 LED GROW LIGHT:
INCREASE YIELD AND CROP QUALITY WITH MARS HYDRO LED GROW LIGHTS: NEWEST SMD LED technology provides the highest PAR/LUMEN output (1122umol@18") and can make you get 30% higher yield compared to OLD blurple led lights. Max 2.5g yield per wattage and achieve maximum quality and quantity, much better than traditional HPS grow systems
LOW ENERGY CONSUMPTION LED GROW LIGHT: Consuming only 300W true output with 684 LEDS! It saves up to 50% energy than other led grow lights. Perfect for 3.5x3.5ft bloom stage, 4x4ft veg stage. Over 90% light energy can be absorbed by plants, it will have higher intensity in a MARS HYDRO grow tent with diamond design mylar, or by crossing over using multiple TSW2000
HIGH EFFICIENCY FULL SPECTRUM INDOOR GROW: 3000K 5000K and IR 660nm 760nm RED, makes it close to natural light, highly engineered to provide improved growing performance for plants at all stages of growing, rapid plant response from seed to flower; Uniform and wide-beam light distribution for your plant's optimal growth
8x8 & 5X5 GROW TENT:
The MARS HYDRO 8x8 and 5x5 Grow Tent interior is made of a unique diamond design mylar which is highly reflective. (Other companies mylar and reflective rate is as low as 50%, and it won't provide efficient light. They use thick 1680D oxford canvas, and being double stitched, it is tear proof and perfect for locking in the light. Their grow tent keeps 100% of the light inside the tent and helps your plants absorb more light. EXTRA-THICK material means No light leaks or rips at all.👍
Likes
6
Share


@StonerMike
Follow
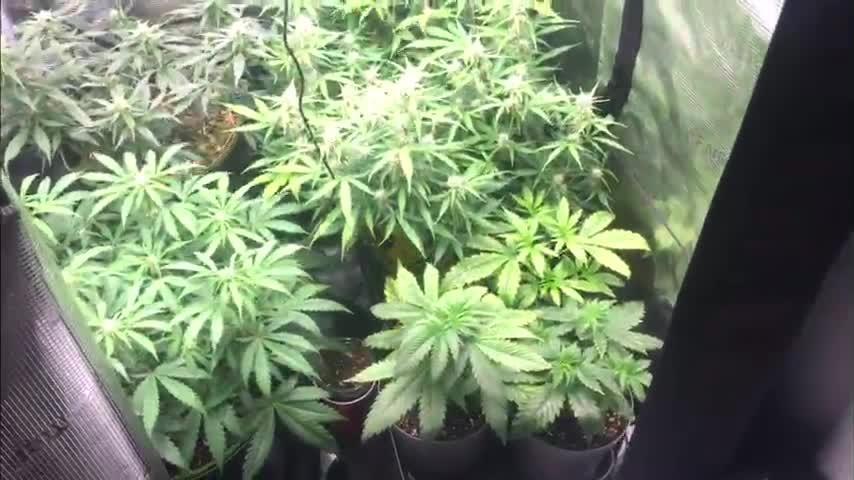
Purple lemonade has been looking crazy for weeks smh. I haven’t had time to continuously update. Pics and video are from 7.22
Likes
8
Share


@Mahali
Follow
Going into flower on 4/10. Plants have been growing and inch or two every day. Suspect front middle and back middle to be males.

Likes
27
Share


@TheCannaProphet
Follow
-----------------------------------------
~BARNEYS FARM DOS SI DOS 33™️~
-----------------------------------------
This strain from 'Barneys Farm’s Cali Collection gets another jolt of super power with this explosive collection of terpenes fused together from some of the world’s most astounding US cannabis phenotypes.
Dos Si Dos was developed from OG Kush Breath, a knockout Girl Scout Cookies pheno crossed with Face Off OG, then crossed again with their legendary Cookies Kush (OG Kush pheno x GSC) AND THAT’S ONLY HALF OF THE STORY.
Add in a subtle blend of Gelato #33 to the pot with its star struck Sunset Sherbet x Thin Mint GSC heritage and boom! A new champion was born: a sativa burst of euphoric energy is followed by tranquility with sedative properties capable of happily tranquilizing an elephant, if you’re overzealous or uninitiated!
DOS SI DOS 33™️ Cannabis Seeds Strain Specifications
~Type: Feminized
~Photoperiod: Normal
~Genetics: Dos Si Dos x Gelato #33
~Effect: Relaxed, Sedative, Happy
~Outdoor Yield (g): up to 2000
~Indoor Yield (g):up to 700 gr/m²
~Flowering Time (days): 60 - 65
~Feminized Outdoor Harvest Month: October
~Feminized Outdoor Harvest Month Week: 1st-2nd week
~Height Indoor (cm): 90cm
~Height: Short
~Indica %: 60%
~Sativa %: 40%
~Indica/Sativa: Mostly Indica
~Taste: Mint, Lime, Spice
~Aroma: Cookies, Sherbet, Lime
*Above information credit to Barneys Farm
__________________________________________________________________________________________________________________________________________________________________________________________________________________________________________________________________________________________________________________________________________________________________________________________________________________________________________________
THE SETUP:
~Planted into Jiffy Peat Pellets that were hydrated with de-chlorinated water with SuperThrive added then ph'd to 6.0 @ 80℉
~Grown 100% organic in 10g fabric pots with Mother Earth 70/30 Coco/Perlite medium amended with 2tbs/g of Down To Earth 4-4-4 / 2 cups/g of Earthworm Castings / 1tbs/g of Dr. Earth Flower Girl 3-9-4, 1tbs/g of Dr. Earth Bat Guano, 3/4 cup of Down To Earth Azomite and 1 tsp/g Down To Earth Fish Bone Meal.
~24hr light cycle during Germination / 19/5 light cycle for Vegetation and 12/12 for Flower
~Straight water ph'd @ 6.2-6.8 when needed and weekly Compost Tea's.
__________________________________________________________________________________________________________________________________________________________________________________________________________________________________________________________________________________________________________________________________________________________________________________________________________________________________________________
Weekly Updates:
10/11- Week Nine! Here we go on our way to sticking a fork in this run!
She hasn't really showed any signs of a fade and she's putting out trichomes like crazy and I'll let them indicate when it's time to put her in the dark before she's harvested! I'm hopeful that possibly by the end of this week she'll be hanging after she spends a couple of nights in the dark.
I watered today using straight water that's ph'd to 6.5-6.7 @ 72℉. I gave her a little over 1.5g to keep her flush going and then turned her pot.
Trichome status: 80% milky / 20% clear
10/13- I watered today with 1.5g of straight water that was ph'd to 6.5-6.7 @ 72℉ and gave her pot a turn.
Her trichomes are almost where I like them and more than likely she'll be going in the dark by the weekend! What a beautiful cultivar she is! 🤩💚
10/15- My routine of watering every other day continues. Yesterday I watered her with her usual 1.5g of straight de-chlorinated water that was ph'd to 6.5-6.7 @ 72℉ and gave her pot a turn. Today was just spent checking her over, turning her pot and doing a quick check of her trichomes which are close, but not quite ripe enough yet!
10/17- Wow!... Nine weeks of flower DONE! 😎👍
Now my sights are set on getting this girl finished up and on her way to 48 hours in the dark before she's hung to begin drying.
I went ahead and watered her with her usual 1.5g of straight de-chlorinated water that was ph'd to 6.7 @ 72℉ and checked her trichomes, which are looking just about right!
This journey is coming to a close in the next couple of weeks with her harvest, drying and trimming up. I so appreciate you following along with me , it's been a blast sharing with you all! 😎🙏
~Thanks so much for checking out my diary! This epic run is in the home stretch with harvest fast approaching...Stay lifted and be Blessed! 😎🙏~
Likes
5
Share


@Kinghaze
Follow
- Week 2 of veg
The humidity was way to low ( 38%)
I set up my humidifier from spider farmer and put it on 70%.
I also put them in 11.6 L Rootmaxx pots.
Tomorrow i will give the lady's some grow nutrients and b12 for the first time, and will begin on an ec of 1.1
