
Likes
Comments
Share


Likes
6
Share


@Dbkoop
Follow
• Largest plants’ fan leaves yellowing now.
• CP(1) looking a little purple finally.

Likes
9
Share


@Headies
Follow
So I had a little less nutrient last week then i needed. Def a calcium deficiency. I think it's clearing up but this plant has spot all over it. I changed the water, gave it the right amount of nutrients and a little exra hydrated lime for calcium. Hydro is hard. I hoping It's not sick. I hope It doesn't get the other plants sick. Just a few weeks left.

Likes
20
Share


@Susquihanna
Follow
Friends, as some of you may not know, “2nd time around Candy Auto” is named 2nd time because my puppies ate the first plant. I am so glad I grew another @Divine Seed Candy Auto because she is getting fat and smelling up my backyard.
According to @DivineSeed Candy Auto my plant should have thick side buds as well AND it does. I tried to capture a few side pictures of my buds so you could see them. I am quite impressed with this plant.
I am in the 5th week of flowering, which equates to 35 days. According to @DivineSeeds, Auto Candy needs 60 days minimum of flower time. As usual, I clipped off a bud so I could get some close up pics of her. I smelled the bud and just like @Divine Seeds boasts, it has a flowery/sweet smell. Miss Candy Auto is truly a beautiful scent. In addition, she is extremely sticky to the touch. Take a look at the close up pictures I took with my Max-see magnifier!! It is just about time to start flushing her.
Stay tuned to next week to see how 2nd Time Around Candy Auto is doing!
As always, Be Happy!! Comments and Likes are appreciated!!
Susquihanna

Likes
4
Share


@Sadom
Follow
08.08.: Blütetag 1
Heute habe ich nur noch die Triebe unter das Netz gebogen, damit alle ungefähr auf einer Höhe sind. Da der Platz nun sehr gut durch beide Pflanzen ausgefüllt ist, ist der Moment gekommen die Blüte einzuleiten. Die PBB hat schon so viele Stempel, sodass es so aussieht, als wäre sie schon in der Blüte. Daher denke ich, dass die PBB nicht lange für die Blüte brauchen wird. Wir werden es sehen.
12.08.: Blütetag 5
In den letzten Tagen seit Umstellen des Lichtzyklus und Einleiten der Blüte, sind beide Pflanzen ein gutes Stück über das Netz hinaus gewachsen. Aktuell gibt es nicht viel zutun. Leider sind einige Thripse auf den Pflanzen, aber ich habe bereits Raubmilben ausgebracht. Hoffentlich können sie die Thripse etwas in Schach halten. Außerdem habe ich die Bewässerungsdauer auf 20min, wenn das Licht angeht und nach 6h Beleuchtungsdauer, gestellt. Falls das nicht ausreichen sollte kann ich immer noch händisch nachgießen oder die Bewässerung anpassen. Den Beleuchtungsrhythmus habe ich so gewählt, dass abends um 10 Uhr das Licht angeht und morgens um 10 Uhr aus, damit die Lampe nicht während den heißen Sonnenstunden brennt.
13.08.: Blütetag 6
Die Stretchphase ist bei beiden Pflanzen noch voll im Gange. Aktuell wachsen sie durchschnittlich ca. 6cm am Tag. Ich bin gespannt, bei welcher Höhe sie ihren Stretch beenden. Das nächste Update gibts dann in Blütewoche 2.


Likes
8
Share

@Pompeyblue
Follow
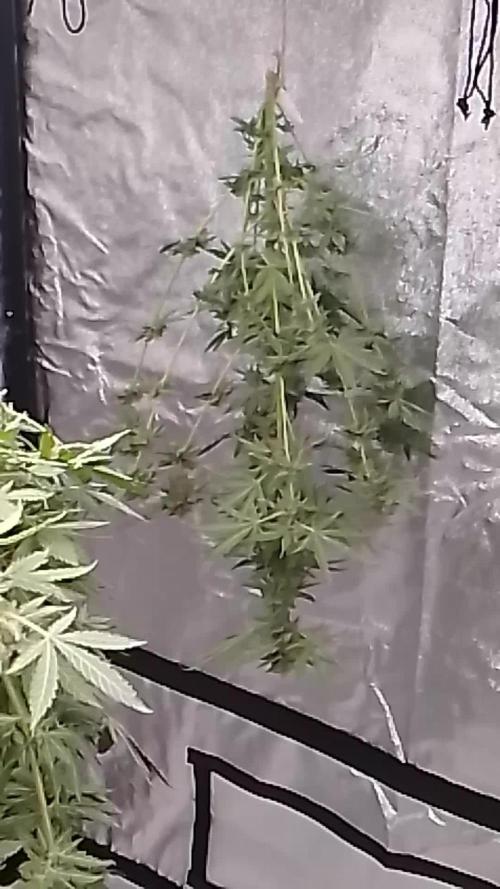
All chopped and hanging
BIG THANK YOU TO @Kannabia for the opportunity to grow their strain's

Likes
2
Share


@sunshinegroww
Follow
Love the looks of her so uniform just wow if i had the space not to top i would leave her anyway ,it was cleaned last night as strech stops now so decided to give her a cleane so removed bottom branches and those who would not make it high enough,drinks around 1l a water for now and just looks gorgeous well done RQS with this strain

Likes
27
Share


@w33dhawk
Follow
Hi ho ihr growmies!
Die Woche ist viel Arbeit gewesen ich stehe beinahe täglich knapp 2 Std vorm Zelt und webe die Triebe ein und halte die Blätter unterm netzt hier und da fliegt auch mal ein Blatt raus an Stellen wo einfach viel zu viel Laub aufeinander trifft. Ansonsten gibt es nicht viel zu Berichten sie bekommt immer noch nur Wasser (nicht ph angepasst, aber abgestanden). Es wird langsam voll im netzt daher wird es auch immer komplizierter ein zu weben, habe die Damen absolut unterschätzt vom stretch her ich hoffe das das alles hin haut da ich davon ausgehe das sie sich diese Woche noch stark ausdehnen wird bevor der stretch vorüber geht.
Ach ja und bevor ich es vergesse ich guck mal das ich nächste Woche an mehreren Tagen mal Bilder mache hab es diese Woche einfach nicht gepackt euch noch ne schöne Woche. Cu ihr growmies!

Likes
2
Share


@ChitownCannaChica
Follow
Did this lady in a shared DWC bucket.
Great auto yield. No herming and beautiful red buds.
Gave the floraflex lineup from veg to bloom.
Had some issues with leaves burning up close to the lighting but the buds are a beautiful color and smell like a nice piney gas.
Cannot say anything but great things with this plant! Very happy and results are great.
Likes
7
Share


@HighQualityH2O
Follow
Week 3. Botanicare is working wonders. I went ahead and topped at the third node. And started giving plants full grow nutes. The Banana Biscotti looks so good I might clone it. The Ice Dream Cake hasn’t bounced all the way back yet.

Likes
5
Share


@Ninjabuds
Follow
Both parents of this cross were super gas very weak start. Plants were not strong enough to push the seeds off so I had todo surgery. I really wander if it has something todo with how long you dry the seeds these were almost fresh seeds maybe 13days after harvest then I popped them. 3 of them going so far
Likes
45
Share


@masterofsmeagol
Follow
6/19 Knowing it was going to be over 100° for the majority of the day I WATERED the garden with 3 1/2 gallons. I went to check around 4 and everything looked amazing. We got some hard rain from a thunderstorm at 4pm but it seems like these girls like it rough and did fine. The take a beating and come back stronger. Knock on wood but I haven't seen any problems on the plant I snapped amd dict taped.. Everything seems to have toughened up and the leaves are an awesome healthy color. They grow observable every day now. Tomorrow is supposed to reach 100 again for most of the day before weather goes back to semi normal. I took a video but it will take way to long to upload. Tons of other pics didn't upload either.
6/20 Another day that's going to be over 100°. Plants seem to love it lol. I can't believe what I'm seeing. Bags still had some heft so I didn't water this morning. I figure I'll check them around noon and then plan on watering tonight if they need it. Hopfully they'll get some rain from thunderstorms. This crop has been through a lot. I think that has helped them significant deal with this unpredictable weather.
6/21 We had a MAJOR thunderstorm with sheet rain yesterday. I missed it but it was intense. I saw some videos. First time dad seemed concerned. Fortunately there was no damage. I was going to water today but I decided to hold off due to the look of the plants and the "praying leaves" at 4pm and feeling some moisture in the soil. Bags seemed to still have some heft. I'll probably water tomorrow. Need to transplant the 1 gals and need to figure out what I want to do for nutes this year. So far I've put in much less effort and I'm still doing great. I just don't have as many plants as usual.
6/22 Rained last night. Not much but the bags were heavy still so I held off watering. Plants looked happy and I can fix under watering much easier. It will rain tomorrow. I'll check throughout the day and update but things are going good. I should transplant those 3 seedlings in 1 gals.
6/23 It Rained last night and is suppised to rain today. It was raining when i went over. Just the kind if rain the plants love. I'll check again before church but I'm eventually going to have to water them. Those thunder storms helped a lot.
6/24 Rained about an inch yesterday. Plants loved it. Bigger everytime I see them. One seedling showed a pistol and I'll transplant it with the rest. It was the only one I was worried about. I've seen a FEW leaf hopper punctures and some other bites that could be anything. Time to get the ipm
6/25 Looks like its gonna be a nice sunny day. 75° at 10am. Plants are doing amazing and growing at a rapid pace. Haven't done anything ipm as of yet but any damage I've seen is localized to "A" leaf on "A" plant. I'll be paying attention and watching for signs of deficiencies. As of now though they LOOK great. I'll try to transplant the 3 seedlings today.

Likes
7
Share


@Ieiogrow94
Follow
Eccoci qui!!!
Tutto procede per il meglio, i pistilli sono usciti e ora si va dritti dritti alla maturazione, NE VEDREMO DELLE BELLE!!!
Davvero molto molto intrigato da queste bellezze, STRAIN 1 mostra colori violacei nelle prendisole in alto e mi fa ben sperare nel fenotipo viola che cerco. Entrambe le piccole sono in salute e crescono molto vigorosamente... WOOOOW
Grazie a tutti per il supporto ❤️🔥🌲

Likes
6
Share


@AlbasDiary
Follow
Jardineros una semana más dándole al lío!
Ya queda poco para cortar
Todas las plantas tienen su limpieza de raíz y están listas para que las pongamos a secar

Likes
65
Share


@TheBudWhisperer
Follow
Week 5 of flower and seed production for all these plants has started in earnest. We cleaned up the tent somewhat and took down all the males after having done their job. Alls left is to wait for finish now.
The nute deficiency appears to have corrected itself now that we’ve balanced out the ratios a little more. The WPM is no match for the sodium bicarbonate but still gonna have to keep on top of that to the end of the grow. Full fumigation of the grow spaces will be required - multi-day process I am not looking forward to. Time cleaning is time not growing, sadly.
We’re coasting to the finish now but should still have some decent updates on our super secret seed harvesting method once they’ve fully matured😉👍. Hope everyone’s well and grow’n that straight 🔥.
Background
Fingers crossed that these Spicy Bitch regs provide at least one male so that we can back build some stock of it. In the event that does take place we’ve got a single clone of each strain from the previous pollen chuck to sit in the tent with them so they can make babies for the next few months. The whole point of the last year was to start making some foundational genetics for a third generational cross we could call our own. If you’ve been following along than you’ll know that it’s been anything but easy. Our previous pollen picks didn’t pan out at all so we’re back to the drawing board with a new option from ExoticSeeds.
This’ll be a 10 plant run with 5 regs and 6 strains for pollination including the strain itself.
We’re running in a 2x4 MarsHydro grow tent all powered by a Mars Sp6500. That’s a little more than 600w packed into half the recommended footprint😳. Why? you ask - because we like our buds big and overcompensatory😂. Really, I’m just of the mind that we can pack more light into this space than recommended and get much better results. The math doesn’t lie. At least not as long as I wasn’t high when using the calculator again…..
Many thanks to @MarsHydroLED for the opportunity to test run the equipment👊.
In addition, we’ve also moved to a new nutrient system - Druid Nutrients out of the Netherlands. They don’t really have a presence on GD yet but you’ll be hearing about them very soon I’m sure. The beauty of this system is that it’s literally a 1 (one) component system for the entirety of the plants grow cycle. It really has changed the game in terms of ease of feeding and maintenance. It’s also very versatile and seems to provide everything needed across multiple different strains in the same ratios. Keep your eyes peeled for these folks. Pretty much a guarantee that they absolutely blow up once more people know about them👍👌😎.
Strain Background
Spicy Bitch: predominantly sativa, heavy yielder with a daytime kinda trip profile. It’s a cross of Queen Mother and a Pre-2000 AK47. We’ll pull what pollen we can and hope to have a female run out a larger supply of seed for the future.
Many thanks to @Exoticseeds for the chance to give these beans a go👍👊.
Pollination Strains:
Holy Surfer S1 - this is one of the focal points for this cycle. A fellow growmie was kind enough to ship over some S1 genetics I took an interest in. The only ask back was that if I did cross it to send a few his way for testing👍. Shoutout and cheers to @blendmedmedman. Hoping to have something back to ya in short order. For full details on this alluring hybrid option check my buddies link at seedfinder -
https://en.seedfinder.eu/strain-info/Holy_Surfer/Smiling_Tiger/
Northern Lights - this came from a particularly interesting batch of seeds that have shown a very dependable variegation trait. It’s a compact and squat plant requiring very little maintenance. Typical for the strain really. It’s been chosen as an option to potentially mellow out the high , shorten the stature of the resulting hybrid and inject it with some of that mellow indica effect.
Boogie Nights - total shot in the dark. Still haven’t even tried the strain myself yet but it was available at the right time and interesting enough to make a salad with. Big thanks to AMS who’ve been nothing short of an excellent seedbank to collaborate with. Expect similar growth characteristics to that of the Northern Lights. Better resilience however.
Blueberry - this particular clone is from extremely strong stock. Spliff seeds broke the mold with this strain. She’s lower maintenance than the NL, more resilient than anything else we’ve got on the menu and the terp. Profile on this girl is out of this world. If we can bring any of these qualities to the cross, then it could be magic👌.
White Widow - garrghh, I just can’t get away from this particular plant. Again, still haven’t even tested the buds yet and all I can say is that the growth characteristics are extremely vigorous and desirable. This plant is one of 3 unicorns that I have yet to tame due to a combo of extremely bad luck and circumstance.
All told, it’s still the same story: a VERY experimental breeding project designed to shotgun a broad swath of genetics against a reliable and dependable Breeder who’s put out proven fire 🔥🤟😎👍.


Likes
19
Share


@ItsGreenjamin
Follow
nice plant 💚💚 she is so unpretentious 🙏 next time definitely will try other spliff genetics ✌️✌️
Likes
95
Share


@DogDoctorOfficial
Follow
Week 5 day 2 from germination And i gave them a first little defoliation yesterday, they have seemed to like it 🤩💚
Week 5 day 3 from germination And all going as normal, I raised my EC up to 0.6, they seems to like it 💚
day 40 from seed And i took some more leafs off, CS2 is now the queen from the Chocolate department and TP2 on the Tropicana department. They all look super happy, i think a couple of days more and i will change them to a bigger pot. For now i will keep giving them all my love and keep hoping for he best 💚💚💚💚
Little battle between Topicanna Poisen from @sweetseeds vs Chocolate Skunk from @00Seeds (just for fun)
TP = Tropicana Poison
CS = Chocolate Skunk
All i grow is medecine for myself, nothing to sell, dont even ask !!!!
Stay safe and do it with love for the love ❤️ 🙏
💚Growers Love to you all 💚


Likes
31
Share


@TacoKart
Follow
Added another 1800w LED (pulls like 250w from the wall) to the 1800w one we already have. Provides a better even spread of light so they aren't all reaching for the middle and they can grow upwards towards the light instead. Raised average temps by a few degrees with still below 80 so its good.
Ended up flooding the tent on accident when the water was left on and it drained our reservoir. The plants experienced some nutrient burn probably because of the 4 gallons of nutrient supplemented water they were flooded with. The time lapse will show the flood :P
Refilled the reservoir with 5.8 pH'd water with no nutrients to help the nute burn.
Did some defoliation and LST. Janice and Rachel were topped. Ended up accidentally snapping one of the lower branches on Monica and just propped it up and its healing well no issues. Have some great before and after pictures of some of the defoliation and growth on the plants.
With the defoliation tons of new bud sights are growing well since the light can penetrate better and the addition of the new light helps too.
The runt (Pheobe) is still.... runty. basically just gonna use the zkittlez to fill out some empty spaces that the sour grape kush doesn't fill. The sour grape kush is super bushy and is doing noticeably better.

Likes
24
Share

@MadeInGermany
Follow
Flowering day 7
since time change
to 12/12 h.
Hey guys :-)
The flowering started last week because otherwise the space in the small tent would end up being too narrow :-)
Cuttings were taken from each phenotype beforehand.
To change the flower, I rinsed it very lightly with clean fruits.
With the next watering she gets a mix of grow liquid and bloom liquid before she only gets bloom.
The heating mat works perfectly in the small tent and the parameters are all in the optimal range 🙏🏻👍.
Now we hope that everything stays that way and that the cold days will slowly pass :-) .
Everything was cleaned and checked.
have fun and stay healthy 🙏🏻
👇🏼👇🏼👇🏼👇🏼👇🏼👇🏼👇🏼👇🏼👇🏼👇🏼👇🏼👇🏼
You can buy this Nutrients at :
https://greenbuzzliquids.com/en/shop/
With the discount code: Made_in_Germany you get a discount of 15% on all products from an order value of 100 euros.
👇🏼👇🏼👇🏼👇🏼👇🏼👇🏼👇🏼👇🏼👇🏼👇🏼👇🏼👇🏼
You can buy this strain at :
Clearwater Seeds
Water 💧 💧💧
Osmosis water mixed with normal water (24 hours stale that the chlorine evaporates) to 0.2 EC. Add Cal / Mag to 0.4 Ec Ph with Organic Ph - to 5.8 - 6.5
MadeInGermany


