
Likes
Comments
Share


Likes
12
Share


@Mo_Powers
Follow
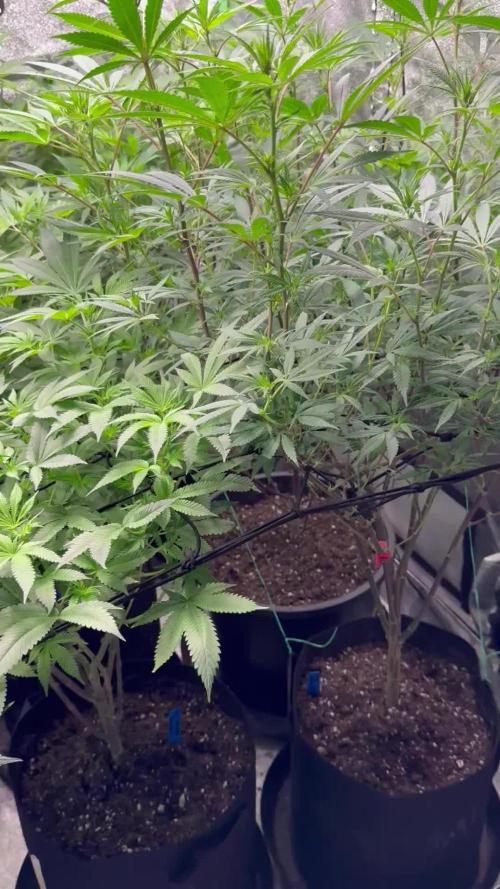
the experiment continues. unfortunately it went up too fast, i'm trying to tie it down a bit. at least it's still alive and i hope it will stay alive for the next week.😅😇

Likes
2
Share


@Cornfed
Follow
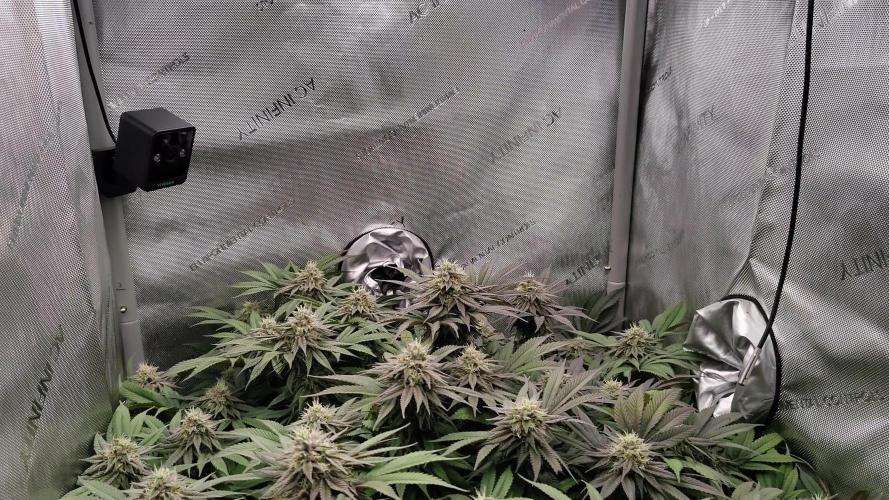
This week I added a new controller to handle up to 8 functions. I installed a new heater, my old humidifier and some LED strips to the controller. Targeting a VPD at 1.0 day and night.
Trying to keep the nutrient ppm under 900 and ph at 6.0 in the reservoirs. Ordered a second ph pen because I don’t trust my readings. Will be here by Thursday.
Friday:
Checked the ppm in the reservoirs and it’s at 1,000. Added more RO water with extra nitrogen to bring the ppm level down to 925.
Saturday: I installed an updated AC Infinity controller 69 Pro Plus (controls 8 pieces of equipment) which allowed me to add a humidifier, corner LEDs and a heater to the controller. Overall I’m extremely impressed with this AC Infinity equipment. My VPD is within the range I want to achieve (.8-1.1). I programmed it to maintain 78 degrees and 67% humidity during the day, 73 degrees and 63% humidity at night. Charts posted also show the impact of an open tent compared to the closed environment. The heater is constantly pushing fresh air into the tent, so I don’t need to cycle the exhaust fan often.
Rewired the tent again and moved the controller later that night. I mounted the controller on the wall. Added Mars Hydro UV/IR lighting to fill out all 8 slots on the controller.
Sunday: I checked the ph in the reservoirs (6.8….i had filled it with 6.0 ph) and the ppm (1200 ppm…I had filled it with 900). So evaporation and possibly a mismeasurement of ph. I topped ff reservoirs with slightly stronger nutes and adjusted ph to 5.8 in the reservoirs. Poor magnesium absorption could be driving some leaf yellowing. Effective tomorrow, I’m switching over to Heads Formula which consistently feeds GH Flora series nutes at Micro (6ml/g), Bloom (9ml/g) and cal mag (3ml/g). Turned on the UV/IR lights for 3 minutes every 8 hours. I’m easing the plants up to 5 minutes every 6 hours which will provide the recommended 20 minutes of IR per day. This will help the plants stretch a little more.
Monday: checked ph and ppm in reservoirs. 6.1ph and 880ppm. VPD remains stable except when I open the tent.
Tuesday: checked ph (6.4) and ppm (880) in reservoirs. Added .5ml of ph down to two reservoirs. Still see slight yellowing between the veins but it’s not getting worse (might be improving). Adjusting ph down to 6.0 target might have solved this. The plants grew by 1-2” last night…..is the infrared light working already?
Decided to mix up fresh nutes for the reservoirs following Heads formula. 6ml Micro and 9ml Bloom per gallon of RO water. Added 5 ml of CalMag too. Ending ppm was 1080 which is too high, so I diluted down to 880 with RO water. 6.0 ph.
Wednesday: plants grew another .75 inches last night. I topped above the 5th node.
Thursday: added RO water with heavy cal mag to reservoirs to increase amount of CalMag available.

Likes
89
Share

@squalino
Follow
🌿 Journal de Culture : Mac 1 Autoflower – "Bee Happy" 🐝 (Semaine 12)
#Dryrocket
Nous y voilà, l'avant-dernière étape avant le grand jour. Ma petite abeille a reçu son tout dernier apport de nutriments la semaine passée et est entrée officiellement dans sa phase finale.
Un Grand Merci
Un immense merci à @mia_biotabs pour avoir été présent à chaque étape de ce run à travers ses conseils. Un grand merci également à @Dryrocket : l'appareil va bientôt arrivé et est prêt sera pret à entrer en action pour le séchage, j'ai hâte de voir le résultat !
Merci enfin à toute la communauté qui vibre avec moi depuis le premier jour.
Paramètres de Culture & Climat Extrême
Taille : Stable à 91 cm.
Climat : C'est le gros point noir et la principale bataille de cette fin de run. La chaleur dans la cave est devenue excessive avec de grosses hausses de température ces derniers jours. J'atteins des pointes compliquées à 29 - 30°C. Malgré ces conditions loin d'être idéales, "Bee Happy" fait preuve d'une résistance remarquable et encaisse le coup sans broncher.
Humidité : Toujours stabilisée à 50% pour éviter tout problème de moisissure sur les fleurs compactes en fin de vie.
Gestion de l'eau :
Le rinçage est entièrement géré par l'Autopot. Le réservoir a été basculé à 100% sur de l'eau claire pour nettoyer le substrat et pousser la plante à consommer ses dernières réserves.
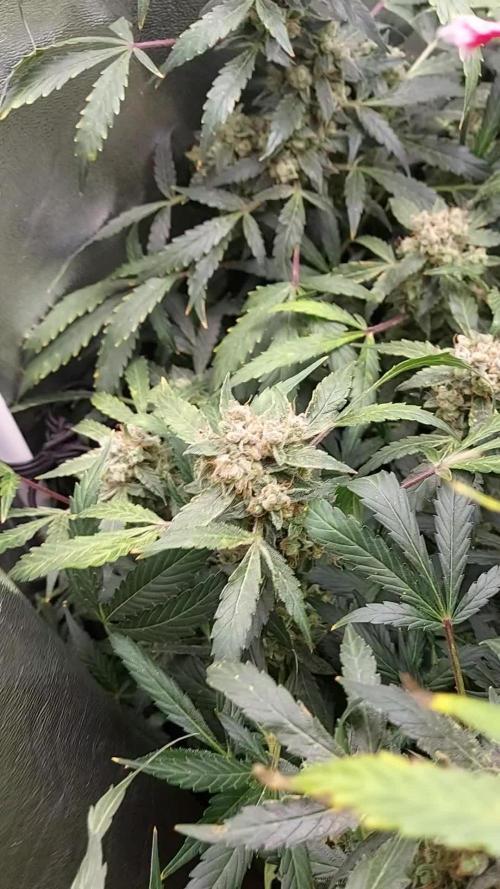
État des Buds & Observations Visuelles ❄️
Les têtes sont devenues extrêmement denses et sont littéralement blindées de trichomes. Le manteau de résine est lourd et collant.
En jetant un œil attentif aux détails des photos, on constate que le cycle se termine en beauté.
Malgré le manque de contrôle global que je regrette sur cette session (entre la colocation serrée avec Spirit, les caprices de pH du bulleur au début et les températures actuelles de la cave), la génétique a fait des miracles. Les calices sont gonflés au maximum, formant ces fameux blocs compacts typiques de ce phénotype "chou-fleur". La sénescence commence doucement à s'installer sur les pointes et les petites feuilles, signe que le rinçage à l'eau claire fait son travail en profondeur et que la plante puise ses derniers retranchements.
Cap sur la récolte ✂️
Le compte à rebours est lancé. Les têtes sont dures, la résine est mûre, et le rinçage libère les derniers arômes de la plante. La semaine prochaine sera celle de la récolte ! ---
Merci à tous d'avoir suivi ce run mouvementé mais ô combien riche en enseignements ! Rendez-vous dans sept jours pour le point final, la coupe, et le passage officiel dans le Dryrocket. Restez connectés, le meilleur reste à venir !


Likes
27
Share


@Stickybudz420
Follow
7 weeks now she’s a real beauty this lemon, plenty of bud sites on her now as she’s just coming into flowering now think this one might be a late bloomer!! Hope you enjoy the pics 🍋🏝️Just had my ACL reattached so might struggle to keep up with my diaries 😪🤞
Processing
Likes
7
Share


@Kushizlez
Follow
Day 56-63
(Day 57) I might have to fix the light to the roof of the tent so I can get another 3 inches up. The ppfd is just too intense at this height. The node stacking is super tight, I’m seeing some droop on almost every plant and the plants just look stunted. I might have to take out the big shelf I just paid 90$ for and raise the light to get the ppfd level down. This happened my last grow as well. It’s a great light for flowering but sucks ass for veg unless it’s hung 5’ above the canopy. I’ve seen videos of others with the same light and they have to fix it to the roof. The dimming function only works with a master controller I don’t have the money for right now.
Pulling bbb #2. I’m seeing very small but clear pollen sacks. It’s also drooping like crazy. The roots don’t look as healthy as some of the other males I pulled earlier. They have a slight brown tinge but still mostly white. I wonder if I accidentally gave top dressed it too many times when I mixed them all up a while ago.
I’m going to transplant bbb’s #1, #3, #6 & #7 into my 10 gallon destiny/coco pots lightly water. This is kind of a gamble because 2 of them are not showing definitively. Although I’m about 75% sure they’re fems. If not, I got my two backups.
(Day 58) I was reading about symptoms of high PH and I definitely have it indicated by the twisted and stunted growth on top. I’m going to try to water in a full gallon at 5.8 and see if I get a good response. I sprayed the pump nozzle directly into the soil after it was empty to put some oxygen into that big 10g pot.
The blackberry I gave the lowered PH water too noticeably responded within a few hours. The clawing has pretty much stopped and it now looks like the healthiest plant in the tent. I’m going to see how it responds over the next few days then try it with my other plants if everything looks good.
I’m going to try it with bbb #5 in the 1.7g pot and see if it responds in the same way. I ran a gallon of 5.8 water through 1.7g and got less than a 100ml of runoff which is a little surprising. The runoff measured 1750ppms which seems a little on the high side but isn’t insane for peat based soil.
(Day 59) Wow. The plants responded to that little PH adjustment insanely well. #5 isn’t dropping at all and the leaf wrinkles are actually flattening out. It’s starting to look like one of the healthiest plants in the tent. I’m still hoping for #5 to show female. 5 plants would cut my veg time down and give me another opportunity for a keeper pheno.
All 4 plants are looking like they’ve already recovered from their transplant. #1 in particular was drooping like crazy yesterday and today it’s bounced back and looking happier than ever. I’m seeing a bit of tip droop on a few plants but they still seem fine
I wonder if because my soil is 50% coco I should try watering on the acidic side, around 6.0-6.2 from now on. I’m almost certain that solved all the issues I was having.
(Day 62) Plants are all looking really healthy. They all seem to have outgrown the initial light stress actually but node stacking is still really tight and I hope to raise the light up next week sometime.
I’m going to drop the humidity to 60% for the rest of veg.
These pots are massive and I’m still a little worried about dry downs but they aren’t showing any signs of overwatering or lack of oxygen.
BBB#3 is starting to show some weird discoloring like an mag or nitrogen deficiency. Which is weird because it’s freshly transplanted into nitrogen rich soil. Guess I will give it a kelp foliar spray.
I’ve been looking for a good organic source of K without an absurd amount of magnesium and sulfur like langbeinite has. I found some 0-0-15 kelp/seaweed extract in soluble crystal form. So from time to time I will water that in at half strength or with compost teas to keep my soil K dominant.
(Day 63) I’m still waiting on #6 to show sex. I am shocked it hasn’t shown sex yet. Although it was started a week and a half after the others but still. I’m going to be so pissed if it ends up being a male. I’m taking a gamble but I’m confident it will show female when the time comes.
bbb#3 got a little more color back from that foliar spray. Hope that doesn’t get worse because it’s my favorite pheno so far. I will give a N boost in the form of compost tea tomorrow afternoon to both of my tents.
I’m starting to utilize the scrog net and boy does it make training way easier. This seems to be a much smarter style of growing for yield and quality.
I’m getting tired of these pH fluctuations every time I water. I’ve been eyeballing for the most part and I need a consistent formula. I found the perfect mix to stabilize my RO water and stabilize the pH at 6.2. I moistened the top soil of each plant and will watch for any reactions.
Water recipe:
60ml bottled water
2000ml RO water
3ml calmag
2ml microbes
Likes
8
Share


@eldruida_lamota
Follow
Vamos familia que ya actualizamos la cosecha de estas zkittelz de Mafia seeds.
Vaya flores que se han marcado repletas de tricomas, parecen escarcha y las flores se marcan aromas bien dulces.
Es una variedad bastante fácil de cultivar pero al tener un periodo de floración algo más largo, hay que estar pendiente de alimentarlas bien, gracias Agrobeta en mi sala es posible.
Temperaturas máximas en 24 y mínimas en 20 y una humedad estable en torno al 36%.
Las mantuve 10 semanas, ya las vi bien maduras y ya tenía tricomas ambar así que les di matarile.
Agrobeta:
https://www.agrobeta.com/agrobetatiendaonline/36-abonos-canamo
Mars hydro:
Code discount: EL420
https://www.mars-hydro.com/
Espero que disfruteis este diario, buenos humos 💨💨💨.

Likes
2
Share


@Glizzy420
Follow
Last auto i'll grow , autos are actualy good for fast and not so heavy stoners , my yield is good but not the way i want it , so i'll keep improving my shit , starting with femenised seeds next run also a blueberry , first femenised im going to use , so lets hope it will have a better harvest. Overall this autoflower blueberry yielded the most of all my autoflowers , dense buds , good quality and very fruity smoke!


Likes
49
Share


@masterofsmeagol
Follow
8/29 Knowing I was going to have to yo to the hospital er again this morning with my wife I got up early and watered. We are supposed to get an inch of rain tomorrow but the bags were totally light. If I was going to be around I might've held off watering. Instead I watered everything one gallon and figured the rain will make up for the other 10 percent hopfully that will do it.
8/30 Rained overnight. Plants were soaked. Flowers are swelling. I defoliated a shit ton of yellow leaves the other day. I still don't think I have anything fungal but I'm keeping an eye u e out and am considering doing an application of plant doctor. We are suppised to get an inch of rain tonight and tomorrow I guess. My biddy said i shouod cover my plants because next week is going to be "great growing weather" but with the rain and then the sun it could be a recipe for disaster since I have some large flowers. I got my father's leaf blower running but it was leaking gas. Brought it to the repair shop and a buddy let me borrow his for thus storm. I and hit the plants with it this morning. It is super strong though. I need to be careful not to blow it right out of the bag!!! Or break branches. Of course after u left it started raining lightly. A nice rain that plants like but it's stopped. I'm wondering if I should go over and blast them again to keep them dry but I know it's going to rain off and on and it'd going to rain tonight. I'll check the weather and decide from there. So far things are going good. Still have some yellowing leaves and a few normal pests but that is to be expected.
UPDATE: Stopped raining so I went over
and shook off the plants then put the leaf blower to them. I made sure to get the interiors before I went and had shook things again by hand. Storage us low bur i took a video. Cant upload toll tomorrow. Buds are growing at an insane rate but im losing some fan leaves that just yellow and die. Im sure its senescence but its still wortisome. We are supposed to have a real good week of growing weather coming so I hope that doesn't change. I'll update tomorrow. That leafblower works awesome though.
8/31 Went over to an extremely sunny windy morning. I didn't even need to shake plants or use the leaf blower since I did it after it Rained last night. I'm worried the wind night dry my bags out today so I'll be sure to keep an eye on them. I defoliated a shit ton of leaves but apparently it's just senescence. I need to check the last time I fed. Trich development is going good. The smell was incredible this morning! Each strain has its own unique smell to it. We are supposed to have a real good week for growing so I'm looking forward to it. May do a preventative plant doctor app but I think it will be alright. I'll keep this updated.
UPDATE: Went over around one and plants were bone dry. The wind was RIDICULOUS! I added a few individual stakes and tied a couple loose branches. I got my tarp out and considered covering the cagecto protect from the wind. However I didn't have time to sanitize if and they had already been through it all night and day alwuth no breakages. Plants are strong and supported well. At least I hope. Plus the tarp would block the rest of the direct sun the plants are getting right now. The wind looked like it dud its worst and the trellis and supports held. I did add extra supports higher up the plant to prevent breakages. Found a moth larvae (yellow) and squished him. Also found some aphids but a few lady bugs and three lady bugs larvae so I think I'll be OK. I am really excited for this year. Flowers are really exploding! FORGOT TO PUT THE MOST IMPORTANT THING. WATERED EVERYTHING TWO GALLONS EXCEPT THE 10. WHICH GOT ONE.
9/1 Forgot my phone on the daY I really needed it. It rained last night. The wind was the strongest i've seen in years. I would've tarped the cage but i couldn't find any of the bungee cords or zip ties. Probably good I didn't. No breaks. One plant had dark brown splotches ALL over the leaves! I picked them all off and took pictures and will consult my commercial buddy. I researched and asked a question on here. If it's septoria or something that could ruin my gorgeous garden I'd rather just junk the plant. It's big but it's the furthest behind flowering and I would not be heart broken if I had to get rid of that for the others. This week is supposed to be the best week we've had all summer so I'm expecting major growth. I'll update after conferring with other growers and making a decision. Looking online it seems like it could just be lack of nutes with the co dictionary we've been having. It IS time to feed and I haven't been feeding much. We'll see what he says.
UPDATE: AFTER RESEARCH AND CONSULTING WITH OTHER CONMERCIAL GROWERS I BELIEVE THAT THIS IS A NUTRIENT DEFICIENCY. I READ THAT RAPID TEMP FLUCTUATIONS AND HIGH WINDS CAN EFFECT THINGS LIKE THIS. IT DOES NOT APPEAR TO BE SEPTORIA (WHICH I'M EXPERIENCED WITH). I WAS THINKING ABOUT DOING AN APPLICATION OF PLANT DOCTOR BUT SINCE IT WAS SO FEW DAYS DURING THESE CONDITIONS IM GOING TO WAIT AND MONITOR THE PLANT. I DEFOLIATED ANY LEAF THAT WAS SUSPECT. FOUND AND KILLED A BUD WORM. I THINK THEY ARE STILL DIEING FROM THE BT. IT WAS LIKE STRETCHING UP FROM THE TOG OF A BIG NUG LIKE, "HERE I AM COME OUT ME OUT OF MY AGONY." ALSO FOUND LADY BUGS AND BEETLES AND THEIR LARVAE. IVE SEEN TGE VERY LOWER SECONDARY BRANCHES GET STRIPPED ON A COUPLE PLANTS BUT THATS WHY I LEFT THEM THERE. IF THEIR ARE EARWIGS THEY CAN HAVECTHE SHIT THAT I WAS GOING TO LOLLIPOP ANYWAY BECAUSE THATS WHAT THEY USUALLY GO FOR. THEY ARE DEFINATELY STRAIB DEPENDANT TOO. THEY LOVE ANYTHING BLUEBERRY BUT DONT TOUCH THE REST. MAYBE THERE IS JUST A COUPLE IN "THAT BAG". ILL HAVE TO GO AT NIGHT AND CHECK. IM EXCITED. MY FLOWERS ARE EXPLODING IN SIZE AND TRICHOME PRODUCTION. SEEIMG THAT I THINK THIS IS A NUTRIENT ISSUE AND MY FEEDING DAY WAS TODAY I FED EVERYTHING 1.75 PINTS OF NUTRIENT MIX TO EVERYTHING BUT THE 10 GALLON WHICH GOT LIKE 3/4 OF THE POWERADE BOTTLE. PLANTS SEEM HAPPY AFTER I FEED SO MAYBE I SHOULD UP THE FEEDING SCHEDULE. SINCE THE SOIL WAS ALREADY MOIST AND IT RAINED YESTERDAY I FED WITHOUT WATERING. HOPFULLY THAT WILL BE OKAY. I'VE DONE IT BEFORE.
Went back over at six and WOW! After this nice sunny day buds have swollen. Plants seemed to love the nutes. I think the nutes in my soil are fairly depleted so I just needed to adjust my feeding schedule. I didn't notice anymore calcium deficiency looking spots and I had defoliated a lot of leaves. Super excited moving forward. Pistols are changing color on one 10th p phenome and retracting into buds. This is is the fun time. As long as I can avoid the rot.
9/2 Says it didn't rain last night but my plants are dripping wet. If course the leafblower kept dying so I had to shake everything by hand. Hope that's good enough. Gonna be real sunny. Bags still had some heft to them. I'll check them later. Found a few leaves with what looks like the calcium deficiency on the sane plant and I just removed them. I really don't think it's anything to worry about. I'll update later.
UPDATE: Went back around 10 and everything looked good and was dry. Brought the leaf blower to be fixed. Should have it by the end of the day. Found and killed another pillar and some ants. Took a picture of a lady bug/beetle. This sunshine is making my buds explode!! I was thinking about checking again tonight but I think I can wait and water tomorrow. Bags are still fairly heavy. I did take another couple leaves off the plant that lopks like it might have a deficiency or something. The stalks are bigger than the bottom of a baseball bat. A couple almost like the fat end. Some 9f the best plants I've grown. I also took three short videos of a plant of each strain. Maybe if it's short it will upload quicker. Happy growing! UPDATE: I was back and forth today. I did some pruning and defoliation and then I noticed that my canary was light as hell. I waited until night and went back and had a couple starting to droop so i watered everything 2 gallons except the 10 and tub got 1. Everytime I see them it seems like they are bigger
9/3 Used the leaf blower this morning to get the dew off the buds. I shook them by hand before that. I'm noticing like a little army of lady bug larvae so any aphids I have are not going to be a problem. I have adults as well but is the babies that eat 10x what the adults do. I'm hoping they'll wipe put any bud worms. The weather is great this week all sunny. Making the buds explode in size and increasing terp production. This is the strongest smelling cannabis I've grown. Each strain. Has its own unique "funk" to it. Purple punch is really sweet and floral smelling. 10th planet is more gassy. I need to get some yellow sticky traps. I saw a couple fungus gnats on my canary. A late blooming blueberrycheese. It's the one that dries out the fastest but is more sativa leaning and drinks TONS of water. I have two that are that phenome. Losing yellow leaves but exploding with flowers. Noticed a couple more leaves with that calcium deficiency looking leaf. I just defoliated it. I'm really happy where I'm at right now.
9/4 Plants were covered in water this morning and the leaf blower wouldn't start. I shook everything off by hand. Each strain hasits own STRONG unique scent. One tenth planet phenome smells like bubble gum. I think I've got like two weeks and some of the flowers on ONE plant should be done. I'm planning to take the top half and then letting the bottom mature longer of its not whete I want it to be. The weather has been gorgeous. Sunny today. I'll need to water tonight I'm sure. UPDATE: WENT OVER AT 3PM AND PLANTS WERE DRY. WATERED EVERYTHING 2 GALLONS BIT THE 10 AND THE TUB. THEY GOT ONE. FLOWER DEVELOPMENT IS VISIBLE FROM MORNING TO NIGHT. I HAVE A TENTH PLANET THAT I BELIEVE WILL BE READY FOR HARVEST (AT LEAST THE TOPS) WITHIN A COUPLE WEEKS. PISTOLS ARE RETRACTING AND TURNING ORANGE ON THIS PHENOME AND RED ON THE OTHERS. I AM LOVING HOW THIS STRAIN LOOKS GROWING. I HAVE REAL HIGH HOPES FOR IT. I FAILED TOO MANY TIMES UPLOADING THE VIDEO AND PICTURES I TOOK SO ILL DO THAT TOMORROW. I CANT BELIEVE THE SWELKING GOING ON AND THE AROMA! THIS IS SUCH A WONDETFUL YLTIME OF YEAR. STILL FIND8NY SMALL SPOTS OF WHAT LOOKS LIKE CAL DEFICIENCY IN THAT ONE PLANT. IM STILL UNCERYAIN WHWT TO DO WITH THAT ONE.

Likes
10
Share
@LandraceCBDLover
Follow
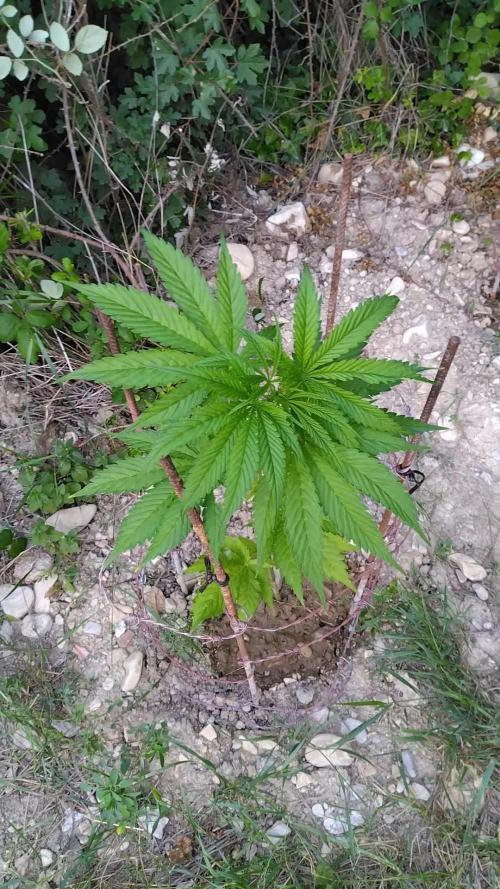
La croissance continue du côté des sativa Nigérianes. Elles mesurent maintenant dans les 70 cm !
Les Frosty's Freak entament leurs floraisons. 🧟♀️🌸
En prévention, j'ai pulvérisé le fameux mélange eau + savon noir + huile de Neem (pucerons et autres insectes) + bacillus thuringe (chenille, pyralle...).
Je renouvelle l'application toutes les 3 semaines à 1 mois.


Likes
7
Share


@jojopfoh
Follow
She has finished her stretch and is now full of buds and the stacking is remarkable. A beautiful strain
She really responded to the bloom nutrients

Likes
162
Share


@Lukush
Follow
Northen beauty finally in week 5😋😎😘
She is so big and starting tu fatten up 👌
She still has a cupple of weeks to go.
Hope yall enjoy and if you wunt right a comment or click that like button if you enjoy 😘 have a good one growmies

Likes
24
Share


@Elixx
Follow
In this week wheatear was very bad. It rain a lot and plant suffer, It was attacked by mold in one of the apical buds. I remove it in the first stage of mold, I hope that spores was not spread on the rest of plant🌧️😥

Likes
Comments
Share

@Walachiangrowindiary
Follow
Week 6. Watering volume Is now 3 liters per day. Nice and slowly at soil surface for evenly wetting peat Moss whats in mix that have after time tendencies to became water resistant and water just fall down. Then water to the base of pot to let Plant and soil suck that watter in as much as need. Whole pot must be properly wet to have healthy living soil and microbial life.

Likes
14
Share


@OilyEliteOrganics
Follow
Growing great.
Smells good looks like its going to be be a nice physcodelic and strain.
Smells sweet and spicy mostly like sttawberries.
Likes
22
Share


@RDWCGrowing
Follow
1/25/2024 Vegetation Week 3 Day 1- took 2 Tops today and cleaned up a few lower leaves that were hanging down. The FiM seems to have worked well and looks like I have three branches coming in where it was FiMed.
1/26/2024 Vegetation Week 3 Day 2- took 2 Tops from the sides and took a little of the foliage that was touching the lid. She seems to be doing very well.. Water change day tomorrow.. YAY!! will get a good picture of the roots and see how she is doing.
1/27/2024 Vegetation Week 3 Day 3- Water Change Day! I noticed a slight red coming in on the STEMS which I added a pinch of EPSOM salt to help correct.
I added 36 Gallons of Water
I added the following Nutes:
Silica = .5Mil/Gal= 18Mil
CalMag= .75Mil/Gal= 27Mil
FloraMicro = 4.2Mil/Gal= 187Mil
FloraGro= 3.8Mil/Gal= 137Mil
FLoraBloom= 3.0Mil/Gal= 108Mil
ORCA = .5Mil/Gal= 18Mil
EPSOM- 1 big pinch
1/28/2024 Vegetation Week 3 Day 4- I cleaned her up just a little bit on stuff hanging down. I also made sure the PH is balanced so she could soak up the New Nutes.
1/29/2024 Vegetation Week 3 Day 5- I Got sick, Possibly food poisoned.. Luckily for me the system was able to do what it do and hold it down until I was feeling better.
1/30/2024 Vegetation Week 3 Day 6- I was still to sick to go to my grow room... Possibly food poisoned.. Luckily for me the system was able to do what it do and hold it down until I was feeling better.
1/31/2024 Vegetation Week 3 Day 7- First day back.. Her PH was down to 5.72 so I raised the PH back up closer to 6.0, I took a few pictures and got her height.. Feeling better through prayer so was able to get some pics today.
