
Likes
Comments
Share


@Wicked_Stix
Follow
We back with some buckets! Straight outta the stix! Time to fire up the pumps and get this show on the road. Soaked this beautiful little gem of a bean in some water until it cracked then threw it into the bucket with 100% perlite. Started them on a low dose of maxigro on day 3. Doing these diy Dutch Bucket style as always. Going to be running 8 in house genetics strains on the system with constant 24 hour a day irrigation. Not much exciting going on yet, but with a little luck that may change pretty soon.


Likes
20
Share

@Prof_Weed
Follow
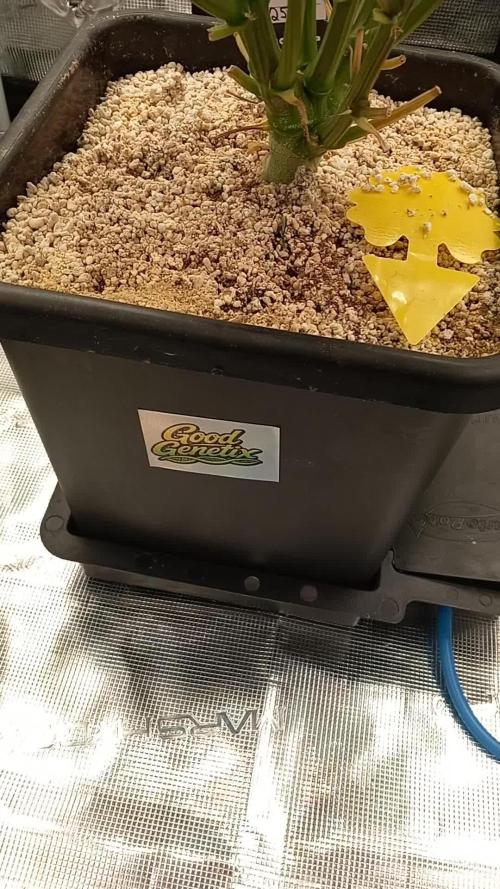
Triple G by Good Genetix
Yeah, week 4 of flower, needs 4 more i think.
A fruity funky smell, and you get sticky fingaz if you Touch her.
Won't be a big yielder, so quality over quantity with this genetix!
Likes
28
Share


@Luv2Grow
Follow
Day 43 - Starting week 7 today and this will be the first full week of flower. I gave her the first dose of flower nutes yesterday and all seems well. She’s been stretching over and inch every day the past couple days so looking forward to her stretching to stop and her starting to pack on the flowers.
Day 44 - Nothing to really speak of today, she’s still doing her stretch. Just really took her out for some updated pictures and to give her a once over/tuck some leaves.
Day 47 - All is going well and she’s still doing a bit of stretching but all the bud sites are starting to fill in a bit now. The soil was starting to get dry so she got 2 full gallons of plain water today. She doesn’t look like she’ll need much defoliating, she’s not a very leafy girl so most likely I’ll just let her go.
Day 48 - All is going well and she’s starting to get a bit of frost going now so looking forward to seeing what kind of smell she’ll put out. I did remove a couple bigger fan leaves from the top today but just tucked everything else.
Day 49 - The end of week 7 for this girl and looking like her stretching is slowing down a bit, only a little over a half an inch the last 24 hours. On the other hand the frost is really starting to come out on her and looking forward to seeing everything fill in.

Likes
2
Share


@Enki_Weed
Follow
Tag 9 seit Keimung. Der Keimling hat den Umzug in die DWC-Anlage gut überstanden und scheint sich wohlzufühlen. Die Beleuchtung liegt bei 250 µmol/m²/s, die Nährstoffzufuhr ist minimal, der pH-Wert stabil bei 5,7. Luftfeuchtigkeit liegt bei 60-65%, die Temperatur bei 27°C. Alles in allem ein positiver Start!

Likes
Comments
Share


Likes
35
Share


@StonedandSteady
Follow
9th W/Flower: No 9th Feed of #HumboldtCountysOwn this Week! I've been Flushing them out once a day with 1 Gallon of Cold Declorinated Tap Water for the last 6 days and Checking the Triks every couple of days as well! Thier Packed, Stacked Up and Lights Upgrading under way! Cloned with my Steady's Saliva!!!
9th w/ Flower: Budz getting Outstandingly Huge, Plump, Dense, Juicy and Everything is Supreme, Savory, Stinky, Sweet, Swelling Out, Skunky and Gasy at thier 9th week of Flower! 9th Week of Flower: No 9th Flower Feed of #HumboldtCountysOwn and the Ladies Love the Bloom portion of Nutrients! They're Stacking Up Great and Filling Out thier Mighty Branches with Giant Gorgeous Budz! 5 Confirmed Females!!!
It hasn't been a few days since I gave the Ladies thier 9th Feed of #HumboldtCountysOwn Nutrients and they look Fantastically Divine!!! We'll definitely Grow back to everything here soon! 11th w/ Veg and Flowers Update #Pre-Sexed🚺 #SuperCropped #Defoliated #Lollipoped
Good Day and Happy Growing Everyone! These Ladies were Growing into thier 11th Week of Veg and Looking Totally Tight and Phenomenally *Femed* from the Right!
#Pre-Sexed 4/9/21 #Opium/#PabloEscobar *Fems* breed by Team #DivineSeeds #DivineSeedsSquad #DivineSeedsBreedingCompany and #SuperCropping continued! I'm Very Excited and Extremely Gracious!!!
Heck Yeah Growmies and Growmets!!! Check Out these Confirmed Females with thier Wild Pistol Hairs popping and I'm still Training and Widening them Out with #SuperCropping Everything looks Expanded and Growing Great!
After #SuperCropping the plant will Grow Bushier, Produce More Buds, and possibly even Produce More THC! This is how the plant naturally responses to danger and protects itself! Growers take advantage of this technique to get Bigger Yields and More Potent Buds than would be produced otherwise!
Getting Trained out into thier 11th Week of Veg and Looking Mighty Fine!!! Thier getting Humongous and Hearty in thier 10 gallon Grow Bag from Broski #www.as420.ca These Cannabis plants are Camping out in the Closet for a week or so! Lol
This is my 2nd run using the Osree.Light QB1000w and Everything is Mesmerizing!!!
My #Opium and #PabloEscobar *Fems* from #DivineSeeds Regs: SalamiLegF3's×2 and FireAlienRomulan look$ Outstandingly Awesome and Growing Up Phenomenally Fine into thier 11th week of Veg in our 2- 10 gallon The Grow Bags from Broski #www.as420.ca and also 2- 5 gallons as Well! Our others are Super and Breed by #thehumancannabiniod #AlienBloodGenetix #TNBNaturals #Foop
Yo!!! Thanks Again for All the Love and Support my fellow Growmies and Growmets!!! These Magnificent and Magical Ladies were Growing in our 48×24×60 ViparSpectra Official Club 🌿 ®️ Grow Tent and under our #Osree QB1000w and #GrowStarStore Kokokala QB1000w and our Purple Rose Cutting×2, Aloe Vera Cutting, Maters×3, Morel Mushroom, Lavender×3, Sunflowers×5 and The 5 Brand New and Fresh Starts are Wonderful with a Huge Hint of Fantastical Fire is my #SalamiLegF3×2 by Broski #thehumancannabiniod #DankFlowGenetics #EastCoastSeedBank #FireAlienRomulan by Broski #AlienBloodGenetix my #PabloEscobar and #Opium by Team #DivineSeeds #DivineSeedsBreedingCompany We Grow with #Growatt 600w with #FoopOrangicBioSciences and #TNBNaturals The Enhancer Co2 Despersal canister and ph'd them w/ Declorinated watering w/ TNB ph Up and Down! Totally Top Quality Topz all Around! Thanks Again #GallowGlas420 #HarleyGrower #thehumancannabiniod #AlienBloodGenetix #TNBNATURALS #FoopOrangicBioSciences #www.as420.ca #divineseeds #divineseedssquad #divineseedsbreedingcompany #BioFlux Family's and Teams!!! Your Genetics are Merry Magnificent, Mega Marvelous and Mighty Medical! Love um!!! I really Can't stress enough how Thankful and Grateful I am of All of you and what you've Shared with Us! Means the World!!! It's definitely a Pleasure being able to Grow with these Phenomenal Grow Lights! Please Enjoy! BudBrothers4-Life! Cheers Famz!!! Much Props and Much Topz!💯🔥 #Osree #GrowStarStore #Growatt #TNBNaturals #TNBTeam #FoopOrangics #GrowYourOwn #Bliss
HumboldtCounty'sOwn:
Email: [email protected]
Phone: (707) 725-4119
Toll free: (866) 872-9434
Humboldt Bottling
Po Box 429 · Fortuna, CA 95540
HumboldtCounty'sOwn Website Link: https://humboldtcountysown.com/
HumboldtCounty'sOwn Instagram Link: https://instagram.com/humboldtcountysown?igshid=1qj809qkkwych
https://instagram.com/osree.light?igshid=1vrsbdyhzg2h8
https://instagram.com/growstarstore?igshid=2yjn0r00r6ru
https://instagram.com/divine.seeds?igshid=1r90iwe9xiwz8
https://instagram.com/thehumancannabinoid?igshid=17k159pumklkq
https://www.instagram.com/alienblood_genetix_official/
https://instagram.com/as420.ca?igshid=1f116alw054wp
The Grow Bags: https://www.as420

Likes
4
Share


@Mr_nugs_lover_David
Follow
I'm not adding no nuts since I make super soil however I'm adding an extra push for her now in flower just once a week using kalong bloom and kalong batboost (extract) she seems to love it,I didn't expect her to produce this beautiful violet nugs she's developing,let's see how beautiful she gets at the end,can't wait guys! 😍👀🌱

Likes
5
Share

@KannaGrowing
Follow
VARIEDAD EN FASE DE TEST. NO DISPONIBLE COMERCIALMENTE. RESULTADOS EN EVALUACIÓN POR KANNABIA.
Ya estamos en prefloración, así que comenzamos a añadir a nuestra mezcla de fertilizantes, Bio Flores y Bio Boost.
Sin eliminar Bio Vega y Bio Rhizotonic, por el momento.
Regamos una vez con agua y otra con fertilizantes, solo cuando el sustrato se ha secado.
Mantenemos las luminarias y extracción a máxima potencia.
Likes
2
Share


@Strangelet
Follow
Little plant.
Day 57. Cold and clowdy week.
No nutes, just water. Curling leaf tips and dark green leaves. Too many nutes last week

Likes
6
Share


@AutoCrazy
Follow
Week one of flower
325 ppm
6.0 pH
65 F water temp.
71 F tent temp.
41 % RH
Things are looking good. The girls are looking nice and healthy. The small one isn’t gonna catch up though lol. Oh well we will see what happens now.

Likes
5
Share


@leapingsoil
Follow
Welcome to the pink feno hunt.
I have a good feeling about this pack of 3 from fast buds. Very exciting. This is an attempt to recreate that one strawberry smoke...
We will be growing these in bottles first so i can have a humidity cap on them (my tent is busy). After about 2 weeks we will have more room. The bottles have air circulation holes and a drain on the bottom.
Plan is to top these in their temporary homes and then transplant them in larger 20 L pots so they can be trained.
No nutrients for the first week. I will just be spraying their pots with PH water when they need it for humidity.
Look for weekly updates.

Likes
13
Share


@Aguitadelavanda
Follow
las plantas ya abarcaron todo el metro, muchas flores y hojas nuevas, muy buenos resultados en la linea de quemanta, se nota el cambio al otro día de aplicar los productos. Hasta el momento estoy utilizando agua de la cañería que dejo reposar oxigenándola constantemente, por lo que no he controlado Ph ni EC.
Riegos intercalados con agua sola y con fertilizantes, mantengo dosificación.

Processing
Likes
10
Share


@GrowerGaz
Follow
No more nutrients just water the last week. Plane sailing till harvest now I hope.
Likes
18
Share


@Lagriculteur420
Follow
Thus, I've switch my 250w CFL for a Mars Hydro ts1000, heat increase to 24°C, I add 1ml of top bud in my water, buds have grown a lot and I can see some trichomes
Processing
Likes
54
Share


@rhodes68
Follow
2/5 Week 6
May be last week of veg kind of depends on factors outside the grow. Lets hope
Keeping the Si included and leaving nuets as is.
Continuing to defoliate as needed to keep things civil in the small tent, Moya is crowded.
Canopy is at 30" plants about 20"
2/6
Better plan!
Found a table at Goodwill that will fit in the flower tent and allow two plants to be moved there tomorrow.
So tomorrow is the day, two plants will remain in Moya, prob Jool and Zhaan
2/7 Aeryn is in flower tent flipped to 12-12
Jool and Zhaan in small tent, Moya, also flipped to 12-12
Here we go
Feed set as above, keeping levels low at this point
2/8 Second day
May reduce feed a bit, white tips
One time feed of Kangaroots 10ml/gal
Keeping things defoliated so the middle gets lots of light
2/8 Last attempt to try and get rid of those white tips. Further reduced feed but added just a touch of cal-mag to make up for it.
If this doesnt work I am just feeding them and ignoring the tips.
Flowering is starting to show, more on Aeryn being under the HPS than Jool and Zhaan under the LEDs.
Continuing to defoliate as needed to keep bud sites in light.
2/10 Bringing down the nuets to under 500ppm did the trick on the white tips but can not leave things there so back to some sane level and I am just going to ignore it.
Stretch is starting for real 😳
2/11 Since the tip burning is an issue with N, I am going to move the girls to all bloom tomorrow with today as a transition.
Strain is absolutely sensitive to Nitrogen.


Likes
80
Share


@Qlimax
Follow
👉Day49- fixed some LST so plants had the max light possible and did defoliation,i noticated 2/5plants have toooons of tricones but rest 3 olmost nothing 😣....some new yelow leafs start to show on 1plant. Wil make video later today.
👉Day51 Got seeds today from 42fastbuds skittlers and blackbarry for next grow :D and got 4x gratis lemon skunk seedss(some new local breeder)😘😘💚❤️I think i will grow them same as this time same pots with 3xblackberry and 1xskittler 1xlemon skunk 🤝
👉Day53 plants looks good... on some still little calsium deficiency on 2 plants mostly,they are now cca.70cm main one 85cm. +Did the last defoliation and reorganizate them,noticated alot stigmas on buds turning orangeish..🧡
Changed the light from 21h>20h ligh ,owerall flowers flowring rly good all flowers got alot of tricones now,👍cant wait till harvest!!💚✂️💚🔬🧡🛏️🧡😂
👉👉Til next weeek mates!!!stay safe and have fun last days of booring 2020 :D

Likes
1
Share


@Vincentmad
Follow
End of week 3, last week we removed bottom node and this week removed last node from bottom tpp, heavy lollipoping for pre veg for 2/3 weeks then flip to 12/12


