


Likes
Comments
Share


@PiusWaxis
Follow
The new year has begun , and as they say, who first starts, sooner ends, fine!
Sleeves up, it starts. 💪😎
This year I start with 2 boxes of 4 pots, 11 liters.
After a year of trying light type soil, I start to use main coco, ,perlite and soil, with percentages equal to 80% ,20%, 20%.
I previously wet the coconut, previously in a 9-liter brick with warm water, about 4 liters, with the nourishing addition of coconut a + b, put perlite, and finally the soil.
Loaded the pots and immediately put to germinate directly in the pot.
The box I will use is a mammoth 80lite, purchased 6 months ago, a great product, excellent workmanship, I do not pass a thread of light.
As for the lighting I used a MARSHYDRO TS 1000.
Is the best novice LED grow light, serving adequate light to 2-4 plants. Its reasonable price, marked yield improvement, and variable output control make it friendly to new growers.
Wattage - 150w
Veg Coverage - 2.5x2.5 ft
Flower Coverage - 2x2.
In this diary I will talk about Gorilla glue automatic.
This particular and powerful strain was created by crossing Gorilla, Cookies and ruderalis genetics. This resulted in a genetic composition of 30% sativa, 50% indica and 20% ruderalis.
Today is the first day since I planted it, from this morning to tonight it came out completely, a small stem with its primordial leaves.
the substrate is quite humid, it does not require any addition of water for the moment, the humidity is about 77% with a temperature of 24 degrees with the lights on, 20 degrees with the light off.
In the next week we will see what to do.
Thanks for reading, if you like, leave a like or a comment!
TO NEXT WEEK!! 😎🤙

Likes
19
Share


@GoldenWeedGrower
Follow
Legend
Timestamp: 📅
Measures: 🛠️
Water: 🌊
Actions: 💼
Thoughts: 🧠
Events: 🚀
________________________________
📅 D57/F18 - 19/10/23
🛠️ EC 1.2 (stable) pH 6.0 (rising) --> EC 1.1 pH 6.3
🌊 Added water and nutes (B52, Big Bud and Bud Candy, only little bit of Bloom A and B)
💼 Little defolation and some adjustment on the little one. As I saw some light stress symptom I changed the light schedule to 12-12 but with red lights always on.
🧠 I can't wait to see the buds of Little Marlene reaching out Big Marlene
🚀 Little Marlene is now quickly blooming. Some light burn symptoms on little Marlene
________________________________
📅 D58/F19 - 20/10/23
🛠️ EC 1.2 (stable) pH 5.7 (falling)
🌊 No water neighter nutes added
💼 Sprayed Spinosad
🧠
🚀
________________________________
📅 D59/F20 - 21/10/23
🛠️ EC 1.4 (rising) pH 5.4 (falling) --> EC 1.2 pH 5.5
🌊 Added 5L water, nutes Bloom A - B and calmag
💼
🧠
🚀Little Marlene leaves are wilting down
________________________________
📅 D60/F21 - 22/10/23
🛠️ EC 1.3 (rising) pH 5.3 (falling) --> EC 1.2 pH 5.4
🌊 Added 2L water and nutes: Calmag, Bud Candy, Big Buds
💼 Made a big defolation and sprayed Spinosad.
🧠 I really hope Spinosad will solve the situation here.
🚀
_____________________________
📅 D61/F22 - 23/10/23
🛠️ EC 1.3 (rising) pH 5.5 (stable) --> EC 1.2 pH 5.5
🌊 Added 4L water and nutes: Calmag, Rhino Skin, Bloom A, B
💼 Little defolation on the big one.
🧠 Never again two girls germinated in a such big time difference (3 weeks)
🚀
_____________________________
📅 D62/F23 - 24/10/23
🛠️ @17.00 EC 1.3 (rising) pH 5.1 (falling) @23.30 EC 1.4 (rising) pH 5.2 (stable) --> EC 1.2 pH 5.2
🌊 Added 2 L of water, calmag, big bud and B52
💼 Little defolation on the big one.
🧠
🚀
_____________________________
📅 D63/F24 - 25/10/23
🛠️ EC 1.3 (rising) pH 4.7 (falling) --> (by setup) --> EC 1.2 pH 5.5 . Check in the night EC: 1.13 (stable) pH 6.2 (rising)
🌊 RES Changed 💦💦💦 -> Added calmag, Bloom A-B, Bud Candy, Big Bud and B52
💼
🧠 Quite strange, but good, pH goes up in that way
🚀

Likes
9
Share


@sunshinegroww
Follow
Been defoliated for the last time me think
Looks super happy and very frosty stinks and very sticky very strong potent smell


Likes
8
Share


@PatriciaGant
Follow
her buds getting bigger and bigger with every day leafs getting nice color. now we getting closer to harvest with big steps everyday hmmm. gave a nice day

Likes
16
Share


@FreedomOfSeeds2009
Follow
Germinating 3 Purple Kush Feminised seeds.
filtered water in glass, also add 3/5 drops of hydrogen peroxide, stir water well before adding the seeds, and stir again after adding seeds to water.
I will leave it for 24 hours
The seed coat softens by soaking your seeds in a hydrogen peroxide solution, allowing the seeds to absorb more oxygen. This results in increased germination speed
Hopefully all 3 seeds will germinate by tomorrow?
Seeds popped today:-)transferred 3 Purple Kush seeds in to small pots 10/09/23
3 Purple Kush seeds, 1 seed in each small pot.
Each Pot is Half filled with lite mix compost and Half filled with Vermiculite , watered planting medium before sowing seeds 2cm deep in planting medium.
The seed will push through the vermiculite easley with very little effort, in effect increasing higher successful germination rate, the compost will offer the first tap root an immediate lite nutrient supply.
Placed 3 pots on top of a Propagation heating mat for correct germination temperature, position in a shaded place, and keep out of direct sunlight.
This may seem like a lot of effort? and it is, but it will be highly beneficial by increasing a higher germination rate and higher amount of seeds will germinate from using this method :-) especially if your seeds were expensive.
11/09/23 no sprouts above the vermiculite yet, i will check it again tomorrow.
Today 2 Purple Kush Germinate and rise above the vermiculite 3 days after sowing.
Purple Kush is going ok, it could be growing faster, unfortunately i can't upload new photos because there is a problem in the GD system, they are doing there best to fix this problem as soon as possible.
GMO Cookies where started 16/09/23 filtered water in glass, also add 3/5 drops of hydrogen peroxide, stir water well before adding the seeds, and stir again after adding seeds to water.
3 seeds sprouted, but only 2 survived, it become to hot and one GMO Cookie sprout died.
I have now started another strain (Party Monster) 19/09/23 filtered water in glass, also add 3/5 drops of hydrogen peroxide, stir water well before adding the seeds, and stir again after adding seeds to water.
I will leave it for 24 hours, 5 seeds of Party Monster have sprouted and are under the same 100W LED grow light.
GMO Cookies have all come up above the vermiculite and are now positioned under a 100W LED, there is a small clip on fan blowing and circulating the air. This is my second attempt to grow GMO Cookies from 3 feminised seeds, i messed up on the first 3 seeds, i put them under a 250 Watt LED and it fried them, my folt.
Growing from germinating seeds is a very delicate situation, your environment temperature needs good control.
2 Party Monster seedlings are looking good, coming along well under the 100W LED light.
3 GMO Cookies are looking good also under the 100W LED light.
Plus i have now started soaking in glass of water 03/10/23, 5 Strawberry Yields fem seeds aka Strawberry Fields.
filtered water in glass, also add 3/5 drops of hydrogen peroxide, stir water well before adding the seeds, and stir again after adding seeds to water.
I will leave it for 24 hours.
The seed coat softens by soaking your seeds in a hydrogen peroxide solution, allowing the seeds to absorb more oxygen. This results in increased germination speed
Hopefully all 5 seeds will germinate by tomorrow?
The 3 GMO Cookies fem seedlings are coming along well, keeping them under the hood of a propagator, i have many mixed seedlings under the same hood, to keep seedlings protected from this relentless Spanish heat.
5 Strawberry Yields fem seeds have all sprouted and are above vermiculite, keeping them under the hood of a propagator, i have many mixed seedlings under the same hood, to keep seedlings protected from this relentless Spanish heat.
Also positioned also under the 100W LED light, indoor temp 29 degrees humidity 65%, still to hot for seedlings to be directly under lights due to high temp in the room.
3 Strawberry Yields sprouts are doing well, gave 2 seedlings away, no space for all 5 plants, coming along well under the 100W LED light.
27 degrees humidity 55% good growing conditions
Super Lemon Haze
I began soaking 13 feminised seeds SLH since 27/10, after 24 hours soaking 11 seeds opened in
filtered water in glass, also added 3/5 drops of hydrogen peroxide, stir water well before adding the seeds, and stir again after adding seeds to water.
The seed coat softens by soaking your seeds in a hydrogen peroxide solution, allowing the seeds to absorb more oxygen. This results in increased germination speed!
1 Super Lemon Haze fem seed planted in a 2 ltr pot 28/10, this is the only plant i will keep for flowering.
The Pot is Half filled with lite mix compost, and the rest of the pot is half filled to the top with Vermiculite , watered planting medium thoroughly soaking it before sowing seeds 2cm deep in vermiculite.
The seed will push through the vermiculite easley with very little effort, in effect encouraging a higher successful germination rate, the compost will offer the first tap root an immediate lite nutrient supply.
And i planted the 11 remaining popped SLH seeds in the brown round pot, this is just to see how many will rise above the vermiculite from the 13 SLH fems seeds soaked on 27/10.
I will give these away to a friend.
Both pots have been placed on a propagating heating mat for consistent and ideal germination temperature until all seeds have risen above the vermiculite.
Once my 1 fem seed has germinated! i will cover the pot with a transparen plastic bag and place the pot 20cm below a 100W LED light.
Super Lemon Haze feminised seeds
Seeds sourced from Satdica Bulk Seeds
Soaked seeds 27/10 planted up on 28/10, 12 out of 13 seeds have transformed in to 12 healthy little seedlings.
11 seedlings will be given away to a friend, and i will keep the one seedling you see already planted up in a black 2 ltr size pot.
Now positioned under my 100W LED light, distance 15cm above seedlings.
Light cycle 24 hours.
Keeping them covered with propagating hood for a few days longer to allow seedlings to become better established before removing the hood.
The vents on hood are fully open to allow seedling to slowly become accustomed to the outside vege room space.
Gelato Cookies 3 Feminised seeds
Satdica Bulk Seeds
Popped 3 Gelato Cookies Feminised seeds today 06/11
filtered water or bottled water in a glass, also add 3/5 drops of hydrogen peroxide, stir water well before adding the seeds, and stir again after adding seeds to water.
I will leave it for 24 hours
The seed coat softens by soaking your seeds in a hydrogen peroxide solution, allowing the seeds to absorb more oxygen.
After placing on propagating heating mat for 24 hours.
This resulted in increased germination speed! and today i can see little white taproot tails protruding out from the seed husk 👌
3 Gelato Cookies seeds, 1 seed in each small pot.
Each Pot is Half filled with lite mix compost and Half filled with Vermiculite , watered planting medium before sowing seeds 2cm deep in planting medium.
Spoon your seeds into it's planting medium, do not touch with fingers, spoon it in with half spoon of water and a seed, place the seed in the center 2cm deep in the planting medium, water it in again very lightly to help the seed settle into a comfortable position before leaving it to rest covered on your heating mat.
The seed will push through the vermiculite easley with very little effort, in effect increasing higher successful germination rate, the compost will offer the first tap root an immediate lite nutrient supply.
Watered and fed them in with Plagron Terra Grow 5ml to a ltr of water, i may have added too much, perhaps 2/3ml to a ltr of water would have been enough?
placed 3 pots on top of a Propagation heating mat for correct germination temperature, position in a shaded place, and keep out of direct sunlight.
This may seem like a lot of effort? and it is, but it will be highly beneficial by increasing a higher germination rate and higher amount of seeds will germinate from using this method :) especially if your seeds were expensive.
3 Gelato Cookies have come through the vermiculite, 09/11 and now they are positioned under my 100W LED grow light.
I didn't expect all 3 seeds to pop, because 1 seed looked like perhaps not viable, because i only keep the bad looking seeds for myself and keep the best seeds for customers.
I am keeping them covered with transparent plastic bags for a few days to protect them in case it's to hot in the 24/7 grow room which is 24 degrees, this is probably an ok temp for them? but i'd rather not run the risk.
Romulan Feminised seeds
Germinating 3 Romulan Feminised seeds 26/11
filtered water in glass, also add 3/5 drops of hydrogen peroxide, stir water well before adding the seeds, and stir again after adding seeds to water.
I will leave it for 24 hours
The seed coat softens by soaking your seeds in a hydrogen peroxide solution, allowing the seeds to absorb more oxygen. This results in increased germination speed
Hopefully all 3 seeds will germinate by tomorrow? 27/11
Likes
13
Share


@Regulator3000
Follow
So far this has just been a crazy grow. Soil issues. Had to leave town for almost two weeks in the middle of the grow so watering wasn’t perfect. Grew this outdoor for a while then inside once the days became too short. Always learning though.

Processing
Likes
Comments
Share


@Heathi
Follow
Flipped to flower to see what she can do because so many clones took! I'm so super new that it's still so exciting every time I figure something out.
Definite pistils at day 3 of flower




Likes
7
Share


@MadeInGermany
Follow
Hey everyone ☺️.
This week the food was increased to 4 ml per liter of water, as they can still tolerate a little more.
I'm curious how it will develop this week.
Otherwise there is not really anything to tell this week ☺️.
Stay healthy 🙏🏻 and let it grow 🌱
You can buy this Strain at
https://thecaliconnection.com/original-sour-diesel.html
You can buy this Nutrients at
https://greenbuzzliquids.com/
Type:
Original Sour Diesel ( Clone )
☝️🏼
Genetics:
Fem seeds- Original Sour Diesel to Original Sour Diesel BX3 RVSD Male
Reg seeds- Original Sour Diesel x Original Sour Diesel BX3 Male
👍
Vega lamp:
2 x Todogrow Led
Quantum Board 100 W
💡
Bloom Lamp :
2 x Todogrow Led
Cxb 3590 COB 3500 K 205W
💡💡☝️🏼
Soil :
Canna Coco Professional +
☝️🏼
Fertilizer:
Green Buzz Liquids :
Organic Grow Liquid
Organic Bloom Liquid
Organic more PK
More Roots
Fast Buds
Humic Acid Plus
Growzyme Big Fruits
Clean Fruits
Cal / Mag
Organic Ph - Pulver
☝️🏼🌱
Water:
Osmosis water mixed with normal water (24 hours stale that the chlorine evaporates) to 0.2 - 0.4 EC. Add Cal / Mag 2 ml per l water every 2 waterings . Ph with Organic Ph - Pulver to 5.8 .


Likes
3
Share


@Kingmecoop
Follow
I'm switching my nutrients from Foop to ILGM Bergman's Plant Nutrients. Shouldn't be a problem Foop works well with other nutrients. However, my irrigation lines were getting clogged and the smell. I think because I'm using small lines... Regardless I'm using 1/8 of 800ppm level=100 ppm.

Likes
29
Share


@THCeitor
Follow
Ya en la cuarta semana podemos ver mayor cantidad de pistilos sobre todo en la planta mas pequeña y la que de seguro estará lista antes para cosechar, la R.S.Banana #2.
La R.S.Banana #1 muestra un crecimiento mas vigoroso con un tallo muy ancho y aunque ya muestra algunos pistilos, esta tardará mas que la R.S.B.#2 pero será mas productora.
En relación al LST es una tarea que se realiza a diario.


Likes
5
Share


@Strangelet
Follow
Day 67. Will give her a couple more days.
Flushed middle of the week and removed all fan leaves.

Likes
6
Share

@Bncgrower
Follow
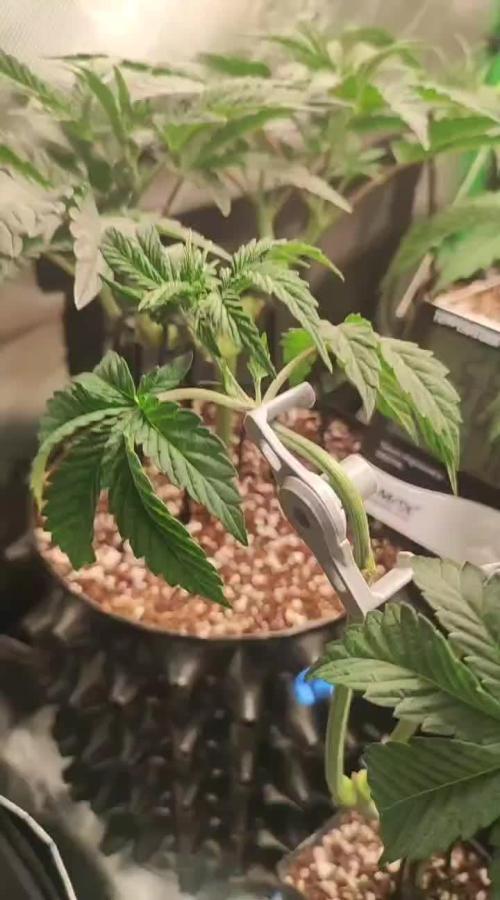
Sorry, I'm a bit behind on my updates... Everything is going according to plan 💪🌿

Likes
44
Share


@I_and_I
Follow
Disaster strikes, I find bud rot in a couple of the biggest colas of the centre plant, I remove the colas, salvage what I can, i now understand I have too little airflow for the number of plants in the tent, I am vigilant with looking for more bud rot, which I find in the biggest colas of the small stout indica plant, I presume its mostly indica from its shape, I remove, salvage and begin to dry what I can save
I install another more powerful fan on max speed with acoustic duct to keep fan on max speed, I install another fan to blow across the plants 5oo, humidity drops, everything looks good again to go forward, no further signs of bud rot
Likes
23
Share

@BettyFlores
Follow
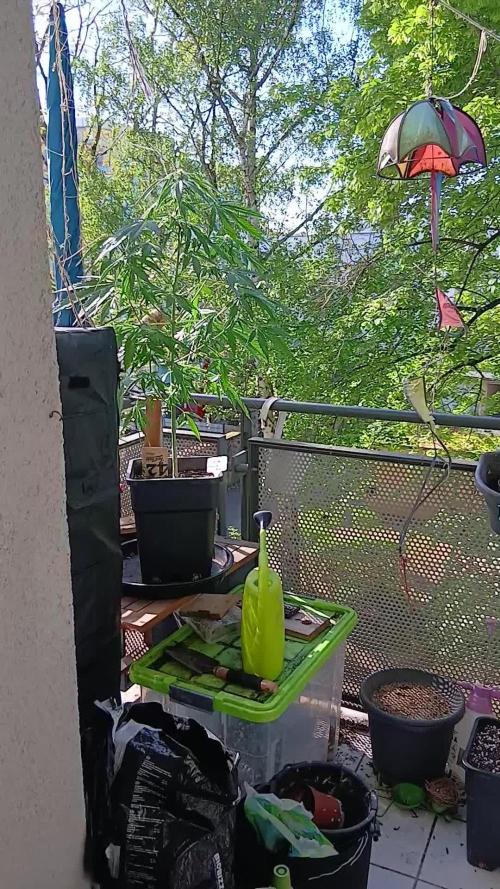
24.04.2026 Ich habe eine wirklich harte Woche hinter mir, aber der Skunk geht es blendend! Sie ist nun schon richtig groß und die Blüten sind in voller Entwicklung. Später werde ich noch ein paar Fotos ergänzen, das Video schon mal vorab. Mittlerweile haben wir prächtiges Wetter, Sonne satt und schön warm, doch nachts rauscht die Temperatur auf fast 0°C ab. Die Skunk scheint es zu mögen 😅.
Happy growing 🌸 💜
Likes
6
Share


@Cultivandomedicinanatural
Follow
En esta ocasión tenemos algunas plantas más grandes que otras, tenemos las red hot cookies miden 17 y 20 cm. Las tropicanas 15 y 20 cm y la purple punch og 16 cm.
Vamos a hacer una agua con concentración de 1.35 para las grandes y de 1.2 para las que son un poco más pequeñas.
Seguimos con un ph de 5.8 y se va notando ya la corrección de las carencias iniciales.
Likes
4
Share

@Bear_Grows_Green
Follow
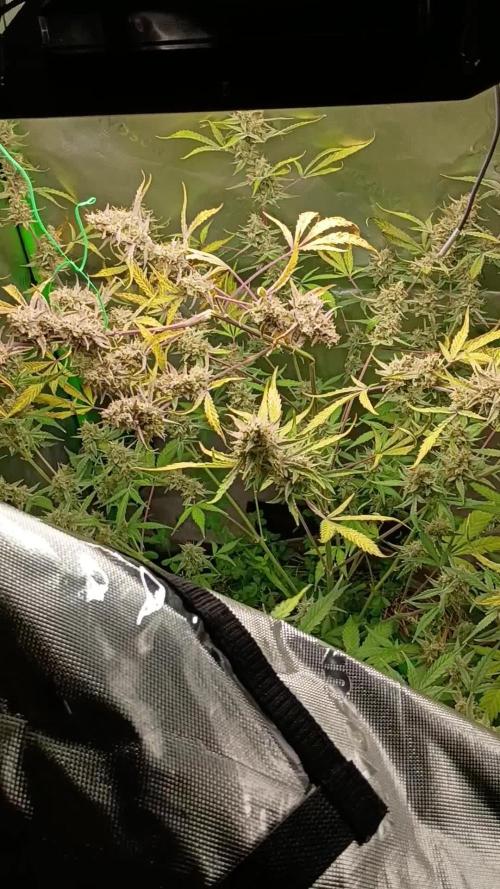
12/18 start of a new week. Smelling super strong now Trichs still a lot of clear no amber yet.
12/19 watered in gallon with coconut and q

Likes
24
Share


@TrueNorth
Follow
Strain: Orange Sherbet 🍊 - Fast Buds
-Tent: 3x3 Grow Tent
-Lights: Budget LED Grow Lights 2 x 250 Watt
LED Full Spec/Red Spec mixed boards
-Light Cycle: 18/6
-Soil: Fox Farm
-Air Circulation: AC Infinity Cloudline T6 Inline Duct Fan
So here we go, she was awesome to grow her smell and structure was amazing, this was my first time not topping, i kinda regret it because i know she would have been a beast but hey!!! I cant complain, okay yield but again my fault i didnt top it, cant wait to grow it again.
GROWMIES! I LOVE LOVE LOVE YOU ALL SO SO MUCH! Thank you for all the continued support and likes and comments and help. Id be no where with this with out all of you. And thank you to the FAST BUDS team and to you heather! Grow diaries thank you for the plat form. I love you guys. All of you. All my sponsors. Thank you!