


Likes
Comments
Share


@Grileon
Follow
10% discount code for Zamnesia shop - GROWITGD
--
Another series of topping done, so that there will be 8 main branches.
Roots look amazing, healthy, white, and bushy.
UPDATE:
Did some heavy defoliation for fan leaves and LST on all 8 main branches.

Likes
20
Share


@R3LOADABLE
Follow
D36-rain has been coming down every single day it seems. Plant is flowering along, going to spray neem oil by end of the week to deter pests.
D37-neem oil sprayed on plants medium and fabric pot.
D38-rain and humidity the past couple days. Weeks outlook though is a high of 97, sunny and night temp of no lower than 60. Summer season is officially here :) I have really been doing nothing to this plant except making sure it was watered and in the sunlight. Adding nutes per schedule helps tremendously also with one extra step taken out of the equation.
D39-plant is growing and showing good bud sites. Nothing but abundant sunshine this week. Noticed a good amount of trichomes already forming on some leaves, as well as at the base of the side branches.
D40-hand watered half gallon as it is brutally hot and sunny. Plant looks good.
D41-noticed fungus gnat infestation. Applied neem like crazy to saturate medium. Heck..

Likes
9
Share


@Vet4weed
Follow
Chonga is doing nicely at 7", Cheecha still a little behind. The soil has been staying moist for awhile, even with light watering and I was worried about root rot. So, I let them go about a week without watering. After a light watering with the remaining 1 ml/2Qt nutrient/water solution (about 1 cup each plant), I took the plunge and decided to try Topping (or FIMing), which I did a few days after watering. I'm also concerned about soil PH. I've been testing it with the 3-in-1 tester, but it always reads about 7. I tried the thing out in pure vinegar, but it gave the same results. So, soil PH is anybody's guess. I eventually bought a digital PH tester for liquids. BIG CHANGE: On Day 27, I switched over to a new, 1200W LED grow light.


Likes
7
Share


@captaincondor
Follow
Time is not on my side as my wedding cake in the other tent is becoming a beast and I want the small tent for the rest of the flowering stage of the wedding cake . So being as its week 11 she will be getting chopped at the weekend which will be around day 77. I think its taken such a long time due to her being more sativa inclined. The grow has gone quite well with no deficiencies that i've noticed. The Humidity is also on the high side so thats another reason to get her chopped soon. I have reduced the nutrients down now for this final week and also reduced the light hours to give her the sign to hurry up lol though she finishing i think at her own pace

Likes
Comments
Share

@BalconyBoy
Follow
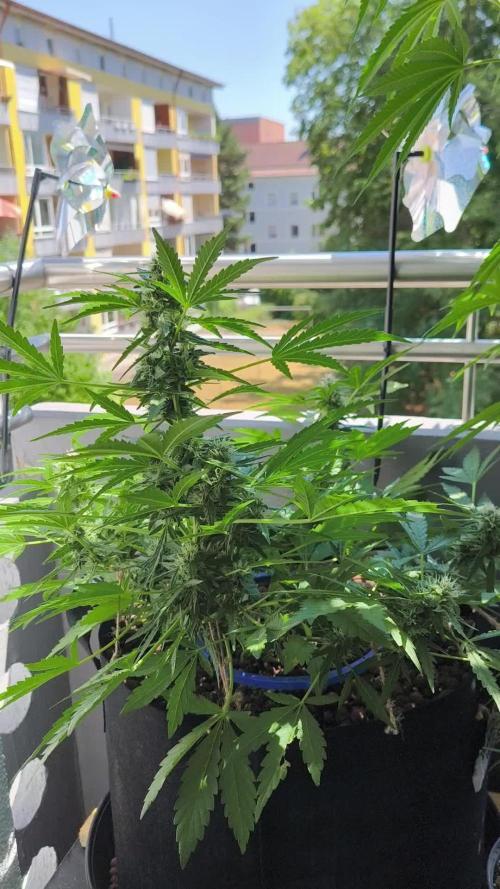
13.07.26 Die Blüten der Hubbabubba Haze nehmen nun sichtbar an Volumen zu, die Pflanze hat auch noch ein paar cm Höhe gewonnen. Vergangene Woche wurden Tüten mit Raubmilben gegen Thrips angebracht. Laut Beschreibung ist es für die Raubmilben deutlich zu trocken, ich hoffe sie gehen nicht alle dadurch ein. Bisher sehe ich weder neue Fraßstellen an den Blättern noch ausgewachsenen Thripse. Nach dem Ausbringen einer Düngermischung für die Blütephase als Top Dressing sind keine Mängel erkennbar, nun gieße ich wie gewohnt nur mit Wasser. Mittlerweile ist die automatische Bewässerung installiert und liefert den Autos etwa halb so viel Wasser wie den großen Pflanzen. Pro Minute tropfen 350ml in den Pflanzsack und nach anfangs 2x2 Minuten (1.4l) habe ich einen dritten Block mit 2 Minuten programmiert (nun insgesamt ca. 2.1l) da die Großen sonst nicht genug bekommen. Ich werde beobachten ob das Substrat der Hubbabubba Haze dadurch zu nass wird oder nicht, bisher passt die Menge.
Angenehme Woche euch allen!

Likes
6
Share

@HandsomeTerpz
Follow
ChatGPT:
🇺🇸 Week 11
--------------------
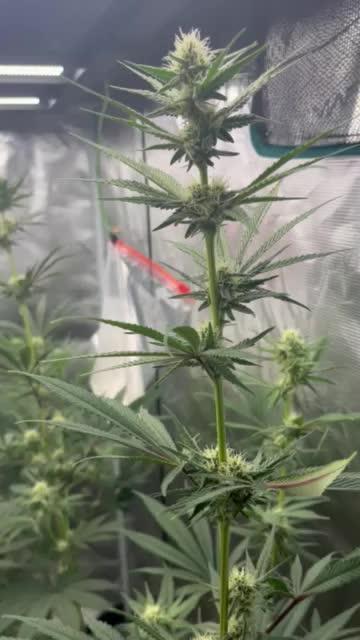
Humboldt California Haze: This week, she has adapted well to the new light, and you can tell the conditions and temperature suit her perfectly. It’s still a bit of a shame that the nodes have stretched so much, but the flowering is coming along nicely. The scent is truly pleasantly delicious.
🇩🇪 Woche 11
-------------------
Humboldt California Haze: Diese Woche hat sie sich gut an die neue Lampe angepasst, und man merkt, dass ihr die Bedingungen und die Temperatur sehr zusagen. Schade ist nach wie vor, dass die Nodien so extrem in die Höhe gegangen sind, aber die Blüte entwickelt sich wirklich gut. Der Duft ist angenehm lecker.

Likes
23
Share


@eldruida_lamota
Follow
Hola familia,de nuevo, no hay ningún cambio en cuanto a lo climático, temperaturas de 26 maximas y 20 de mínimas y humedad 45% mínimas k asomas de 70%.
Eso si crecer van creciendo a buen ritmo , las más lentas son las power plant xl.
Aún así se ven bien sanas todas, pronto las trasplantaremos.

Likes
9
Share


@Dthebudguy
Follow
Few weeks to go it’s looks great cola development noce sweet piney mix of smells triche are beautiful

Likes
35
Share


@ISCA_Abi_In_Da_HOoD
Follow
Bana gonder bebegim Bana gonder
Cicegin en guzellerini Bana gonder
🤩😜💕🍀🌽🤯👽

Processing
Likes
150
Share


@RussianGrower
Follow
I welcome all my like-minded people who are in different parts of the world. I thank everyone who provides moral support to Russian plant growers. 👍
It's me again-an underground Russian grower with some experience with different strains of cannabis. Subscribe to my diary if you want to follow my progress and learn a lot about the life Of Russian growers, and the difficulties they face every day👊
Today my have my plants 62 day life. 9 weeks. today I visited my underground production.
As I will have difficulties in financial investments, I had to collect from improvised materials additional ventilation and air filtration. In addition, I installed forced ventilation at the entrance with a computer power supply.
Bubblelicious Auto-with the genetics of this cannabis variety I was familiar before, so knew what to expect from these plants. I can say one thing, it is the most delicious and sweetest sort of marijuana I grow. Also, it produces a lot of oils which I think it is suitable for extraction or cooking cannabis food. I look forward to the harvest
Neville's Haze Auto - this variety of cannabis shows an unprecedented strength in growth, its flowering only in the early stages, and should take a long time before its full sexual maturity.
In addition, I made my girls an intimate haircut, so that their genitals become like full-fledged women.
In General, I'm doing well, thanks to this resource and the advice received here, I manage to fight with the stench, I'm free and I'm not going to finish my activities. Until next time. 😉


Likes
14
Share


@Dre25
Follow
Looking Great.👍🏼 lst and added Tiger Bloom purple lemonade not ready for lst. 6/22


Likes
23
Share


@nonick123
Follow
Día 41 (03/06) Riego 750 ml sólo H2O pH 6.2
Día 42 (04/06) Riego con 750 ml H2O + Regulator 0,15 ml/l + P-Boost 0,5 ml/l + CaMg-Boost 0,25 ml/I +TopBooster 0,2 ml/l - pH 6.2
Día 43 (05/06) Riego 750 ml sólo H2O pH 6.2
Día 44 (06/06) Riego con 750 ml H2O + Regulator 0,15 ml/l + P-Boost 0,5 ml/l + K-Boost 0,5 ml/l +TopBooster 0,2 ml/l - pH 6.2
NYC Sour D Auto está mostrando el tallo central y las ramas llenas de tricomas. Parece que algo muy interesante se avecina!
Día 45 (07/06) Riego 750 ml sólo H2O pH 6.2
Día 46 (08/06) Riego con 750 ml H2O + Regulator 0,15 ml/l + P-Boost 0,5 ml/l + K-Boost 0,5 ml/l + CaMg-Boost 0,25 ml/I +TopBooster 0,2 ml/l - pH 6.2
Día 47 (09/06) Riego con 1 Litro H2O + Regulator 0,15 ml/l + P-Boost 0,5 ml/l + K-Boost 0,5 ml/l + CaMg-Boost 0,25 ml/I +TopBooster 0,2 ml/l - pH 6.2
💦Nutrients by Aptus Holland - www.aptus-holland.com
🌱Substrate PRO-MIX HP BACILLUS + MYCORRHIZAE - www.pthorticulture.com/en/products/pro-mix-hp-biostimulant-plus-mycorrhizae


Likes
17
Share

@ZoobZoob_farmZ
Follow
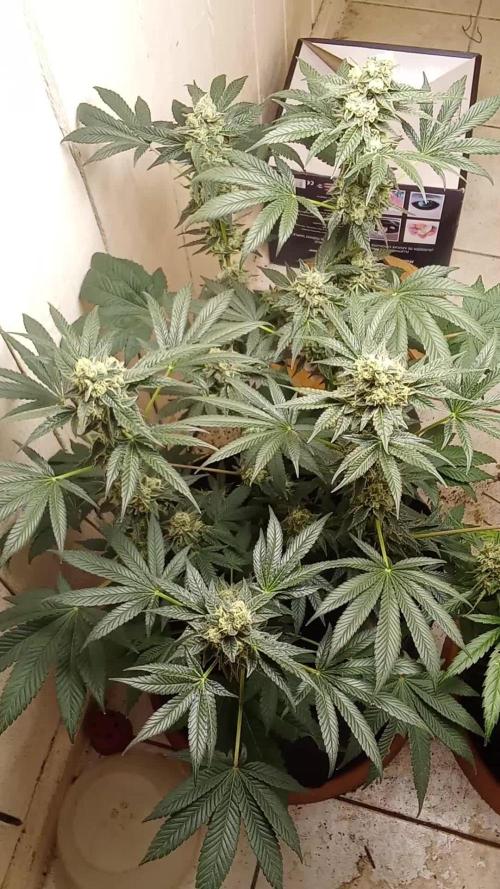
💪🌱🌲☀️👌Truffle gas #1 × (Animal Cookies x Do Si Dos )
Hi everyone 👋 for the smell 👃 this one gives off the smell of argan oil, diesel And earthy And slightly minty
Useful links👇👇👇
https://artgenetix.world/
https://marshydro.eu/products/mars-hydro-ts-1000-150w-led-grow-lights/?lang=fr
https://shop.greenhousefeeding.com/4-bio-nutrients
https://www.royalqueenseeds.fr/47-growing
https://biotabs.nl/fr/produit/bio-pk-5-8/
💪🧑🌾🌱🌲💚.
Likes
6
Share


@Growformyself
Follow
Pflanzen wurde heute das letzte mal mit ca. je 5l Regenwasser gespült. Sobald die Erde fast trocken ist, wird das Licht für 48 h ausgestellt und anschließend geerntet 😊


Likes
6
Share


@Cannabis_ConnectionUK
Follow
Soil PH Stabilised
Plants Have Shot Up Over 10” Over The Last Week.
Moonshine Spray Used Once A Week Until Flip.
Lights Are At 60% Brightness

Likes
28
Share


@MrGrowthSpurt
Follow
What's up Growmies🤟🏽. Week # 8 is in the books🙌🏾
Hello week #9💪🏾
I went a little overboard on pictures this week, they are so happy and healthy that I got carried away. I know we are supposed to post pictures with the lights off, however it's something about the contrast it gives with the lights on that makes it look sexy to me😁.
I have had to tie the stalks of both White LSD plants due to heavy sagging. I'm noticing with this strain the stalks seem to topple over even though the buds are far from fully developed. A trellis net probably would be ideal however I hate them. They are easy to put on but very difficult to take off come harvest. I use garden wire and string them as if they are puppets being controlled by the puppet master🤪.
I continue my feeding schedule with the recommended "bloom" concoction using general hydroponics Flora series trio. I give them 1 liter every 3 days. I have them on a 2 to 2 cycle (feed them twice with nutes and then twice with plan water) I keep the p.h. around 6.1 to 6.6.
Temps and humidity are in the perfect range I'm enjoying it while it last because spring and summer in VA makes it difficult to keep the humidity in check.
All in all everything is going well for me and my ladies. I hope the same for all of you.
Until next week my friends Happy Growing 🤟🏽 and may the grow goddesses bless you all with a bountiful harvest 💪🏾
