


Likes
10
Share


@HIAZ_urbanbudfarmer
Follow
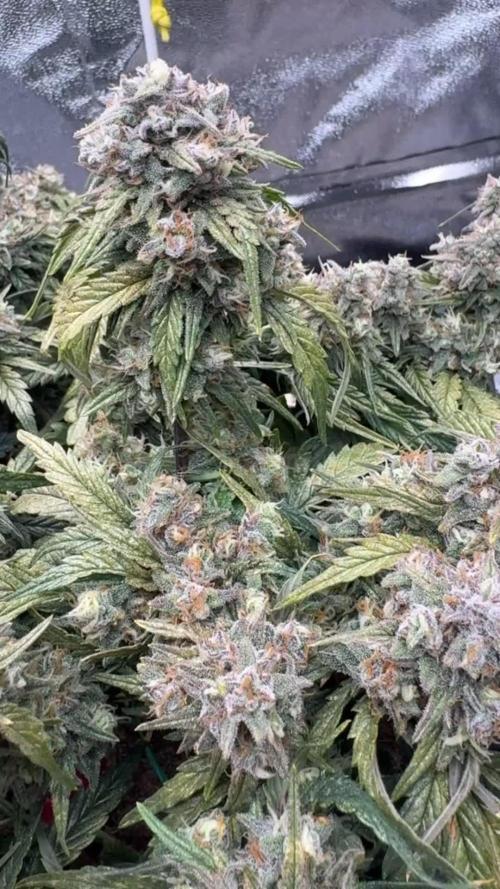
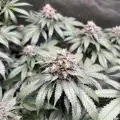
Hi Gromie's & a Happy New Year to all in advance👍 A BIG shout out & thanks to Fast Buds as I just received my prize for November diary of the month competition. Great customer service in both my dealings with fast buds their products have arrived on day 13 to 14 through air freight & customs to Oz! The girls are going great buds really stacking on size, smell getting very strong, super sticky. Gave them a good defoliation last night removing all the bigger shade leaves covering bud sites & touching. They were quite bushy & needed it , lolliepoped any sucker buds all the smaller secondary side shoots I've removed everything except top buds so to they get all the energy. Some trichomes all ready going cloudy & a couple of amber's as well. Since I'm only using 1 side of the new 4x8 at the moment, I've hung some myar sheet up in th e middle to stop light loss to the other side & shin back onto plants.👍

Likes
26
Share


@PatriciaGant
Follow
Dane, We all should help one another.
Human beings are like that.
We should live by each other’s happiness - not by each other’s misery.
We don’t want to hate and despise one another, share the Joint.
And mother earth is rich and can provide for everyone.
We can Grow enough Happiness, In this paradise, there is room for everyone.
We only exist to bring joy into the world and The way of life can be free and beautiful,
but we have lost the way.
Grow High and Give the world A smile.
At the end we own nothing more then all our memories, lets make them amazing for everyone,
nothing to loose only everything to win.
A last kiss goodby, a second one, softer and long as a sign, that you are woth it.
That Everyone worth who loved and give.
Enought Hippie Talk, now have a nice day and an even better grow, thx for watching by.
(36 next week flower nutrients for water

Likes
3
Share

@KannaGrowing
Follow
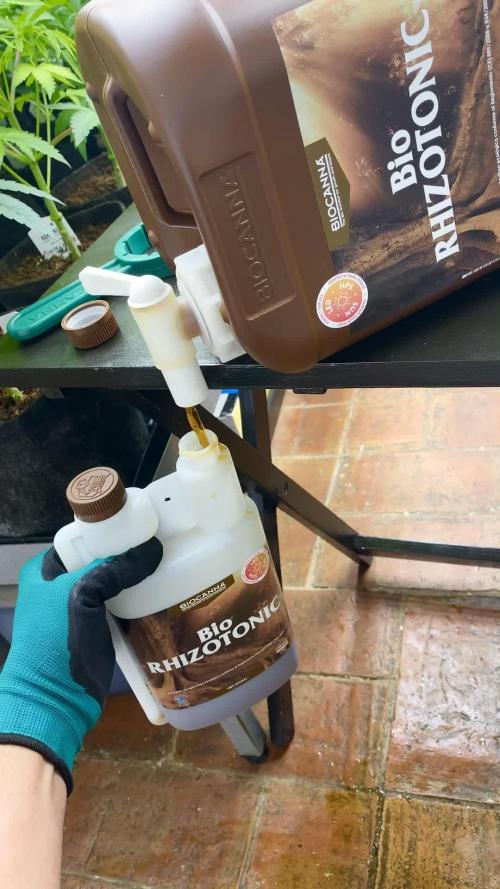
Esta será la última semana donde incorporamos Bio Vega a la dieta de alimentación.
La potencia de las luminarias al 75% y regamos cada tres días aproximadamente alternando entre fertilizante y agua.

Processing
Likes
13
Share


@GrowGuy97
Follow
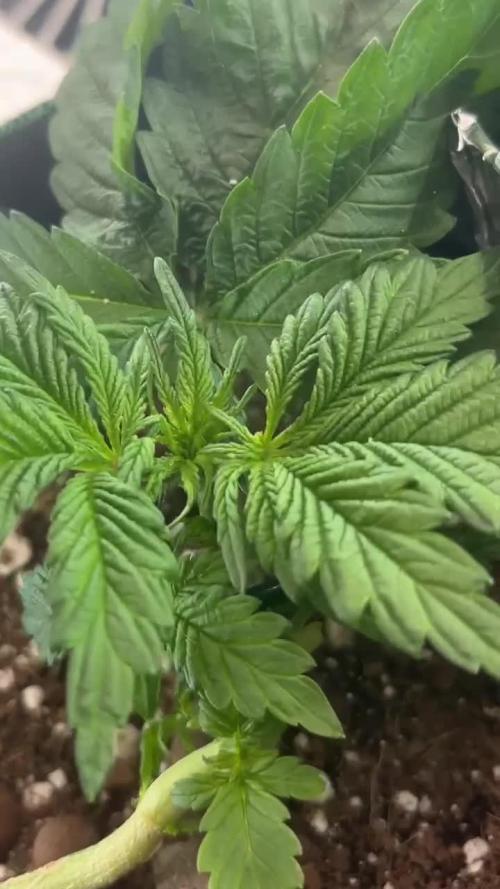
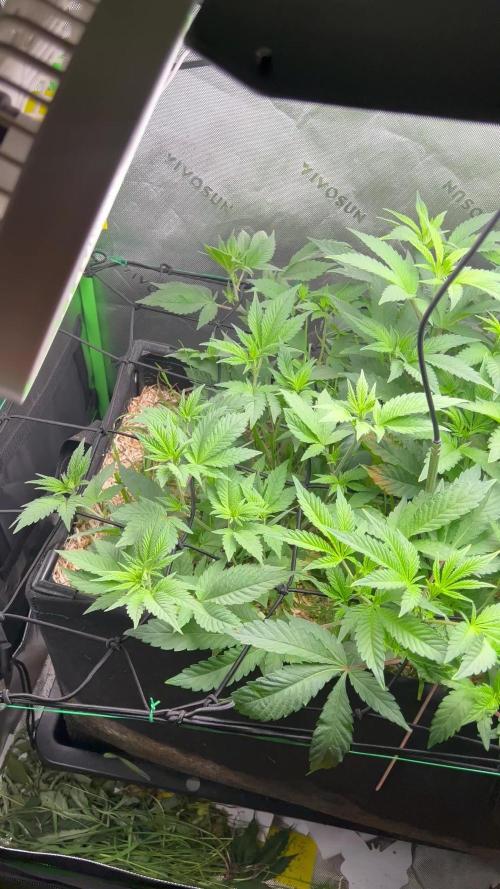
Going great so far except the 2 Gorilla Zkittles are still a little far behind but they are starting to bounce back!
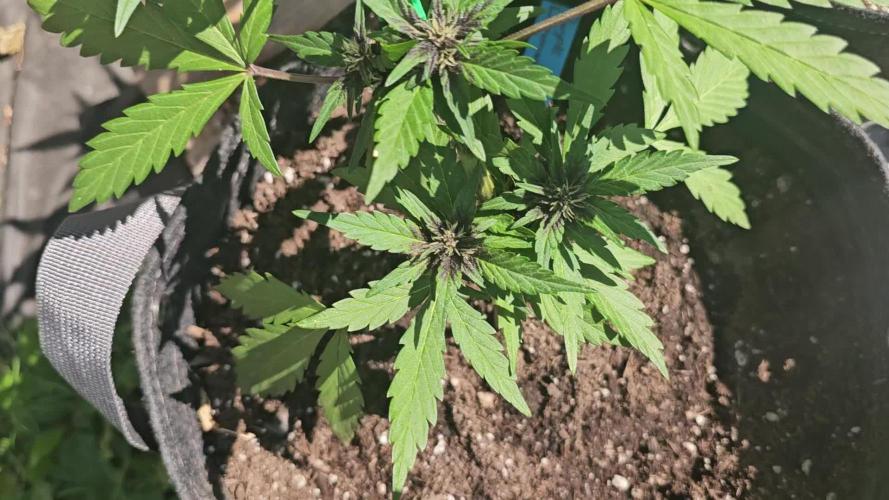
Day 18 everything finally transplanted in 5 gallon pots except the hulk berry is in the 3 gallon, hopefully the 1 small gorilla zkittles hits a growth spurt soon🤞🏼


Likes
3
Share

Likes
4
Share


@queljoel
Follow
Day 50: I'm back home and she survived!! With only 1 L in 12 Days. Awesome. I love this plant.
Day 5x: she grows and grows and she looks so pretty. Let's see how dense are her buds going to be...


Likes
16
Share


@DreamIT
Follow
Sponsored by:
💫PARADISE SEEDS💫-💡VIPARSPECTRA💡-💐GREEN BUZZ LIQUIDS💐-🛠️WEDRYER🛠️
4/9 I'm back with updates. we have entered the third of flowering and it is progressing very well. being predominantly indica, it has not stretched much, but it is nice chubby. today water and fertilizer
__________________________________________
Personal advertising (contains affiliate links)
__________________________________________
🦄 winners and holders of the most prestigious awards, since 1994 they offer genetics of the highest quality! Anonymous shipping!
✅https: //bit.ly/Paradiseseeds_
__________________________________________
Did you know that Green Buzz Liquids fertilizers are 100% vegan? A complete line of products ready to give the best to each of your plants! Visit the site and see my journals to see how they work 🦄
🤯 And with the code "dreami t" you will immediately receive a 15% discount on your purchases
✅https: //bit.ly/GreenBuzzLiquidsPro
__________________________________________
👀 Are you looking for a good lamp to start with? 👀
🌞Viparspectra has something more than the others, take a look at their site.
⏩ Use "GDVIP" for an extra discount or "DREMIT3" for an extra 5 %% discount
👀 Search for it on Amazon
✅Amazon USA: https://amzn.to/30xSTVq
✅Amazon Canada: https://amzn.to/38udUVe
✅Viparspectra UE: bit.ly/ViparspectraUE
✅Viparspectra USA: bit.ly/ViparspectraUS
______________________________________________
🌈 Tired of blowing on your weed hoping it dries quickly? Check out the Wedryer website! You will find a well-made accessory that will help your weed dry in just 8-10 days without the annoying risk of finding mold or other annoyances! (no affiliate links)
✅https: //bit.ly/Wedryer_
______________________________________________
📷🥇Follow the best photos on Instagram 🥇📷
https://www.instagram.com/dreamit420/
Backup
https://www.instagram.com/dreamit4200/
🔻🔻Leave a comment with your opinion if you pass by here🔻🔻
🤟🦄💚 Thank you and good growth 💚🦄🤟

Processing
Likes
4
Share


@Ferenc
Follow
Week 10: 20/4 light schedule, 150 mp water per plant 2x, no fertilization anymore. Day 65: Next week Tueasday/beggining week 11/ we need to harvest because they will come from the council to check the house😂 Well, the previous one finished in 69 days, but I think they won't be properly ready by next week. I tried it and made me high anyways. I would give at least 2 weeks more to be done. Tomorrow I will check the trichomes with magnifying glass. They are beautiful stinky girls. Flowers are getting thicker and pistils are getting brownish. Day 66: I checked the trichomes with magnifying glass and it will be ready by next Tuesday. 7 days left with this day. They are beautiful just check in the video (Day 66).
Day 67: It is crazy the last 3 days was so hot here in London. Today was 38 degrees!!!!!! Poor plants even with ventilation it goes up to 30-31 degrees. Well, it is alright because direct ventilation goes on so they won't be cooked. 😓😛 Day 70: It is the last day when they receive water and they just get once and half of the daily intake. 2 days before harvest I will not water them. Harvest day is on Tuesday 30th of July when they are 72 days old. I have checked the trichomes all good they are matured nicely cloudy so now it is very strong. They are very stinky girls 😋 Day 71: No more water for them..... Tomorrow is harvest day!!!!!😋

Likes
9
Share


@CanarianGrow92
Follow
Week 6 already, we will add some extra PK until week 7 more or less as this strain has a little longer flowering, the buds are starting to look great, they are getting bigger and longer week by week!

Likes
10
Share


@Elpicor
Follow
the weather forecast says 2 weeks of rain, it will be a challenge to keep the humidity low in the house and of course in the growbox.

Likes
3
Share

@psychonaut420
Follow
The plants structure has become more sturdy and have seen development of more side branches developing I have topped both side branches at the 2nd node as didn’t want to top main bud site and have been doing light defoliation of the bigger fan leaves hoping to see more development as week 4 progresses
Likes
15
Share


@Uwish
Follow
we continue the run with the slowing down of the stretch and the beginning of the beautiful flowers.
This week my EC indicated me some things...
It was at 1.8 and went up to 1.9, so I added water to lower the ec to 1.6.
When my ec goes back up it tells me that I have enough nutrients in my solution.
Now, the ph is back to 1.7, I will add more water to bring it down to 1.5.
We can observe on some leaf tips a beginning of over-fattening, this is what I'm talking about above, I'll let you know next week if I lower the ec or if I keep 1.5.
I did one last defoliation and it was needed!
If you look at my vitals, it's not crazy, 70% humidity at this time of the year can become problematic, so I'm going to take the dehumidifier out and set myself at 55%.

Likes
13
Share


@Eldorado_ed
Follow
Well after splitting the Girls up due to space it’s looking like the HPS Ladies are almost ready looking we’ll ahead of LED ones also buds are fatter with HPS but would say the LED ones look healthier looking if that makes sense

Likes
35
Share


@I_and_I
Follow
Start of week 5, think she has finally stopped stretching maybe
Starting to thicken up the bud sites on the long tall colas
Two poly colas, one splits into a fork, the other is a single massive bat of a cola already, this thing has 7 or 8 weeks left to go yet, insanity, cant wait too what this ends up like 😂😂😂🌲🌳🌿

Likes
5
Share


@Mattyice
Follow
This one grew extremely weird. For two months it didn't flower and for almost 4 weeks after veg it stopped growing. Then after two months the main cola started flowering and stopped, then all the other lower branches outgrew it. Now 90% of the branches have outgrown the main cola. No topping or training done until just recently so it did everything on its own lol weird. Super skunky and spicy. Way stronger smelling than the full grown plant right next to it lmao I'm excited to see it flower the rest of the way idk why it's taking so long its an autoflower. Halfway through the video I part the branches to show you the main cola now buried by everything else but still looking pretty good
Likes
43
Share


@UnorthadoxDude
Follow
Day 98: Fertigated 10l
Hello growmies and welcome to week 15 for Nesia - this superb Amnesia Haze Auto from Fast Buds. Nesia continues to amaze me as by far my largest plant.
If you have been following my grow series you will know that I recently harvested Karen, who was dwarfed by Nesia, and Karen has yielded 160g dry. So I am properly excited to see if Nesia can set me a new yield record! I think she can and will!
Day 100: So I can no longer move her out of the tent to photograph, she is just too big and too heavy with bud. It is recipe for disaster. So for the rest of the grow I will be doing my best to get good photographs in the tent. I hope that's okay, because I don't have a choice really. Anyway she is a photogenic girl to say the least so I am not too concerned. I am really enjoying this new camera, I need to explore the limits! Anyway you should expect another update tomorrow or soon! :D
Day 104: Fertigated 10l I very nearly cut Nesia today, I even announced on Twitter that I would in the end I decided to let her go a bit longer I want to see some serious amber! I think I am starting to get the hang of the lighting and new cam... practice practice!
Likes
3
Share
@frankensoil
Follow
Die Pflanzen wurden endlich in die Blüte geschickt und dürfen jetzt erstmal schön nach oben wachsen
Likes
4
Share

@Emerald_Gardens
Follow
This week shows early flowering and amazing colors starting to show. Lst is evening out the canopy nicely and the organic purple lemonade received its forst top dressing of gaia green power bloom, GG glacier rock, and GG worm castings.
Likes
20
Share


@DrGanj
Follow
Mild defoliation throughout this week. Flush imminent so will leave the remaining fans as nute banks.
Next run with these genetics I'll be running a monstercropped clone under this scrog and will go heavier with the defoliation earlier on. I was advised this on here this grow and did a bit but have learned I need more!
Forever learning. Looks like it's gonna be an epic harvest. These girls smell absolutely dank.
Testament to the quality of these Madame Grow Fertilisers. Harvest just get better every time!
Also big shout out to my bro at NatureDelight.co.uk providing some awesome organics to add into the grow schedule. Used The Active Sugar Boost all through flower at 3ml per litre this run and I think the results speak for themselves. I cannot implore you guys enough to go check this stuff out. It's unique and you wont find better customer service.
Lots of vids and content this week as we all love bud shots <3
