
Likes
Comments
Share


@TheMadHasher
Follow
The ladies bud growth is starting to take off! Got Some nute burn but honestly they’ve still been growing just fine. Candyland is undoubtedly the mother of all three! She is budding so beautifully! The smell is starting to get stronger and stronger everyday. cant wait to see these beauties ripe! Until next time Happy growing!


Processing
Likes
8
Share


@GrownwithLED
Follow
The plants stopped growing in height and are now in FULL FLOWERING mode. Every day more and more flower clusters appear and start to build colas at the sidebranches now. The trichome production is also in full swing, the plants get stickier every day and smell DELICIOUS. The Barbarian (=AK-47 x Barbara Bud) plants have a sweet sandelwood-smell like the AK-47 but also with peach undertones from the Barbara Bud in it. I LOVE THE AROMA!
Likes
101
Share


@Ferenc
Follow
Day 51, 4th of November 2020:
The 3rd day since the lamp switched to be 12/12.
I raised up the nutrition intake as it can be seen above only the BioBizz family 2ml/l and removed some LST because the plants remain in shape or just set a bit but nothing significant....
They look good and strech is on the way.....
Nothing really to report there is crazy 2-3 weeks from now ;)


Likes
2
Share


@Ninjabuds
Follow
Those three Bubble OG plants are something else. They're stretching up so much, it's like they're on steroids or something. Seriously, in the past week they've shot up a ton. I can't believe how much they've grown.
Well, it's Christmas again. This year feels a little different, though. Maybe it's the snow blanketing everything, or the way the tree lights up the whole living room. Either way, it's cozy and warm, even when it's freezing outside. I'm really looking forward to seeing what Santa brings. I hope I get that new video game I've been wanting. But most of all, I can't wait to spend time with my family. We always have so much fun
This past week was a good one for the plants. They started the first week of their stretch, and they've already grown a decent amount. I can really see them filling out. It's cool to watch them grow so fast. I can't wait to see how big they get by the end
I always get a little worried at this stage, like they're not gonna get as big as I want them to. But then I remember how they always end up surprising me. By the end, they're always perfect.
Likes
43
Share


@MadeInGermany
Follow
Hey everyone .
This week we switched from Canna Vega A + B to Canna Flores A + B, because she is starting to put her energy into flower formation ☺️.
Furthermore, I keep her EC value at 1.6, as it has done her very well so far 😎✌️🏼.
You also stretched very well again.
The network is also fully filled out as it should be.
I wish you lots of fun with the update, stay healthy 🙏🏻, and let it grow 😃👍.
You can buy This Strain at :
www.Zamnesia.com
☝️🏼☝️🏼☝️🏼☝️🏼☝️🏼☝️🏼
Strain
Gelato clone from mother (Zamnesia )
☝️
Genetics: Wedding Cake x Gelato x Gelato 33
👍
Vega lamp: 2 x Todogrow LED CXB3590 COB 55 W
1 x Sanlight S2W 62 W
💡
Flower lamp : 2 x Todogrow LED CXB3590 COB 55 W
1 x Sanlight S2W 62 W
💡 ☝️
Grow Aero System : Growtool 0.8
☝️
Fertilizer:
Canna Aqua Vega A + B , Canna Aqua Flores A + B , Rizotonic, Cannazym, CANNA Boost, Pk 13/14, Canna Cal / Mag, Canna Ph - Grow, Canna Ph-Bloom
☝️🌱
Water:
Osmosis water mixed with normal water (24 hours stale that the chlorine evaporates) to 0.2 EG. Add Cal / Mag to 0.4 Ec Ph with ph- to 5.5 - 5.8
💦 💧
Likes
3
Share


Likes
12
Share


@ZzTooRightOGzZ
Follow
All round the grow went well first time grow the forbidden runtz and I'm pretty happy about it.


Likes
21
Share


@Trickybis82
Follow
Hi all,
Finally at that stage and I am so excited to be able to write this out.. have been Flushing these 2 beautiful girls since Friday just passed.
They have also been flushed for 2days with flashclean so I just cannot wait now :)
Will have a harvest next week with some weights to follow early after that...
Good luck growmies.. stay tuned 😉 🌿🌱

Likes
14
Share


@MG2009
Follow
03/20/2022
Biscotti Skunk looking lovely first four pictures.next up is lemon OG,followed by the three Grape Skunk girls middle one is my favorite so far (Middle in height)
I did a light feeding of fish and seaweed, a little extra something just incase they get hungry in final weeks.

Likes
3
Share

@GreenEldritchGardens
Follow
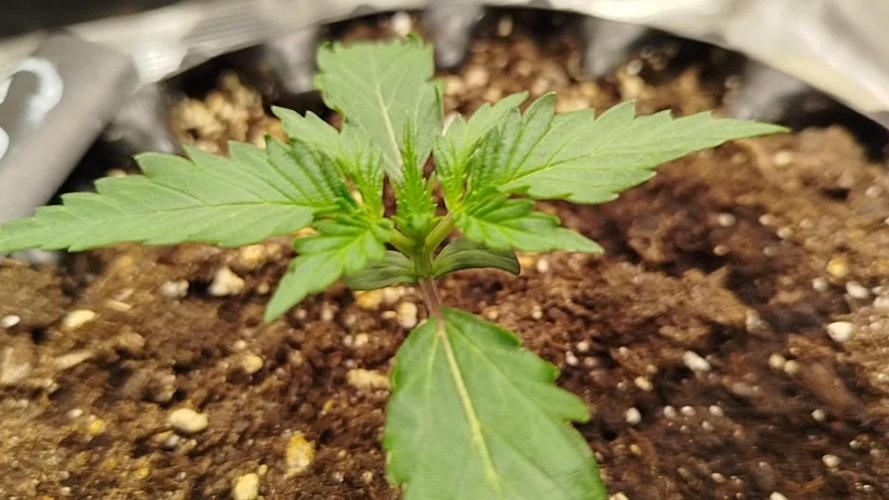
Nice plant so far, a bit smaller leafs than other autos in parallel, but showing some good development!
Can't wait to see her flowering, gelatos are one of my favs
Likes
5
Share


@Deli_Weed
Follow
Esta semana fue solamente de flush 🚿 en esta ocasión decidí usar florakleen para ver con cual obtengo mejor resultado si con este o con flawless finish, lo hice así, primero hice un lavado con pura agua con ph de 6.2 lo hice desde el ultimo día de la semana anterior, fue lavado doble, uno en cuanto se encendio la luz y otro justo antes de apagarse, luego empezando esta semana regué dos dias usando el florakleen y ph de 6.2, el tercer día no regué y al final de ese día le di corte ✂️ y la colgué, actualmente ya la tengo curando, la tuve 10 días secándose con una humedad de entre 50 y 60% para un secado lento.


Likes
3
Share


@xipo86
Follow
day 42 of Flower... gettin bigger and smellier by the day. pistils starting to go amber.. i say 2 weeks for gorilla girl f1 and Mental Rainbow to be ready.

Likes
11
Share


@HIAZ_urbanbudfarmer
Follow
Every going well, no more signs of herming. Pistils are getting a golden colour, stands out a lot. Very cool.
Likes
1
Share


Likes
37
Share


@iii2e
Follow
29.11.2021 : I gave her fertile water. I applied neemazal to the leaves. organisms were eating leaves, so I took precautions. In one of my plants, the development is slow and the other two do not seem to have a problem.
02.12.2021 : everything is going well, I increased the watering to 2 liters.

Likes
30
Share


@Fatnastyz
Follow
Week 2 of Flower
2-24
First day week 2!
Top dressed 1/4 cup flower girl
Shes pushin now! Trying my best to hold off on the defoliation. Had no choice but to take one here and there. Think I get the scrog. Thus far, looking very promising.
Slight yellowing, no alarms. Just top dressed, should be fine.
GD she be poppin!!
2-26
Day 3 week 2
Wasnt going to tuck anymore, but then I did!
Ok last tuck, let em finish from here. Maybe! Lol
Seem to be doing pretty good, considering I don't have clue what I'm doing!
Shes drinking like nuts, im scared of over watering. Gave her a gallon. After an hour, moisture was 39%. Woke up this am, already at 34%. Try to water at 30, but gd. Oh before I watered it was 25%. Thats pushing her 2 days.
Haha fun stuff!
Likes
11
Share


@julian100614
Follow
Ya tenemos su 6 semana y 3 de floración, donde vemos ya buenas terminaciones llena de pistilos 😃
Esta genetica promete mucho ya que es bastante resistente y tiene un gran olor a pesar de ser debil 💪
He aplicado el Delta 9 en modo de pulverizador para aplicarlo a las hojas y ramas 👌
Likes
33
Share


@Darksoul
Follow
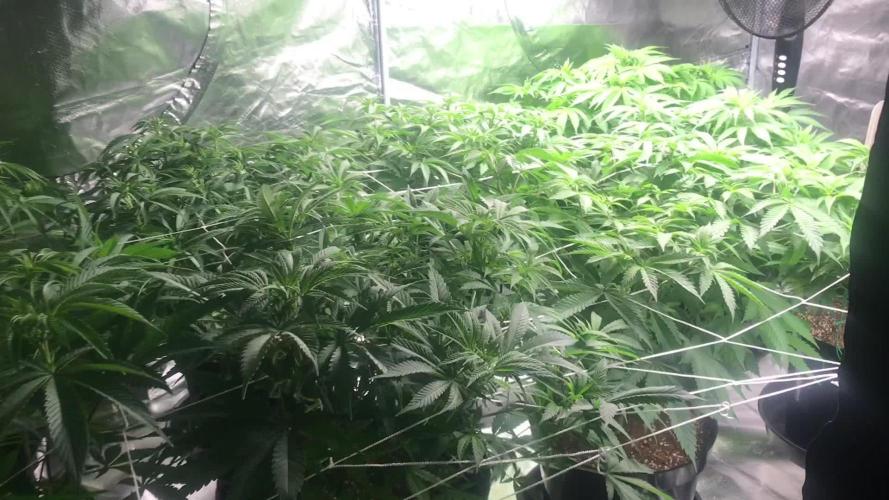
Third week of flowering.
I added a second screen to be able to separate the tops. The screen has 8x9 squares, adding up to 72 and each square has a flower.
I think I will have a good harvest.
See you next week