
Likes
Comments
Share


@Highsince92
Follow
I think this is the sort of strain you need to pheno hunt and keep a mother. It was crazy just how different they were.

Likes
4
Share


@pzwags420
Follow
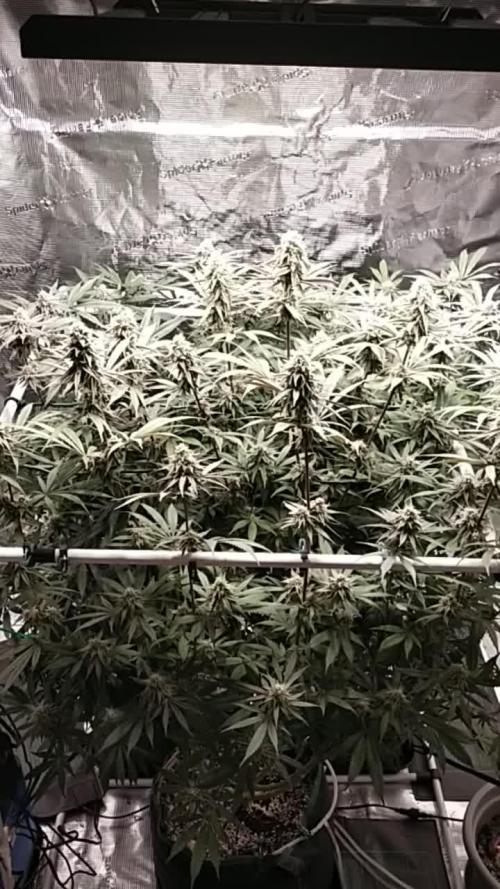
On day 1 I changed out my reservoir. I lowered my nutes to 650 ppm(25% reduction). I adjusted the PH down to 6.1. My left plant has some burnt tips from either PH shift or over fertilization. My hope is that the lower ppm will help to resolve the issue before it spreads.
On day 2 I adjusted the reservoirs PH from 6.3 to 5.9.
On day 3 the reservoirs PH is 6.0. I installed my new 200 watt HLG Rspec. I adjusted PPFD readings to 700-1300 PPFD on all tops.
On day 4 I adjusted the reservoirs PH from 5.8 to 6.2.
On day 5 I adjusted the reservoirs PH from 6.4 to 6.0. I diluted my nutrients in my reservoir by removing one gallon of nutrients from the rez and and adding 2 gallons of straight tap water to the rez. This brought the nute concentration from 770 ppm to 540 ppm as the plants will be entering the ripening stage in a few days and they have too much nitrogen judging by the extremely dark green leaves and burnt leaf tips on some branches of the left side plant. The buds seem slightly smaller then my last run which may be due to an excess of nitrogen and maybe not enough light as some of my tops are taller then the others making proper PPFD challenging. All in all the girls are coming along nice and I look forward to the final weeks of flowering 😀
On day 6 I adjusted the reservoirs PH from 5.9 to 6.2. I think I have halted the nute burn as I haven't seen it progressing any more on the leaves. I will continue to monitor closely during these final weeks. The trichome production is increasing with some trichs on top of colas starting to go cloudy. The pistils are turning brown with roughly 40-50% are turning brown all signs I'm getting closer to the harvest window 😆. I dimmed my light to give 600-1000 PPFD to tops.
On day 7 I reduced my temps to 75 during the day and 68 at night. I adjusted the PH of the reservoir from 6.6 to 6.1. My reservoirs ppm was too high so I diluted the rez with 2 gal of tap water. This brought it down to 480ppm. The average ppfd to all 14 tops is 604 with no top receiving more than 1000 ppfd
Processing
Likes
10
Share


@GIJOSE
Follow
The clones are coming along nicely. They have quite a bit of new growth. I am now leaving the bubble off of the Clone box all the time now. I had to make a makeshift nursery for the time being because my other girls are occupying my grow tent at this time. once that's done I'll be able to bring them over and give him plenty of light but until then I'm stuck with what you see here. I'm still waiting on my lite from winning second place in the tutorial competition. Once I get that I would be able to replace my blurple lights in the nursery with the Mars light I hope everyone grows are doing awesomely! Cheers! -G.I.JOSE


Likes
9
Share


@Medgrow93
Follow
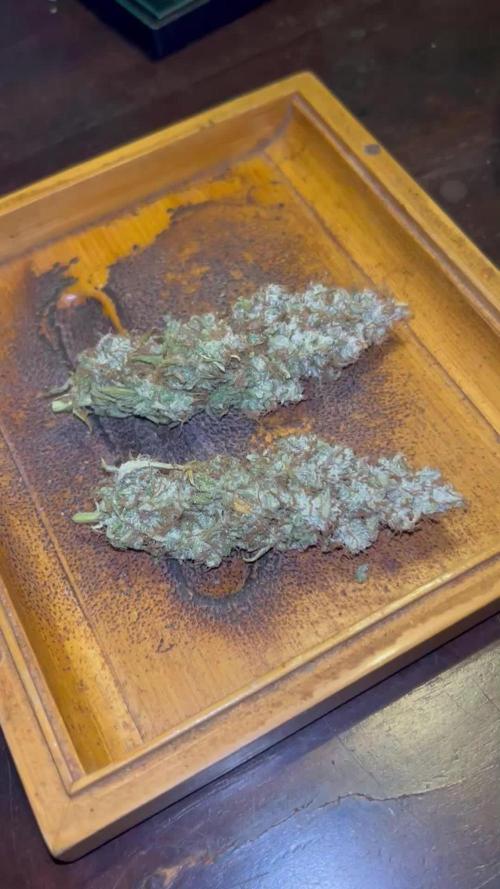
Had mold at the very end so ended chopping then down early. Delicious smell. Smells like vomit or piss and gets stronger as they continue to cure.

Likes
4
Share


@Stick
Follow
Main colas are impressive! But I should have been more radical on pruning, the lowest parts of the plant are not that much interesting. Anyway she's gonna put weight on the scale, for sure! She has a delicious orange/mango smell. Thanks for stopping-by 👊


Processing
Likes
20
Share


@BudXs
Follow
"Chugging" along this week. Weather is hot, girls are loving the all time drip system. Forgot that my nutes and hot sun dont mix well and created a bad case of algae. Will monitor more often and maybe increase the drip flow

Likes
11
Share

@TheGreenfulOne
Follow
The healthy Bruce Banners are bulking up fast, while the post-stress "pink" plant still has wet soil, so I’m letting it dry out.

Likes
43
Share


@WAWAWEED
Follow
My pH meter was troubled that make my plants got lower pH you can see brown spot on the leafs that's it.🌱✌️

Likes
7
Share

@OnlyBuds
Follow
Harvest Update – The Finale 🌱🏁
Alright Muchachos, this is the harvest update.
Everything is done now: chopped, trimmed, dried and jarred.
Yield-wise, it wasn’t exactly what I originally expected – but honestly, the quality makes up for everything.
The smell is already absolutely insane.
Heavy lemon, sweet candy, bonbon vibes, fresh and fruity. Really loud. And that’s before a proper cure. After another 2–4 weeks in the jars, I already know where this is heading.
Smoke report so far:
• Joint: burns great, smooth, tasty
• Vape: super clean, very smooth, flavor pops hard
• Aroma: lemony, fresh, fruity, slightly sweet – just perfect
One thing still hurts a bit: the front-right plant.
That phenotype was something special – really special. A shame I didn’t take backups, because that one was absolute fire. Lesson learned.
All in all:
A bit wild, not everything went according to plan, but a hell of a fun run and an amazing result in terms of quality.
And don’t worry – this is not the end.
In the background, the next ladies are already lined up, waiting for their turn in flower. More on that very soon.
Muchachos, thanks for following along.
Stay tuned. Hasta la vista. 🌱🔥
Likes
2
Share

@Josers
Follow
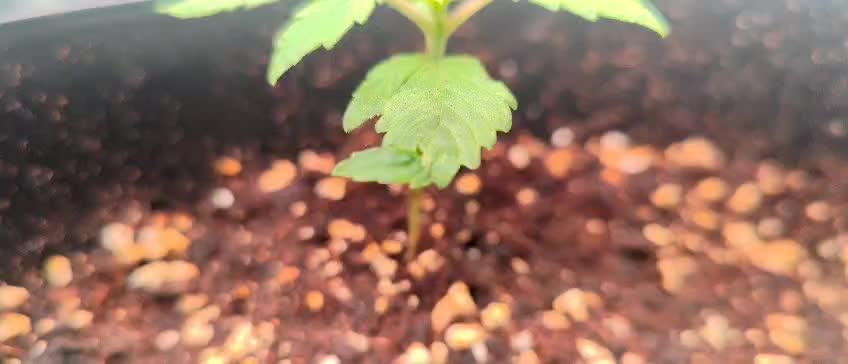
Week 2
I finally made it to get a QB panel led. So i hope these lights help me to grow more efficiently
Seedling number 1 is growing faster than number 2 but both seem to be healthy.
I water two times a week with 2Lts each plus Hesi's root complex and Calmag


Likes
12
Share


@Dankybongtoker69
Follow
Slow growth this week. I was away this week for work and my wife watered for me from a spray bottle. About 30 sprays or so. Maybe not quite enough. Day 20 dropped the light to 21.
I gave the soil a good watering with higher than normal nutrients
Root booster 2 ml/l, bud juice 5ml/l, calmag 2ml/l. Ec was 1.5 with soil that has slow release nutrients. Next watering is going to be just pH water. Then back to the scheduled program

Likes
29
Share


@JeyGanesha
Follow
Un altra settimana è passata senza problemi...grazie alla mia perseveranza nel curarla e debellare i ragnetti Rossi che bastardelli mi sono arrivati anche dentro al box... sicuramente c'è li ho portati io involontariamente quando sono andato a vedere delle piante di un amico che erano impregnate di ragnetti e ragnatele sui fiori....vabbè ora devo sbattermi un po' più ma non lascerò che mi rovinino la mia terapia 💪👍🙏🕉️🙏... Boom Shiva Shankar 🕉️ belle le mie coccinelle 🐞 che mi tengono pulita la mia terapia
Likes
3
Share


@stephandjo
Follow
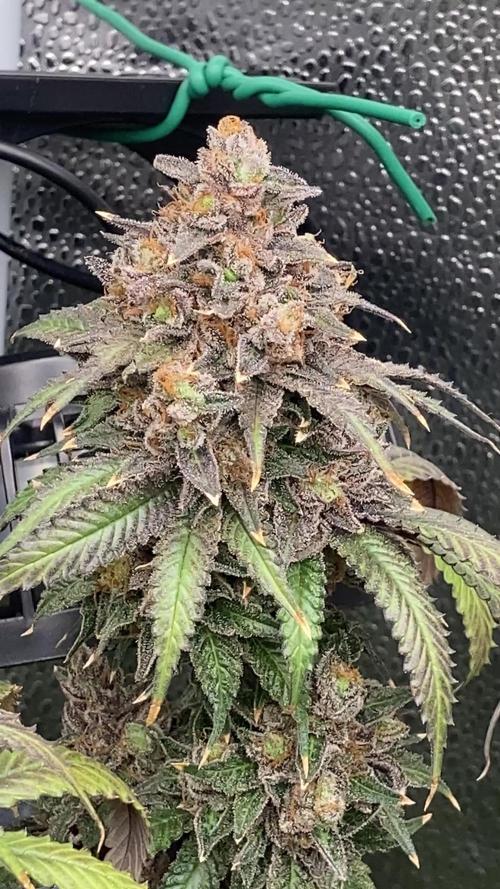
Sugar Bomb Punch
THC Bomb X (Critical Orange Punch x Bubba Island Kush).
Harvested on 63 th day of flowering.
A cool strain to grow from Dutch Passion 👍
4 on 4 on germination rate.
The 4 ladies were slightly different from each others but they gave some very cool buds !
The "black one" was a real beauty 😍
Likes
16
Share


@Plantinator
Follow
It's safe to say she was reacting well to LST so far. It's time to stop pinning down and let her grow vertically as now she is showing signs for pre-flower.
I lowered the light's position a little and cranked the DLI value up to 30.
Also, dropped down the humidity to 60%.
From this week I will give her 2.5L of water.
Likes
3
Share


@TS_Greens23
Follow
This was a big week of defoliating and lollipopping,,being that from pinning her down,,,and her laterals becoming their own leaders,,i have excess tops to work with,,which brings plenty of defoliating to keep the Bud sights with as much air and lumens drenching them,,
It’s time to sit back and watch the grass grow
Likes
111
Share


@DreamIT
Follow
🍋🥧🏎️ LEMON PIE AUTO BY FAST BUDS 🏎️🥧🍋
🍋 26.2 Aware that decanting is not recommended for autoflowering, I made the last one, in a geotextile fabric pot, with Biobizz light mix soil. I rearrange the maininling to the @Canamatoes style (if you don't know it, look for it here on growdiaries, or on instagram, or on youtube and Facebook and twich). Irrigated with 1lt of water fertilized with HESI. yeah
🍋 27.2 ...
🍋 28.2 ...
🍋 1.3 ...
🍋 2.3 As expected, she has grown very little in these days after racking, but we don't get discouraged for so little :) in the meantime, more fast buds seeds have arrived that I can't wait to plant 😀
🍋 3.3
🍋 4.3 I had forgotten that these pots dry the soil quickly. today, 2.5 liters of fertilized water flowering scheme. They are 16 buds, I evaluate whether to double them again or keep it like this, suggestions are accepted: p
____________________________________________________________________________________
❌❓Not sure where to buy your seeds?
😮 Fast buds literally ships all over the world, check out their site!
http://bit.ly/FastBudsgood
__________________________________________________________________________________
📜 A look at the details of what I'm growing 📜
🍋🥧🏎️Lemon Pie Auto 🏎️🥧🍋
⚧ Gender
▪️ Feminised
➰ Genes
▪️ 50% Indica / 50% Sativa
🎄 Genetics
▪️ Lemon Pie X Autoflowering Genetics
🚜Harvest
▪️ 450 - 550 g / m²
🌱Vegetation
▪️30 - 35 days
🌷Flowering
▪️ 30-35 days
✨THC
▪️ 24.0%
✅CBD
▪️ 1.0%
🏡Room Type
▪️ Indoor
🌄Room Type
▪️ Outdoor
🕋Room Type
▪️ Greenhouse
🎂Release Year
▪️ 2020
__________________________________________________________________________
📷🥇 Follow the best photos on Instagram 🥇📷
https://www.instagram.com/dreamit420/
🔻🔻Leave a comment with your opinions if you pass by here🔻🔻
🤟🤗💚Thanks and Enjoy growth 💚🤗🤟
Likes
5
Share


@Stretch448
Follow
Not sure why the other seeds didn’t germinate. One of the other Bananacane’s started to but died off upon sprouting

Likes
8
Share

@CalGonJim
Follow
4/20 AM all the photos are looking good. The Tyson’s are done. 👍👍👍🍇⛽️
4/21 4:30AM Took small samples of BTT!!! Smoking now. Heavy hitter right off the tree. she is looking already done Grimm Seeds finish fast once flowering. Wasnt expecting that! I will grow some more and veg longer. I am RE-vegging. Ricky and Bubbles they are almost a year old and I want to keep thiem. Julian can go fu...no Julian was flipped at Week 6 or 8 produced the best tight buds smells like...'tangerines.
4/21 5:04AM VIDEOS 2 MONTEL'S, THE TALL ONE AND 1 TYSON, PUNCH PIE & GELATO 44!!!!
4/21 FLUSHED THE TYSONS WITH JUST WATER AGAIN AND WOW!!!!! LOVE THE RQS TYSON PHOTO PLANTS!!!! THEY ARE STRONG THEY CAN GROW UNDER HIGH STRESS CONDITIONS. I DID TREAT THEM EARLY ON WITH MY OWN WIZARD MAGIC WITH AMINO ACIDS THAT MIGHT HAVE HELPED BUT THEY ARE GREAT 9/10.
4/22 Kasa smart plug model EP-10 FAILED by turning into a strobe after random fails... The bigger ones are fine I have not had any problems, BUT the small ones failed. Thankfully I had them on my internet and not in the grow room!!! Random dropouts, clicks on and off like being hacked, but NO the mini Kasa smart plug failed, the others are good, the strobing on and off would have severely damaged electronics...I did NOT know that could happen! THE MORE YOU KNOW!
4/23 11AM CHOP DAY BOTH Tysons came down. They were ready a while ago. They did GREAT. Underfilled 2 gallon pots. Low light using 2 TS-100-'s at about 50 to 60 Watts. No idea how m;uch i got

