Likes
3
Share
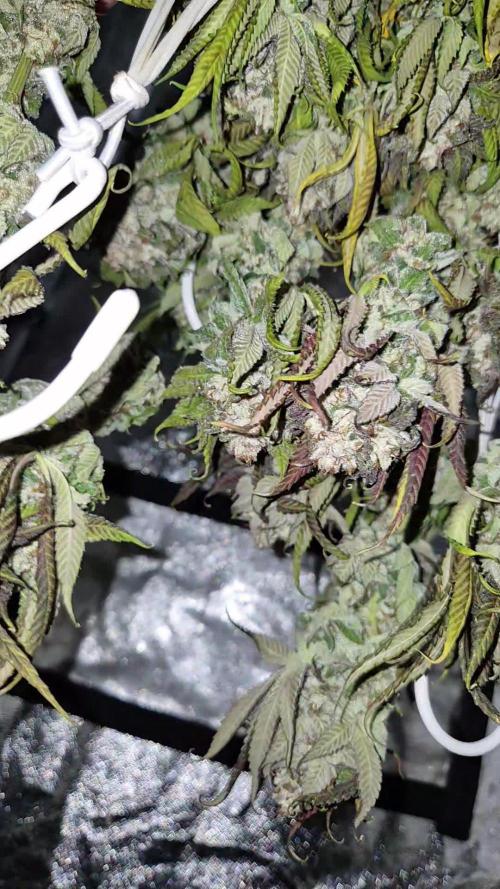
Flower development definitely set back right from the beginning with extreme light intensity reaching 1650 ppfd before corrected. Never fully took off I don’t think. Midway through week 7 started to slowly dial back the intensity from 900 at tops to 650 ppfd. This is a 9.5-10 week strain. Using fish shit to keep things ramped up, also Bokashi Bran and worm casting. Also mixing in Gaia seaweed extract 0-0-17 with the fish shit. Not a whole lot more needed that the soil and top dressings doesn’t already have, if anything at all. I just like to give it that extra kick. I had completely wiped out those pesky fungus gnats and future offspring before flower, but they came back after top dressing and adding more soil. They come in the bag soil, and while I was on holidays for 10 days they came back and I wasn’t on top of the new wave of those dirty bastards. Just about got them cleared out again with the use of nematodes and sticky traps.
Likes
23
Share
@Piorkeed
Follow
Tenth week of flowering started. I went out a week and at my return I discovered that the #2 is sick. The plant doesn't drink anymore and a lot of branches are falling down with limp leaves. I think that the missing defoliation, the height and the poor ventilation caused that. At the moment I removed her from the tent moving her out to the balcony. I did a huge defoliation to the #1 and a massive LST in order to low the height of buds that reached the lamp that is at its maximum height. So far I gave to the plant only water. I think that the cause of plant disease is the high humidity level (at least 90%...). Tomorrow I will buy a dehumidifier hoping that this will help the remaining plant. D63: changed the water into the pot. Added 15 ml grow, 30ml micro and 40ml bloom. [email protected] EC 1.2 D64: after the defoliation the plant seems to be healthy. The humidity into the tent is still high, tomorrow I will install the dehumidifier. D65: I've put a dehumidifier into the tent, I've added 3 liters of tap water to the pot; the plant is drinking a lot so I think that she is fine. The plants produces a lot of fat buds, so I've checked the trichomes for the first time, they are clear for the majority. D67: added 5 liters of tap water to the pot. The plant is drinking a lot
Likes
Comments
Share
Saludos desde México estare actualizando semana a semana genética y banco 100%recomendados germinaron 2 de 2 aguantando las lluvias intensas creciendo desde el inicio en exterior
Likes
12
Share
Likes
27
Share
1/20/2023- So much to do pre grow and over the next 16 days, absolute first order of business is that I have to take down my current Grow---TIMBER-- Then I have a list of things I have to get done in order to be ready to start this grow 1 Feb. With that said T - 2 days until start 48 hour Flush T - 2 days until Start 48 hours of Light T - 4 days until TIMBER!!! Items that need to be done before 1 Feb 2023 1. I need to clean the tent out 2. I need to clean the equipment- Proper Sanitization between grows in Hydro is a must!!! 3. I need to get the hole in the ceiling above my tent repaired- For my last grow I had a deep sink installed in my grow room, to make Hydroponics a little bit easier and have a water source in the same room. The seals on the pipes they were installing broke and leaked through the ceiling causing some damage all the way across my grow room, I was already weeks into my grow and couldn't risk them working above my tent and it would have been very awkward positon for them to be working in as well, so have to get this done quickly between chop and germination. 4. I have to install my new light- I was using a Vivosun 4000 and for this grow I am switching up to a Spider-farmer SF 7000. 1/20/23- For this upcoming grow I am working with M/F photo seeds so I ordered 4 Sex determination kits. I recieved my my 4 Sex determination testing kits from Rimrock Analytics today. I will be using these to test my plants at week 2 of Veg so that when/if I take clones I know I am taking them off females. As well as I don't want to accidently pollinate my tent during this grow I am looking for big beautiful buds not seeded buds. :-) 1/24/2023- Harvest of current grow- Started at 2:00pm and finshed wet trim and firt batch into the freeze dryer. 1/25/2023- Next batch into the freeze dryer and cleaning all my equipment for this Grow. T-1 Day until the workers are supposed to be here to fix the hole in the Grow Room. T-3 days until I instll my new Gorilla Grow Tent and my New Light Spider Farmer SE-7000 for this grow. T-7 Days until Start of Germination 1/26/2023- Harvest is done ran through the Freeze dryer and dry tim completed. 1/27/2023- Grow Room repairs completed. Hole is gone Letting the paint dry before I install the new tent. T-2 days until Install the New Gorilla Grow tent and the new Light T-3 days until I put the hydro equipment in the new tent T-5 days until Germination 1/29/2023- Day 0- Final Pre Germination activities Germination Start T-3 days The paint on the ceiling was dry and it was time to finish prepping for Germination. I got the following items knocked off my list. New 4X4 Gorilla Grow Tent is up and ready New Spider Farmer SE-7000 Light is installed- Thanks Moony Grows for the suggestion and for the Code that got me some money off and free shipping (Moonygrows)!! I turned the lights all the way up to max and set the timer to 18/6 0600-0000. I will keep an eye on the temperature and humidity without my plants and see how hot it gets with the new light. I put my Hydro system back together and put in 40 gallons of water into it, time to monitor for leaks the next few days. I Setup my cloning machine for Germination Days 3-11 1/30/2023 let me break down the situation, ROOM in the TENT.. Enough said.. No really I tried putting my exhaust system up in the new tent with my new light, The light is so big corner to corner that it really didn't give me enough room for the lights be be raised, with the exahust hanging the buckets my plants are Starting in are 2 and 1/2 feet off the ground, great for plenty of room for roots but not so great for upwards space for the plant to grow. In a 6' 11 tent with the exauhst in side and hanging that only gave me a little over 4 feet of grow room to play with. My last grow if you saw my diary, anyone could tell I was struggling to keep the buds off the lights. No good, Since space was such an issue I was running my carbon filter inside on the ground but It really needed to be up sucking the heat out not shooting the cool out. With that setup I was sucking air through the filter and pushing it out the tent at a bottom exhaust hole cold out. Wasn't doing me any good for my heat. I was hitting temps of up to 85 degrees. I bought a portable AC unit and have been running it in the grow room to try and keep temps below 85 and I have had to lower the power on my lights during grow also not ideal.. With that said a friend of mine MoonyGrows (Check out his diary) took the time to look at my issue send me a picture of my grow tent setup with detailed instructions on how to suck the air out from the top but putting my filter and fan on top of my tent so no room issue and I am sucking the air out from the top where the heat is instead of pushing the air out from the bottom where the cool is... THANK YOU MoonyGrows For taking the time to help me get this straightened out.. Now I have room and I have the exhausts working right and now my temps with everything at 100% are topping out at 80 this dropped the temp by 5 + degrees at 100% max. T-2 days until Start of Germination Prepped my seed tray with humidity dome Prepped my Rapid Rooter plugs. I Used RO water, and I added a few drops of Hydrogen peroxide to Oxygenate the water. I then PH balanced between 5.7-6.0 the same that they will be getting in the Cloning Machine and when they get to thier final grow pod. I perfere the 5.8x range and I hit 5.84 for these rapid rooters. If you want to see a complete video on the process HowWeedGrow has an amzing video that shows step by step how to do it and explains it better than I ever could including how to plant the seeds. Which I will cover when I get to that step on Wed. https://www.howweedgrow.com/how-germinate-weed-seeds-cannabis-rapid-rooters/ 1/31/2023 T-1 day until Germination Start All set and ready have my Rapid Rooter plugs ready to go have my seeds out.. Have my seed tray warming up tonight. Tomorrow morning right into the Rapid Rooter then strait into the tray. I will spray the dome to start the humidity in there. 2/1/2023 Germination Day!! Let the games begin! 0600am Put the seeds into the Root Riots. And then put the seeded Root Riots into their first home the Seed tray. I have them under the light 24/7. Sprayed the dome 7:30pm Sprayed the Dome to keep humidity going on the dome. 2/2/2023 Day 1 of Germination Sprayed the Dome in the morning Sprayed the Dome in the evening 2/3/2023 Day 2 of Germination Roots are starting to come out the bottom of the root riot plugs and the heads are slowly popping out of Number 4 just below the surface. Afternoon- Number 4 has popped up Evening- Number 3 has popped up as well. Happy Dance!! 2/4/2023 Day 3 - Germination Surprise Surprise Surprise- all 4 have now poked their heads up.. Happy day!! 100% Germination succeeded. Now major milestone to track is how many are female and how many are male. I will take look at the roots this afternoon/evening and see if they have enough root to go into the cloning machine for the next 7 days before they go into their Hydro Pods. Day 3 - Germination - Evening.. Roots looked good and they were tall enough to make it into the cloning machine. Now that they are all in the cloning machine I have switched the lighting to veg state 18 on 6 off. 2/5/2023 Day 4 - Germination - Morning All the Ladies (fingers crossed) looking great stretching nicely and look nice and green, Photo synthesis underway.... UPDATE!! After a very interesting POD cast on FSTS by Dr. Bruce Bugsbee from Utah University, I have shifted my lighting to 24 hours on through seedling and then I am going to shift to 20 hours on the rest of Veg. 2/6/2023 Day 5 - Germination While Checking on my conditions inside the new tent last night, I found that the Humidity was down to 39 Percent. I added an AquaOasis Cool Mist Humidifier, the reason I selected this humidifier is that I needed one that could be turned on and off utilizing my Inkbird Humidity Controller IHC200 that I have my Pro Breeze Dehumidifier currently running with. Root structures are starting to get there about 1/4 of an inch. 2/7/2023 Day 6 - Germination Everything seems on track more roots poking out of each today. They are each getting a little taller as well. Checked in the evening and number 3 was drooping the Root riot plug on the bottome was dry and the roots were not in the water yet. I raised the water just enough that the longest root that was sticking out is now hitting the water. 2/8/2023 Day 7 - Germination Everything looked good while checking in on them this morning number 3 is now full up and no droop again. 2/9/2023 Day 8 - Germination T-2 days until Plant into Forever Pods and we start week 1 of Veg .. :-) Surprising thing to me is that number 1 and 2 were later in popping then 3 and 4 but the roots are growing longer in 1 and 2. 2/10/2023 Day 9 - Germination Number 1 and Number 2 are definitely ready for transplant today.. Based on how they were yesterday and where they are today I am hoping by tomorrow 3 and 4 are ready. Today they look to me where 1 and 2 did yesterday.. I really hope 3 and 4 catch up by tomorrow since.. T-1 day until transplant to new/ final home for grow. Need the roots long enough to have some clay down in the basket to keep the root riot out of the water and only roots in the water.. 2/11/2023 Day 10 - Germination Today they got placed in thier forever Home, 7 days from Sprout and 7 days until Week 1 Start. PPM- 180 this is water out of the Tap Temp Water: 70.7 Temp Tent: 77 Humidity: 40% I have a humidifier going 24/7 to try and bring this up.. I also have Humidity Domes on each plant. 2/12/2023 Day 11 - Germination Sprayed the domes, all are looking good.. Nothing much to do at this phase but Keep monitoring the PH level in the system and making sure they have a comfortable home. T-6 days until Week 1 start 2/13/2023 Day 12 - Germination Sprayed the domes, They were looking a little yellow today so I moved the light down to assist. Nothing much to do at this phase but Keep monitoring the PH level in the system and making sure they have a comfortable home. T-5 days until Week 1 start 2/14/2023 Day 13 - Germination Sprayed the domes, They were looking a little Florissant yellow today, with what looks like slight burn on the tips, I talked with a fellow grower and we agreed that It was probably that I was drowning them, Yes you can drown you plants even in Hydro, but only early on.. :-) It usually happens with the water being too high, which soaks not only the roots but the medium (root Riot plug in this case). I lowered the water from touching the bottom of the pot to about 1" away. This will probably take 3-4 days to resolve. I will continue my daily monitoring. T-4 days until Week 1 start 2/15/2023 Day 14 - Germination Sprayed the domes, continue my daily monitoring they look a little darker green instead of lime green now that I lowered the water levels in the system, so I think that I might have resolved the issue but it will take a few days for recovery to happen. T-3 days until Week 1 start 2/16/2023 Day 15 - Germination I looked in on them this morning, 3 and 4 look like they are doing well and recovering nicely. Number 1 not so much it has brown spots on the leaves, this very well can still be a side effect of the overwatering but I decide to go ahead and add Nutes earlier than I was planning just incase. I was going to wait until Saturday but I think intervention is necessary now especially after drowning them early on. I added 1/2 what I am planning on adding for week 1 start. I also think I am going to adjust my chart to add 1/2 2 days after plant from now on. I don't think it would hurt it to have some Nutes to pull from. .25ml/Gal Calmag = 12.5ml 1ml/gal GH FloraMicro= 50ml 1ml/gal GH FloraGro = 50ml 1ml/gal GH FloraBloom = 50ml T-2 days until Week 1 start = I will drain the system and start it over on Saturday with Week 1 Nutes. 2/17/2023 Day 16- Germination I didn't even want to post today after looking in on them this morning, 3 of the 4 are now showing signs of dronwing.. Brown spots on the leaves, the water levels were still too high.. I drained about another inch out of the tanks.. Will see how quick they recover.. I start week 1 tomorrow and will have to ensure my water levels are at least 1" away from the basket on this round.
Likes
167
Share
⭐ TrolMaster tracking ⭐ I started to track my crop during week 15, when I got the Tent-X TCS-1 by TrolMaster. First impression was: this is too professional for me, I can't handle setting it up and using it well. Then I started reading some posts on Instagram, I visited their site and in 5 minutes my cultivation experience took a huge step forward with disarming simplicity, I couldn't believe it. I have uploaded tracking videos from the TrolMaster app for each week from the 15th to the 19th, as well as the two weeks of drying stage. ⭐ Controller Chronicles ⭐ Day after day I appreciated the clarity and precision for data, access to all settings and instant readings by connecting a WIFI router to the controller's LAN port. I loved the possibility to dim my lamps remotely, or even automatically based on the temperature in the box! 🌱 GERMINATION (2 days) Seeds in a glass of EC 0.4 tap water for 10 hours, then in root riots and under the lamp. They sprouted after 48 hours from dry seed. 🌿 GROWING STAGE (10 weeks and half) I decided to give these plants a long vegetative growth and this allowed me to do a lot of training on both. Starting from the 4th veg week I started with defoliation sessions every two weeks, for a total of four during the entire vegetative phase. The last defoliation was done a couple of days before the switch, in order to allow the lower parts of the plant to get as much light as possible. Furthermore I did Topping on week 6, cutting the apical branch, then on week 8 I did Topping again on several sites, as well as SuperCropping on the highest branches to make the canopy uniform. The light cycle I used is 18/6 and the last two veg weeks I lowered the light hours to 16/8 first and 14/10 then. During the veg stage I made 4 DWC change, PH was always between 5.5 and 6, about EC I started with 0.6 and was 1.4 on the last veg week. 🌸 FLOWERING STAGE (9 weeks) I started this phase after 36 hours of darkness, I then changed the DWCs solution (adding a flowering stimulator). Then I mounted the ScrOG-net about 50 cm from the base of the plants and I wove the phenotype #1 through the net occupying at least 60% of the available space; the phenotype #2 stretched shortly after the switch and I used the net only to widen the central branches. They showed the pre-flowers two weeks after the switch, then I made two defoliations on week 3 and 5 flo. During the last four weeks of flowering (weeks 6-9) I simply paid attention to the PH-EC levels to provide the roots with optimal conditions. I then kept the TEMP-RH-VPD-PPFD values ​​under control and this also thanks to the Tent-X controller by TrolMaster which allows me to provide optimal conditions also above. I chopped them when trichomes were about 85% milky and 15% amber. During the flowering stage PH was always between 5.8 and 6.2, about EC I started with 2 and was 2.3 on the last week before flush. ✅ HARVEST - From dry seed to harvest: 140 days (2 days germination + 75 days veg + 63 days flo). - Chopped after 4 days flush and 48 hours in dark; - Wet trim, removed fan leaves. ✅ DRYING STAGE - Time: 14 days; - Average: 20° C - 50% RH. - After that I made a dry trim, removed branches and sugar leaves. ⚖️ DRY WEIGHT - Phenotype #1: 230 gr buds + 25 gr larf; - Phenotype #2: 105 gr buds + 50 gr larf. So, the overall dry weight is: 335 gr buds + 75 gr larf. ✅ CURING STAGE - Curing is done after 30 days with Boveda 62%.
Likes
5
Share
Our King Louis Automatic are truly those plants with a great desire to grow, the one in main lining is perfect. Remember that we are growing 1 Plant worked with the techniques and one left to grow without cutting techniques to preserve its speed. In this diary we find the plant that is growing normally, nice and straight just with a little cleaning and LST at the bottom only on the branches and not on the main stem. The plant had a moment of over at the end of the vegetative phase when it was time to move into flowering it had a manifestation of rusty spots on the sunbathing leaves but now at the beginning of flowering everything seems fixed. In my opinion it is a lack of K but yes The comparison is the salt of the experience so the plant in the other diary will be worked very differently go and see it to compare them. We have started the Plagron fertilization program, we are in 100% organic configuration, the soil is recycled Promix + 1/3 fresh soil + 10% Perlite + RQS Mycorrhiza Mix (4 g in the mix, 1 g under the small fiber pot). We are administering // 1 ml/l Power Roots - 1 ml/l Pure Zym - 1 ml/l Sugar Royal - 3 ml/l Alga Grow We have sprayed Vita Race Foliare 3 ml/l. https://plagron.com/en The doubts about the compatibility between Pure Zym and mycorrhizae have been dispelled, they can get along according to Plagron experts. If someone tells you that enzymes eat mycorrhizae, which in principle may seem possible, explain to them that it is not true. https://www.royalqueenseeds.it/growing/452-easy-roots-mix-di-micorrhize.html Love this strain perfect for main lining! ---- https://www.zamnesia.io/it/11238-zamnesia-seeds-king-louis-automatic.html Brief description of Zamnesia // Say hello to true royalty with King Louis Auto, an autoflowering version of the original King Louis. Bred from OG Kush, LA Confidential and a premium ruderalis cutting, King Louis Auto delivers premium bud fit for a king just a few weeks after germination. As if that wasn't enough, her small size and vigor make her great for almost any grow environment. Incredibly efficient King Louis Auto has inherited the best traits of her photoperiod cousin, all wrapped up in a fast and easy-to-grow seed. With good soil and adequate watering, King Louis Auto seeds will quickly grow into robust and vigorous plants. Once fully mature, these plants will not exceed 80cm indoors, meaning they can easily fit into even the smallest of grow spaces. Likewise, outdoor plants will only reach 100cm, making this strain ideal for guerrilla grows or other environments where discretion is key. And if that wasn't enough, King Louis Auto only takes 9–10 weeks from germination to harvest, after which she'll reward you with yields of up to 300g/m² indoors and 150g/plant outdoors. With its pungent terpenes and high THC levels, King Louis Auto offers a fragrant and relaxing experience. When you open your jars of buds, you'll immediately notice intense scents of pine, damp earth and fragrant wood. After inhaling her equally complex smoke or vapor, you'll be hit with a deep, relaxing body stone that's perfect for those moments of well-earned rest and relaxation. With 24% THC, King Louis Auto hits hard and takes effect within minutes, working every muscle in your body to relax. Perfect for evenings, weekends or any time you want to unwind. Buy your seeds now and experience the king of sweet strains. You can find the entire world of growing on Zamnesia and more, just take a look at the site and you will find "all the best that nature has to offer" in various shapes and colors. The new strains are fantastic and the old ones are no exception... --- // www.zamnesia.com
Likes
19
Share
@nonick123
Follow
Día 20 (13/05) Todas las plantas muestran las preflores! Día 21 (14/05) Baño de sol de 2 horas! Día 22 (15/05) N/A Día 23 (16/05) Riego 750 ml H2O + Regulator 0,15 ml/l + CaMg-Boost 0,25 ml/l + Startbooster 0,25 ml/l - pH 6.2 Día 24 (17/05) Las plantas salen al exterior! 😍 Les aplico heno como mulch (acolchado) Día 25 (18/05) Riego 250 ml solo agua todas las plantas Día 26 (19/05) Banana Purple Punch Auto está sedienta! Riego con 750 ml H2O + Regulator 0,15 ml/l + CaMg-Boost 0,25 ml/l + Startbooster 0,25 ml/l + TopBooster 0,2 ml/l- pH 6.2 💦Nutrients by Aptus Holland - www.aptus-holland.com 🌱Substrate PRO-MIX HP BACILLUS + MYCORRHIZAE - www.pthorticulture.com/en/products/pro-mix-hp-biostimulant-plus-mycorrhizae
Processing
Likes
29
Share
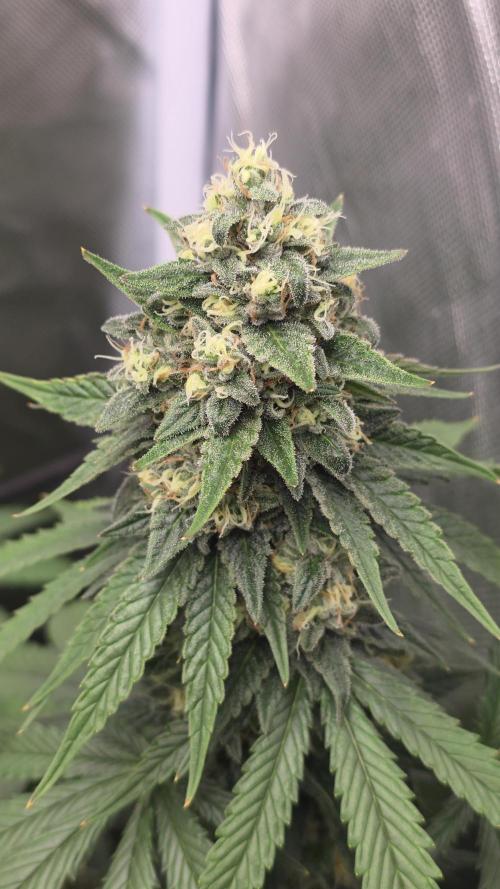
Fast Buds new strain CA (still no idea what CA stands for yet). Growing strong and starting to show bud sites now, but the leaves look a little more yellowish than I'd like. I was not checking PH previously and started checking the PH this week. My well water comes out of the tap around 7.3-7.4, which is a bit higher than most recommend. This week I PH'ed down to 6.3 and fed her Recharge only. Hope to see some more green coming back over the next few days.
Likes
Comments
Share
Here our Zookies, as I anticipated, have started off great and are starting to give their best In this diary you will find the plant that we will let grow straight, applying only a few techniques that do not involve cuts to preserve its speed characteristics. After taking the first fertilizers the plant is really doing very very well at a great pace and we expect great things the internodes are growing very well and we are practically almost in pre-flowering. The other one you will find in the next diary worked with Topping / Main Lining / Main Folding Comparison is the salt of experience. We have started the Plagron fertilization program, we are in 100% organic configuration, the soil is recycled Promix + 1/3 fresh soil + 10% Perlite + RQS Mycorrhiza Mix (4gr in the mix, 1 gr under the small fiber pot). We are administering // 1 ml/l of Power Roots - 1 ml/l of Pure Zym - 1 ml/l of Sugar Royal - 3 ml/l of Alga Grow I have doubts about the compatibility of Pure Zym with mycorrhizae. If in doubt, ask the experts, do not mix too much at random. https://plagron.com/en The doubts about the compatibility Pure Zym / Mycorrhizae have been dispelled, they can go well together according to Plagron experts. If someone tells you that enzymes eat mycorrhizae, which in principle may seem possible, explain to them that it is not true. https://www.royalqueenseeds.it/growing/452-easy-roots-mix-di-micorrhize.html Try this variety, it is a top strain of the last few years very high level of thc ---- https://www.zamnesia.io/it/11174-zamnesia-seeds-zookies-auto.html Brief description of Zamnesia // The result of the cross between Animal Cookies, GG#4 and ruderalis, this compact variety produces top quality buds, maintaining all the charm of a modern US hybrid. Thanks to the hard work of the Zamnesia genetics team, Zookies Automatic is easy to grow, fast flowering and exceptionally vigorous. Regardless of whether you grow indoors, outdoors or in a greenhouse, if you are looking for a stable autoflowering strain that is quick to harvest, Zookies Automatic is definitely the one for you. Like all Zamnesia autoflowers, Zookies Auto promises rapid harvests of top-quality bud with minimal effort. And she delivers on that promise. After germination, Zookies Automatic plants grow vigorously for around 3–4 weeks. At the end of the pre-flowering phase, plants typically reach a height of between 90–110cm, depending on the size of the pot. You can find the whole world of growing on Zamnesia and more, just check out the site and you will find "all the best that nature has to offer" in various shapes and colours. The new strains are fantastic and the old ones are no exception... p.s. no hermaphrodites so far, can you growers say the same? ---- // www.zamnesia.com
Likes
Comments
Share
Likes
115
Share
🍒 🍒 We are now 70 days from seed and we are 42 days in flower 🍒 🍒 Everything is going great 👍 so I've changed there feeding program now to there flower nutrients 👍 Ok 👍looks like it's full steam ahead 😋 There looking fire 🔥 🍒 🍒 🍒 🍒 🍒 🍒 🍒🍒 🍒 🍒 🍒 🍒 🍒 🍒🍒 🍒 🍒 🍒 🍒 🍒 🍒 Thanks for the support my friends 🙏
Likes
4
Share
Likes
2
Share
@Naujas
Follow
14 days, the girl looks great, a little wrinkled due to the humidity which is only 40-45%, but I don't know if all this will soon resolve itself, I just need to water it more often :) this week I'm changing the light to mars sp150 which will stay until the end of growth :) I'm giving the girl 6.3 ph water with 2 ml of heaven :) good luck to everyone.
Likes
9
Share
@GrowStiga
Follow
a planta vem sendo regada com água de torneira desde a germinação vem se desenvolvendo muito bem nas ultimas semanas, na proxima semana a planta irá mudar de ciclo para floração veremos...💫💨💨💨
Likes
5
Share
End of week 9 harvest time for the blueberry. She grew very well and packed on a lot of weight in her last 2 weeks. I will update this in about 2 weeks with dry weight and first smoke, taste, flavor review. This will be my last grow of this strain for a while. Update - Mar 7 - dry bud weigh-in 218.3 grams. She had big buds, nice density, but not as heavy as I had hoped for.
Likes
8
Share
It's Week 01 Flower. For My 2 Kombucha Cream by atlasseed . And For My Snow White & SpliffStrawberry by Spliff Seeds Amsterdam . Today was Feeding Day and I also did a small Defoliation and LST all 4 Plants . My Kombucha Cream 3-Part And Snow White Received 4ml Of Emerald Harvest Nutrients Grow, Micro, Bloom, 6ml Of Emerald Goddess, 4ml Of King Kola, 4ml Honey Chome and 4ml Of Quad.AG Products Fulonic. Ph at 6.0 Ppm at 686. On Runoff My Kombucha Cream 3-Part Ph is at 6.3 and the Ppm is at 1004 I will keep a eye on the ppm on this one for the next few feeds. My Snow White Ppm Runoff is at 696 and Ph is at 6.2. My Kombucha Cream 2-Part & SpliffStrawberry Received 5ml Of Emerald Harvest Nutrient Cali Pro Grow A&B, 6ml Emerald Goddess, 4ml King Kola, 4ml Honey Chome And 4ml Of Quad Ah Fulonic Ph at 6.0 Ppm at 553. On Runoff My Kombucha Cream 2-Part Ph is at 6.5 Ppm is at 657. My SpliffStrawberry had a Ph of 6.1 Ppm is at 756. On my next feed I will ph at 6.2. All 4 Plants had there last transition feed. Next feed I will feed the Roots and give them a nice Flower Feed 😁 Happy Growing Growmies 🤘🏻