


Likes
Comments
Share


@1soloflowerlover
Follow
I'm just getting started I must be crazy trying to do 10 plants all alone..

Likes
10
Share

@Thedibber
Follow
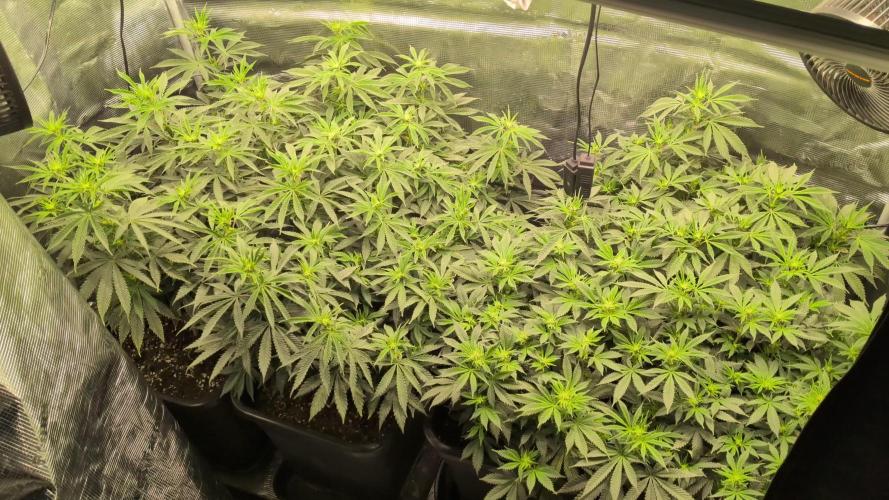
Week 2 starts the 3 plants on the right are the Blood moon gelato. Jungle inc 😅
Likes
5
Share


@therealgrowmie
Follow
Autumn is coming, Growmies—at least in our tent environment!
The bottom leaves are starting to put on a beautiful fade, while the buds are stacking up day by day.
We can see clearly now the rain... that we’re in for a sweet harvest in just a couple of weeks!
Airflow is crucial from here on out, and since I’m not taking any chances with mold, I’ve dropped the VPD to maintain a steady humidity below 55%.

Likes
8
Share


@TrueNorth
Follow
-Strain: Purple Lemonade - Fast Buds
-Tent: 5x5 Gorilla Grow Tent
-Lights: Budget LED Grow Lights 2 x 250 Watt
LED Full Spec/Red Spec mixed boards
-Light Cycle: 18/6
-Soil: Fox Farm
-Air Circulation: AC Infinity Cloudline T4 Inline Duct Fan
WECLOME BACK GROWMIES! Week 8 here with our GELATO AUTO by Fast Buds!
January 14, 2020 (DAY 52) - Hey there growmies sorry for the one and only update this week, i got sick and just cant do it. i hope you all understand.

Likes
7
Share


@TherealNICOGREEN
Follow
Har ikke vært i stand til at give rapport sidste uge da jeg glemte hende og hun ikke havde det godt der ! Nu har hun fået det bedre og SÅ MEGET BEDRE HUN SNART SKAL HØSTES HVIS I ER ENIGE OG HVIS I VIL HJÆLPE MIG SÅ SKRIV LIGE HVORNÅR I TROR HUN ER KLAR TIL HØST;)

Processing
Likes
Comments
Share


Likes
15
Share


@Springbokke
Follow
Доброго времени суток
Сегодня конец первой недели перевода на цвет. Перед переводом поставил сетку, от верхушки растения до сетки было 20 см(нужно было ставить не выше 10см от верхушки растения), девочка моя выросла за неделю 19-20см, что оказалось не достаточным и мне пришлось поднять сегодня горшок на 4-5см. Так же я сегодня поставил железный хамут у основания, но я еще не стал сильно зажимать его. а так сказать подготовил для дальнейшего зажима(и за сетки мне бы было проблематично в будущем это сделать). Планирую зажать хамут где то через недели 3-4, не раньше. Яркость лампы 3500К увеличил до 75%, а 5000К до 100%, через неделю планирую убрать 5000К и поставить 200вт 3500К, и 200вт 3000К.
Поливать стал каждый день, сегодня девочке моей 68 дней жизни.
Полил ( 980ppm )-3л Cal-mag Xtra - 0,5мл/л; Bud Candy - 2мл/л; 1-й день предцвета
Полил ( 919ppm )-3л 2-й день предцвета
Полил ( 903ppm )-3л Bud Ignitor - 2мл/л; 3-й день предцвета
Полил ( 754ppm )-3л 4-й день предцвета
Полил ( 936ppm )-3л Bud Candy - 2мл/л; 5-й день предцвета
Полил ( 872ppm )-3л Bud Ignitor - 2мл/л; Piranha - 2мл/л; VooDoo Juice - 2мл/л; Tarantula - 2мл/л 6-й день предцвета
Полил 3л 7-й день предцвета
До харвеста 9-10 недель, не думаю чтоб заняло больше.

Likes
8
Share


@Gonjuk
Follow
GreenHouse seeds è sempre una garanzia, super lemon haze più volte vincitrice di premi non delude mai, una pianta fantastica

Likes
37
Share


@Smoking_Joe_Frasier
Follow
Nurturing My Cannabis Plants: Balancing Light and Protection
In the first half of the day, I place my seedlings on a south-facing windowsill to ensure they catch some light. During the evening hours, they travel back to my balcony. This routine helps them get the light they need while staying safe from pests.
Protecting My Plants: A Grower's Dilemma
I'm hesitant to leave them outside permanently because, unfortunately, all my other vegetables have been eaten by snails. I certainly don't want the same fate for my precious cannabis plants. For now, they’re enjoying a mix of south windowsill and balcony life, which seems to be working well.
First Watering: Preparing for Growth
Once the coco mix dries out, they will receive their first feeding. Terra Aquatica Tripart is my nutrient trio of choice. I'll start with a half-dose, as recommended by the feeding chart, to ensure they don’t get nutrient burn.
First Feeding: A New Stage
My ladies seemed to enjoy their sleepover in the greenhouse. Now it's time for their first feeding. I added Cal-Mag to achieve an EC of 0.5 mS/cm to start with. I gave them a half-dose of nutrients as described in the chart and watered with enough runoff.
Likes
1
Share


@Geili_Seili_fireinfireout
Follow
Day 1 in flower. The last clones from this company. But 4 in the garbage.

Likes
Comments
Share


Likes
6
Share


Likes
13
Share


@Drawer
Follow
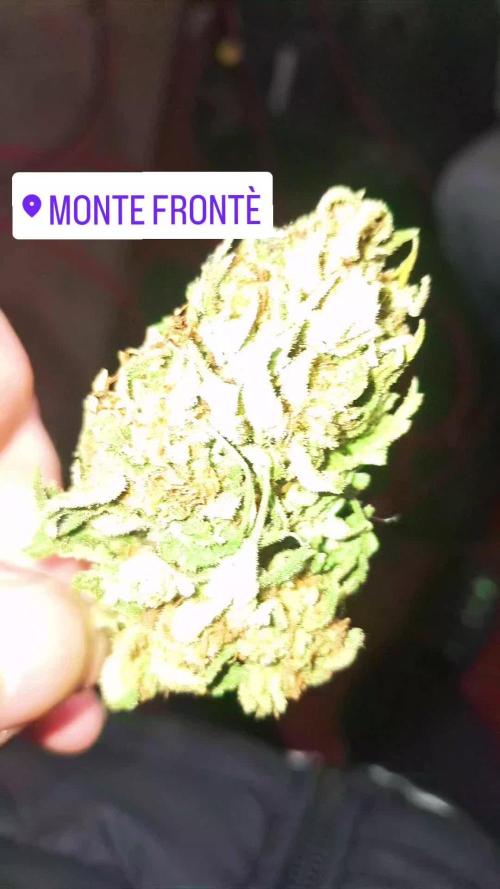
I still found a few places with bud rot and I keep removing every spot I see.
The plants have been doing fine beside that, they are looking and smelling great, they are super dense and I can't wait for them to be ready.
Most trichomes are still clear so I am awaiting for the first ambers to show up, aiming for around 5% amber and 95% milky.

Likes
Comments
Share


@JardineiroBr
Follow
Perdi mais uma semente , agora vamos tocar essas duas para ver se elas crescem bem saudáveis e fortes.
Estão com um bom tamanho vieram para o quintal, ainda pode ter algum ataque de pássaros mas preciso do espaço na estufa para novas sementes que germinaram.
Perdi mais uma só restou uma , mas ela está bem .

Likes
3
Share

@MadProfessor
Follow
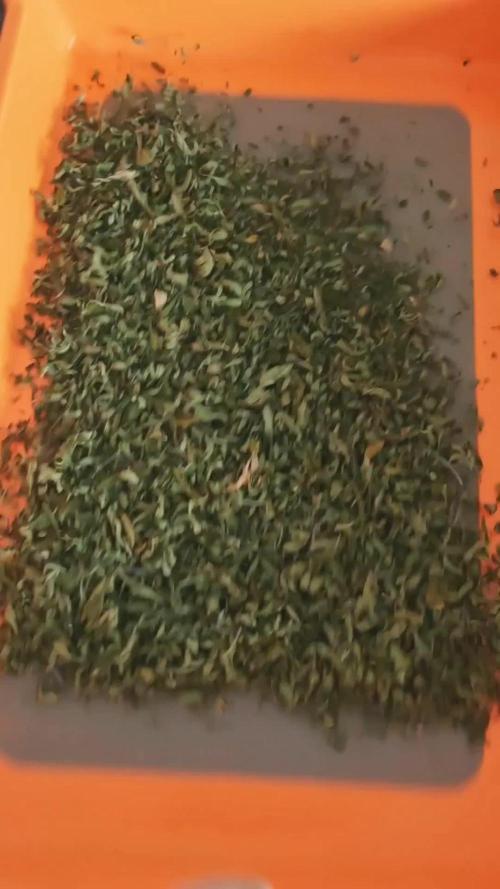
Im Happy that I coule harvest the plant without any Budrott! I am glad that this 8 years old seed germinated that Well and a plant vigorous Like her was thriving since the begining of her life cycle ❤️ a big thank you goes out to Humboldt!

Likes
12
Share


@Lushbloomz
Follow
A little trim and nutes. She's filling up my little make shift grow tent. Growing great!

Likes
10
Share


@CANNASIM
Follow
A lot of rain and wind, continuously. Temps have dropped as well.
I’m reading another week or two to chop this plants.
Sativa dominant hybrids did the best, the Fastberry and the banana purple punch did not really develop as the other two.
In specifics the cbd crack developed sizable buds, and the blue dream as well, the flowers are not as developed tight and dense as in the indoor grow. A bit of fox-tailing nothing too expressive.
Minimal work, as per the setup chosen, an no extra nutes this week.


Likes
8
Share

@eldruida_lamota
Follow
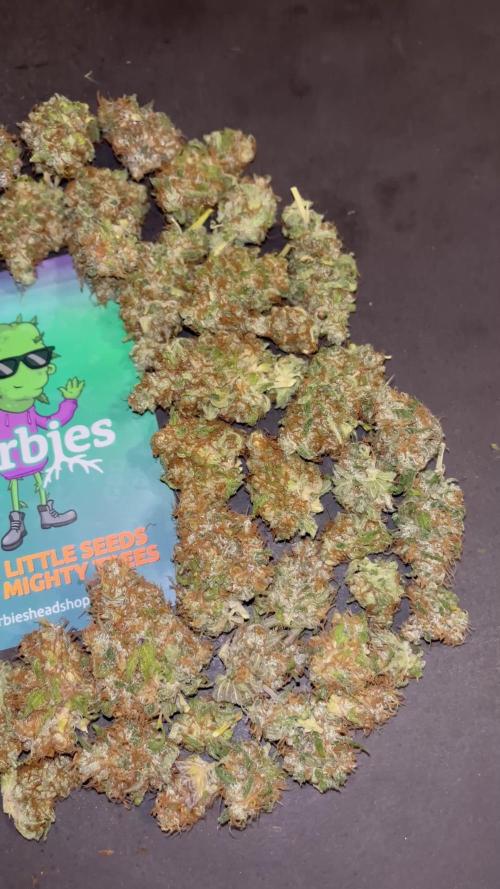
Venga familia ya viene la cosecha de estas Runtz Punch de Herbies, que ganas que tenía ya de darles machetazo.
Para empezar es buena variedad un poco tardía de lo que dicen pero me encantó cultivarla , aún con la plaga de trips que sufrí las 2 últimas semanas aguantaron y sacaron unas flores alucinantes.
Las flores aparte se ven resinosas.
La planta pues si creció vigorosa , no tiene mucho satélite es más porra central.
a sido una genética con la que disfruté bastante, no fue muy complicada cultivarla.
Agrobeta:
https://www.agrobeta.com/agrobetatiendaonline/36-abonos-canamo
Mars hydro:
Code discount: Eldruida
https://www.mars-hydro.com/
Hasta aquí es todo , espero que lo disfrutéis, buenos humos

Likes
15
Share


@Viccrazyweed
Follow
Big improvement with the custom tent
Gyal are showing real snow on top of the bud
Really excited with this week, seems like another week only water and sugars and they’ll be done
How do they look growmies?!
Thanks for reading and good smokes for everyone!! 🖖🏼
Likes
16
Share


@thefrozenking
Follow
starting week 8!
Brrrr its getting frosty in there! :-)
they are really gettting tall.