Likes
Comments
Share
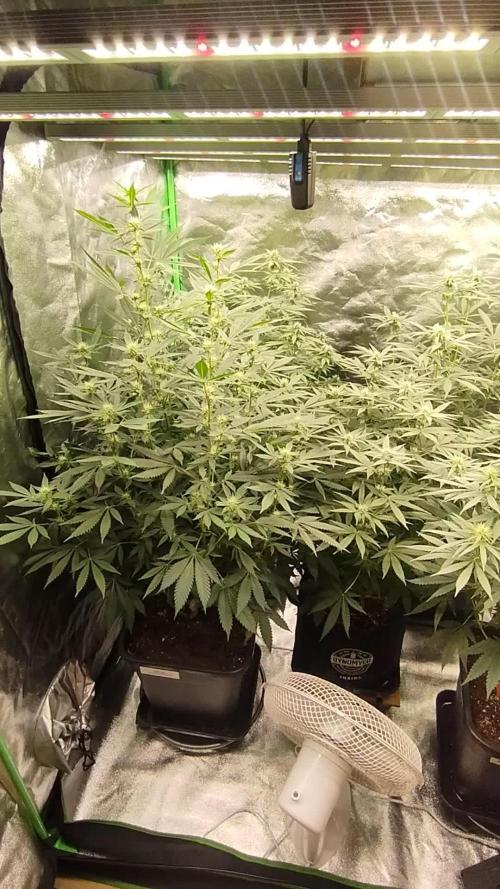
I think multiple things have gone wrong during this grow. resulting in Buds that are really not great to smoke. buds smell funny. it will get you high but it's just not pleasent for smoking. i don't think this is because of this strain but more of the way i have grown it. I decided to grind all and i'll make THC oil out of it. really glad this grow is completed tho.
Likes
35
Share
Bueno familia ya finalizamos, estas red hot cookies son una cepa bestial. La verdad que el secado muy bien 7 días en Malla y a los botes, 45% humedad y 23 grados es la temperatura ambiental que han tenido en el secado. 4 plantas que se cultivaron en un armario de 1.20 pero estos ejemplares solo ocuparon 80x80. Así que ya está cultivada esta gran variedad que es novedad este 2020, americana de la familia Cookies, la Tropicanna Cookies (Girl Scout Cookies x Tangie) con un porcentaje de thc entre los 17/25%, una bomba. Que decir de Agrobeta, lo peta 💪 en cuanto a nutrientes. Un saludo y buenos humos.
Likes
4
Share
Since this is my first time around, before getting started, I took a week to finetune my freshly built setup. Took me a couple of days to get the parameters in order, mostly battling high humidity due to wet soil straight out of the bags. (Plagron Promix) At the beginning of this week i first put the pots in the tent (actually a 4 by 5) and started feeding the soil the myco alraidy. Figured it could be benificial. Them being autoflowers, I planted the seeds in the original pots and covered them with solocups. Watering mostly around the solocups multiple time per day wit a pressure dispenser. I took about 72 hours for the seeds to start germinating. Kept Par levels on the high side (350 and up day by day to 480 in the last days of week 1, probably less to the plants themselves because of the solo cups) thinking the strong genetics could handle it. All the while checking for signs of to much of it. That didn't occur, even after taking of the cups a day or two after germination. Nice as I am, I did not take any pictures, this week! But! some footage from the room where it all happens :)
Likes
20
Share
Here we are again ready to start again, always under the sign of Zamnesia, we make our fantastic plants and we show you what we are capable of. We have 5 autoflowering strains and 5 photoperiodic ones and now we present them to you. We are faced with a Classic of recent times: Runtz. It certainly does not have the age of Northern Lights but it is a truly magnificent plant and Zamnesia perhaps also has the best version. Truly super I have grown it in all sauces let's see this one. Gelato and Zkittlez are my all-time favorite mums perhaps. To explain my germination method which is a combination of experiences acquired in the field and readings of the right advisors, I have chosen to divide it into phases so whoever wants can follow them and understand better step by step. - Preparatory Phase ---- Check the average temperature in the room, humidity status to understand if it is the case to start or wait, I decided for the end of August because the temperatures start to drop towards the 22-25 degrees recommended for germination. Then another thing more or less credible depending on the sensitivity is the control of the lunar phases. I believe in it a lot, it is a method that ancient farmers used to understand when it was best to plant depending on the attraction of the moon. To make my life easier I use a simple app that advises you on the right time to plant, harvest and put in the jar (depending on the lunar phases). - Phase 1 --- Soaking in water. There are many authoritative friends who advise against this method due to the risk of drowning, but I have always been fine and I follow the rule if it opens in water the seed is almost certainly healthy and will come out of the ground 90% normally. - Phase 2 --- Opening the seed in water. As soon as the seed opens and the root comes out a little, you have to be very very careful not to leave the seed in the water open for too long. This is why there is a risk of drowning. So as soon as the root comes out, it must be planted. Do not wait for it to stretch out a lot, you can wait a little longer in the absorbent paper, but not in water. - Phase 3 --- In the meantime, while I soaked the seeds, I prepared my pots: I use small biodegradable pots (choose the ones with holes underneath for drainage). A few hours before working with the opened seeds, I moistened the soil with water adjusted to the right pH (5.8 - 6.2) and Plagron Power Roots. The small root is now open and we can make a little hole with a toothpick, widen it and insert the seed. Not too deep with the root facing downwards. From Serious Seeds we learned the dome technique: if you put a small dome of soil on the seed the water will settle on the sides avoiding overwatering problems. - Phase 4 --- The plant emerges from the soil. So far I have not put the light, now I turn it on at minimum after half a day of soil to give direction to the seedlings. The first week the light will be gradually brought from 40% to 60% to go to 70% - 75% in the remaining weeks of veg. During the first week maximum, I keep the cycle of 24 hours to avoid stretching. Be careful not to exceed the first week at least with photoperiodic plants. - Germination % --- In water 20/20 seeds have opened for good luck I'm waiting to talk when they come out of the ground but it seems that we are going towards an excellent percentage of germination..."Not too bad"... - Soil and Food --- The soil used is entirely organic in every part and is the Plagron Promix that will be used with the 100% organic pack provided by Zamnesia complete with all the main fertilizers for your plant buy it at the link -- https://www.zamnesia.io/it/11457-plagron-easy-pack-natural.html // Strain Description // Guys, we have really reached a turning point! Our breeders have recreated one of the most sought-after strains by Californians: the very powerful and exquisitely delicious Runtz. This cross between Gelato and Zkittlez is everything you could want from a cannabis strain: tasty, powerful, balanced, productive and fast flowering. Buy the seeds and try it yourself! - Get a seed of this fantastic strain --- https://www.zamnesia.io/it/6000-zamnesia-seeds-runtz-femminizzato.html - Soil and Fertilizers entirely organic --- https://plagron.com/en - Growbox --- https://www.secretjardin.com/ - Music and sound --- I made my girls listen to 432hz frequencies and music from www.radionula.com - Z --- You can find these seeds, much more from the world of cannabis, mushrooms and an incredible series of accessories and gadgets on the reference site not only mine but of many growers ---- https://www.zamnesia.io
Likes
13
Share
This week everything is falling perfectly into place week 8 so close to the end not even funny! You can see from the tricomes shots (all from lower buds) is just around the corner of all 5 plants being done. Some is already sone like a runtz muffin and 1 persian pie, but we wait for their friends. Over week 8 have gave them only fresh water with blackstrap molases and have taken the temps even lower to 67 at night. Pushing towards that finish line!!! Next should be a harvest i would think!!!
Likes
18
Share
These ladies are really fattening up and building heavy trichomes.I absolutely love this strain as it’s my 2nd run of the frostbanger.I have increased the light intensity to 80 percent and I will continue the same feeding schedule
Likes
4
Share
Processing
Likes
6
Share
@Jubaea
Follow
The bud's are starting to to swell up stopt feeding leafs are green enough fore the last weeks
Likes
7
Share
@Jumbotron
Follow
Flushing this week or for the next two depending on how much time she needs.
Likes
36
Share
Day 179 28/10/24 Monday Last feed today possibly, using again de-chlorinated tap water pH 6. Also added calmag as a last push 💪💚 Day 181 30/10/24 Wednesday De-chlorinated tap water pH 6 only. I will add pictures tomorrow when lights off ✌️💚 Day 183 01/11/24 Friday De-chlorinated tap water pH 6 only today. Day 185 03/11/24 Sunday (End of week) De-chlorinated tap water pH 6 with Plagron PK13-14 today. Last nutrients now will allow 2weeks watering off ✌️💚 Picture and video update ✌️ 💚
Processing
Likes
Comments
Share
We simple can just recommend these strain for B.s.f .seeds a company that have new Genetics, originally from southamerica , the other one is the dan Fernando Valley these one becomes in flowering these week.
Likes
21
Share
Week 8, Day 63. September 22, 5:38pm Kaboom Mama is doing very well! She continues to grow and buds are beginning to form. I realized the plant needed more nutrients and have given full strength of all nutrients and she appears to be doing well. She now requires water every 24-36 hours.Two days ago I give her 1.5 liters of water with with pH down, armor Si, Cal mag, and half a teaspoon of Recharge. Today, I gave her a gallon of water today with all nutrients except Recharge. I plan to water again within 36 hours with armor Si, Calmag and Big Bud. The fabric bag is becoming calcified so I will flush before the next full feed. As always, thank you for stopping by. Happy growing and prosperous harvesting 💯💚
Likes
11
Share
I hate citrusy bud and this one reaks of it lol. Other than that looks good smells good (not to me lol). Water day today
Likes
6
Share
Que pasa familia, vamos con la primera semana de floracion de estas Lemonpaya feminizadas de fastbuds. Vamos al lío, de las 3 plantas, me quede con 2 por espacio, siempre pongo alguna semilla de más por si no abriese alguna por no perder ese hueco del indoor. También se trasplantaron a su maceta definitiva, en este caso de 7 litros que además provocó un shock que también solucione. El ph se controla en 6.2 , la temperatura la tenemos entre 20/22 grados y la humedad ronda el 50%. Hasta aquí todo, Buenos humos 💨💨💨
Likes
Comments
Share
Day 15 Update : Decided to grab a tape measure to check canopy heights on a whim and discovered that my light was hanging 35 inches from “Cellie” Cereal and Milk . Wowzers 👀! So I raised the plant to be 26 inches from the light that I also dimmed down to about 40% . It works out that I can try to get the most out of the end of flower stretch for the older gal who shall no more than be mentioned for reference to accentuate the great glorious glamorous “Cellie”. The humidity plummeted after I did a major defoliation of the older gals so I adjusted the airflow rate of the lower in-line fan and the upper inline exhaust fan with the carbon filter . I lowered them both to the lowest setting & the humidity returned to “normal” Let me explain my reasonings/thinking behind my adjustments which are experimental at BEST. It’s worth also mentioning without having to preset a single thing on my 70pint Dehumidifier located inside this tent it is legitimately only plugged into my PRESET humidistat controller which is set to 50%-46% RH WITH an alarm on highs of 55% and lows of 43% . In real life what this translates to is when this humidity controller triggers the dehumidifier ON @50%RH immediately the fan of the Dehumidifier begins running. However this does not help the rising humidity that is occurring (it will reach 55%-60.2%RH ). Given a fixed amount of time , the condenser(atleast what it sounds like . .again, it could be anything) turns on . It is when this “condenser” “sounding” component begins working that the humidity IMMEDIATELY plummets down to my low point of 46% So to make a long story short the humidity gets vacuumed to 46%RH & the dehumidifier turns off, bc of the PURPOSEFUL EXPERIMENTAL TWEAKING making all air exchange fans low leveled the humidity slowly but steadily rises to 50%RH then the dehumidifier is triggered on but only the fans initially and the humidity eventually reaches 55%RH-60.2%RH & then the humidity gets all its hair snatched out by the dehumidifier and drops back down to 46%RH. 😮‍💨😮‍💨😮‍💨😮‍💨 with all that said of anybody was even interested per my tents leaf canopy height temperature average good to great OR LITE GREEN TO DARK GREEN VPD for my temperature begins @ 60 & ends @ 52 which is kind of a perfect storm for OUR GIRL “CELLIE” oooooooorrrrrrrrrrr sssssssoooooo I think/hope . She still hasn’t needed watering since being transplanted, she should now ready and willing to stretch those toes and we need the opportunities to top water that soil a few times to make those dry amendments available to her . More pics of later the week coming as we go . . Hopefully . Diligence is a practice Day #17: giving her some water today, no specific amount just until she feels the right amount of “heavy”. She was given 3 different batches of water once ph’d to 6.3 once ph’d to 6.7 one ph’d to 6.5. She’s grown an inch in 2 days. Also swapped out the smart hygrometer system to a different brand . So far it has all the capability I was looking for but I need to run 2 more experiments to know for certain it lives up to my needs and its price tag 😁 Day 18 Update: she grew an inch taller nice 👍 The smart hygrometer system has reported/experience Bluetooth failures twice already(although I don’t know exactly what that means considering I purchased this for it’s Wifi capabilities ) I didn’t think to check it whilst I was away so I cannot yet say If it meets my final expectation/need I bought a soil ph meter & it indicates “my mix” is at 3.1 ph 👀 hmm 🤔 I’m wondering if this is a must fix or can I get by .eventually she will be transplanted and at that time I can use my new digital soil ph probe to construct her new blend moving forward but I am curious is I mixed another batch at 3 something ph would it matter ? In the beginning I wasn’t ph’ing any of my watering just because I assumed my soil mixture was highly acidic because of the 70ish pecernr peat moss base . I also assumed that it would be acid fixing for the water I put in it and therefore wouldn’t need to ph it and I did just fine just giving plain old tap water when thirsty until I experience VPD issues & in an effort to pinpoint what my exact issue was and how to fix it I of course eliminated all the variables and dialed in on my ph of my feed water and now my soil so it leaves me wondering does the soil need to be relatively 6.1 ph or is the 3.1 I’m flying at alright also . I checked the other 3 currently in here getting through flower & two of them are in the 3’s for ph & one of them is 6.2(the largest of them all) how ever she was the largest of them all always and oddly enough I mixed one big batch for them and transplanted them at the same time so I get two of them having the same ph as “Cellie” but the other that is in ph heaven is an oddball Should I top her here or supercrop later hmm I need to decide my vision for this thing Day 19 Update: ponytailed her youngest internode for about 16hrs she aggressively popped out of it twice ! It didn’t even work for 24hrs when I try it again it’ll be before the internode is so strong . Also rigged up a 16in oscillating wall-fan that currently being held with 2 zip ties , 2 rubber bands , & a smidget of duct tape and MAJORITY OF FAITH keeping it in place . The biggest plus to my added circulation is that I got the 16in fan for ! A win is a win . Pics uploads will be held for the next 3 days until the end of week 3 upload . Drop a thumbs up Day 20 Update : THE FAN FELL! But no one was damaged or injured . I re-rigged it . This time with duct tape , 3 popsicle sticks , 2 heavy duty zip ties & 1 regular strength zip tie . SHES SOLID NOW 😂 I did some solid rigging this time & have videoed my handy work . Also I forgot to turn my A/C back on before leaving the house so temps and humidity skyrocketed and swung for 9 hours until I got home . The temp in the tent was 84.4 and the humidity went from 42.4 to 57.5 to 42 every three mins. Day 21 Update : SHES A PRETTY GIRL. RQS says Cereal Milk is a slightly sativa dominant hybrid but the pheno of this particular seed seems to lean more towards indica I’m not mad at it ! I’m getting more stoked to see what she can do. She still hasn’t received any additional water since day #18.
Likes
3
Share
Likes
38
Share
@TrueNorth
Follow
September 23 2019 6AM- Here we are! Week 10! Feels like just yesterday they were seedlings! Great bud growth, frostier than frosty the snowmans ass! 🤣. Going to get a microscope to look in there and see if they are milky yet or not! More and more hairs are going orange, i have been lollipoping these bad girls like crazy. September 23 2019 10AM- Got a microscope! So damn cool!😱 September 24 2019 6PM- The Smell is so sweet it is amazing, almost like candy! i took some popcorn buds and they are currently drying! that is where i got those sugar leaves from, i continue to defoliate the bigger leaves covering the buds from all that beautiful light.😘 September 25 2019 7AM - Today i started the flawless finish by advanced nutrients!!😎 September 25 2019 6PM -The buds have honestly thickened up over night it seems to happen as i blink lol i love growing, amazing strain! definitely recommend this strain for beginners as you can see i made many mistakes! September 26 2019 6PM - i took the videos and photos when i took the ladies outside for the first clean water flush through the whole thing. i will continue flawless finish both are looking amazing. the smell is so good, Those popcorn buds i took off are so amazing i can not wait to have the full finished product!😍
Likes
28
Share
@Chubbs
Follow
420Fastbuds FBT2307 Week 9 What up fellow growers. Weekly update for these three amazing girls. All seem to be growing good even the one to the left that's been fighting me the whole grow. The other two's flower sites are swelling up nice at this stage of flower. The middle one has decided to go into beast mode since transitioning into flower showing growth daily. Over all no big issues to be to worried about getting some fade/yellowing in the leafs but over all Happy Growing.
Likes
2
Share
Suffered a little burn, but flushed it and voila, she is back up and running beautifully. Day 18/19 she has started spitting leaves out left right and centre. Can see little calyxes and hairs coming through. Really is coming along nicely The Critical is a photo period as you know, she too is coming along beautifully. Gonna veg her for 2-3 more weeks and begin flower for 6-8 weeks. Will do more updated on it.
Likes
31
Share
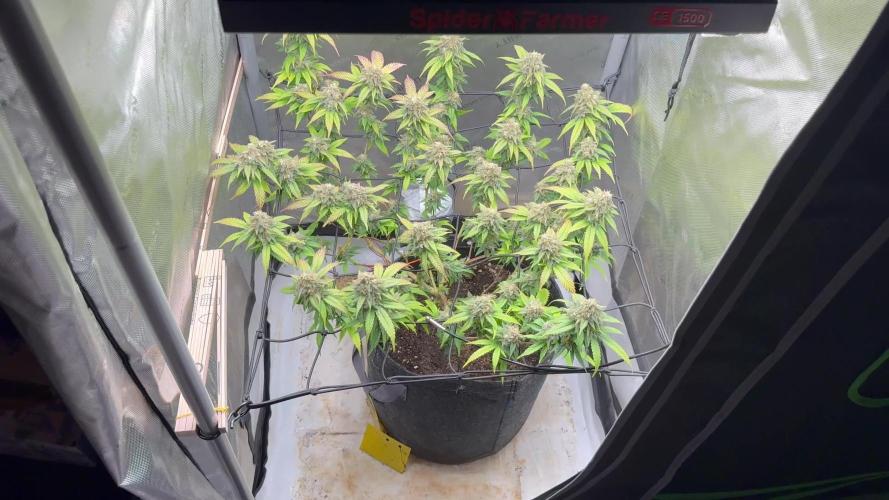
I think she's suffering from some light burn from my LED's, take a look at the pics of the top bud sites. I completely rearranged my tent and got the LED on her side up as far as it can go. I hope that helps. The buds themselves look completely fine but the sugar leaves are turning dark purple and yellow. This is only happening on the upper most bud sites. Any other feedback suggestions are welcome. Please comment away.🙏 I got some Fox Farms Organic Big Bloom this week and added it with Recharge in this weeks feeding. Looking forward to seeing the results. Feb 5, 2018 update: Raised the LED light even more and removed most of the damaged leaves.