
Likes
Comments
Share


@love_2_grow
Follow
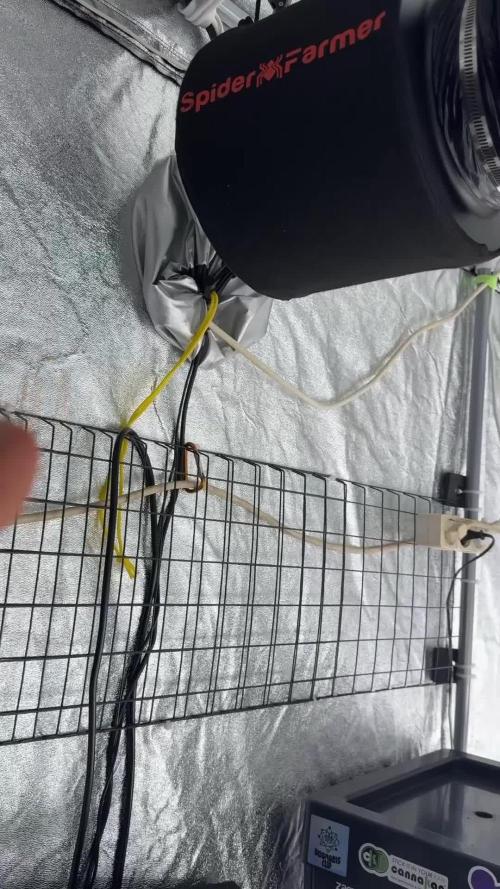
D42 - Today is the first day in the sixth week of veg for #2 and the fifth for #1. It has been six days since the first topping for the first girl, so I went ahead and topped her for the second time. I kept a couple of clones from her this time since she is so vigorous.
I also had planned to do the third and final topping on the second girl but knew that I had to buy some more soil staples first. However, this morning a red warning showed up in my Corona warn app. It's the first warning I have ever gotten, but I'm triple vaccinated, of course, and I was wearing my N95 mask for this five-minute exposure, but I want to act responsibly and quarantine for a few days, just in case.
So I improvised with BBQ skewers and some electrical tape. The skewers won't hold that well, but the branches are still small, so it shouldn't be a problem until I can venture out again.
The cover crop was getting a bit unruly again, so I cut it back again.
Finally, I gave both girls around 1.2-liters of water @ pH 6.3 and added a couple of qtips with peppermint oil to deter pests.
D43 - I gave each girl about two liters of compost tea that I started brewing yesterday. A bit soon, possibly since I watered them only yesterday, but I needed to feed the girls in the other tent, so these girls got some as well.
D45 - Aaaaaaaaaarrrrrgggghhhh!
Thrips have found their way into the tent. Lately, I've noticed some discoloration on the older leaves but haven't thought much about it.
Today though, it was much more pronounced. I took out my loupe and microscope, and sure enough, I could see thrips larvae. Ugh.
I ordered some predatory mites immediately to help with the problem, but they won't get here until a few days, and I want to start fighting the infestation as soon as possible. So, I went out shopping and picked up some pure alcohol, chili flakes, and a spray bottle. After soaking the flakes for a couple of hours, I strained the mixture and prepared a 1:10 solution with distilled water in the spray bottle.
I removed all older leaves that were affected most and then sprayed all the remaining leaves, taking care to get them soaked on both sides.
This chili tincture is nasty stuff, though, and I was coughing like mad, and the snot was flowing like a spring-river. Next time I'll wear a mask!
I also sprayed the clones outside the tent and the Chocodope girl in my other tent, just in case. The Colorado Cookies girl is in flower, though, so I couldn't spray her. She has no sign of infestation, but I'll treat her as well with the mites when they get here.
D47 - I resprayed the girls yesterday with the chili tincture to ensure I got to all the little critters, and today, the predatory mites arrived. I hung one sachet on each plant, and I hope that's the end of the little buggers.
D48 - The end of another week of veg. The second girl thrives after her third topping, and I will do the third and final topping on the first girl in a couple of days. Once that is done, I can install the scrog net.
As for the thrips, I can still see larvae, but they are far and few in between. Hopefully, the predatory mites will soon make short work of them.
I haven't even flipped yet, but there are already flowers in the tent!!! Alfalfa flowers that is :D

Likes
11
Share

@DogDoctorOfficial
Follow
🌱 White Widow – Week 3 | Structure, Strength & Setup
Genetics: White Widow (Zamnesia Seeds)
Light Schedule: 11/13 (Flower From Seed)
Stage: Week 3 – Preflower (no signs yet)
Structure: Compact, Healthy | Heading into 4th Node
Feeding: Aptus Full Recipe
Lighting: ThinkGrow Model One Bars + Future of Grow Black Series 600W
Control: Full TrolMaster Ecosystem
⸻
Three Weeks In – Compact & Confident
Here we are, Week 3, and White Widow is showing us her best early form. She’s:
• Tight in internodal spacing
• Vibrant in color and leaf health
• Low & strong, with no stretching yet
• Just pushing into her fourth node and still no signs of flowering, exactly what we’d hope in this phase, given our light cycle
She’s not rushing—she’s setting her foundation.
In an 11/13 light cycle, some might expect earlier preflower signs, but not all strains respond immediately. And honestly? I’m loving this slower, more intentional rhythm. She’s taking her time, and that usually means she’ll stack smart, not wild.
⸻
💧 Feeding Routine – Gentle, Consistent Support
Even though she’s rooted in a rich super soil blend, we’re continuing to assist her via the feed water with a light, targeted Aptus mix:
Current Feed Recipe:
• Aptus Regulator – 0.15 ml/L
• CalMag Boost – 0.25 ml/L
• All-in-One Liquid – 1 ml/L
• Start Booster – 0.25 ml/L
This isn’t about force-feeding, this is about helping the soil activate and harmonize, giving her what she needs before she starts asking for more. The mix keeps her cell structure strong, supports microbial life, and encourages consistent early root development.
She’s loving it and it shows.
⸻
💡 The Environment – Light & Movement
This week, she’s been bouncing between two active grow zones, as we continue to refine the entire setup. It’s all managed within the TrolMaster ecosystem, offering precision control over both lighting and environment.
She’s currently rotating between:
• ThinkGrow Model One Bars – soft, powerful full-spectrum LED bars with excellent canopy penetration
• Future of Grow Black Series 600W – full spectrum, deep reds for flowering intensity
Both are synced and monitored through TrolMaster, giving us:
• Consistent PPFD targets (250–400 µmol/m²/s for now)
• Environmental tracking for temp, RH, and VPD
• Freedom to adapt space as needed while the grow evolves
🎛️ Why this setup?
Because we’re still dialing in the room and flexibility is everything. She’s adjusting beautifully to these shifts, showing no signs of stress. A real soldier.
⸻
👀 What to Expect / What Not to Expect
Expect:
• More node development, maintaining compact shape
• Flower pre-signs within the next 7–10 days
• Slow, deliberate shift toward stretch (if she chooses to stretch at all)
• Stronger feeding signals as roots fully colonize the pot
Not to Expect (just yet):
• Pistils or heavy flower behavior
• Wild vertical growth
• Deficiency signs (thanks to our balance and microbial boost)
She’s exactly where she needs to be.
⸻
🤝 Gratitude & Shoutouts
Huge thanks to the partners helping this journey become a reality:
🌱 Zamnesia Seeds – for delivering timeless classics like White Widow and keeping the legacy alive
🔧 Aptus Holland – for the precision nutrients that support both living soil and direct feeding
💡 ThinkGrow – for elegant, pro-level light bar systems that keep our canopy even and calm
🚀 Future of Grow – for the Black Series 600W, bringing serious intensity and bloom readiness
🧠 TrolMaster – for letting us control every detail, from light to leaf, with precision and peace of mind
⸻
💚 Final Thoughts – Week 3
This White Widow is more than just a plant, she’s a rebirth after a rough start, a solo performance, and now she’s writing her own pace into this grow.
No rush.
No shortcuts.
Just care, balance, and a slow, steady climb toward bloom.
We’re watching closely, learning daily, and adjusting with love. Thank you for walking this path with us. More to come soon 🌿
#WhiteWidow #ZamnesiaSeeds #Week3Update #ThinkGrow #FutureOfGrow #TrolMasterControlled #AptusPowered #GrowDiaries #11_13FromSeed #FlowerFromSeed #LEDGrow #CannabisCommunity #GrowYourOwn
📲 Don’t forget to Subscribe and follow me on Instagram and YouTube @DogDoctorOfficial for exclusive content, real-time updates, and behind-the-scenes magic. We’ve got so much more coming, including transplanting and all the amazing techniques that go along with it. You won’t want to miss it.
• GrowDiaries Journal: https://growdiaries.com/grower/dogdoctorofficial
• Instagram: https://www.instagram.com/dogdoctorofficial/
• YouTube: https://www.youtube.com/@dogdoctorofficial
⸻
Explore the Gear that Powers My Grow
If you’re curious about the tech I’m using, check out these links:
• Genetics, gear, nutrients, and more – Zamnesia: https://www.zamnesia.com/
• Environmental control & automation – TrolMaster: https://www.trolmaster.eu/
• Advanced LED lighting – Future of Grow: https://www.futureofgrow.com/
• Root and growth nutrition – Aptus Holland: https://aptus-holland.com/
• Nutrient systems & boosters – Plagron: https://plagron.com/en/
• Soil & substrate excellence – PRO-MIX BX: https://www.pthorticulture.com/en-us/products/pro-mix-bx-mycorrhizae
• Curing and storage – Grove Bags: https://grovebags.com/
⸻
We’ve got much more coming as we move through the grow cycles. Trust me, you won’t want to miss the next steps, let’s push the boundaries of indoor horticulture together!
As always, this is shared for educational purposes, aiming to spread understanding and appreciation for this plant. Let’s celebrate it responsibly and continue to learn and grow together.
With true love comes happiness. Always believe in yourself, and always do things expecting nothing and with an open heart. Be a giver, and the universe will give back in ways you could never imagine.
💚 Growers love to all 💚

Likes
22
Share


@EhJay
Follow
Invested in Green Planet 1 Part Nutrient System. Going to see how it finishes my buds in these last few weeks, also will use it to start my next girl.
D60 - There are some amber Trichomes, but on the part of the leaves that will be cut off when I manicure, going to give it another week at most to ripen more.
End of the week - Flushing down to 150ppm and hopping the buds put on a bit more size in this last upcoming week.
Side note, I should have put more space between the bud sites, they are too compact and the bud sites near the middle are not able to push up through the canopy, which is limiting its growth.

Likes
13
Share


@raulmoat123
Follow
The girls are getting on fine week 4 flower
Strawberry banana are packing on loads and loads on weight
Slurricane wow just wow
Dolato is slightly slower but smells amazing
Wedding cake is limited edition Black Friday from seedsman is the most gas weed I have ever grown just amazing
Larry bird kush doing wonderful
I will take a proper picture and video of the girls when I have time out of the tent


Likes
63
Share


@Wicked_Stix
Follow
All the plants are building buds. Gave them a little beastie bloomz. I cut them off the maxigro today since the leaf tips are burning. Other than that everything is going smooth.
Processing
Likes
34
Share


@LockDownGrow
Follow
My first time making alcohol tintcure
Using the c1 ,
Hold on tight gonna be a trip

Likes
4
Share


@Huckleberry39
Follow
She is starting to come together finally. Ive never seen a plant like this one. But, I love an underdog. She is getting some nice trichome production already, which is always good. Taking a full dose of nutes and loving it. So far so good. I am loving 420 Fast buds!!!
Likes
105
Share


@Natrona
Follow
Frostbanger Plants 1-6
Week 8 May 18– 24
FLOWER 4
Nutrients :
GH Micro 25 ml
GH Gro 10 ml
GH Bloom 30ml
CalMag 30 ml
Recharge 10ml
Green sensation 16.5ml
Power buds 7.5 ml
5/17 PH 6.3, PPM 1130, temp 71
1ltr each
5/18 PH 6.67, PPM 935, temp 68.5 1 ltr each
5/20 PH 6.67, PPM 1330, temp 68.5 2 ltr each
5/21 PH 6.66, PPM 984, temp 69 1 ltr each videos & pics
5/17 Defoliation of yellowing leaves, feed, pics
As I mentioned last week, I must monitor and control the tent environment manually. For the past month, the humidifier has been an issue putting out way too much humidity; often leaving water in the bottom of the tent. In addition, the temperatures are also out of control. I added an AC last week to keep the temperature below 80. I finally determined the exhaust vent is also broken and has been for some time. AC Infinity does not extend the warranty to the replacement parts. I guess that makes sense since they would be in a state of perpetual free replacements. I bought a new one from Amazon that came with a new controller which is different from the controller 69 currently using. I decided that while it is very inconvenient and inefficient to monitor the tent through the day, I would rather finish this Frostbanger run without introducing a new unknown variable. I will continue using 3 circulating fans, the 4” exhaust vent from my 3x3.
I have the AC pushing air in and the exhaust pulling air out. This creates a neutral pressure tent environment-neither positive nor negative.
It looks like growth has stopped and plant height has been reached. Now is the time for buds to fatten and frost up. All 6 of them are short remaining less than 3 ft. They range from 15 to 31 inches. #4, 5 &6 are showing some fade, particularly #4.
Upon opening the tent, a melon smell comes off the buds if I get close, and more stickiness was observed during the process of defoliation. They are living up to the new strain’s name. #5 is the frostiest followed by #2. Wow week 3 of flower and that much frost already. Before FastBuds announced the strain name and characteristics, I was disappointed that FBA2502 could be an indica sleepy strain but the universe provides what you need at the time. The new strain profile indicates a whopping 29%THC with mainly sativa uplifting, euphoric, social effects with sweet fruity flavors which I love and enjoy. In addition, I recently bought a dap press and this strain is frosty and resinous. She will be great to press for live rosin.
FBA2502 is FROSTBANGER. Meet Frostbanger Auto, an autoflowering and Indica-leaning hybrid packing a staggeringly high THC content averaging 29%, making this one of the most potent strains on the market. It was created by Fast Buds through crossbreeding Gorilla Glue and Chemdawg, two equally iconic strains. Growers must know that these difficult-to-grow plants will pose specific challenges in terms of environmental control and nutrition, making them best suited for cultivators with some experience under their belt. The flowering cycle is short, averaging only 50 days, and yields are usually around 300g/m². The Frostbanger Auto flavor and aroma are both mouthwatering with a delightful combination of sweet, fruity, and flowery notes. The high is mainly Sativa-driven with uplifting and happiness-inducing effects that lead to euphoria and a general sense of well-being. You might feel sociable and talkative, but too spacey to say something. Following this surge of energy comes a deepening sense of relaxation, leaving you sedated and completely at ease with the world. Due to its potency and these long-lasting effects, medical patients hail Frostbanger Auto for treating chronic pain, stress, and even depression.
Measurements:
#1 15”
#2 20”
#3 17”
#4 30”
#5 31”
#6 24”
Your likes and comments are appreciated. Thanks for stopping by.
Growers love 💚🌿
💫Natrona💫
Likes
2
Share


@Enki_Weed
Follow
In the third week of the cannabis flowering stage, I have been working to reduce deficiencies. I used PK 13-14 for the first time at a very low dose. Humidity is consistently at 55%, temperature is maintained between 23-24 degrees Celsius, and I am following a 12-hour light/dark cycle. 🔄 I welcome any tips!
Likes
9
Share


@wiz4rd
Follow
The plant is doing really well now. Although it isn't growing as much in height as expected, it is putting a lot of energy into flowering. Given its size, I don't expect huge yields, but I am still surprised and excited to see what comes next.
Through training, I managed to make the plant wider and produce more buds, which are now clearly visible and covered in trichomes. The plant's scent has become very strong, with a sharp lemony and earthy aroma, reminiscent of a lemon soda, or even Sprite. The buds are incredibly sticky and have grown well, although the plant remains very compact.
Next week, I will keep using the wooden plant stakes with wire to support the plant and continue the LST gently, but I will soon remove them.
In addition to the regular fertilized watering, I am also giving tap water from the bottom, both of which are well absorbed.
In the video, you can see the trichomes clearly and also get a good size comparison of the buds.

Likes
11
Share


@RamboGringo
Follow
This plant is Definitely a weird one growing one fingered leaves. Light penetration is perfect so I didn't have to train. Unfortunately 3 weeks of her life she grew under the older plants, and didn't get much if any light exposure. The buds would have been phenomenal had I got 3 more weeks out of her


Likes
9
Share


@Deeng
Follow
On day 34 i had to leave my house and i will be missing for the next two weeks, so i put my laptop as live cam to check how its going, and connect ed a smart outlet to a pump for irrigation.
Likes
6
Share


@StonedandSteady
Follow
Pistil Popping in Action and Stretching Out!!!
#AutoWhiteRussian and #AutoMontreal *Fems* breed by Team #DivineSeeds #DivineSeedsSquad #DivineSeedsBreedingCompany Looking Magnificent and Amazingly Great in thier 4th week of Flowers! Thier Growing under the #Growatt600w and in my #TopoLite 24×24×48 Grow Tent! I'm also using #TNBNaturals #TheEnhancer Co2 Despersal Canister and using thier Ph⬆️⬇️ for my Decolinated Tap Water!
#AutoWhiteRussian breed by Outstandingly Awesome Team #DivineSeeds #DivineSeedsSquad #DivineSeedsBreedingCompany
Yo!!! This Lil Beauty popped open in under between 16-18 hours of Germination using this Wet Papertowel Method, this New Heat Mat, Baked potato ToGo Container and Regular Tap Water Helped Tremendously! Heck Yeah Growmies and Growmets!!! Let's Grow!!!
DivineSeeds:
#AutoWhiteRussian
Origin:Afghanistan
Type:Indica/ Sativa/ Ruderalis
Flowering:65 days
THC:24 %
Harvest:400-600 g/m2
Height:100-150 cm
#AutoMontreal breed by Top of The Line Team #DivineSeeds #DivineSeedsSquad #DivineSeedsBreedingCompany
Yo!!! This Lil Beautiful Bean Popped under between 20 hours of Germination using this Wet Papertowel Method, this New Heat Mat, Baked potato ToGo Container and Regular Tap Water Helped Tremendously! Heck Yeah Growmies and Growmets!!! Let's Grow!!!
DivineSeeds:
#AutoMontreal
Origin:Canada
Type:50% Indica/ 40% Sativa/ 10% Ruderalis
Flowering:65 Days
THC:23%
Harvest:550-750 g/m2
Height:120-160 cm
https://divineseeds.net/
https://instagram.com/divine.seeds?igshid=osxe2v7en33v
I love and Appreciate Everyone!!! Thanks Again Team! Cheers Famz!!! Much Props and Much Topz!💯

Likes
25
Share


@Kush_queen
Follow
The buds are getting fat and there are plenty of bud sites and they are nice and frosty now the 2 that were lagging behind certainly aren't that far behind.
I have bamboo canes ready to go in soon as the side branches are getting heavy and i don't want them to get snapped or anything now I come this far 40 days on 12/12 today
Thanks for taking the time to read my update 🙏💚


Likes
53
Share

@DogDoctorOfficial
Follow
The Germination Odyssey of Blackberry Auto: A Grower's Diary Chapter 01
Greetings, fellow cultivators! Today, I bring you the enthralling tale of my Blackberry Auto's germination – a journey filled with anticipation, dedication, and a touch of magic.
It all began with a tiny Blackberry Auto seed, a potential green marvel waiting to unfold. With the excitement of a horticultural explorer, I delicately placed the seed into the H2O oasis, where the dance of germination was set to commence. The water cradled the seed like a nurturing embrace, awakening the dormant life within.
As the seed soaked in the liquid symphony, a subtle transformation took place. It absorbed the essence of life, swelling with the promise of a vibrant future. In those moments, I felt a connection with the very essence of growth – a humble seed evolving into a botanical masterpiece.
The time had come to transfer this burgeoning life force into the next stage – the root riot. Placing the seed in this matrix of potential, I marveled at the intricate dance between life and the growing medium. The root riot cradled the seedling-to-be, creating a perfect haven for roots to stretch and explore.
With the root riot as a launching pad, I introduced my Blackberry Auto to the dome of dreams. Inside this miniature greenhouse, the seedling began its ascent toward the light. Temperature: a cozy 28°C, humidity: a whopping 95%. The perfect conditions for a germination symphony, a crescendo of life echoing within the dome.
Oh, the magic of 28°C! The ideal temperature for my Blackberry Auto to stretch its roots and unfurl its tiny leaves. It's fascinating how this golden number orchestrates the ballet of germination, a symphony of growth playing out in my humble cultivation space.
As I stand before the thriving Blackberry Auto, I see not just a plant but a testament to the delicate balance of nature and nurture. The journey from seed to this radiant seedling is a reminder that each step is a chapter in a living story.
In the coming weeks, I'll continue this saga – documenting every milestone, every challenge, and every triumph as my Blackberry Auto blossoms into a bountiful harvest. Join me in this horticultural adventure, where the language of plants is spoken, and the dance of growth unfolds. Stay tuned for more updates from the heart of my cannabis cultivation sanctuary!
Genetics Blackberry Auto @Fast_Buds
Food - @aptusholland @aptus_world
As always thank you all for stopping by, for the love and for it all , this journey of mine wold just not be the same without you guys, the love and support is very much appreciated and i fell honored and blessed with you all in my life <3 <3 <3
With true love comes happiness Always believe in your self and always do things expecting nothing and with an open heart , be a giver and the universe will give back to you in ways you could not even imagine so <3<3 <3
#MissBlackberryAuto #fastbuds #aptus #aptusplanttech #aptusgang #aptusfamily #aptustrueplantscience #inbalancewithnature #trueplantscience
Friendly reminder all you see here is pure research and for educational purposes only
Growers Love to you all
Likes
14
Share


Likes
2
Share


@BenjasGrasgefluester
Follow
Die Lady‘s sind jetzt 25 Tage alt und haben mit der neuen Lampe einen absoluten Sprung hingelegt👌🏻
Ich habe mir eine Terplight gegönnt.
Gegossen wurden die letzten 2 mal, jeweils 150ml für jede Dame.
Es wurde einmal mit PK Juice, Power Plant und Big Start gedüngt.
Heute werde ich die Erde schonmal vorbereiten für das finale Topfen nächste Woche.
Bis dahin, habt einen schönen Sonntag und stay High🏻
