
Likes
Comments
Share


@MrHightimes
Follow
BEST GROW YET!
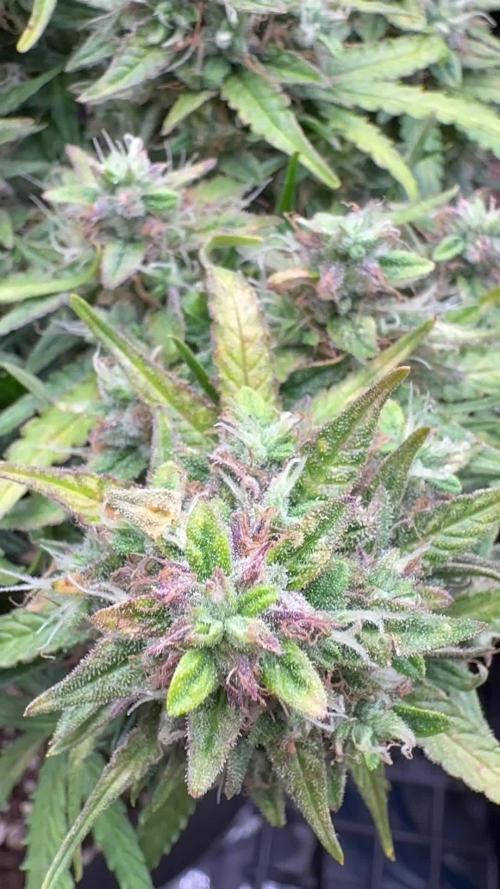
I'm so pleased with these baby girls! They are everything you could ask out of an auto! I'm really really happy with this round of plants! They are getting VERY stinky and sparkly!
Installed my new flood to drain table so now hopefully this will be EVERY grow from here on out! SUPA PLANTS!!!!!!!!!!!!!!


Likes
148
Share


@CrazyHorse
Follow
Finally last stage of flowering is here 😁 In next 2/3 weeks she will be ready for harvest.
Update: Day 93
It's like waiting for Xmas, you know there will be gifts but you have to wait for them 😂😂😂
Update: Day 97
The buds slowly start to show a colours 😊 But my phone camera is a total trash so at that pictures you're not able to see it...
Like I said before I will buy something better for next grow report 😇😇😇
All the best, You Lovely Girls Growers 💪💪💪

Likes
Comments
Share

@hassehujasse
Follow
all info coming ahead
pronto me posteare toda la informacion de los controlers i los sensores
Likes
39
Share


@Bluemels
Follow
Tag 91: Noch 5 Wochen bis zur Ernte...leider sind ihre Blätter schon etwas hell geworden. Aber die doppelte Menge an Alg a mic hat doch schon ein wenig mehr grün in die Blätter der Shogun zurück gebracht 😉

Processing
Likes
26
Share


@eldruida_lamota
Follow
Buenos días familia, volvemos con la cuarta semana de floración con nuestras skunk de zambezaseeds y hay que recalcar que esta variedad tiene una rápida floración, apostaría Que será lo primero que cortemos.
El ph está controlado en 6.5 a partir de esta semana añadimos overdrive en nuestros riegos.
Temperatura y humedad ideales para la Avanzada etapa de floración.
Esta cepa es bastante resistente y Fácil de cultivar , os la recomendaría sobretodo a cultivadores novatos, y no tan novatos claro , ya que se valora mucho una floración rápida en indoor.

Likes
60
Share


@valiotoro
Follow
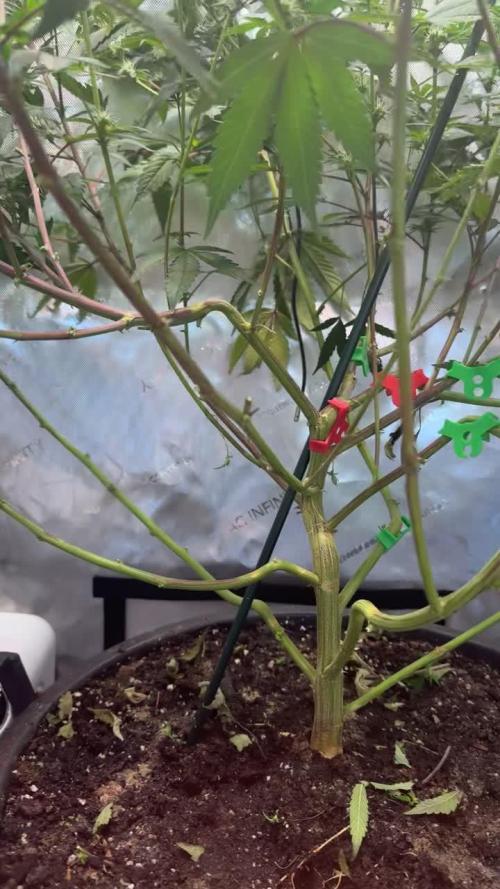
Alright, I decided to repot her she just started flowering. It’s a bit risky, but I’m gonna cut about half of the root mass to fit her into a wider pot. It’s my first time doing this, but I trust this strain. I’m sure she’ll bounce back.⛩️💃🏻💃🏻💃🏻💃🏻

Likes
19
Share


@CommanderCannabis
Follow
Started 12/12 light cycle. Normal week. watering up to 1.5 L a day. co2 PPM @ 1250. Defoliated due to massive growth and to bring light to the tops.

Likes
19
Share


@HinduGod
Follow
WOW LOOK AT DAT!!! TODAY IS EASTER MONDAY!!!! I WOULD LIKE TO GIVE A SHOUT-OUT TO DAT JESUS GUY!!! FOR DA SERVICE AND SACRIFICE HE GAVE TO ALL MANKIND!!!! HE WAS A VERY VERY KIND MAN!!! DER HAS BEEN AN ISSUE WIT DA RAINGOD AND SUNGOD DIS ENTIRE DIARY!!!! SO DA HINDUGOD SET UP A MEETING WIT ALL DA GODS!!! DER WAS A VOTE DAT DER HAD TO BE AN OFFICIAL REPRESENTATIVE OF ALL DA GODS!!!! DIS OFFICIAL WOULD GUIDE ALL DA GODS TO WORK TOGETHER!!! IT WAS A UNANIMOUS VOTE DAT DA HINDUGOD WOULD BE DAT GOD!!! DAT IS VERY VERY GOOD!!!!! NOW DA PLANT IN DIS DIARY IS LOOKING VERY VERY GOOD FOR BEING STARTED IN DA LATE WINTER!!! DA HINDUGOD HAS TALKED WIT DA SUNGOD AND HE WILL BE HERE FOR DA NEXT FEW DAYS!! DA HINDUGOD IS NOT A GREEDY GOD!!! HE KNOWS DAT DA SUNGOD NEEDS TO BE OTHER PLACES AS WELL!!! SO HE WILL BE SENT OVER TO YOUR OUTDOOR GROW VERY VERY SOON!!!!
PLEASE COME AGAIN!!!!

Likes
3
Share


@macrocefalo
Follow
The ladies were flushed on the 68th and will be flushed again on the 71st. Analyzing the resin with a magnifying glass, I think we will not have a harvest before the 75th. B3 this blooming I think she will be looked after with more than 80 or 83 days.


Likes
18
Share


@BlackForestGrower
Follow
Last Days
Week 11 Day 5 Now the 60 hour dark phase is over and the plant get trimmed and hung up

Processing
Likes
142
Share


@MadeInGermany
Follow
Hey everyone :-)
This week a lot has happened 🤗🍀.
The 5 that are already in the 12/12 cycle explode day after day 😍😅.
All others have been repotted, and will remain in the vegi phase for 1-2 weeks.
Otherwise there is not much to say 😃.
I wish you all a good start into the week, let it grow and stay healthy 🙏🏻🍀🌱


Likes
14
Share


@Pleasant_Internet
Follow
New feeding schedule seems to be bringing the girls new life. I might have to give the Recharge credit. Also checking pH very thoroughly. Stick doesn't seem to work well anymore. PH could be why the couple in the back were growing slow the last few weeks while the others were slightly more resistant.
Crossing finger to find purple phenos in a couple week.

Likes
70
Share


@Santica_Garden
Follow
Dark Phoenix drying away nicely.... Should be trimming them at the end of the week. 😁👊🏾 Can't wait to try her n see how she tastes. Any questions just ask away guys

Likes
7
Share


@hooolian
Follow
23/01/22: Plants are really tall and flowering well with lots of bud sites - pistils are long and prominent - the beginnings of the trichomes are starting to spread onto the leaves to make them sugar leaves. all looknig very healthy - the ventilation system in this tent is great with an intake fan and two circulation fans. ideal temperatures - looking very well.
average around 36 inches in height the largest one is around 47 inches.

Likes
11
Share


@SintrexGrow
Follow
The plant is growing very healty and fast. Very happy with the results so far. Will keep documenting as this is a DIY project 😀

Likes
4
Share


@Canna055
Follow
Ladys got a bloom topdress (greenhouse Feeding Bioline ) & flipped to 12/12 After long 60 days of vegging


Likes
22
Share


@MonsieurDeLaRuche
Follow
Finally here !! After 3 days in a mix of lombricompost and black soil of demetheart
the plants have stretched too much, the clone light is not bright enough, I'm going to move them!!


Likes
52
Share


@SomeLikeItGrow
Follow
Very easy and nice strain, i like to grow this one, tasty and euphoric happy effects, perfectly for day and night time and recommended to grow at least once 😂

Likes
17
Share


@JamCam87
Follow
This week I have seen plenty of Budgrowth! Everything is filling out nicely.. i’m very excited for the following weeks
