
Likes
Comments
Share


Likes
29
Share


@GTools
Follow
I've been waiting for at least some trichomes to turn amber. I prefer to harvest when there are at least a few amber. I took the PL2 3 days before the PL1. Flushed them for a week only


Likes
10
Share


@Cocogrow1234
Follow
Week 4 flower : everything’s looking nice still got the lights about 7-9” from top of canopy without any issues . The humidity has gone up to 50% in day and I can’t really get it any lower I’ve already got a dehumidifier so don’t want to get another one . I would like to lower to 40-45% and lower for last 2 weeks but can’t see that happening .
I’ve started the pk from end of week 4 (day 28 )at 1ml per litre this took my ec to 2.2 I will see how it goes and maybe up it to 1.2-1.5 and I’m going to use the pk for 7-14 days then I will start the flush
I also lowered the silicone to 0.5ml per litre
3x blue cheese plants are on the left but has spread over
and 1x sunset sherbet on the right


Likes
40
Share

@THcHunteR23
Follow
C’est deux la 2 me font vivre des montagnes russes chaque semaine 😅cette bête mérite d’être apprivoisée !

Likes
190
Share


@Sparkles
Follow
April 8 - added a few more pics of lights ;)
Brought to u by Mars Hydro. Grow on Earth. Grow with Mars.
All pics and video flower day 56.
Lights are running at ~60%. 18” away from canopy.
Can’t wait for her to finish. Hope u enjoy the pics


Likes
8
Share

@BlaKX
Follow
Banana Purple Punch Auto RF3 🍌😈🥊3️⃣ ist nach 21 Tagen über 45cm groß geworden! Man entdeckt die ersten Haare und kommt in die Vorblüte.
Nach 3 Wochen so groß wie andere Autos wenn sie 4-5 Wochen alt sind^^
Bin gespannt wie hoch sie wird am ende ;)
📈 Current Conditions
🌡️ Day: 24,0-26°C
🌡️ Night: 19-20°C
💨 Humidity: 60-65%
🌬️ VPD = 0.9-1.2 kPa
🔦 PPFD: 400 µmol (20/4 light cycle)
💡DLI:28,5
Likes
65
Share


@Roberts
Follow
Gold Sativa is doing well. She is bulking now. Has a nice frost. She got a solution change as usual and ready to go for a few days. She is in a New Level Hydro bucket, under a Spider Farmer SE5000 light. Thank you Spider Farmer, New Level Hydro, and Quebec Seeds🤜🤛🌱🌱🌱
Thank you grow diaries community for the 👇likes👇, follows, comments, and subscriptions on my YouTube channel👇. ❄️🌱🍻 Happy Growing 🌱🌱🌱
https://youtube.com/channel/UCAhN7yRzWLpcaRHhMIQ7X4g
SE5000
https://amzn.to/3qFpAML
Spider Farmer Official Website Links:
US&Worldwide: https://www.spider-farmer.com
UK: https://spiderfarmer.co.uk
CA: https://spiderfarmer.ca
EU: https://spiderfarmer.eu
AU: https://spiderfarmer.com.au
Coupon Code: saveurcash
Www.newlevelhydro.com
Www.hygrozyme.com

Likes
35
Share


@eldruida_lamota
Follow
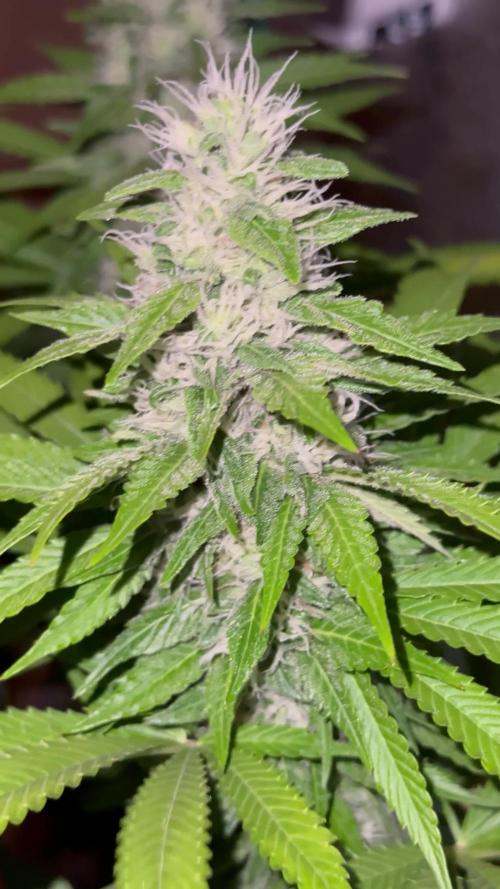
Vamos familia que ya actualizamos la cosecha de estas Frosted Guava de Zamnesia.
Vaya flores que se han marcado repletas de tricomas, parecen escarcha y las flores se marcan aromas muy tropicales, la verdad que únicos.
Es una variedad bastante fácil de cultivar pero al tener un periodo de floración algo más largo, hay que estar pendiente de alimentarlas bien, gracias Agrobeta en mi sala es posible.
Temperaturas máximas en 24 y mínimas en 20 y una humedad estable en torno al 36%.
Las mantuve 10 semanas pero facilmente si se quedan 11 tampoco estaría mal, yo las vi bien maduras y ya tenía tricomas ambar así que les di matarile.
Os comento que tengo un descuento y para que compréis en la web de Zamnesia de un 20%, el código es ZAMMIGD2023
The discount 20% and the code is ZAMMIGD2023
https://www.zamnesia.com/
Agrobeta:
https://www.agrobeta.com/agrobetatiendaonline/36-abonos-canamo
Mars hydro:
Code discount: EL420
https://www.mars-hydro.com/
Espero que disfruteis este diario, buenos humos 💨💨💨

Likes
Comments
Share


@The_Lonely_Farmer
Follow
Monday 29th!!!
So this diary is again late and only allowed too add a few images which are mix match,
How upsetting 👎 annoying at the least...
I've been trying since repotting these girls on monday too upload yet constantly saying resizing photo no matter which folder I upload from so I appolagize.
I will try too upload and update this week but if continues will create a new diary and try that way 🤷♂️
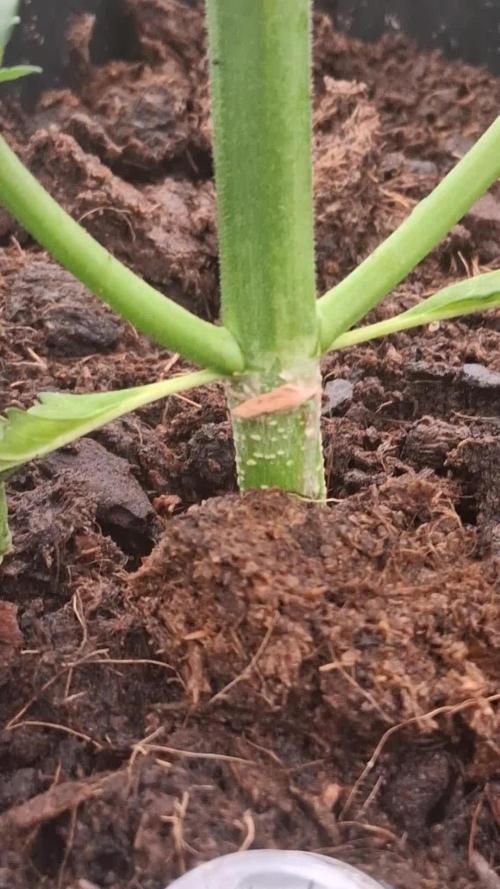
So as if it were monday 29th I transplanted all the fastbuds testers into their final pots and I have 2 of each whichever I'm very happy with and the other 3 seems slightly slower but still here 🌱
They are now being fed shogun nutrients and hopefully this week they settle in and get comfy ready too begin their vegative journey 👌
I will feed lightly and all girls will start some form of lst next week
Hopefully I can update this week properly soon as I like too recap myself as it helps keeping log of what I've been doing 🙄
Shouts too aptus Holland nutrients I gained great roots ready for transplant using their startbooster & regulator which I'll be continuing too use too start of all my seeds/seedlings in future 💪 thank you aptus! 💚
Growers love, stay blessed 💚
Likes
130
Share


@SlowpokeFuegobud
Follow
❓ 💚 😗 💙 ❓ 💚 😗 💙 ❓ 💚 😗 💙
Welcome to week 11, dear friends!! 😘
Watering with each 5ml of Growzyme, Humic Acids + Bigfruits 💧
Thanks, everybody for visiting!! 💚 💚 💚 Eternal grower love!!! 😘🙏 🌱
___________________________________________________________________________________
SETUP:
80x80x180 cm Zelsius
240W Full Spectrum LED IR UV dimmable
DW240H-A6-HS
Heatsink color red
LED Chips:
512pcs SAMSUNG LM301H + 24pcs Osram 660nm + 8pcs Osram IR 730nm + 8pcs UV 385nm
Color mix: 2700K + 4000K
2,8umol/J
Driver HLG-240H-C2100B
Coverage: veg 5x3ft / flower 4x2ft
Product size: 628x205x68mm
Green Buzz Nutrients
Shouts go out to my sponsors @GreenBuzzNutrients, thanks so much for your support! ❤️
If anyone would like to try their amazing organic products, use code GD42025 for generous 25% discount (for orders of minimum 75€) ✨
https://greenbuzznutrients.com/
Mills Nutrients
Biobizz Lightmix
custom exhaust fan 320/270cm³/h
Carbon Active Granulate 240cm³/h
tab water pH 8 - EC 0,25 with Calmag to 0,5
Advanced Hydroponics pH minus Grow + Bloom to pH 6.2
❓ 💚 😗 💙 ❓ 💚 😗 💙 ❓ 💚 😗 💙


Likes
4
Share

@MindFlowers68
Follow
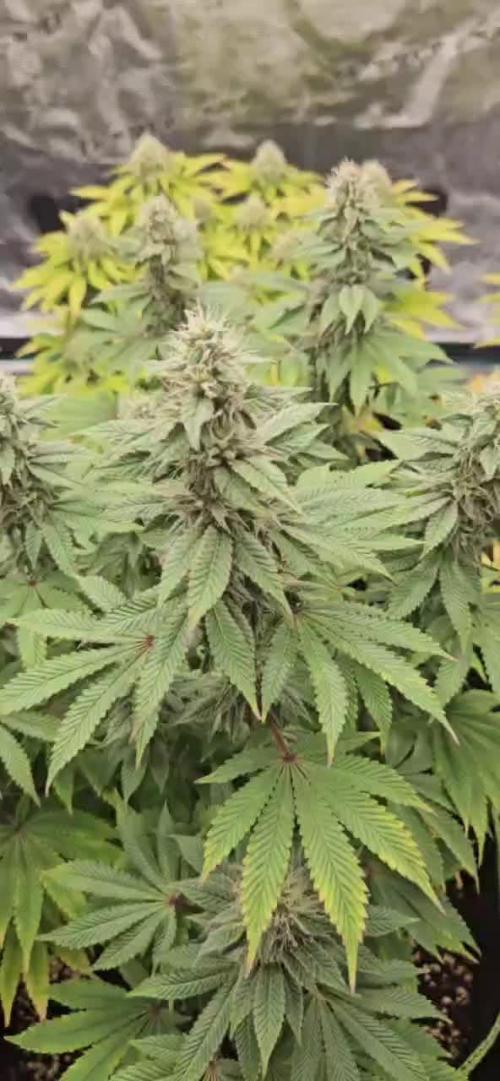
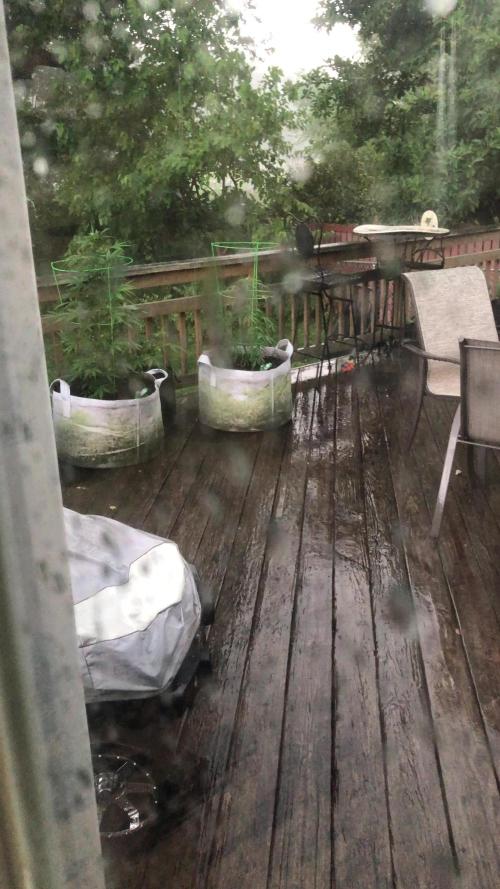
She started to flower this week and stacking quick. Still stretching and not to far behind the other olants. Quite a rainy and stormy week so did not need to water but I been consistand on the compoat teas each week. Top dressed with the spent compot tea and roots soaked with 700 pom compost tea with liquid kelp and cal-mag.

Likes
9
Share


@Budking420
Follow
The purple punch is doing very well with her companion banana purple punch sisters! She already even has a wonderful smell. I'm very excited for her to get a little lst later in the week. Just trying to be patient I wanna do lst but I feel it's even still a little early. I have been tucking leaves but I may defoliate a small amount here soon when I perform LST. Check back next week to see just how fast she grows & remember its 4:20 somewhere!!!!!!!!!!
Processing
Likes
4
Share


@OneBakedWalrus
Follow
Chugging right along were getting some stinky sticky ass buds. They smell my whole basement up of sweet citrusy with some skunks undertones(probably my photos that are also in bud but I dunno for sure) the buds are getting thicker daily and I mean daily doubling pretty well. I've never seen such a thing. I included the 4 photos I have that are also a month in to bud for a kind of comparison. The multi top frosty ass indica is the farthest along of the photos at 32days. I started them just before the autos went in. The other 3 are more sativa than frosty. They are all experimental to me so please excuse the way they are. I have been playing doctor since I bought this tent. Trying different things to see what works what doesn't what i am and am not capable of.Anyway I'm gonna start some Northern Lights x Big Bud Auto sometime after these 2 Short Riders get hung and i pull the indica . Ill keep a diary of it in case anyone starts following my adventures. Anyways I'm late with this one so enjoy my ramblings and my pics of my girls.

Likes
10
Share


@BasedBuds_89
Follow
Had a great week. These babies are still stretching quite a bit and I see pistils everywhere. The next couple of weeks should show some actual nuggies popping up.


Likes
4
Share


@Black_Widow
Follow
Привет садоводы !
пару дней был в отъезде и за эти дни соцветия стали тяжелыми , некоторые ветки завалились на бок
придется делать им сцепку из проволоки
это только пятая неделя
сегодня я полил растение обычной водой и наверное в следующий раз переведу ее на RIPEN
А в общем отличный цветок растет
Сегодня я полил ее Ripen
Likes
20
Share


@Basementganja
Follow
Plucked a few leaves that were looking at me funny ;) Not much to do!
Smells of sweet berries, after a fresh rainfall.. Smells amazing!
Watered with 2.5 gallons of the above listed nutrients, every 5-6 days. (when the soil becomes 95% dry)
10% of the solution watered runs out the bottom of the pot, and is removed with a wet-vacuum.

Likes
10
Share


@Ieiogrow94
Follow
Eccoci qui...
Tutto va per il meglio, questa settimana non ho applicato stress alle piccole, ma ho guardato l'evoluzione che hanno avuto dando i nutrienti.
Ora hanno un odore davvero intenso ed uno strato di resina pauroso, vediamo come si riprendono dalla defogliazione che ho fatto settimana scorsa.
Seguiranno aggiornamenti, grazie a tutti per il supporto🔥🌲❤️
