




Processing
Likes
26
Share


@eldruida_lamota
Follow
Esa familia, a que pintan fenómeno estas skunks?.
Es que Zambeza hizo un gran trabajo con esta variedad, es una cepa que es bastante rápida en floración, crece muy bien en su etapa de crecimiento, y sobretodo es aparte de típica, muy sencilla de cultivar.
De mis favoritas hasta ahora para indoor, como siempre, controlamos el ph y la humedad (siempre dentro de los parámetros correctos establecidos).
La semana que viene nos vemos con más avances , un saludo.

Likes
9
Share


@Call_Me_Vaan
Follow
💪ROUGH FEED SCHEDULE💪
VEG
Week 1 (day 1-6) : Just 6.5Ph balance H2O
Week 2 (day 9) : ( 1ml Micro , 1ml Grow , 1ml Bloom , 2ml B-52 , 2ml Voodoo Juice) / 1 lite H2O
Week 2 (day 14) : ( 2ml Micro , 1ml Grow , 1ml Bloom , 2ml B-52 , 2ml Voodoo Juice) / 1 lite H2O
Week 3 (day 19) : ( 4ml Micro , 4ml Grow , 4ml Bloom , 2ml B-52 ) / 1 lite H2O
Week 4 (day 23) : ( 4ml Micro , 4ml Grow , 4ml Bloom , 2ml B-52 ) / 1 lite H2O
FLO
Week 5 (day 32) : ( 4ml Micro , 4ml Grow , 4ml Bloom , 2ml Voodoo , 2ml Bud Candy , 2ml Sensizym)/ 1 lite H2O
Week 5 (day 38) : ( 4ml Micro , 4ml Grow , 4ml Bloom , 2ml Voodoo , 2ml Bud Candy , 2ml Big bud , 2ml Sensizym)/ 1 lite H2O
Week 6 (day 42) : ( 4ml Micro , 4ml Grow , 4ml Bloom , 2ml Voodoo , 2ml Bud Candy , 2ml Big bud , 2ml Sensizym)/ 1 lite H2O
Week 6 (day 48) : ( 4ml Micro , 4ml Grow , 4ml Bloom , 2ml Voodoo , 2ml Bud Candy , 2ml Big bud , 2ml Sensizym)/ 1 lite H2O
Week 7 (day 52) : ( 4ml Micro , 4ml Grow , 4ml Bloom , 2ml Voodoo , 2ml Bud Candy , 2ml Big bud , 2ml Sensizym)/ 1 lite H2O
(👉one time per 5-7days👈)
😏EQUIPMENT USED😎
- CREE CXB3590 COB 3500k (100watt) 💪
- Mars Hydro grow tent (0.6mx0.6mx0.6m)
- 4" Duch fan HF-150P
I'm a beginer grower 👽
Please LIKE 👍 & FOLLOW ME 🙌


Likes
45
Share


@masterofsmeagol
Follow
9/10 Went and shook the plants off. I don't think it rained. I think it's just dew. Plants with ailments seem to be progressing well and it looks like they'll outrun the pathogens. It may not be a banner year yield wise but the quality will be great it looks like. GMO is stacking up real nice. The ones in further flower are swelling more and more everyday. Earwigs MAY be back because I noticed a couple of plants where I left a tiny little branch on the bottom have been lollipopped on tje sherb pie and rather quickly too. I suppose it could be leaves dieing and rotting bit I doubt it. If they are here there aren't many and most plants are too far in flower for them to bother. They eat the lower newly developing shoots. Not big dense buds. Luckily. I noticed some pm on the gmo with pm. Looks like it's time for another treatment of k bicarb. I'll probably do that tonight. I'll keep this updated.
WENT BACK OVER AND DEFOLIATED A BUNCH OF STUFF. ITS TIME FOR ANOTHER APP OF K BICARB. I CHECKED THE SHERB PIE AND IT DOESNT NEED TO BE WATERED. IT WAS STILL VERY HEAVY. IM THINKING I MAY HAVE EARWIGS THAT ARE FEASTUNG ON LOWER BRANCHES THAT SHOULDVE BEEN PRUNED. I NOTICED SOME LARFY SHIT THAT KOOKS LIKE NEW SHOOTS WERE CHEWED. LUCKILY THEY DONT SEEM TO BOTHER DEVELOPED BUDS. ESPECIALLY ROCK HARD BUDS. I'LL DO SOME RESEARCH AND DO SOME FORM OF APPLICATION FOR THE PM SPOTS I SAW AND THE SEPTORIA I KNOW IS THERE. IM SUPER GRATEFUL THOUGH. THESE ARE VERY HARD TO GROW STRAINS AND I THINK ILL KNOCK IT OUT OF THE PARK. Also thinking of switching to cha ching shortly on the toasted toffy and the event horizon that's furthest along.
9/11 I Didn't water anything today because things still seemed heavy. I'm noticing the same thing that happened a few years back. Lower secondary or tertiary branches are getting stripped on a couple plants. They never touch the developed buds they want the new shoots. If IT IS ear wigs they are impossible to fight. I put poison down and d.e. around those plantscand we'll see. It could also be rot from dying leaves. I need to treatcsome of the plants with a longer flowering time with plant doctor. I'm going over today to spend a few hours working in the garden. I'll apply something I just don't know WHAT yet. One event horizon looks like it tried to reveg AGAIN which is super weird . I just see a lot of one and 3 finger leaves. It will probably turn out to be great. The other event horizon looks like its going to be incredible. The toasted toffy is getting close too. Temps only reached 62° yesterday. It took FOREVER to shake these plants off. Time to get the leaf blower out. I'm going to bring my trich scope when I go over today. I wanna look at tgat event horizon. Pistols are retracting on the top flowers. This may be a multiple stage harvest. I'll keep this updated.
UPDATE: WENT OVER AT FOUR AND WATERED. I MIGHTVE BEEN ABLE TO HOLD OFF UNTIL TOMORROW MORNING BUT I HAVE PLANS EARLY MORNING. I ALSO DEFOLIATED QUITE A BIT. BUDS ARE SWELLING CONSIDERABLY. THE SHERB PIE HAS TURNED COMPLETELY PURPLE. IT HASNT HAD ANY FLOWERS ON IT BUT NOW IT HAS FLOWERS BIGGER THAN A QUARTER! THESE PLANTS ARE VIGEROUSLY FLOWERING. I NEED TO CHECK THE TRICHS ON A COUPLE PLANTS AS THEY DONT HAVE MUCH TIME LEFT. AS I WAS DEFOLIATED I NOTICED THAT SOMWTHING HAD STRIPPED FRESH BUDSITES ON SOME LOWER BRANCHES. IN YEARS PAST THATS ALWAYS BEEN EAR WIGS WHICH ARE IMPISSIBLE TO DEAL WITH. THEY USUALLY DONT TOUCH THE BIG BUDS THOUGH. TJEY LIKE THE FRESY SHOOTS. ILL GO OUT AT NIGHT AND SEE IF THIS IS THE CASE. ITS ONLYVHAPPENING ON A COUPLE PLANTS BUT STILL. THE EVENT HORIZON IN THE MIDDLE IS GROWING DIFFERENT THAN ITS SISTER. YOU CAN TELL THE STRAIN IS THE SAME BUT THIS SEEMED TO REVEG (AGAIN) BECAUSE IM SEEING SMALL FULLY DEVELOPED BUDS THAT I DONT REALLY SEE CONNECTING. CRAZY TRICHS THOUGH. IT WILL BE INTERESTING TO SEE HOW IT COMES OUT. I TREATED THE GMO WITH WPM WITH A QTR GALLON OF K BICARBONATE FOLIAR SPRAY WITH A DROP OF DAWN FOR A SURFICANT.
9/12 Shook everything off and then used the leaf blower to try to better dry them. Weather is lookingvyo be good for the next couple weeks. Perfect finishing weather for my two that are furthest in flower. I may have to do a staged harvest. Some BOTTOM branches on e.h. are FAT and have trichs on trichs. I'll have to use my scope. I'm switching to cha ching next feed for the three furyhest in flower. Maybe four. The sherb pie had NO flowers last week but it's exploding with really compact buds. The whole plant turned purple. I need to be careful of botrytis with this weather. I've been pretty good about leaving and removing any dead or dying leaves. Even the plant in the ten is filling out nice. I have SOMETHING (behaving like earwigs) and eating "fresh" shoots. It's like lollipopping the new growth on a couple plants. I'll becstaying at the grow from now forward so I'll go out tonight and see what I found. The poison I put down seems to be gone. Anyway I'm very grateful for what I've got. I'm update as I go.
9/13 It's sprinkling a half hour trom my grow. I think it's supposed to be nice though. I found some botrytis on two plants. Two are so close to finishing that I need to closely watch them. I don't want botrytis. I applied k bicarb to the middle gmo as I saw a spot of pm. I spent a ton of time defoliating. This cold weather has brought the fade much faster. Trichs are looking good.
WENT THROUGH THE PLANTS AND DEFOLIATED A SHIT TON. APPARENTLY THIS EARLY FADE IS NORMAL THIS YEAR. AT LEAST IN ALL MY CANNABIS GROUPS. WENT THROUGH EVERYTJING! STILL HAVE THE MIDDLE EVENT HORIZON I WANT TOO TIE DOWN BUT I DID A LOT OF DEFOLIATION. THIS ALLOWED ME TO FIND A FEW PIECES OF BOTRYTIS. ON MY PLANTS THAT ARE ALMOST DONE. WE HAVE GOOD WEATHER FOR A LITTLE BIT BUT I MAY HAVE REACHED DIMINISHING RETURNS ON A COUPLE. THAT E.V. AND THE TOASTED TOFFY I DONT WANT GETTING WET. THEY ARE TOO DENSE. TRICHS ARE ALL MILKY AND THEYRE SWELLING. IM SLEEPING ON IT BUT IM ALMOST POSITIVE IM GOING TO DO A SELECTIVE HARVEST ON THOSE TWO. IM NOT LETTI G SHIT ROT AND AGTER LOOKING AT THESE UNDER A SCOPE I WOULDS TAKEN THEM YEARS AGO. GMO IS FROSTY AS HELL. EXTREMELY ARONATIC GARDEN. ILL KEEP THIS UPDATED.
Decided to hold off feeding and watering. Defoliated a shit ton throughout the day. Around five I noticed that my shittiest GMO with the yellow leaves had a couple dead interior branches. Upon closer inspection it looked like grey mold. A few tiny buds were destroyed but the branch needed to be removed. Jot any big loss but if it's in the shit that doesn't matter than it's around the shit that does. Found info on event horizon flowering time. Middle of September until middle of October. That could be why I'm seeing coke cans on the bottom branches of that phenome. I've got some decisions to make. I mixed up enough water to water in the morning. I'll mix up feed in the morning. Tje garden has gotten a lot of attention lately. I hope it pays off. I'm leaning on a multi staged harvest of the event horizon amd toasted toffy but we'll
9/14 Hurries morning. Mixed water for this morning last night. WATERED AND FED EVERYTHING (BUT TOASTED TOFFY AND EVENT HORIZON #2 DUE TO THEM BEING CHOPPED SOON.) Everything got a gallon of water and a qtr of food. I had to cut a couple small interior secondary branches on my shottiest GMO due to the appearance of grey mold. I also found some botrytis in both the event horizon and toasted toffy that I plan to take the tops of today. I scoped them and I'm planning to do a staged harvest. Trichs are milky with some amber. Everything is blowing up! I'm not sure what's happening but like it previous years there's a couple plants with leaves dieing near bud sites and an overall yellow appearance. Maybe it's late stage septoria. I cant isolate it due to local laws but if I have to I'll deal with it. Nothing else had anything like that. I hace noticed SOMETHING nocturnal that can eat a small branch and leave it bare. Also eat the small newly forming shoots at the bottom of plants. I shouldve taken off ALL the larfy stuff as it draws bugs but I did things a like different with each plant this year. I'm going to go through the plants again today and I'll update what I decide. Chances are the top half of those two plants are coming down. I'll do a video.
9/15 I'll have to add pics and videos tomorrow. Last night I did a final check of the trichs on event horizon #2 and toasted toffy. Everything looked great so I proceeded to do a "wet trim" outside (ill use the leaf blower to clean up) and cut the tops off the plant. I know this injures tje plant but it also makes them go crazy thinking they are dying and the buds and trichs swell. I had one plant last year I got two harvests off and a bunch of fresh frozen for concentrates. I looked this morning and I madecthe right decision. These plants are DONE. I've got another event horizon but it's not quite there yet. I'm going to leave it as long as I can. If the injured plants pick up pm or something (already had septoria) then the flower will be used for extracts or I'll do a Cervantes wash. I imagine concentrates though. One GMO isn't doing as good as the rest. Yesterday I had to cut three branches off due to grey mold on the stalk. If laws allowed it I'd isolate that plant. Luckily since I spend so much time going through the garden I'm able to find this kind of stuff. The GMO'S look wonderful (even the one with some yellow leaves that I cut the branches off) . K bicarb has kept pm at bay so far. This strain has TONS of trichs. It's like trich on trich on trich. I can't wait to try it. It smells amazing. Sherb pie is completely purple with rock hard buds that smell amazing. It's quality over quantity this year. The big one in the 50 (I think red runtz) is swelling more everyday. I'm going to switch to ch ching soon. The plant in the 10 had TOTALLY SUPRISED ME. I've never grown a plant lime this. It started out with dark purple in the middle now buds are swelling and calyxes are EVERYWHERE! This plant is growing extremely fast! You'll see what I mean when I put the pics and the videos up. I'm not going to do the event horizon harvest until I get both plants and all of both plants. It will be a while before I finish the toasted toffy one as well.
9/16 I'm glad I took those plants. Weather is good but plants were soaked thos morning. I need to go out at night and see what is eating new shoots. Flowers are looking great. I need to do another app of k bocarb sometime. I'm suprised the pm has pretty much stayed with that one plant. That two other GMO's flanking it are doing awesome! Purple, sticky stinky. It's got the whole package. The one in the 50 has some huge flowers that won't require much longer. The one invthe 10 has some time left. This is clearly a sativa dominant hybrid. The buds are swelling like crazy. It went from NO buds to having little purple calyxes to flowers that look like cat-tails! I can't wait to see what rhis year brings. Once I get things dry and manicured I'll give you guys a look at how the first stage of the first harvest went. I'm super happy. Spent a large part of this morning shaking plants by handcand removing any dead leaves or anything that could cause rot then I went over them with a leaf blower. I'll need to water tonight I imagine.
WATERED AROUND 3:00 PM. MY FAVORITE GMO STARTED DROPPING. WATERED EVERYTHING A GALLON EXCEPT I SPLIT ONE GALLON ON THE PLANTS THAT HAD BEEN CUT. IM EXTREMELY TIRED BUT I NEED TO GO OUT AT NIGHT AND SEE IF I CAN FIND EARWIGS CRAWLING UP THE STALKS. WEATHER STILL LOOKS GOOD. BUDS SWELLING PISTOLS RETRACTING AND MORE AND MORE LEAVES DYING. I CANT BELIEVE THE SIZE OF THAT SATIVA LEANING HYBRID IN THE TEN!

Processing
Likes
10
Share


@LoveBud90
Follow
So week 5 of flower done. I didn't get to spend as much time as I needed with them this week and barely got 4 feeds in. They get a ltr or 2 of water in between or the res will be dry so they're drinking nicely.
She has stopped stretching so hopefully it's all stacking from now. Waiting on a loupe so I can tell when to harvest because I think I harvested her mum too early being my first plant.
Took some of the leaves off that were shading other budsites and adjusted some of the lst later in the week but she seems happy enough.
She is still outside even though we've had some rain, I'm sure I've managed to get her under cover most times.

Likes
15
Share

@Kominest
Follow
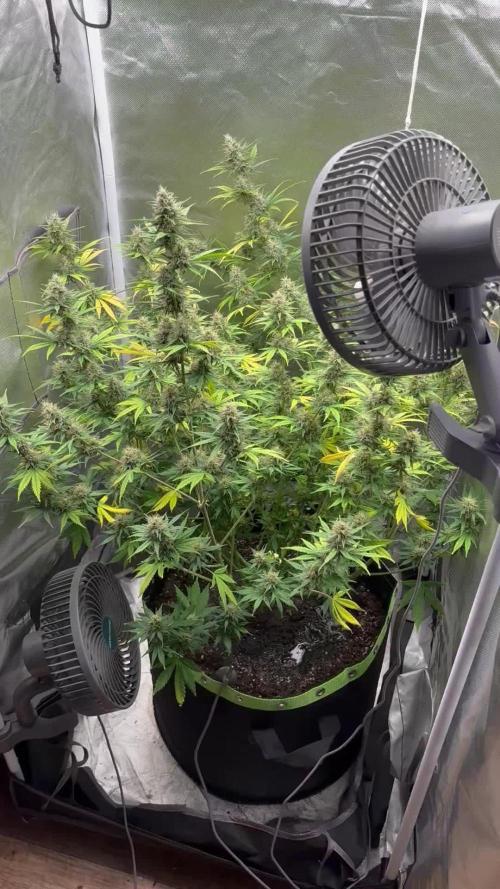
She’s evolving a sweet chewing gum like smell which is very pleasant . I think she’s taking the nitrogen of the leafes since there’s not much in the soil anymore . We’re aiming for 8-10 weeks of flower so this is fine for me . Overall she’s developing nicely except the lower branches which I usually cut off when lollipopping but this time I didn’t .

Likes
2
Share

@BeautyBudsVio
Follow
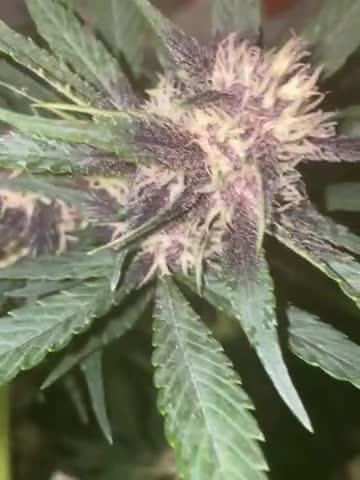
Blueberry is nearly Blackberry 😳
This Pheno is unbelievable for me
And I never had this 😍
Very dark and the smell is unique defintly

Likes
41
Share


@FrostyGardens
Follow
Start of week 7. I think I will just feed water this week. I have lots of nutes still in the soil and leaves. They wont get much water this week maybe 1 or 2 flushes.
Next week I wanted to experiment with light deprivation, as well as crank my A/C as high as possible. May even split one of the stems to see if it makes a difference.
12/12/18
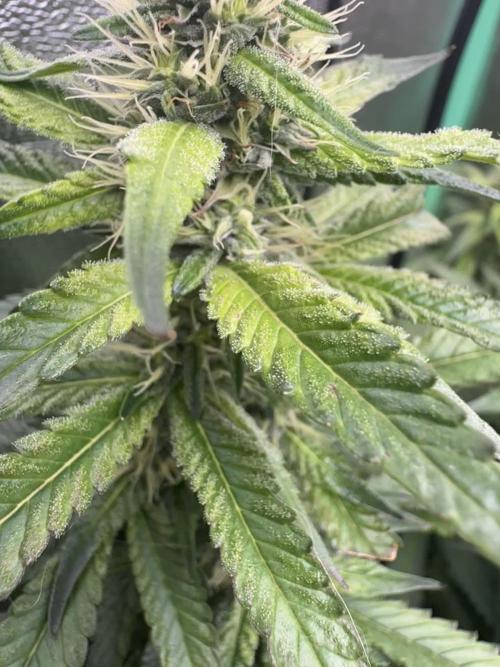
Everything looking good. No problems, the ladies as super frosty and the smell is intense. Impatience is starting to kick it. So tempted to take a tester bud. But that's a waste.

Likes
3
Share


Likes
2
Share


@BushDoctor740
Follow
Final days as a big storm is coming I will harvest a bit early but most of the trichomes are cloudy smells absolutely amazing.
Processing
Likes
33
Share


@weedelicious030
Follow
Alle Pflanzen haben sehr gut auf das weitere Low Stress Training reagiert. Sie wachsen gesund und fühlen sich wohl.


Likes
6
Share


@JackSkellington
Follow
😫PRIMO OVERFERT SENZA AVER DATO NULLA ASSURDO...solo acqua e sono cariche scure ora sono palesemente in over...
procederò ancora per altri 10 giorni di acqua
il topping a funzionato bene da come si vede nel video ora faro riposare per 15 giorni e poi lancio in flow
14/05/2021
la jungla sembra crescere ora dovrò fare un pò di pulizia defogliare dalle foglie piu grandi e lollipoppare per bene....
sono solo un pauroso di togliere le foglie grandi (foglie primarie)
al momento zero fertilizzanti ancora troppo scure
18/05/2021
la sera del 18 a un giorno da un mese di vegetazione in growbox ho lollipoppato e potato i rami i inutili....
ho dovuto anche fare una rotazione di piante in quanto non sono uniformi nel crescere....
ho riempito il bidone da 30 litri e mi sono accorto che le baby ora bevono molto
pur troppo sono ancora in forte stress e overfert non capisco da cosa provenga in quanto non ho usato nei fertillizzzante....
vedremo oggi 21 come staranno ora posto le foto del 19 maggio giorno in cui fanno un mese e sono ancora 40cm aime qualcosa sta rallentando la crescita
e arrivato il filtro a carboni e pesessantissimo speriamo che la mia box lo regge
Likes
10
Share


@Shefman93
Follow
Defoliated and lollipop the bottom of the plant at the end of week 2. Plant seems healthy, did an early top dress of 80% bloom 20% veg and I have began using the tribus bloom microbes inoculant at every watering. I will also be making banana peel tea to feed a boost this week.
Likes
17
Share


@Geili_Seili_fireinfireout
Follow
Woche 4 in flow👌
Gefällt mir!💚
Die sauberszen und vitalsten stecklinge gibts wie immer hier bei ROOTS-FARMS.💚🤝🌱🔥🔥


Likes
10
Share


@Elcoquigrow
Follow
Ya mostrando sus primeras raíces, esperamos a que enraícen bien y esta vez trasplantaremos a maceta definitiva de 7 litros y daremos corta vegetación..


Likes
34
Share


@Bruno_The_Stoner
Follow
Hello there, it's just 70 days of girls' lives. As you can see the plants are doing well. They welcomed the extra HPS 250watt lamp, the overall temperature went up and the humidity dropped to 40% in the day. After rinsing the plants I intend to reduce the overall dose of BioBizz fertilizers and use the last time PK 13/14.

