
Likes
Comments
Share


@Kynareth
Follow
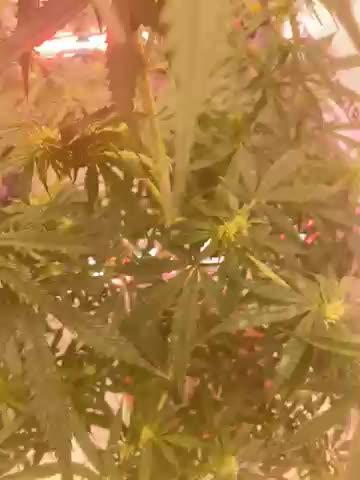
Day 81 update - as you can see at microscope pictures the buds are near to be ready for the harvest. I will stop watering for the next 24 hours the 2 biggest plants to be harvested at the weekend on days 82-84.
The other one i will wait a bit more to madurating proccess.

Likes
55
Share


@w33dhawk
Follow
So nummer 4 ist am sonntag 24.01.21 auch in 0,25 l Topf gezogen finden sich alle ziemlich wohl in den Töpfchen mit der Erde hab den Ladys heute mal vita race aufgesprüht mal schauen was passiert..... Gibt es ja auch nur einmal pro Woche

Likes
16
Share


Likes
7
Share


@UKAgent47
Follow
So I planted this girl 2 weeks after my first grow but instead I put this in the garden just to see if it would do any good outside.. it’s done so much better then I ever thought it would with very little care, not been fed that often and sometimes just left to rainfall. I even took it out of the flower bed and potted it during early flower and still she kept going just fine :) bonus plant


Likes
5
Share

@Ninjabuds
Follow
Growace.com aircube only discount code NINJABUDS
ELUFAH / Amazon discount NINJABUDS
The plants are very close to being large enough to start useing the watering system to water them
Black sugar 2.0 is a beast from the start I think it’s gonna be a monster plant
Likes
54
Share


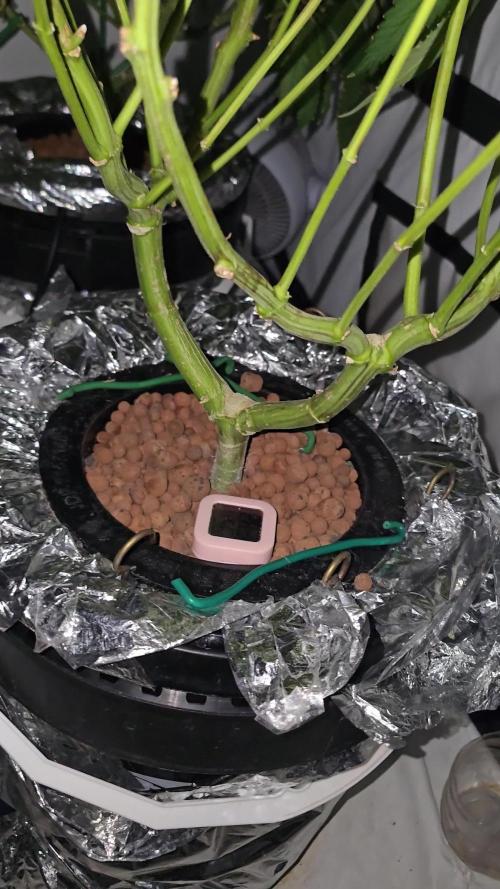
@TheCannaProphet
Follow
~ AirCube Active Oxygen Ebb/Flow System sponsored by GrowAce, featuring Strawberry Gorilla Auto by FastBuds ~
Well guy's and gal's here we go again on another exciting Autoflower run together! This time will be different as I will be doing a 'Hydroponic' run utilizing the AirCube Active Oxygen Ebb/Flow System by GrowAce, who were kind enough to sponsor me for this run, so it should be interesting to see what results I get and have some fun along the way!
•Let me first tell you about this 6 Pot Ebb/Flow system from GrowAce:
"The AirCube system is the one and only Ebb & Flow grow system on the market that combines the benefits of air pruning with a fully automated Ebb+Flow system! With the AirCube's proprietary fabric pot in bucket design, this system is guaranteed to outgrow any other Ebb + Flow system on the market. The results speak for themselves- grow MASSIVE roots that result in MASSIVE fruits!
Air Pruning- Air Pruning only happens with fabric pots. As the roots reach the fabric walls of the pot, they penetrate and grow into the breathable fabric. Once penetrated, the roots are exposed to air, which causes the tips of the root to dehydrate and naturally prune themselves. This natural pruning process forces the roots to grow tons of lateral fibrous feeder roots. This results in a plant that utilizes the entire root zone and fills the entire pot with tons of roots. These fibrous feeder roots are incredibly effective in uptaking water and nutrients, resulting in a plant that grows healthier and more vigorously!
Oxygen Benefits- Without oxygen, nutrient absorption cannot occur. On a molecular level, oxygen is needed to transmit nutrients across the cell walls and into the roots of a plant. With the AirCube's proprietary bottom lifted draining design, the system actively draws all of the water out of the bucket pulls vital oxygen into the root zone.
Maximum Versatility with Any Grow Medium: The AirCube System is the only system on the market that allows you to use any growing medium you like. Use coco coir, soil, peat moss, perlite, vermiculite, hydroton, rockwool or any other medium you wish! This system is the most versatile Ebb and Flow bucket system in today's hydroponics industry.
Temperature Control- with the fabric pots constructed with highly porous polypropylene fabric, heat dissipates easily and effectively. Unlike standard plastic pots, heat isn't trapped in the root zone. Heat in standard plastic containers can reach temperatures of up to 125 degrees. When this type of heat is trapped and unable to escape, it can damage your plant's health and limit the potential of your harvest. Growing in the AirCube System, plant roots grow cooler, healthier, and more vigorous.
Largest Pots in its Class- this system features 5 Gallon grow buckets, the largest pot size of any other ebb and flow hydroponic system in the market.
Modular and Expandable- start with 6 grow buckets and expand up to 36 grow buckets with the optional 105 gallons PopTank reservoir!"
For my medium and nutrients I decided to also switch things up from my regular Organic runs, going with Plagron Nutrients and Root Royale 70/30 Coco/Perlite. When filling the fabric pots with medium, I first added just under a gallon of horticulture perlite from Nor-Cal as a base layer to ensure good drainage and then filled the remainder with the Root Royale.
•Now for one of my favorites, and award winning strain from my friends at FastBuds... Strawberry Gorilla Auto:
I'll be running Strawberry Gorilla Autoflower which is a 55/45 Sativa/Indica Hybrid. "ATTENTION ALL! Due to our continuous efforts in evolving our breeding process, we are proud to confirm that our Strawberry Gorilla Auto has now become one of the most potent autoflowers in the world! Paving the way to our recent success where she ranked on top & brought home the gold at the very first American Autoflower Cup in California. Moreover, she proved that not only modern autoflowers can compete with photoperiods, but they can even beat them in their field. At the most recent edition of the Farmer’s Cup and competing against various photoperiodic strains, Strawberry Gorilla Auto took home the title of 'Highest Combined Terpenes' in the highly sought-after 'Home Grow Hash' category, with an impressive 97.163 mg/g total terpene content! Our exceptional genetic selection's crowning Strawberry Gorilla Auto strain is a spectacular hybrid known for producing yields of up to 600 gr/m2 in 70 days. This is a very manageable grow that can reach heights of up to 150 cm - due to its magnitude we recommend it for more experienced growers, as a huge plant may be a little overwhelming for first-timers. This show stopping sativa heavy hybrid is perfect as an all day smoke, producing a taste bud tingling, pungent berry and diesel terpene-rich flavor combo that leaves you with a grin from ear to ear, a perfect choice for those looking for a day-and-night autoflower! "*
*References: GrowAce.com, 2fast4buds.com
______________________________________________________________________________________________________________________________________________________________________________________________________________________________________________________________________________________________________________________________________
The Setup:
• AC Infinity 4x4 tent
•AC Infinity Cloudline T6 Exhaust Fan w/ Controller 67
•HLG 650R w/UVA Bar *** For some reason GD does NOT have a listing for the USA version of the 650R so I selected the closest match to it.
•AirCube Active Oxygen Ebb/Flow 6 pot System
•TrolMaster Hydro-X Controller for light
•AutoPilot APC8200 co2 controller fed by a 50# tank
•16" Hurricane oscillating fan and 8" floor fan
•Tent cooling via filtered outside air delivered by AC Infinity Cloudline T6 fan
•BlueLab instruments: PH Pen and Truncheon Nutrient Meter
______________________________________________________________________________________________________________________________________________________________________________________________________________________________________________________________________________________________________________________________________
Weekly Updates:
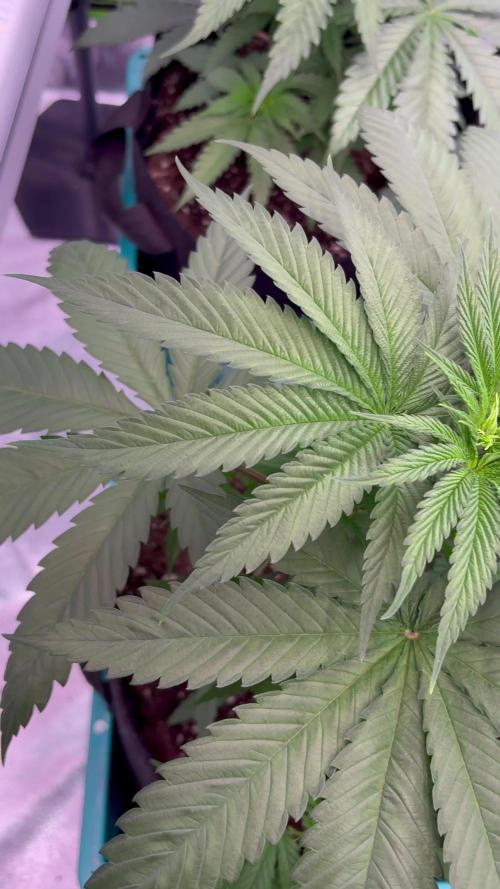
12/20- Week 7 of flower and the end is drawing ever closer for these three Strawberry Gorilla's from FastBuds!
Today, I started off this week with a drain/clean of the AirCube reservoir, after which I filled it with 80L of well water and added in the Plagron Nutrients (Green Sensation first, then 'A' & 'B' base nutrients, finally the Royal Rush). After the nutrients were added and the EC checked ( it's 2.0), I ph'd the solution to 5.7 @ 68℉.
12/22- I'm continuing with six feeds per day @ 900+/-ppm's, the HLG 650R is at 100% power 28" above canopy and they are getting 4 hours of additional UV during the middle of the light cycle. Tent temp's are running 68-75℉ at a RH of 40-45% and co2 levels are running 650-900ppm.
12/24- The #1 and #2 plants continue to be the better looking of the bunch, with the #2 being the 'one'. The #3 plant continues her struggle but has a generous coating of trichomes covering her flowers!
12/25- ~🎄MERRY CHRISTMAS!🎄~
12/26- Seven weeks of flower and only a couple more to go! I'll be starting to flush these ladies in the coming week and they should all be beginning to fade soon! Hope to see you next week! Growers Love!💚
💚 Thank you for checking out my passion in life! Please visit as often as you wish and I hope you enjoy this journey as much as I know I will! Grow what you love, Love what you grow!💚


Likes
Comments
Share


Likes
7
Share

@BeautyBudsVio
Follow
Opium grows and grows and just didn’t stop 😂
144cm now lol
He should stop with that and bring the energy into the buds


Likes
10
Share

@Thedibber
Follow
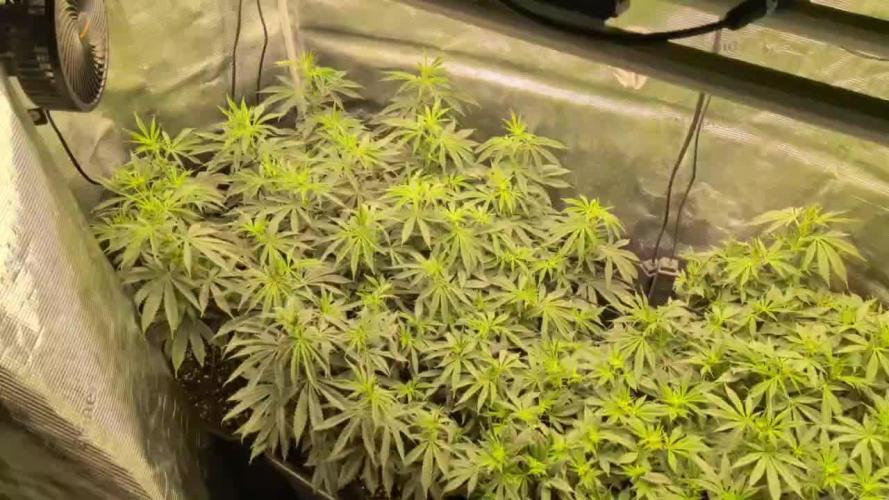
Week 2 starts the 3 plants on the right are the Blood moon gelato. Jungle inc 😅


Processing
Likes
10
Share


@YAKDADDYDWC
Follow
started this week of with a nutrients change and topping the the two dwc buckets again. ill keep lst to keep all my nodes down and canopy even before i flip to flower in next week or two.....
Been going well this week shes drinking alot of water!! All the tops have come back nicely going to make net for flower tommorow

Likes
97
Share


@Roberts
Follow
Big Jack widow grew great, and finish fast. She has some great frosty purple hues in her dense colas. The Viparspectra P4000 light worked great. I am Cutting her down, and will try to post a video here, but if it does not take it. The video can be found on my YouTube channel, link below. I learned a lot about the quality of water, and treating it properly this grow. So far roots on other grows has been great. This grow was saved by it just in time. Thank you Viparspectra, and Weed Seed Express. 🤜🤛💪❄️
Thank you grow diaries community for the 👇likes👇, follows, comments, and subscriptions on my YouTube channel👇. ❄️🌱🍻 Happy Growing 🌱🌱🌱
https://youtube.com/channel/UCAhN7yRzWLpcaRHhMIQ7X4g

Likes
4
Share


@Finsfan
Follow
Finally in full flower mode. Ready to start putting on some serious size. I turned the lights up to 80% a couple days ago and they both are taking it well. No light burn yet that I notice.
I'm not sure if I should start bringing the lights closer at 80% or keep the distance but instead
Increase power to 90%. Going to feel it out as we go. Happy so far for sure.
Update: increased light to 100% . No lead burns or weird looking leaves yet.. Just bulking up and very thirsty!
Doing a nutrient/nutrient/water feeding schedule now.

Likes
131
Share


@PapaNugs
Follow
Big week here. Got the girls transplanted to their 7 gallon pots. First time with pots this big. Gonna really let them grow. Got a little water with BT and mycorrhiza.


Likes
7
Share


@vito_scl
Follow
Se sueltan amarras de LST y se deja de tejer en la malla.
Ramas presentan crecimiento del 100% durante la semana.
Se sube un par de cms la malla.
Defoliación selectiva en día 14.
Riego por medio con fertilizantes.
Riegos abundantes solo con agua.
Pistilos comienzan a ser más notorios.
Leve olor.
Poda de bajos en una semana más.
Ventilador en mínimo durante la noche. Al máximo durante el día.


Likes
3
Share


@OrganicPower
Follow
Week 6 flower and the girls seem to have recovered from last week’s neglect and light intensity, but I’m sure the end result will be affected. The leaves also got a bit beat up. Watered in the final top dressing and did another round of selective defoliation. Moved the tops around a bit to open up the lower bud sites.