The Grow Awards 2026 🏆 


Likes
6
Share
@ButterfliesLittleFarm
Follow
Hello Diary,
It's the end of the first week of vegetation on my little farm. I'm a little late in updating the diary, but I'll try to change that in the future.
Vegetation officially starts when the plants get at least 4 leaves, in the case of White Widow it's the same as with her roommates.
It's the same case for all three plants, 9 days from when I planted the seeds in the ground, or 5 days from when the plants sprouted.
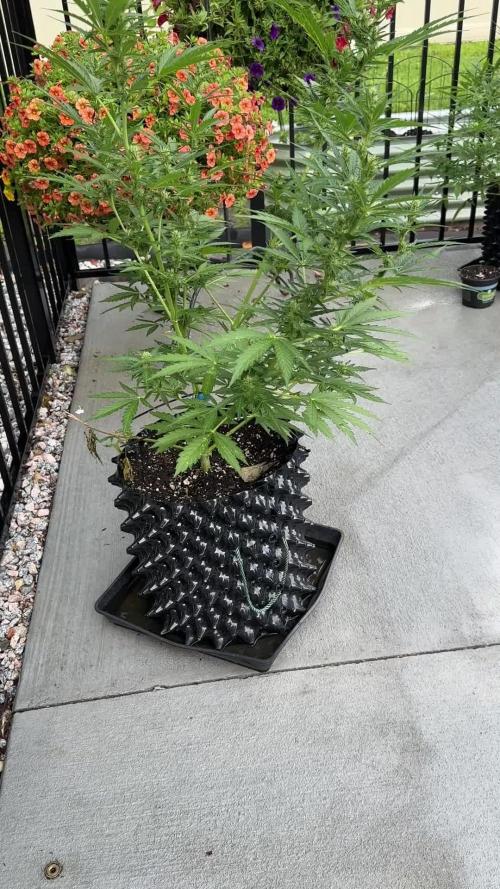
As you can see from the photos, White Widow is making great progress from day one.
Although initially one leaf was trapped by the seed coat, which can be seen in the photos, one is more developed than the other.
You can see a drastic difference every day, I put photos on the 1st day of vegetation and the 7th day of vegetation and the difference is obvious in those seven days.
White Widow - Day 1. - 2.5 cm
White Widow - Day 7. - 6 cm
Conditions on the farm are not ideal.
The summer heat is still unbearable, affecting the temperature in the apartment.
When I add Migro Aray 4 to that, the temperature sometimes reaches 32 degrees.
I don't see for now that it has a bad effect on the plants, but I would like it if the temperature were lower.
The lights are now set at 35 cm from the plants and are dimmed at 40% of their power.
The regime is 18/6 from the first day of vegetation.
Watering is every three days.
I prepare about 4 liters of water, add 1 ml/L Calcium and Magnesium supplement and this week I started adding Bio Grow Fertilizer, a new product from RQS.
After all, I lower the pH to 6.0. and with that amount I water all three plants on the farm.
Here's a quick recap of the week.
25/07/2024 - Day 1.
The official start of the vegetation.
After photographing the plants, I watered them. I still put the seed booster in there, also a new product from the RQS organic fertilizer collection.
28/07/2024 - Day 4.
Watering.
I prepared 4 liters of water again, added Calcium and magnesium supplement, Bio Grow Fertilizer and finally lowered the pH. with Lemon Kick.
31/07/2024 - Day 7.
End of the first week of vegetation. Taking photos and after that I watered all three plants on the farm.
White Widow - Day 7. - 6 cm.
That's all from me for this week, thank you all for your well wishes. See you soon.

Likes
13
Share
@J_diaz420
Follow
Genética muy estable, floración rápida, hermoso color y bastante generosa 💚❤️


Likes
36
Share
@BrigadeDesTerps
Follow
Elle est extrêmement résistante 85% d’humidité tous le mois de septembre et beaucoup de jour de pluie, je ne l’ai pas protégé et elle tien le choque à merveille
Les couleurs deviennent sublime elle devient entièrement violet et givrée de trichomes
L’odeur est très fruité on peut pas rêver mieux en termes de terpènes j’ai hâte de goûter ça!
J’en suis amoureux
J’ai mis les données du mois de septembre en photo


Likes
9
Share
@Susquihanna
Follow
So after the hailstorm last week, one of my colas were broken. I taped it together and used wire ties to hold it together and it has survived. It continued to grow an inch and is flowering! I thought for sure I had lost this cola. I also used the "question" forum here on grow diaries regarding my broken cola and like the responses I received. We have had some very cool nights and warm days but my Skunk has continued to thrive.
The one thing I think is very interesting to notice is how crooked the buds look on this plant. Is it because I grew two colas or because of the trauma from a broken cola?? I have no idea but time will tell.
Please like and comment and come back!


Likes
91
Share
@Salokin
Follow
Hi Growmies,
I'm excited to share some big news today! Although there have been some unexpected twists, it's all part of the incredible journey of gardening.
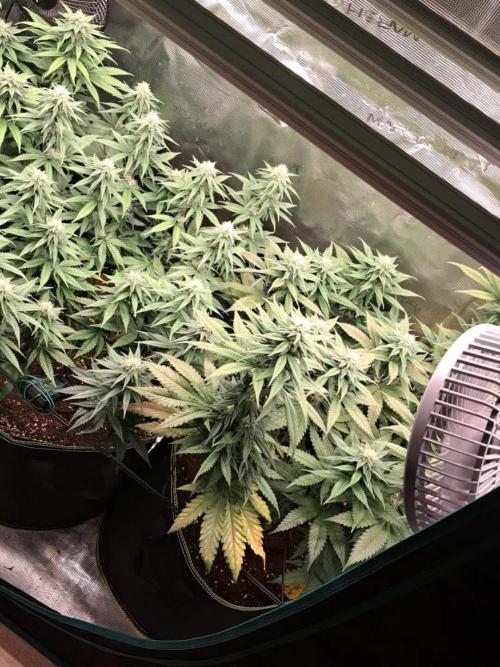
I've just completed the harvest, a tad earlier than initially planned, due to finding a bit of mold in one of the buds. Despite this minor hiccup, the trichomes were already at a decent 10% to 15% amber. So, all things considered, the timing ended up being pretty spot-on. The harvested weight was a solid 609 grams after trimming, which is quite a feat!
A lesson learned for next time: perhaps I let her grow a few too many buds, leading to a denser canopy than ideal. But on the bright side, the aroma is absolutely divine. I sampled an airy bud that had dried a bit, and wow, it packs a stronger punch than its clone mother. And the flavor? Pure, unadulterated cheese – no hint of pineapple here!
Now, the anticipation builds for the final dry weight, which I should know in about 3-4 days. It's always exciting to see the fruits of our labor fully realized.
A huge thanks to everyone who's been following along on this journey. Your interest and support mean the world.
And now, the adventure continues! I've started on Epic Buzz by Anesia Seeds. The diary for this new chapter is up and running, and the seedlings have already sprouted, marking the beginning of another exciting phase.
(https://growdiaries.com/diaries/185718-grow-journal-by-salokin)
I can't wait to share more updates with you all. Here's to the continued growth and learning in our gardening adventures!

Likes
170
Share
@Master_weeda
Follow
Bonjour à tous les padawans et maîtres jedis jour84 arrosage avec 25 centilitres d'eau ph6.3
Jour87 arrosage avec 30 centilitres d'eau ph6.3
Jour88 pratique de la techniques du tronc fendu (videos explicatives) et arrosage avec 20 centilitres d'eau ph6.3
COMMENT FENDRE LES TIGES DE VOTRE PLANT DE CANNABIS
Pour fendre les tiges de votre plant de cannabis, il vous faudra :
Une lame propre et aiguisée (une lame de cutter fonctionne bien)
Un mètre ruban
Une ficelle ou un adhésif pour marquer les coupures que vous ferez le long de la tige
Un crayon, une baguette ou une brochette pour séparer la tige une fois fendue
1. Tout d'abord, commencez par mesurer la partie de la tige que vous allez fendre. Il faut faire une incision d'environ 10–20 cm juste sous la branche la plus basse de votre plant. Utilisez un ruban adhésif ou de la ficelle pour marquer le début et la fin de l'incision.
2. Ensuite, prenez votre lame et faites une incision en travers de la tige, en commençant par le haut. Attention à faire une coupe propre, jusqu'au centre de la tige.
3. Utilisez votre lame pour tailler en descendant vers le bas, jusqu'à la marque inférieure de la mesure que vous avez prise auparavant. Essayez de tailler aussi droit que possible. Une fois que vous avez atteint votre marque du bas, laissez la lame au centre de la tige, puis utilisez un crayon/baguette/brochette pour ouvrir la partie coupée, puis sortez votre lame.
QUEL EST LE MEILLEUR MOMENT POUR FENDRE LES TIGES ?
Il existe de nombreuses théories sur le meilleur moment pour passer votre tige au couteau, mais la plupart des cultivateurs suggèrent de le faire à la dernière semaine de floraison. Même si certains cultivateurs recommandent de le faire dans les 3 derniers jours avant la récolte, nous recommandons de le faire un peu plus tôt (7–10 jours avant la récolte).
QUELS SONT LES RISQUES À FENDRE LES TIGES ?
Fendre les tiges est une technique à stress élevé très agressive que nous ne recommandons qu'aux cultivateurs expérimentés. Nous ne recommandons également pas de fendre les tiges sur les variétés à autofloraison, car cela peut être bien trop intense pour elles.
FENDRE LES TIGES, ÇA MARCHE VRAIMENT ?
Il existe un solide ensemble de cultivateurs expérimentés qui déclarent que le fait de fendre les tiges peut produire de bons résultats. Malheureusement, peu de données qualitatives le prouvent. Cependant, il semble que la fente des tiges soit originaire des Pays-Bas, où elle est pratiquée par des cultivateurs néerlandais experts depuis les années 1970.

Likes
19
Share
@MiyaguiOkPolilla
Follow
Esta variedad me encanta, huelen genial y sus cogollos son super densos y llenos de resina siempre. Poca tolerancia a los excesos y es muy fácil de estresar. A pesar de todo sigue siendo una de mis variedades favoritas ya que su aroma old school con toques ácidos me fascina!. Actualizaré luego del secado y después notas de humo. Saludos!

Likes
1
Share
@Grow4ever
Follow
Die Pineapple Express hat so einen süßen Geruch.
Wirklich tolle Genetik.

Likes
7
Share
@Viccrazyweed
Follow
Easy week, they grow nice and easy, really nice structure and healthy vegetative stage
One is two weeks older than the other, the older one is preflowering already
I am struggling a bit with space in the tent due to one girl oversized
I’ll keep updating weekly, really excited with this grow
Thanks to @james for everything


Likes
10
Share
@Sadhus
Follow
Jolie Développement latéral, bientôt le prélèvement de boutures ! Rien a signalé, bonne santé, 100% organic par Madame grow
Likes
7
Share

Likes
10
Share
@Thibaut
Follow
i am a straight newbie first summer grow. but this strains are absolutely the most beautiful i have seen the colors are out of this world i lost 2 girls on the road, but i am totally fine with the outcome they stood in a homemade grow house only feed them tap water once in a while, they stood in a storm by accident but is all good fam! when its dry i will take some nice bud pics , thanks Sweet Seeds for this amazing seed 🙏 see you all next summer


Likes
13
Share
@tresplantes
Follow
Pruned on Day 10 of flower and the smell is already coming trough
Everything good for now the ladies looking Amazing
Will do da Heavy defoliation between Day 21 and 25
Ec 2.8-3.0
