
Likes
Comments
Share


@Dictator
Follow
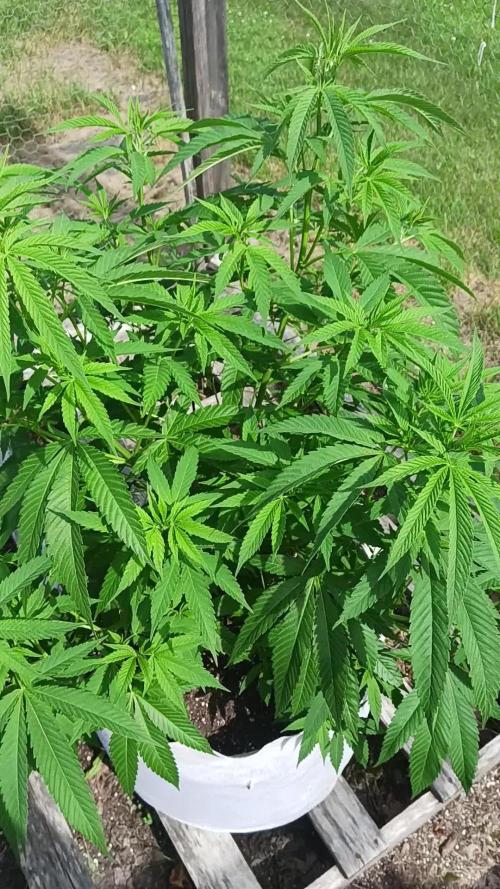
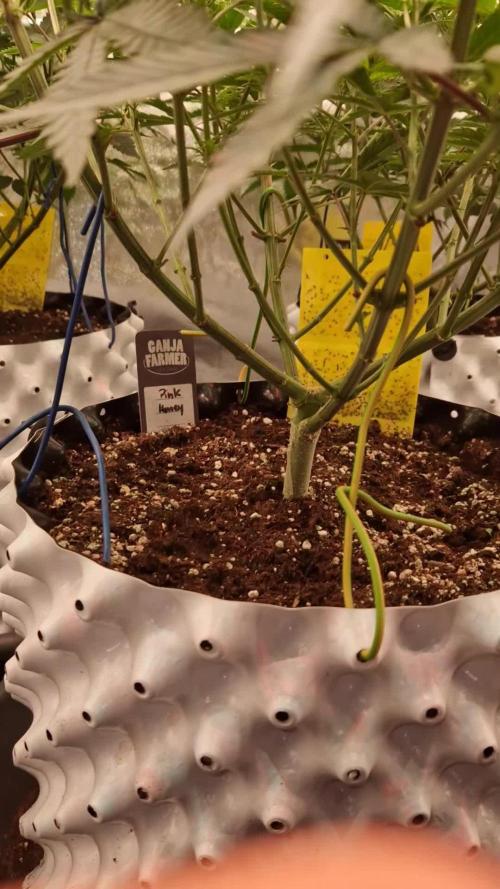
The plant is topping, it feels good, the roots are developing well 🌱

Likes
10
Share


@Martymar021208
Follow
This grow will be a very humbling experience being this is my first full grow from seedling to harvest and figured I would bring others along for this journey with me, hopefully some of you viewers may even have insight to any future problems I should have or run into. I appreciate your support and well wishes 🙏. Good luck to you and your grows. Can't wait for the first topping and to start L.S.T.

Likes
82
Share


@Budz_Bunny
Follow
No change in fertilizing behavior
I performed lollipopping today, as the plant started to shed leaves that did not get enough light on its own
Plants look splendid and have also handled the pruning well
I hope that the stretch will calm down by the end of next week otherwise I will have problems but as I said everything is tip-top so far
If you notice things that I can do better, do not hesitate to tell me,
Thanks for stopping by and see you next week :)

Processing
Likes
7
Share


Likes
11
Share

@masterofsmeagol
Follow
6/30 I messed up and put 8 days last week so I'll have tp do a six day week to get back on schedule. Pounded rain last night I guess. Very intense but very brief. As you can see in the video the plants are found great. A few have revegged so I'll need to defoliate the middle. I could make a TON of clones but it's pretty late for that. I might clone a couple outstanding plants to keep the genetics. Still seeing some pillar damage. Might do bt tonight. I'll keep this updated.
7/1 Super hot yesterday. Reached 90°. We are getting SOME rain today and thunder showers day after tomorrow. Bags still had some heft and everything looked good. I went back aroundcand found about half were at the point of needing water. He'll, they probably all did. My watering can is 2 gallons not 1.5 as advertised. So that means I used 5 gallons on the garden (not watering the 50) focusing the more water on the lightest bags. That tenth planet I'm seeing more septoria like leaves. This makes enough for me to be fairly positive ill need to treat it. I have plant doctor but I think copper works better. I also see more pillar damage so I've gotta apply something. I also need to lst more and I keep to clean put the interior of the plants so they don't get pm.
EDIT: IT WAS 80° and no rain at 6:30. Humidity close to 100% bit plants look AMAZING! I'm hoping this may be my best year yet! I won't grow a bigger plant than tjat blue cheese in the 50 but so far everything is looking good. I may add some nutes to the pink kush in the 50 due to tje slightly less green color. I assume it's just because the other soil is all New amd this was a mix. I defoliated lightly to prevent pm but I have more to do. I just wanted to get a video of the girls looking good.
7/2 82° at 9am. Glad I decided to water even thoughvi watered yesterday. I need to up my volume. Thirty degree temp swings don't help much either. I said I used 4 gals but I used 5. I had one phed already. I'm hoping this will be one of my best years. IT looks like it! I won't have that MONSTER blue cheese in the 50. It was the smallest plant anyway and shows the difference between using NEW soil and mixing old soil WITH new soil. It's a much lighter green. Still need to apply bt and do a little more defoliation.
EDIT: IT'S 90° WITH LIKE 100% RH. PLANTS LOOK A LITTLE HEAT STRESSED BUT OTHERWISE PRETTY DAMN GOOD. EVEN MY FATHER MENTIONED (KNOCK ON WOOD) "THAT I DONT HAVE ANY SHOT ON THEM THIS YEAR." LOL. I UPLOADED A VIDEO TO SHARE. HOPE YOU GUYS ARE HAVING AS MUCH FUN AS I AM!
7/3 83° at 9:40a.m. I need to increase my watering volume so I don't need to water every day. I used 5 gallons to water everything but the 50. I think I'm underwatering. However it was supposed to be severe thunder storms with torrential rain, high winds and hail. I'll gratefully take this hot sunny day instead. However in the future I think I'm not goingvto add in the predicted rainfall in my schedule. Unless it's a torrential down pour obviously. Everything g is still looking good and I've still got some work to do.


Likes
21
Share


@Jays_Not_Here_Man
Follow
A-Week 9-(Day 67) B&C-Week 9-(Day 63)
A- Loving life, she is fattening up, easily 3-4 inch round buds, about 8-12 inches long circling the plant. Lots of little nugs filling in the middle 🤩Tricomes are multiplying daily, still almost 50% clear, 40% milky, and 10% amber or so. Couple of weeks left, gotta keep air flow high and RH low with those dense buds 😎💨
B- After looking back on last weeks photos, she has really started to thicken up. She has big calyxes, and are stacking nicely. Tops on tops for this one. Her LST and topping created a very dense canopy, similar to A, but B stretched a little more.
C-Done her stretching, she is now focusing on bud building. She is stacking nicely, and I said it last week, I’m pretty sure she will be the biggest producer if she fills in as thick as her sisters are 👀💥
No issues, no pests, not even Gnats. A tip I got from WTTGT, Woooooooooh! Was to store your soil/medium near the exhaust of your tent so it always has dry warm air blowing on it. I have not had any issues with pests since doing this before starting this run, and then adding another to the mix mid-run(my GG#4) has had no issues.
The 975 ppm seems to be their sweet spot, I don’t want to push it as it has been almost uneventful with regards to issues or deficiencies. I’m very happy with the Indo nutrients line, and the addition of the Sensi CalMag xtra together have made this run super easy, considering Autoflowers are far more finicky than photo periods. The differences between each are drastic, topping and LST can be real space savers for those with small gardens, but clearly the un-topped, un-trained pheno is thriving and will produce fairly well 🌱😎💨 Happy Gardening All 👩🌾

Likes
2
Share


@dauntless
Follow
Fast forward to end of week 4, time to choose and top to start the manifold process, the large fan leaves are bigger than my hand and its starting to smell funky - like skunk a little
Week 4 would have started 4/24/2022 - adding this after the fact


Likes
9
Share


@newenglandgrowers
Follow
Week 7 of Flower going well, plants seem to be stressed a little bit though I believe it's either some slight nute burn or a nute lockout caused by overfeeding. Runoff EC coming out about 200 higher than the input also runoff ph is around 5.4-5.5 which to me indicates slight overfeeding. Going to feed one more week every other day with a watering in between each feeding ph'd to 5.7, than I will start my 2 week flush using clearex by botanicare and plain ph'd water. Some nice purples have also started to really come out this week and the trichomes are constantly packing on.
Likes
23
Share


@canongun
Follow
Day 43 - 49
My beauty has a problem :(. This my first growing with coco and showing my neophyte skills...
Everything was going fine until I realized my lady starting have some potassium issues. So, I increased the fertilizers to provide more potassium. Additionally, I also wanted to check the run-off water. I have never done that because I thought I was doing a good job. After checking the run-off water, I realized that I screwed up :)
I am sharing the data of the irrigation water:
pH: 6.06
EC: 875 mS/cm
And now please look at the run-off water data:
pH: 5.16
EC: 7750 mS/cm
Yes you read it right, and I am sure the EC and pH is literally f****d! So, there is no deficiency on the plant. She is literally drowning and there is huge nutrient lock problem...
Yesterday (28/08/2024), I flushed her with 8L of water and ~6 pH. Today, I watered her with fertilizer like as always, then checked again the run-off water and NOTHING has changed...
So, I will do a couple of more flushing, I hope I will manage to fix the problem but if the situation continues like that, it won't end up nice...
I am open every kind of suggestions fellas.
Processing
Likes
1
Share


@nausicaahime
Follow
everything changed on week 4
grow tent and cob led came to show how a good light is important.
from now til last 2 weeks, only indoor growing
goodbye CFL's, you worked well.
+ LST and ferts (2ml + 0.25)
Defoliation started
Removed branches from 1st node


Likes
12
Share


@AGP90
Follow
3rd week of Flower done, Shining silver haze is 99days old and honey cream and critical are 68days old. Been hard controlling the front 2 plants definitely taken over light of back 2 plants, starting to support honey cream at front as its coals are getting heavy ans dropping. Will increase nutrients today, 3rd week done and looking good and healthy got the odd brown pistols and hoping it's not mould related
Likes
5
Share


@Black_Widow
Follow
Привет садоводы !!!
Хотел уже срезать цветок , но так жаль такую красоту срезать
И я решил подержать ее еще недельку
Полюбуюсь еще такой красавицей
Шишки у нее как камень
оцень интересный экземпляр !!!

Likes
5
Share


@Ninjabuds
Follow
The pound cake auto so far is an amazing plant. It has grown great and is super strong. Honestly it might be the strongest growing plant I have ever grown
The weather is starting to warm up a bit it has been below freezing for over 30 days and now the snow is starting to melt finally it’s a lot easier to keep the humidity on point when it’s like 32 outside compared to 10
Likes
15
Share


@Silverback_Guerilla
Follow
2/7:
Did a thorough feeding today, and also foliar fed with Microlife Maximum Blooms. Added humic acid.
2/12:
Fed today..no time for anything else..
Likes
11
Share


@smoker420
Follow
She has really orange and sweet terps on pheno1 and pheno 2 smelled like cat piss or something growing really zesty and gassy at same time both show great colours towards the end got cuts going again for next run will be better would recommend this strain first time with exotic and wont be the last all i can say haha

Likes
5
Share


@Rock_n_Roll_Randy
Follow
This was a nice taller plant that filled in nice and is extremely delicious. It has a slight orange flavor and smell mixed with a very strong sherbert taste and smell and very dank kushy skunk exhale but I still taste the orange sherbet too and it is mouthwatering and potent. I smoke it at night because it is very strong stuff. Highly recommended strain because it is very strong and very delicious
Likes
19
Share


@sneakymexican712
Follow
This was an amazing firat grow and I’m not done yet love mainlining. Depending on how these dry and the yields come out I may just do lst and get about the same amount of yield out of the grow but I still have another week or so till I chop the others

