
Likes
Comments
Share

@MadeInGermany
Follow
Flowering day 49
since time change
to 12 / 12 h
Hey guys :-)
All ladies look very healthy and delicious :-)
We're slowly getting closer to the end.
Watering was done twice this week, each time with 1.2 l (sewing materials see table above)
At the next watering there is a very light rinse with Clean Fruits so that the last nutrients can be slowly used up.
The trichomes are now checked every day.
I'm looking for my microscope with an app so I can take pictures of it 👍.
I wish you a lot of fun with the update and stay healthy 💚🙏🏻
👇🏼👇🏼👇🏼👇🏼👇🏼👇🏼👇🏼👇🏼👇🏼👇🏼👇🏼👇🏼
You can buy this Nutrients at :
https://greenbuzzliquids.com/en/shop/
With the discount code: Made_in_Germany you get a discount of 15% on all products from an order value of 100 euros.
👇🏼👇🏼👇🏼👇🏼👇🏼👇🏼👇🏼👇🏼👇🏼👇🏼👇🏼👇🏼
You can buy this strain at :
Clearwater Seeds
Water 💧 💧💧
Osmosis water mixed with normal water (24 hours stale that the chlorine evaporates) to 0.2 EC. Add Cal / Mag to 0.4 Ec Ph with Organic Ph - to 5.8 - 6.5
MadeInGermany
Likes
82
Share


@WhiteEdge
Follow
12.03.2024
Continue into week two. Target EC is the same for this week
Girls looking great. One Purple Lemonade fall into bucket! That lid is not cut with precision😏 Put some plastic to hold till now
Clean tanks and filters with h2o2+vinegar acid +bleach
Replace all filters
Mix new batch with 2ml AN connoisseur AB + Big Bud Powder + Silica - total 20l @
Donne one pass off long misting 2m
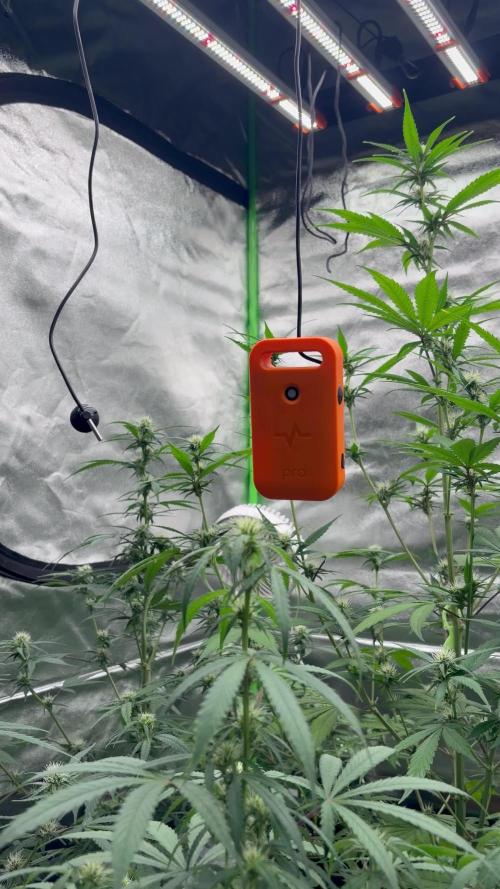
TrolMaster Tent-X arrived! Setup and registration done in seconds. Finding best placement ...
700 PPFD @ center, VPD 1.0, RH 53-56% day, RH 45-48% night, Temp Night-20c, Day-25/26c, Leaf temperature 23c, Light distance 60-65cm, CO2 750+ppm
540w@70cm distance
NT-Nutrient Tank - PH -5.9, EC -1.15, Temp-21c
14.03.2024
Top up tank with 10l off 1.2EC solution - 2ml AN Connoisseur A+B + 3g Big Bud @ 18l (1.16EC)
Replace all filters
Before top up, nutrient solution in tank is 0.86, after adding 1.2EC new mix is 1.03
PH is slightly rising, normal when EC is drooping
Girls grow nicely, no deficiencies, this week is start off stretchy faze.
Remove some big and bottom levees
PAR map 800max/600min PPFD, VPD 1.0-1.1, RH 50-54%, Temp Night-21-22c, Day-25/26c, Leaf temperature 23c, Light distance 60cm, CO2 750+ppm
580w@60cm distance
50s ON time 20min OFF time Day Time
50s Off time 30min OFF time Night Time
NT-Nutrient Tank - PH -5.92-5.99, EC -0.89-1.0, Temp-20-22c
15.03.2024
Position TrolMaster Tent-X Box on tent and connect to internet. Temperature ,Light and humidity sensor is great, I lake that all sensors and connector boxes are on RJ connectors
Great and fast install, registration and connections off all cables, censors and light! Like ability to expand system with Aqua-X and Hydro-X for irrigation ,PH/ EC/Temp monitoring off nutrient tank
Controlling solenoid valves and pump will be SUPERB!!! Recycling type off timer are great for Aero misting!
With Inkbird equipment i have issues that all connections are permanent and if you have longer cables....😡
HLG Scorpion Diablo LED light is connect via LMA-14 light adapter ! Wow i can control dimming and timing off my light via Wi-Fi😀😊😎👏🙏🙌
PAR map 800max/600min PPFD, VPD 1.0-1.1, RH 50-54%, Temp Night-21-22c, Day-25/26c, Leaf temperature 23c, Light distance 60cm, CO2 750+ppm
HLG Scorpion Diablo@83%
580w@60cm distance
50s ON time 20min OFF time Day Time
50s Off time 30min OFF time Night Time
NT-Nutrient Tank - PH -5.95-5.99, EC -0.89-1.1, Temp-20-22c
16.03.2024
Top up tank with 15l off 1.2EC solution - 2ml AN Connoisseur A+B + 3g Big Bud @ 18l (1.16EC)
Replace all filters, still everything in pristine condition after every changing, nutrient solution in tank looking and smell fresh and clean.
Reducing humidity in night time below 50% , humidifier rise temperature to 22-23c at night
Day RH is 53%, in first two hours keeping temps and humidity lower to reduce deferential form night time to 1-2c
Don't want to have more than 10-15cm off stretch in next week
Girls drink more water and nutrients every day, think around 10-12l per day
Managing EC strength with adding slightly higher nutrients solution when top up tank. Overall its around 0.9-1.0EC for most of the time
PH is stabile , slowly rise in small increments. Need to adjust @ 6.2 to 5.9 every two-three days. Probably i will leave it to swing even more.
Diablo is at 80% power @ 45-55cm from top canopy, 900+PPFD in center, lowest corners get 650+
PAR map 920max/650min PPFD, VPD -1.1, DRH 50-54%, NRH48-50%, Temp Night-21-22c, Temp Day-25/26c, Leaf temperature 23c, Light distance 45cm, CO2 750+ppm
HLG Scorpion Diablo@80%
580w@45cm distance
50s ON time 20min OFF time Day Time
50s Off time 30min OFF time Night Time
NT-Nutrient Tank - PH -5.95-5.99, EC -0.89-1.1, Temp-20-22c
17.03.2024
Top up tank with 10l - 1.2EC solution - 1.8ml AN Connoisseur A+B + 3g Big Bud @ 18l (1.16EC)
Replace all filters, install one new. Total 5 mash filters + 2 disc filters
Remove some large fan leaves from all girls. Nothing crazy. Next week is final BIG defoliation and pruning
Clean room benches a little bit after defoliation.
Whole week all girls are doing great , no sign off any kind off stress or deficiencies. Superb fast growth.
Stretching is more apparent in the end off this week. Next week is going to be madness!
18.03.2024
Raise light 10cm , adjusting to canopy level..
HLG Scorpion Diablo@83%, Set sunrise/sunset dimming @ 30min - TrolMaster Tent-X
PAR map 890max/650min PPFD, VPD -1.1, DRH 50-54%, NRH48-50%, NT-21-22c, DT-25/26c, Leaf temperature 23c, Light distance 45cm, CO2 750+ppm
Week 2 off Flowering in Summary
100l off RO water
190ml+190ml AN connoisseur A+B, 15g Big Bud Powder
70kW electricity in total for light, Pumps and AC Infinity Fans. 58kW for Light + 8kW Dehumidification + AC Infinity ventilation
Week start @ 1.14EC, nutrient strength. Strength dropping every day by 0.1-0.2. Topping up tank with 1.2EC solution bring back strength to 0.9-1.0EC
Start using AN Big Bud powder for day two off this week. For next slowly reducing Nitrogen and add more Big Bud. Next week start @ 1.2EC
Girls look superb all time, Wedding Cheesecake is going to be a biggest strain in this run. Two off them are gigantic plants, third one is little smaller.
Tropicana Cookies is short and bushy with lots off side branching. Need good defoliation next week . Purple Lemonade is also huge , all three girls
Flowering going nicely, obvious sign off formation off bud sites, pistils have shown an all girls.
PH was stabile and move from 5.85 min to 6.2 max. Swing all week without chasing perfect number.
Light distance start at 65cm from canopy finish week at 45-50cm , PPFD levels around 800-940 in center, trough whole week
Temperature vary slightly from 23c at start off day to 26c max at some points. AC Infinity T6 extracting fan program in AUTO to kick in @ 26c
Night temps around 21-23c, dehumidifier start to work at night time to bring down humidity, trying also to minimize Day/Night temperature differential for this week also
Continue in next week at same environment settings and light strength..

Likes
18
Share


@Canadian
Follow
This plant has been a Beast has been going very healthy and very strong I have been defoliation heavily to ensure maximum light penetration into the canopy in order to make them ready for flowering cycle . Currently running on 12/12 cycle.
I will continue to update thank you for reading have a happy grow


Likes
2
Share


@LoganatorDude
Follow
I absolutely love to watch them grow! Especially that moment they hit their first growth spurt.
I started with RO water that is remineralized for drinking purposes. The ppm is only 18! My tap is 156! So considering they don’t need much water, I’ve been stealing some of our drinking water. The RO water starts at pH of 7. After I add the nutrients, ppm of 249 @ pH of 5.8 while soil is still sweet @ pH of 7
I think my days are off as a new week begins on the last day of the previous week. I am going to leave that for consistency.
04/21 - Noticing some possible nutrient issues with the Fruity Pebbles for several days now. Going to see what she needs. Up front I’m thinking maybe just a super small amount of Amino Acids with a little Epsom Salt. Maybe she is struggling to access the nitrates from the neem cake. IF it’s a issues with nitrogen. We will see. Maybe she would benefit from some extra calcium?… Any ideas are greatly appreciated.
Day 22 and I am noticing how these girls have been burning up a lot of potassium lately, dealing with the wind and sun 💨 ☀️, getting pushed around all day.
I plant to top dress with some Kelp Meal pretty soon.
Day 24 -> 4/22/22- a quote from the weather on today’s red flag warning and dust storm warning.
“ HAZARD...Less than a quarter mile visibility with damaging wind in excess of 60 mph. SOURCE...Satellite imagery. IMPACT...Dangerous life-threatening travel.”
I’m keeping the girls inside today.
Day 26, I was planning to check the runoff on some of these girls, especially the fruity pebbles, however I messed that up as I also top dressed WAY too much of the seaweed bliss. So I flushed with plain RO water at pH of 7 until there was only slight coloration in the runoff. I didn’t check the runoff as a lot has changed with all that flushing. So next watering/feeding I will make sure I check the runoff on multiple plants.
So the seaweed bliss with its 17 on potassium, seems to be the most likely culprit for why there is a bronze-ish color on the inside of the new growth. Hopefully a foliar feed of Epsom salts can correct the problem. Inside tent, lights on LOW. Noticing similar pattern in all of them to a degree, most noticeable in the fruity pebbles.


Likes
30
Share


@coyote2thick
Follow
*clears throat* NOOB SPEAKING! So I fudged up and just realized that I’ve been using the kool bloom POWDER way too early. Never realized the difference between the liquid and powder. She seems to be doing good and fattening up fine. I’ve never seen a issues from using it too early. Smell fruity, spicy, and sweet.... maybe from the kool bloom being used too lol early I dunno. From what I read it may hurt the yield but with two week left in flower only time will tell 😞 thankfully I know it’s strong so only ever used very small amounts. Thoughts???

Likes
11
Share


@4F1M6
Follow
Stretch is done and flowers are piling on now! I treated with lost coast as a preventative. I kept the feed the same but it will be altered end of grow week. Canopy is getting hella full can't wait to watch these colas stack on. Until next update. Happy growing and stay lit fam.

Likes
16
Share


@Mrg7667
Follow
Day 74 and there getting chopped today! I thought the harvest was going to be broken into two separate weeks considering the times on the Choco was listed about 7-10 days sooner then the DD (wich was listed at 70 days for flowering)
However looking at the tricombs on the Chocolate Marshmallow most pheno didnt start getting amber untill the DDs did as well! A couple DD pheno could have maybe gone a couple more days but we will see!
Going for reveg on all the pheno, since i didnt get to take any clones. We will see how it goes!

Likes
10
Share

@AestheticGenetix
Follow
Everything is great with these genetics.
Great breeder. 100% of 11 seeds have made it to maturity.
I have culled 2 males.
I have 1 that has insane structure compared to its siblings. The only one with side branching was a male. I haven't culled it yet but I probably should asap
Likes
41
Share


@Kmikaz420
Follow
Bonjour a toutes et tous (cette semaine j ai eu un petit soucis sur une melon gum (bud rot) alors que je ne dépasse jamais 50% d humidité mais je pense le problème viens d autre part (les têtes ont triplé de taille en une semaine et vue qu'elles sont en contact c est pas top pour la circulation d air j ai donc enlevé les 2 têtes et désinfecté comme il le faut , j ai également monté un gros ventilateurs en plus )
Autrement tous ce passe plutôt bien d ici fin de la semaine on passera au flusch voilà voilà les amis j ai enfin trouver la force et le temp de sortir les plantes de la tante (hors mis les 2 plus grande melon gum / et cherry cookie) mais promis je les sortirais très vite.

Likes
10
Share


@Organic_G
Follow
Wachsen und reifen ganz gut, überlege bereits eine zu cutten aber denke warte noch ne Woche oder so
Good Things Take time ;)
Ansonsten Terps sind jut
Likes
Comments
Share


@8_SafeMode
Follow
live now! FLOweek 6day41 she so cool!
#fallen angel #clones #thaiweed #420bkk #livingsoil #organic #growergreenroom #ganja

Likes
15
Share


@JeyGanesha
Follow
3 settimana 🔥💪👍 e crescono bene.......
La prossima settimana inizierà la pre fioritura...vamos vamos belle mie... Crescere forti e grandi.....,
Ma soprattutto venite buone🤣😂🤤
27/10/2024 ha iniziato la pre fioritura 💪💚💛❤️
Likes
10
Share


@Unnamed
Follow
Added Yara Kristalon Orange, Yara Calcinit and a little bit of Haifa GrowClean to the reservoir.
Adjusted PH/ORP, PH- adds P and ORP adjustment adds K.
Light intensity is measured at the hottest spot.
The stem is swelling, the netcups are 24/7 soaked due to the pipe being full with roots and increased water levels, next grow I'll go for a bigger pipe.
The stem is not getting soft it is actually harder at the splitting part.
Flowers are swelling up nicely, no deficiencies, stretch stopped, EC 1800-2000 seems to be a good range for this strain/pheno in my specific setup.
Did some defoliation as needed.
Can't increase the light distance anymore, kinda hot for the super stretched branches but great for the rest, the super stretched branches don't show any sign of stress so I take that :)
Nothing else to report.
Values are average of the day.
DATE - °C - RH% (Tent Temp/RH)
20241118 23.4 64.6
20241119 22.9 64.9
20241120 24.0 60.7
20241121 23.5 59.9
20241122 23.7 59.5
20241123 23.7 60.3
20241124 23.4 60.9
DATE - PH
20241118 5.90
20241119 5.88
20241120 5.91
20241121 5.91
20241122 5.92
20241123 6.01
20241124 6.02
DATE - ORP (mV)
20241118 70
20241119 101
20241120 97
20241121 80
20241122 88
20241123 87
20241124 91
DATE - EC(us/cm)
20241118 1991
20241119 1740
20241120 1817
20241121 1846
20241122 1847
20241123 1941
20241124 1966
DATE - CF
20241118 19.91
20241119 17.40
20241120 18.17
20241121 18.46
20241122 18.47
20241123 19.41
20241124 19.66
DATE - °C (Reservoir)
20241118 21.8
20241119 21.7
20241120 22.7
20241121 22.1
20241122 21.5
20241123 22.2
20241124 22.3


Likes
1
Share

@GreenEldritchGardens
Follow
Sour Jealousy Auto was one of the strains that always caught my eyes but I never bought and grow it. Now it's time to correct this error :)
Likes
13
Share

@TrickzGrowz
Follow
Sie hätte sicher noch 2 Wochen gekonnt. Aber Heute ist schon Ernte bei den anderen Ladys.
Dafür das Sie eigentlich nur 12/12h Licht bekommen hat, bin ich sehr zufrieden mit der Pflanze. Ein echt hübscher Pheno und der Geruch ist einfach übertrieben intensiv! Die werde ich sicher noch einmal anbauen!
Processing
Likes
24
Share


@GrowGuy97
Follow
HUGE shoutout to Paul at New420GuySeeds for sending me these new 3 Run Homer test seeds to try out! I am extremely excited to see how this grow goes & to make it even more interesting there are currently no diary’s with this strain on GD! Everyone go check out their website & get some for yourself! I will be back tomorrow with day 1 pics when I get them planted! Keep watching & happy growing friends!✌️🏼🤙🏼🌱
Day 1 - Everything is going great all 3 seeds popped!👍🏼 Finally got them planted & watered with Fox Farm Big Bloom (6tsp per gallon)
Day 2 - I can see all 3 seeds starting to come up we are off to a great start👍🏼✌️🏼 Gave them a little more water this morning with big bloom, grow babies grow!
Day 3 - Everything is going great!🙏🏼
Day 4 - All 3 are growing strong👍🏼
Day 5 - PH water 6.4
Day 6 - end of week 1, everything is looking good✌️🏼🌱

Likes
90
Share


@OrganicNature420
Follow
Germination date 🌱 29/11/2021
Day 84 23/02/2022
Strain 🍁 SinCity seeds Frosted Biscotti
(Biscotti Sundae x Whitenightmare)
THC% • Unknown
💡 Mars Hydro FC-E6500
• Power draw 650W + 5%
• Max coverage 5 x 5
• LED 3978 pcs high quality chips
• Max Yield 2.5g / watt
• Noise level 0 DB
• Removable Driver & Light bars
• Daisy chain
• Fast cool system
https://marshydroled.co.uk/ 🇬🇧
PROMO CODE • (organicnature420) DISCOUNT
https://www.mars-hydro.com/ 🇺🇲
PROMO CODE • (ORG420) DISCOUNT 👍🏻
⛺ Mars Hydro 150 x 150 x 200cm
📤📥 AC infinity 6inch
💧 10lt dehumidifier
❄️ 3.1kw air con system
💉 Nutrients Living soil (dry amendments)
Grow
Bloom
Bloom2
MycoBoost
Barley
🌱 Growing Media • Soil
Notes 📝
Faster improvements by lowering temps. Terpine production on point 👍🏻 a little behind the coco girls but not enough to worry about. Little feed of greenbuzz and bat guano 🌱💚
Discount codes in bio for Mars hydro


Likes
3
Share


@RunicKevin58675
Follow
Good evening to all growers !! It starts to make a certain smell that is now clearly perceived even outside the growroom... So from next week we will attach the filter you have activated carbon ;D