


Likes
5
Share


@WooderIce
Follow
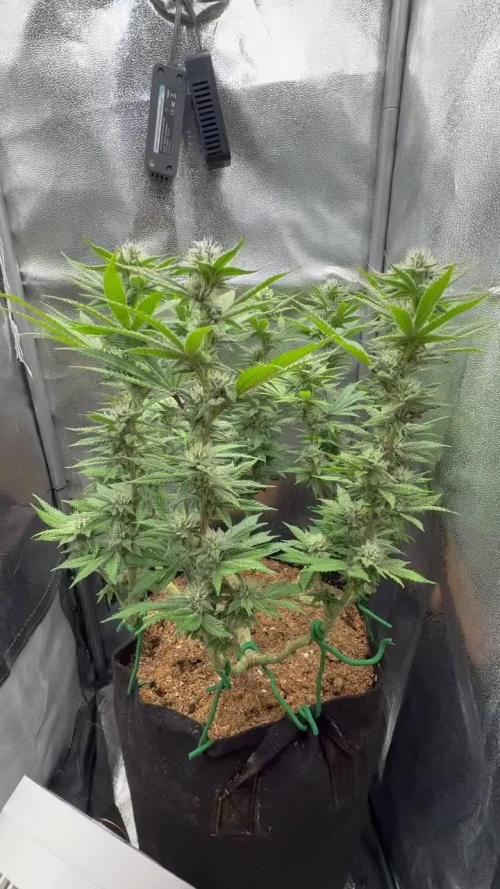
flush week! plants looking beautiful. Ill continue to flush for another 4-5 days, harvest mid next week. buds are so heavy, had to do some major tie ups to keep them upright for these last few days.

Likes
Comments
Share


Likes
4
Share


@2x2UkGrow420
Follow
9weeks and 4 days seed to harvest, 125g dry weight👊🏻 Banging straight after a dry 💯 white ash, gonna be killa when had a good cure😎😤

Likes
18
Share

@GREENPHOENIX6262
Follow
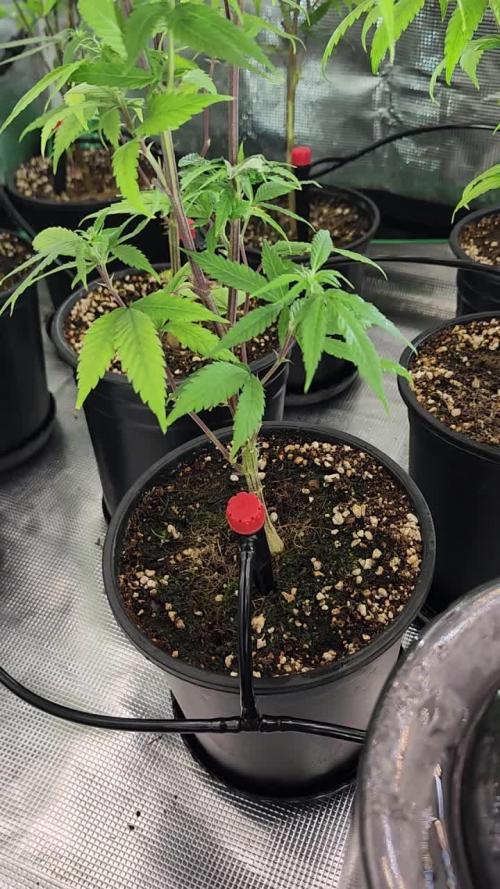
05/03 - (C) - All the babies are coming along amazingly - They are in week 2 of early pre-flower and white hairs are setting in accordingly - Since the addition of the drip lines and keeping their feeds consistent they are thriving and coming into flower without any issues.
05/03 - (M) - The mother is also coming along nicely - Dense nuggs with heavy trichome build up on all the colas - I have increased her feeds to twice a day at 1 minute feeds per cycle.
05/07 - Disclaimer - Please disregard the weeks on the grow calendar as I am now they are offsetted for Mother - Clone harvest.
05/07 - (M) - Cutting down the mother this weekend, She seems to be suffering a bit from being ran so long (Lessoned learned) - Her buds are dense and frosty af!!😎😎😎- Her dry run will be as much as 60-60 can be (Low and Slow).
05/07 - (C) - Clones are in early flower running accordingly - since hooking them up to the Vivosun Drip system their feeds have become more consistent allowing them to feed on schedule - the feeds are offsetting clean water and nutrient feeds - They will continue to run in the 3x3 until the mother is dried out and harvested then they will be moved into the 4x4 - I will also increase "Cane Molasse" dosage to increase trichome production and facilitate and more robust terpene profile for all of them.
😎😎😎😎.. Peace and Bud..

Likes
17
Share

@MistaOC
Follow
12.01. F10
Everything is running according to plan and the ladies are growing strong and evenly. The plants are currently developing a lot of small side shoots, which slightly reduces internal airflow. As a result, minor traces of powdery mildew are still present – not completely gone, but clearly under control.
Any affected leaves are removed immediately when spotted. In addition, the plants are treated once a week with Purolyt, which has proven to be quite effective so far. Overall, the mildew situation remains manageable and at a low level.
The drip Blumat irrigation system is working reliably and takes care of watering automatically. A humidifier is not needed, as relative humidity stays consistently around 55–60 %, which is more than sufficient at this stage.
The Biotabs nutrients continue to perform exceptionally well, with very active soil life supporting healthy and vigorous plant growth. All in all, this run is shaping up very nicely.
Likes
2
Share


@EtnoGrow
Follow
Well, those in the catalog died or did not germinate well, apart from that, the 6 seeds without breed that we have saved from good buds that came into my hands germinated well. here I share a little of what could be recorded, as you can see there is a bigger one that was the attempt to germinate the cars with an approximate age advantage of 25 days, with that criterion I will comment on this one in particular and the others in your set.
The largest in age also has the largest pot of all of 11 liters approx 3 gallons
The 2nd largest is for having the 2nd largest pot of 7 or 8 liters approx 2 gallons
The remaining 5 are in pots of 3.5 liters or 1 gallon
We also started fighting with the high temperatures due to the weather, which will go down as the months go by in our favor, we turn on lights at night and turn off the lights during the day to compensate, which we will manage just as well as the plants adapt, as will be seen until 3 o'clock 4 week of flowering, which is the one we are currently going through when this diary is being updated
Likes
2
Share

@hassehujasse
Follow
Llama al Doctror! Me estoy creciendo de maravilla. Buenos noches para GG4
Empesamos bien otra semana con co2 elevado hasta 1200 i ppfd hasta 1500
Likes
11
Share

@Chuckwaggon420
Follow
This week has been interesting but I have came out on top.
Had a problem at beggining of week and had it fixed towards the middle and everyone bounced back! Had a mistake on my end not mixing the 5L jug over the months that I had it so by time got bottome was more potent than should be.
Got a new jugs and calibrated new ph pen trashed old wouldn't keep calibration was broken or something would be off in 4 days.
Have cut out the botanicare for a bit to see how it reacts with my hard water already testing at 180ppm should be enough calcium and magnesium along with A&B.
Have had a bunch of growth over the last week since everyone is feeling better.
Stay up everyone
💚


Processing
Likes
21
Share


Likes
6
Share


@Ninjabuds
Follow
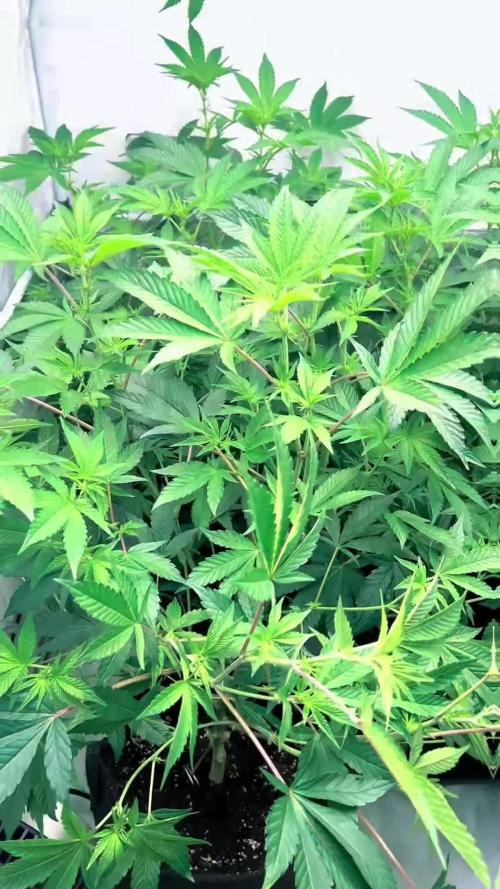
My permanent marker plants are looking really interesting! The short and stocky one with the purple leaves is super vibrant. I love that pop of color against the green of the other plants. It's a little different from the taller plant, which has this really cool stacked-up look to it. I'm curious to see if those stacked-up leaves will change color too.
The past few weeks have been so beautiful, watching the plants grow and change. It's amazing how something so small and fragile can turn into something so strong and vibrant. Now that they're getting ready to bloom, it feels a little bittersweet. I'm so excited to see the finished product, but I'll definitely miss having them around while they're growing.

Processing
Likes
4
Share


@2x4auto
Follow
Good week of growth. Fed twice throughout the week. Couple signs of insects but hoping it's just the few fruit flies I have in the vicinity. Also continued with LST, both plants seem to like it. Growth on Alaskan purple is slow due to the shitty Amazon light overjead I believe. Seemango has a mars hydro ts1000 overtop.


Likes
42
Share


@Brown832
Follow
Everything is going good happy with the progress, I flipped the lights about 5 days ago and put another net up yesterday just to see the stretch progress, I started to use bio bloom and bio topmax with feeds.
Hopefully I start to see some little buds forming. 😃

Processing
Likes
6
Share


@eldruida_lamota
Follow
Y hasta aquí, el corte última semana ya de todo el proyecto, solo queda tijera en mano y esperar para catarlo.
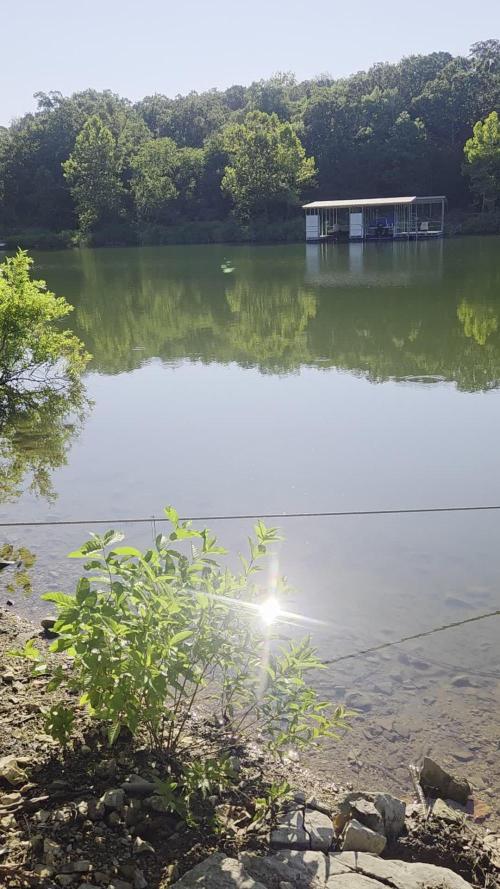
Os muestro mi zona de trabajo en un video 🤷♂️ Para mi consumo justo
Likes
52
Share


@Fatnastyz
Follow
Really getting thick now! Showing some yellow, begging for some P/K! I just added in Success Nutrients Game Time, so excited to see how fat she can get. I'm a bit obsessed with her now, she looks so pretty.
She's about 24" now with her bud growing. Still an easy going plant with minimal effort needed.
Likes
Comments
Share


Likes
4
Share


@pzwags420
Follow
week 3 flower is going great. I increased my UVA lights to 8 hrs on. Gsc and Blueberry have decent bud-lets already on day 17. OG kush has preflowers. waiting on Blueberry muffin to show pre fowers should be soon. At the end of week 3 GSC and Blueberry are doing the best and starting to get more trichomes. Im waiting on OG kush And Blueberry Muffin to really get going!

Likes
72
Share


@BodyByVio
Follow
The plant is drinking over 3 gallons of water every day. I’ve lowered the PPM’s to 600. Everything seems to be ok now. I will try to change the reservoir water every 5 days from now on.
She started to smell amazing! Very lemony 🍋
P.S. Lowerd the TDS to 550 PPM on day 46.
Also just realized that I stressed my plan with to much light. I moved the light at 13” and dimmed to 95% ... I will continue to dim it 2% every day...

Likes
8
Share


@hooolian
Follow
20/02: The plants are overall reacting well to the larger dose of nutrients especially the ignitor - there are lots of bud sites throughout. I was under watering some plants which has resulting in wilting stems and leaves - will move onto 1 litre of water every other day from next week. 1 OG kush and 1 White Widow is lagging behind but we'll get there. Good strong stalks mostly for all the plants. Gave the a hefty defoliation this week also trimming the fan leaves and letting light penetrate the lower branches and bud sites.