


@Heregrowsnothing
Follow
The time for this beautiful girl to be chopped and dried, I flushed her for 4 days then shut the light off for the last 48hrs before she came down. Smelling amazing, I must also say she doesn't look too bad either 😍😍 the other 3 plants managed a total of 300 grams which I am delighted with and that's curing nicely with a few 62% boved packs 😎😎😎 ✌️🏻


@TheBulldozerSicily
Follow
Iniziamo un nuovo ciclo alla scoperta di nuove genetiche e nuovi sapori.
Continuiamo crescendo a fare e condividere con voi nuove esperienze!
Seguitemi e lasciate Like!! Happy growing!!


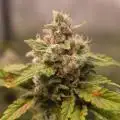


@UGrowGuy
Follow
Been a lil busy. Haven't been on here or in the garden as much as i need to. The girls are growing all natural. I have literally taken no leaves off their entire lives. Some of the old fan leaves die during light drybacks. Inuse deybacks for stacking nutes and some light drought stress which can increase oil production. They just have a small cage at two levels. I have cut nutrients to most of them, going for quality smoke as its already more than I can consume lol. Two look like they are still bulking. Some are getting close. Everyone is still getting bokashi/ffj for the terps and ethylene found in the ripe fruits. It helps with senescence.. I turned the lights and temps down to help crop steer ‘em. We are getting close! Thanks for readin


@cadur
Follow
Bobbing along. Moved into its own tent...happier now.
Almost at the pre-flower stage and LST going well.


@Mrs_Larimar
Follow
Sunday, Feb. 14th.
Purple Queen Girls are growing nice
They are showing nice Indica style
Big Strawberrylike Leaves, she grows very dense , with more short Internodes
I cleaned up the Plant a few Days ago
that means , taking away undergrowth and small shoots
She going to be topped again, and then she will be sent into Flower , with her Tent Company.. the 3G
Lights are still on 50 Percent
and its agreat thing to have such
high Quality Light, that is dimmable
Here are the Links for te3nt and Light:
Light: http://bit.ly/marshydro-sp3000
Tent: http://bit.ly/marshydro-120x60tent


@BudMunchies
Follow
04/06/25:
There’s not much to report today, which is exactly what I want to see at this stage. All five plants have recovered well from the transplant and topping, and they’re starting to look happy again. Leaves are upright, color is rich, and the overall posture of the plants suggests they’re back in growth mode. They’re beginning to bush out as expected, and I can tell the root systems are continuing to expand into the 1-gallon AirPots.
Structurally, all five plants are still showing very similar growth patterns. The internode spacing and leaf size are fairly consistent across the board, and none of the plants are falling behind or surging too far ahead. That uniformity is great for managing the canopy later and suggests solid genetic stability across the seeds.
If all goes to plan, I’ll top each of the four current branches in the next 4 to 5 days. That will give me a solid base for structure going into the final stages of veg. I expect that the final transplant into the 6.9-gallon AutoPot XL system will happen in about a week and a half to two weeks, depending on how quickly they root out the current pots.
Ideally, I’ll be able to determine sex before that final transplant. That would let me cull any males and avoid wasting time and space in the larger pots. I’ll return with another update after the next topping session or if anything of note comes up before then.


@Master_weeda
Follow
Bonjour à tous les padawans et les maîtres jedis
Jour42 ma plante entre bien en floraison je pratique sur elle une defolliation pour permettre aux têtes de prendre la lumière
La floraison des plantes de cannabis
La plante de cannabis passe par différentes étapes de vie avant de parvenir à la récolte. Ces étapes sont : la germination, la pré-croissance, la croissance et la floraison.
Pour les autofloraisons il n'est pas nécessaire d'avoir de changer le cycle de lumière elle entre en floraison automatiquement voilà d'où elle tient son nom "d'autofloraison"
L'origine de l'auto-floraison vient de la sous-espèce "cannabis sativa ruderalis" , qui à l'origine produit de très faibles niveaux de THC. C'est en croisant cette variété de marijuana avec d'autres qui produisent des niveaux de THC plus élevés qu'à vu le jour ce magnifique compromis que sont les variétés auto-fleurissantes avec des taux de THC très satisfaisants. En parallèle, cela a permis d'améliorer la production de ces variétés, qui initialement étaient exceptionnellement basse.
Pour des résultats optimaux, en culture Outdoor (extérieur), je recommande que la germination des graines de marijuanaAuto-flo se fasse entre avril et août.
En culture Indoor(intérieur), la photopériode idéale que ce soit pour la croissance comme pour la floraison est de 20h de lumière. N'oubliez pas que ces graines ne sont pas tributaires de la photopériode pour passer en floraison.
Il est préférable d'utiliser des pots d'une capacité de 10 à 20L dès le début, étant donné que leur cycle de vie est réduit, les auto-flo n'ent pas besoin de plus de volume pour se développer. Vu sa petite taille (et la discrétion) elle fait l'objet d'un bon choix pour la culture de cannabis sur balcons.
La première variété de Lowryder auto-floraison a été créé à partir de cannabis indica sativa croisé avec des génétiques de cannabis sativa rudelaris par la banque de graines de marijuana "The Joint Doctor". Puis vinrent la White Dwarf de "Buddha Seeds", la Roadrunnerde "Dinafem", l' Auto Stoned d' "Autofem", la Speed Devil de "Sweet Seeds" , la Maxi Gom de "Grassomatic", la Flash, la Gnomo de Kannabiaet bien d'autres.
Jour42 defolliation (video)
Avant toute chose n'oublions pas de bien désinfecter ses outils et bien ce laver les mains.
Quesque la defolliation ?
LES CULTIVATEURS AMATEURS, PRENEZ GARDE, MAIS NE PRENEZ PAS PEUR
La défoliation consiste à retirer les feuilles des plants de cannabis en intérieur afin d'accroître le rendementfinal. Le cultivateur amateur doit faire preuve de vigilance lorsqu'il commence à appliquer cette technique de taille. Malgré le débat sans fin entre ceux qui prônent cette technique et ceux qui la dénigre, il n'y aucune raison pour qu'un amateur ne s'y essaie pas afin de voir si ça lui convient ou non.
COMMENT DÉFOLIER
Que vous tailliez les feuilles ou les branches des plants de cannabis, il vaut mieux utiliser un sécateur stérile qui est confortable en main. Arracher des feuilles à la main manque de finesse et engendre souvent par accident, l'arrachement des couches d'une tige en plus de la feuille. L'objectif principal de la défoliation est de permettre une meilleure pénétration de la lumière et de promouvoir la production de plus grosses têtes. Les feuilles éventails qui font de l'ombre doivent être retirées. Tailler la tige principale et/ou les pousses secondaires n'est pas de la défoliation.
La règle d'or lorsque vous donnez à vos plantes un rafraîchissement est de commencer avec les feuilles nourricières les plus grandes et les plus larges, en taillant du bas vers le haut. Il est important de retirer les feuilles stratégiquement et non pas au hasard. Pensez également qu'il vous faut limiter votre rafraîchissement à approximativement 10 à 20 % des feuilles totales de votre pied. Il est très facile de s'emporter durant la taille et de se retrouver avec des plantes chauves. Un excès de taille de feuilles empêchera la photosynthèse et paralysera vos plants.
QUAND FAUT-IL DÉFOLIER
Il est assez rare d'appliquer la défoliation comme seule technique pour obtenir un fort rendement. La taille des feuilles est généralement associée à d'autres méthodes de tailles et de palissage pour un meilleur rendement telles que le topping ou étêtage, le FIMming, le LST, le manifolding, le supercropping et le ScrOG. Les cultivateurs utilisant la méthode ScrOG auront besoin de retirer toutes les croissances inférieures ainsi que les feuilles et les tiges se trouvant sous le filet.
Les plants de cannabis peuvent être défoliés dès lors qu'ils sont passés de la phase de plantule vers la phase de croissance végétative. Cependant, il est recommandé aux cultivateurs amateurs de laisser aux plantes 1 à 2 semaines de croissance végétative avant de s'attaquer à la défoliation de celles-ci. De plus, certaines variétés sont plus sensibles à la taille que d'autres et de ce fait, seront plus stressées par la taille des feuilles. Surveillez minutieusement le comportement de vos plants après la taille. Une période de convalescence de minimum 3 à 7 jours avant de recommencer la défoliation est fortement recommandée pour éviter trop de stress aux plants. Les cultivateurs peuvent également défolier pendant la phase de floraison, ce qui permettra à l'énergie de la plante d'être concentrée vers la production de têtes tout en limitant l'ombre et l'excès d'humidité. Néanmoins, il est important de ne pas défolier trop tard sous peine de simplement blesser ses plants inutilement.
LES AVANTAGES DE LA DÉFOLIATION
Évidemment, l'avantage numéro un de la défoliation, c'est l'augmentation du potentiel de rendement de cette technique de taille pour tous types de cannabis allant de la photopériode aux variétés autofloraison. Ce n'est pas un secret que les fleurs qui reçoivent plus de lumières deviennent plus grandes et larges que celles dissimulées dans l'ombre des feuilles. De plus, retirer les feuilles intérieures des plants touffus aide à prévenir toutes menaces de moisissure. Les plants très feuillus avec un feuillage intérieur dense produiront une quantité importante de têtes pop-corn. Dans le pire des cas, les branches de têtes et les têtes qui sont denses succomberont au pourrissement.
Si vous observez des gouttes d'eau se former sur la surface des feuilles, il est grand temps de penser à faire de la défoliation. Libérer la zone inférieure et médiane des feuilles est un excellent moyen d'améliorer la circulation de l'air.
LES DÉSAVANTAGES DE LA DÉFOLIATION
Les plants de cannabis en intérieur bénéficient de la défoliation pour deux raisons. La première est parce qu'ils reçoivent la lumière d'une source stationnaire au-dessus d'eux, et la deuxième est parce que les conditions environnementales sont contrôlées par le cultivateur et non Mère Nature. Les plants d'extérieurs eux, n'y gagnent pas beaucoup, car les cas échéants se vérifient pour eux. Le soleil traverse le ciel, illuminant sur sa route, différentes portions de la plante de son lever à son coucher.
Les cultivateurs en extérieur n'ont pas besoin de manipuler les plantes afin qu'elles se développent en adoptant une structure plate puisque le soleil est infiniment plus puissant que n'importe quelle lampe de culture et qui plus est, il est toujours en mouvement. Tailler les feuilles des plants extérieurs les rend également plus vulnérables aux conditions humides et brise leurs barrières naturelles contres les nuisibles.
De nombreux cultivateurs d'intérieur peuvent, et malheureusement, c'est souvent le cas, réduire le rendement final à cause d'une défoliation faite au mauvais moment et/ou excessive. Tailler les plantules n'est pas conseillé et engendre souvent des plants nains. Scalper les plants matures est encore pire, et au lieu d'obtenir de longues branches de têtes, vous obtiendrez probablement encore moins de fleurs. De même, tailler des plants malades ou en mauvaise santé à n'importe quelle période de la croissance risque de paralyser la croissance plutôt que d'encourager la formation de fleurs denses.
Jour44 Arrosage une fois sur 2 topmax de biobizz
Jour46 arrosage avec de l'eau ph6.3 à laquelle j'ajoute 0.8g par litre d'eau de feeding enhancer greenhouse.
Jour47 léger arrosage.
Jour48 léger arrosage



shorts_status_processing


@MadeInGermany
Follow
Welcome to the Green House CUP 🏆
Hi everyone :-)
I hope you are all fine 🙏🏻.
This week the lady has developed really well 😍👍, which probably has something to do with the Green House Powder feeding that she has been using for a few days 😎.
I will top her tomorrow for the first time. After a few more days, I will spontaneously decide whether to do LST or a few more times top :-)
Depending on what time allows and how it develops 🤗. It seems to be a very nice genetics.
This is how you are used to from Green House 😍🙏🏻.
I wish you all a good start to the week, stay healthy 🙏🏻 and let it grow 😎👍
Green House Seeds Company Cup 🏆
Type:
Wonder Pie
☝️🏼
Genetics:
Wedding Cake x OG Kush
👍😍
Vega lamp: 2 x Todogrow Led
Quantum Board 100 W
💡
Flower Lamp : 2 x Todogrow Led
Cxb 3590 COB 3500 K 205 W
💡💡☝️🏼
Earth: Canna Bio
☝️🏼
Fertilizer: Bio Grow Feeding ( GHSC ) , Enhancer ( GHSC ) , Bio Bloom ( GHSC)
☝️🏼🌱
Water: Osmosis water mixed with normal water (24 hours stale that the chlorine evaporates) to 0.2 EC. Add Cal / Mag to 0.4 Ec Ph with Organic Ph - to 6.0
shorts_status_processing


@PureMedicin
Follow
Im very happy with the progress so far. One of my better vegetative periods thats for sure. I removed my scrog as it was annoying to work with
I did only water 1 time this week. Gave them around 1,2 liters each. Some a little less. PH 6, nutrients solution strenght is at 100% and they seem to be loving it. No signs of defficiencies to my knowledge.
My grow tent is a little hot peaking at 30 celcius with a average around 29 at day and 18-22 celcius at night.
Humidity is around 35 as well. My humidifier broke. I have fixed it and using it for my lemon tree and my vegetables that i got growing as well
The smell is heaven like when i open the tent and some of them have the smell i am looking for so im really excited.


@Insaniac_0
Follow
(11/25-12/01)
Hope everyone enjoys the daily progressions of overhead and side profile (Organized Chaos) Unfortunately they have too much of a toll for me to keep up with with 3 sets of grows going now, so this was the last week I am doing them on this set. I will try to add a video and black back or cover pics by end of week every week.
Week 3 Notes & Observations:
As mentioned last week, Plant 1 remains the supreme plant now and is producing nice stretch in the node spacing but is still showing a different type of leaf shape than plant 2. No issues from the mainline topping and they seem to be going okay. I will be topping again this weekend for the second of 3 total topping sessions. This topping will be 2 tops off the ends of the last and will produce 4 main colas.
**OOPS**
was being a little too aggressive in my HST while trying to set the mainline on both plants today. P1 was just a little rip of the skin, I taped her up and suspect she will be fine. However, on P2, I nearly snapped the whole branch off. I taped it and crossed my fingers hoping it works out in a week or two, but have serious doubts it will be able to mend such a large break. We'll see because I am posting ALL of the grow, the good and the bad.
VPD and PPFD:
This week I will hold the humidity in the tent to about 70-75% and temps will be monitored for 70- 75F daytime and 66-71F overnight. Im not adjusting my lights and look to control them 350ppfd max. Meaning slight increase over last week but mostly just growth increase.
Feed & Monitor:
***All feeds with nutes use either a whole ratio or combination of "Veg Mix" and "Bloom Mix"concentrates DILUTED in water until a total ppm of add-in is reached using a (Total Dissolved Solids) TDS Meter measured in PPM (parts per million). The "Veg Mix" concentrate will eventually be added in smaller ratios and "Bloom Mix" concentrate will eventually replace the "Veg Mix" concentrate entirely. The ppm and ratios of each feed will be listed when I feed. Veg mix recipe is on week 2. Bloom Mix recipe will be noted in this top message of the week that I make it.***
Day 28 (last feed was day 22)
Tested and Calibrated my ph pens. Starting weight from each pot was 18 lbs and 8 oz, P1 weighed 15lbs 12oz and P2 was 15lbs 4oz before feed. Each plant got 1 gallon of de-chlorinated tap water with 300ppm Veg Mix concentrate added (recipe on week 2 and makes 1 gallon at about 3600 to 4000ppm concentrate to dilute each feed, i.e. I only fed 300ppm above the purified water ppm this feed) The ph on this feed was balanced to 6.0ph to combat the original higher runoff ph from the first runoff feed. After feed P1 weighed 22lbs 3oz (21lbs 2oz after last feed) and P2 weighed 21lbs 14oz (20lbs 14oz after last feed). I got about 5cups of runoff on P1 (9 cups last feed) and 5 cups on P2 (7 cups last feed) . Runoff for P1 ph was 6.45 with 1170ppm (6.45ph with 980ppm last feed) and P2 was 6.45 with 1230ppm (6.45 with 1130ppm last feed). Top soil tested at: P1 6.35,6.3,6.33,6.33 for an avg of 6.327 (6.497 avg after last feed) and P2 tested at 6.47,6.37,6.26,6.51 avg 6.402 (6.46avg after last feed) - next feed will be 6.3ph as Im liking where the ph is so I dont see any issues, but will continue to monitor this way.
Day 34 (last feed was day 28)
Tested and Calibrated my ph pens. 1st Starting weight from each pot was 18 lbs and 8 oz. Before feeding this time, P1 weighed 14lbs 14oz (15lbs 12oz before last feed) and P2 was 14lbs 7oz before feeding (15lbs 4oz before last feed). Each plant got 1.5 gallons of de-chlorinated tap water with 98ppm Veg Mix concentrate added to flush any salt builds in the soil (recipe on week 2 and makes 1 gallon at about 3600 to 4000ppm concentrate to dilute in each feed, i.e. I only fed 98ppm above the de-chlorinated tap water ppm this feed) Due to this soil showing a possible calcium deficit, I am starting a 1ml per gallon add-in to test on all plants using this soil, so I added 1.5ml of CaliMagic (General Hydroponics 1-0-0) to each plant's feed then I ph balanced before feeding. The ph on this feed was balanced to 6.3ph. I used knitting needles to help both aerate the soil and create new water pathways for the roots. (a practice I may consider a new feeding standard) After feed, P1 weighed 21lbs 9oz (22lbs 3oz after last feed) and P2 weighed 21lbs 7oz (20lbs 14oz after last feed). I got about 11cups of runoff on P1 (5 cups last feed) and 11 cups on P2 (5 cups last feed). Higher runoff volume was expected with the feed volume increase for flush this round. Runoff for P1 ph was 6.65 with 838ppm (6.45 with 1170ppm last feed) and P2 was 6.60 with 879ppm (6.45 with 1230ppm last feed). Top soil tested at: P1 6.58,6.57,6.58,6.67 for an avg of 6.600 (6.327 avg after last feed) and P2 tested at 6.47,6.61,6.64,6.64 to avg 6.590 (6.402 avg after last feed) - next feed will be 6.0ph as I'm still liking where the ph is, but rather see it closer to 6.3 or 6.4 top and bottom. I dont see any issues with the feed's data other than the possible calcium deficit and I will continue to monitor runoff ppms as I expected this to be higher with more runoff.
Hope everyone enjoys the daily progressions of overhead and side profile (Organized Chaos) Unfortunately they have too much of a toll for me to keep up with with 3 sets of grows going now, so this was the last week I am doing them on this set. I will try to add a video and black back or cover pics by end of week every week.


@Turgor72
Follow
So I started this grow with thoughts of no till, closed loop, regenerative gardening….I was all out of Biobizz nutrients🤣. I made Jadaim Nettle and Comfrey ferments and put my trust in worm castings. I have produced a small but very frosty, super smelly plant.
I bottom watered 5% of soil volume when dry and misted the top to keep it moist. I top fed every two weeks with a couple of handfuls of worm castings. I low stressed trained the plant at first sign of pistils and that’s it. Super easy grow.
So the only negative is the super small plant. However it’s all relative growing in a little over a ft2 area with just 25 watts, means that 25 grams is a 1 gram/watt ratio. This is fine by me.
Now the only thing I like doing as much as growing is consuming. I will update you with the smoke report, well vape report, when the buds have dried. Thanks for following along, grow with love✌️


@GanjOS_OG
Follow
First week of Veg is done after the propagator tent. Clones looking good so far - getting healthy again. Startet LST.


@Mrg7667
Follow
Smells like Rubber bands coated in a berry sugar or berry sryup very interesting on the nose!
Harvested day 67 ish maybe a couple more hard ot tell outdoor Split the harvest into drying buds and some to made into fresh frozen hash. i can dry weigh the fresh frozen buds and put that weight in the wet section and i will put the to smoke buds in the dry weight section so total between the two will be the whole plant
Drying was a big mishap got condensation around day 10 of drying and it caused some mold 🤦♂️ right around the time i was going to cure!
Found a peroxide soak that ill post butt it seemed to take off all the mold without affecting tricomb heads! Had to re dry for another week afterward i feel like the re dry maybe messed with the terps because it definitely never got the smell back like i thought but who knows slmost 3 weeks into cure coukd get better but doubt it


