


Likes
Comments
Share


@Canna_Enthusiast
Follow
Placed 2 of 3 Seedlings into the hydro set-up
The third seed will be used for an outdoor soil grow.
Will change the water in 1 week to vega and cannazym with rhizotonic.
Planning to switch to aqua bloom on day 15.
Currently the lights are set back to 75% to save electricity.
Once flowering starts I’ll put in on 100%

Likes
189
Share


@Legendaryseedthumb
Follow
They could be in pot for 1 more week but I really need my weed right now 😂 100% cloudy but no amber

Likes
6
Share


@GoldenWeedGrower
Follow
Legend
Timestamp: 📅
EC - pH: ⚗️
Temp - Hum: 🌡️
Water: 🌊
Food: 🍗
pH Correction: 💧
Actions: 💼
Thoughts: 🧠
Events: 🚀
Media: 🎬
D: DAY, G: GERMINATION, V: VEGETATIVE, B: BLOOMING, R: RIPENING, D: DRYING, C: CURING
______________
📅 D85/R13 - 09/07/24
⚗️ EC: 0.1 pH: 7
🌡️ T: 26°C H: 65%
🌊 3L
🍗
💧
💼 Flushing 5dd
🧠
🚀
🎬
______________
📅 D86/R14 - 10/07/24
⚗️ EC: 0.1 pH: 7
🌡️ T: 26°C H: 65%
🌊 3L
🍗
💧
💼 Flushing 6dd
🧠
🚀
🎬 1 video, 3 pics, 6 macro pics
______________
📅 D87/R15 - 11/07/24
⚗️ EC: 0.1 pH: 7
🌡️ T: 26°C H: 65%
🌊
🍗
💧
💼 Flushing 7dd
🧠
🚀
🎬
______________
📅 D88/R16 - 12/07/24
⚗️ EC: 0.1 pH: 7
🌡️ T: 26°C H: 65%
🌊 3L
🍗
💧
💼 Flushing 8dd
🧠
🚀
🎬
______________
📅 D89/R17 - 13/07/24
⚗️ EC: 0.1 pH: 7
🌡️ T: 26°C H: 65%
🌊
🍗
💧
💼 Harvest
🧠
🚀
🎬
______________
📅 D90/D01 - 14/07/24
⚗️
🌡️ T: 26°C H: 65%
🌊
🍗
💧
💼 1st day drying
🧠
🚀
🎬
______________
📅 D91/D02 - 15/07/24
⚗️
🌡️ T: 26°C H: 65%
🌊
🍗
💧
💼 2nd day drying
🧠
🚀
🎬

Likes
5
Share

@GANJAT
Follow
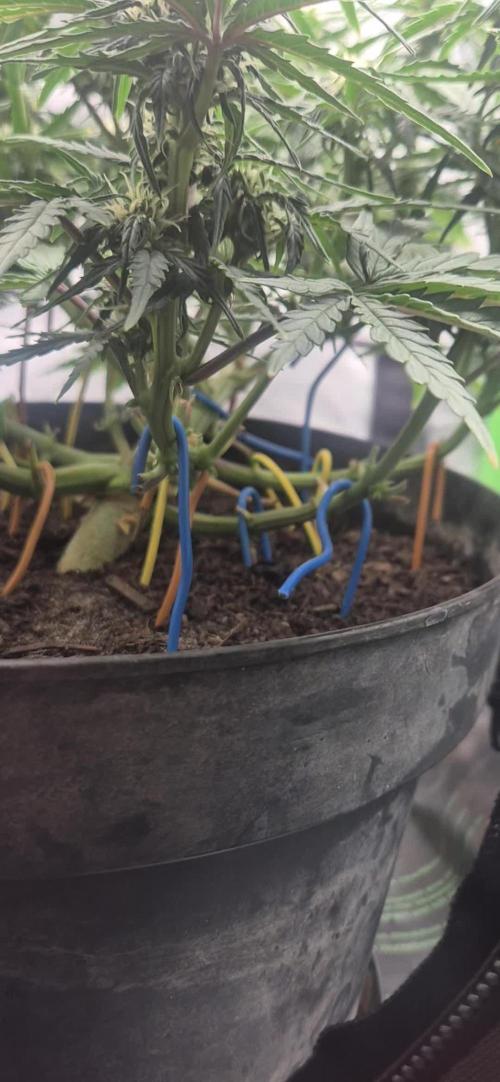
Die Pflanze gedeiht gut und mit der Entlaubung und etwas Lollipopping lege ich den Fokus auf gleichmäßig große Buds.
Die Luftfeuchtigkeit hält sich bei 40 bis 55%, je nachdem ob gegossen wurde.
Likes
4
Share

@FlowerForYou
Follow
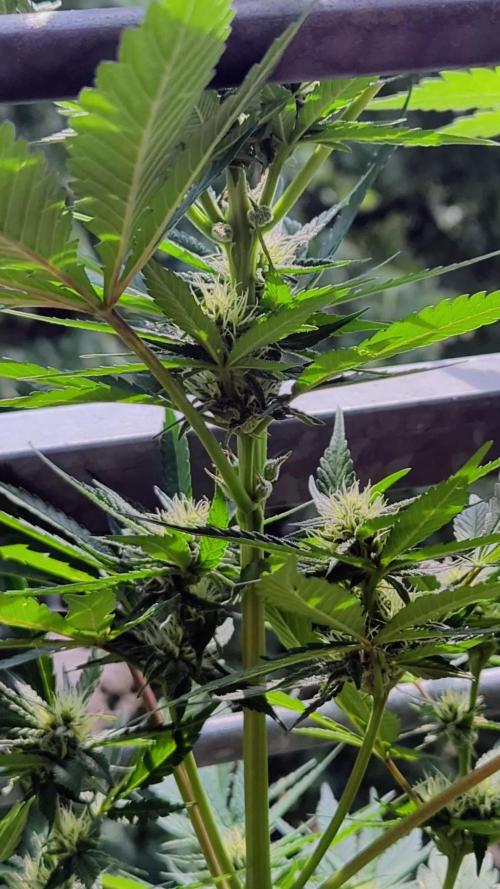
11/07/25: We just entered the third week of flowering and the explosive growth definitely stopped in the past few days! Buds are forming nicely along every branch, stacked with those first white pistils! In the close-ups, you can see those tight clusters starting to take shape, soon the candy factory will be open for business! 🍬I gave them a light feed of Plagrom Green Sensation (1ml/L) to keep the flower sites happy, and they are clearly loving it. No signs of stress, just pure jungle energy. 🦍

Processing
Likes
18
Share


@Silverback_Guerilla
Follow
Here's the talley:
72g - Candesia [Candy Cane x Amnesia] (top section)
112g - Candesia [Candy Cane x Amnesia]
116g - Candesia [Candy Cane x Amnesia]
119g- Candesia [Candy Cane x Amnesia]
127g - Candesia [Candy Cane x Amnesia]
184g - Candesia [Candy Cane x Amnesia]
TOTAL: 730g 👍
Likes
10
Share


@BelgianBudtender
Follow
Heya Growmies
Week 6 flower is over, the smells are really starting to come through now, she's still killing off lower growth displaying symproms of a P deficiency, I even added some more PK 13/14, but her top buds are super healthy and getting thicker daily.
who knows, hopefully giving her some more PK will help.

Processing
Likes
8
Share


@MountainFlowers
Follow
NEW PLANTS ARE GROWING 💪👍
I thank Zamnesia for giving me the chance to participate to Spring Cup contest.
This time i will grow two BlueBerry Automatic strain form Zamnesia!!
Germination and Seedlings:
This grow cycle started with put the two seeds in pre watered Jiffy pallets(I place them in the grow box).
After four days the new plants sprouted from the Jiffy😍 and i prapared the soil and I let him rest in the grow box to adapt to the enviroment and facilitate the transplant in the end of the week.
The soil was made by mixing BioBizz Ligth Mix soil with Monster Bud Mix by BioNova x Zamnesia.
I put 21L of soil and all 150g of Monster Bud Mix in a bucket.
After well mixed everything I put the soil in the two pots i choose too use( before I had place a leayer of clay pebbles on the bottom of the pots), one is the 11L fibric pot by Zamesia and the second is a 9.5lt plastic pot.
During the germination stage I sprayed every day water on the Jiffy to keep the humidity and the soil moist.
The seedlings stretched a littel bit from day 4 and day 7.
The enviorment of grow box:
18h Ligths On
Temp/Umidity => 20-26 °C / 40-55%

Likes
14
Share


@eldruida_lamota
Follow
Vamos familia novena semana de floración de estás Punch Pie de RoyalQueenSeeds .
Que ganas tengo de ver el final de progreso de esta variedad, las plantas están sanas, se ven con buen color.
La cantidad de agua cada 48h entre riegos, quitamos todos los nutrientes de la gama Agrobeta.
Y entramos en la recta final, últimas semanas de floración ya, y como se están hinchando las flores.
Estas próximas semanas veremos cómo acaban.
Mars hydro:
Code discount: EL420
https://www.mars-hydro.com/
Agrobeta:
https://www.agrobeta.com/agrobetatiendaonline/36-abonos-canamo
Hasta aquí todo, Buenos humos 💨💨💨.

Processing
Likes
7
Share


@Andres
Follow
is in its exact point to be cut ... she grew healthy ... with cloudy days ... the substrate I did ... was fed every 15 days with guano and worm humus only ... amber tricomas 5% and mostly cloudy
Processing
Likes
43
Share


@Jack_Greenstalk
Follow
started flush on nemo on left, probably getting chopped in next week to 10 days, V still has a few more weeks to finish, after harvesting tops of nemo, I'll reweave V all around the tent to get more airflow, better light usage, and allow them to fill in and finish up. watching trichomes on Nemo, feed is just RO water with 20 ml of finish all the way til shes ready to get cut down. going to add a few ice cubes to outter edges of pot to slow trickle and cool the feed to bring out some blue, purple and silvers in fade

Likes
24
Share


@TerpTurtle
Follow
White Truffle x Red Pop by Detroit Seed Co
BuildASoil 3.0 LOYAL TO THE SOIL
Strawberry truffle | Vivosun 2x4 | Mars hydro sp3000 | 7 gallon pot
Chem 91 x Red pop | AC infinity 2x3 | AC Infinity Iongrid 24 | 5 gallon pot
Likes
8
Share


@ChitownCannaChica
Follow
And that’s all she wrote for this little one gallon auto! Gorilla punch doesn’t miss if you want density with frost! A serious looker with the terps to follow! Smells like candy for sure! Probably my favorite of all the fast buds autos!!!
Flushed this week and she up and drying for the next 7 days. Did a partial harvest on 6 of the tops and let the rest ripen for a week. Worked well.! Taste test will be sooner! 🏻💚
Likes
14
Share


@ConspiracyFly
Follow
This week since Monday most of the pistils (little hairs) have turned from white to brown and orange.
I continue to remove leaves that are obstructing the flowers.
When I look through the magnifying glass the trichomes are some 60% clear, 40% cloudy, 0% amber.
The goal is to harvest with these values in the trichomes:
0% clear
90% cloudy
10% amber


Likes
18
Share

@All_our_small_plants
Follow
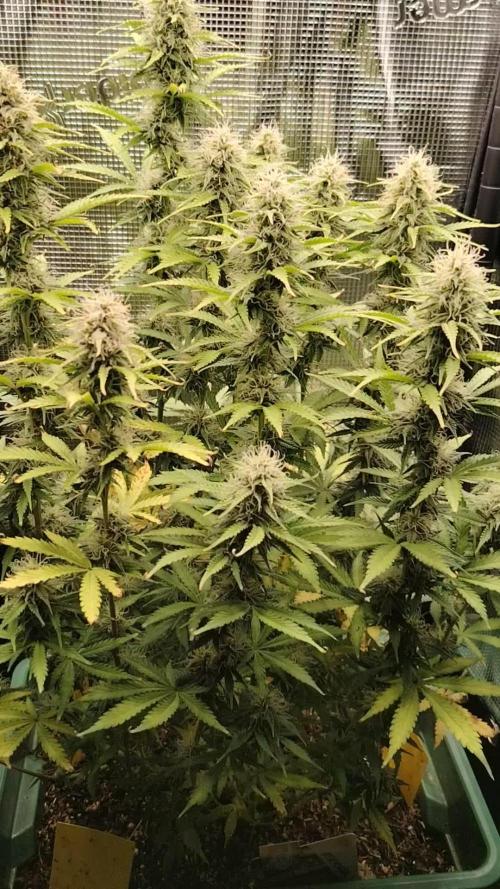
2000 ml alle 2 Tage
PH-Wert: 6
EC-Wert: 1,6
Temperatur: 22ºC
Luftfeuchtigkeit 62%
Schädlingsbekämpfung: Nematoden
PPFD: 510 µmol/m²/s
DLI: 33
Düngemittel: Mineralischer Dünger 3,5-6-6
Besonderheiten: Wurden direkt in die erde gepflanzt in einer Kokos-Quelltabletten.
-Tag 71 Heute haben wir sie mit 2000 ml Wasser gegossen, angereichert mit 1,5 ml Calmag, 4 ml Canna PK 13/14, 2 ml 3,5-6-6, 1 ml Plagron Green Sensation, 1ml Plagron Power Buds, sowie 0,32 ml HY-PRO Generator. Der EC-Wert betrug 1,650 mS/cm und der pH-Wert lag bei 5,8 😚
-Tag 73 Heute haben wir sie mit 2000 ml Wasser gegossen, angereichert mit 1,5 ml Calmag, 6 ml Canna PK 13/14, 2 ml HY-PRO Epic Blast sowie 0,32 ml HY-PRO Generator. Der EC-Wert betrug 1.540 mS/cm und der pH-Wert lag bei 6 Ihre Buds werden immer dichter und sie riecht sehr gut 😍
-Tag 75 Heute haben wir bei ihr den pH-Wert kontrolliert, und er liegt bei 6,6. Der EC-Wert lag bei 580. Wir haben ihr Wasser mit einem pH-Wert von 5,7 sowie Mikroorganismen mit Weizensirup gegeben.
-Tag 77 Heute haben wir ihr wieder de Runoff Kontrolliert und er ist nach wie vor bei 6,6, wir werden ihr heute wieder Dünger geben. Ihr Buds werden immer Kompakter und sie hat einen Sehr intensiven Geruch bekommen 😍
Likes
17
Share


@AfroBlooming420
Follow
Got back on Day 42. Two are definitely in the flower stage. I was out of the country for 10 days for work. 😐 The self-watering system with water and BioBizz nutrients made it into the the plant. The reservoirs were almost completely empty after 10 days with 3L of water/nutrient in each. When I opened the tent, it was starting to smell and all of the plants had grown quite a bit while I was gone.
I STILL CAN'T BELIEVE THIS WORKED!! I mean, I can. I was just nervous being gone for so long with no one checking on them.
I'm going to keep the self-watering system in place. And I bought a better camera. I think this self-watering system will help me not over water so much. Also, since it's starting to smell, it's probably best not to open the tent too much.
And yes, I have another work trip in two weeks. To another country. 😩 But I'll have a trusted friend coming by to check on things.

Likes
6
Share


@captaincondor
Follow
I watered yesterday with just plain water with a dash of calmag, I am now done feeding her as I am hoping she will be fully mature shortly


Processing
Likes
13
Share


@LeedsGenetics
Follow
Today's the beginning of week 2 veg, Plants are under 600w MH lights now. Roots are growing and spreading out nicely as you can see them popping out the bottom of the pots. By the end of this week when all plants have roots popping out of the bottom they will be transplanted into 20ltr fabric pots.
Feeding upped to 400ml per 3 days on average.
Likes
4
Share


@TwinExotics
Follow
Lemon Cherry Pops are in it’s own 4x4 along with the Smile now Cry Laterz x 1
FX3 is in its own 3x3 now. Topped


Likes
19
Share

