
Likes
Comments
Share


@Skunk_Life85
Follow
She is loving the 1000watt light. She is starting to stretch a little. There is 12 tops total. I put the tomatoe cage around her and her sister to help with support and training. Large internodal distances. Couple of calixs have popped up besides the pre flowers. No deficancys or issues, so far east strain to work with.


Likes
25
Share


@Terpy_Sonic
Follow
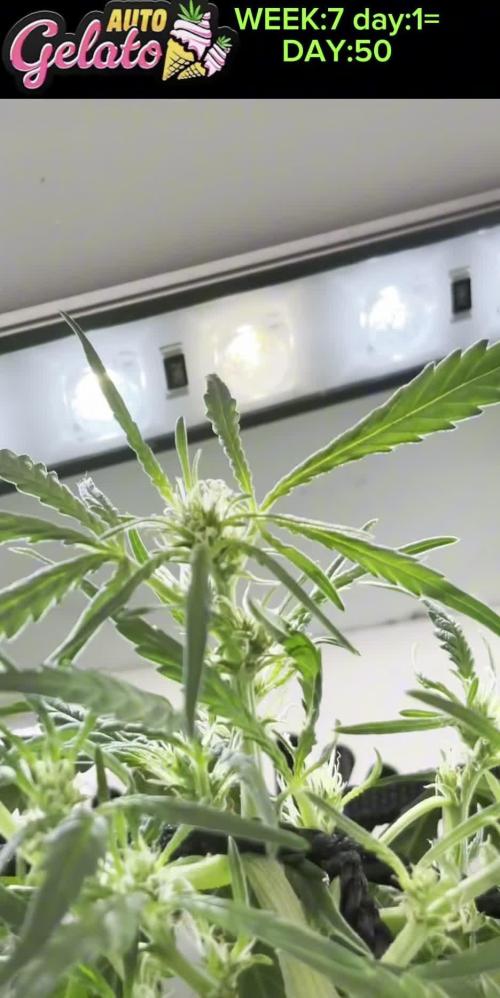
Welcome ladies and gentleman to the start of week 7. Plants are officially 42 days since sowed.
Plants just woke up from their 2nd night of 12 hours off. They are officially in flower. That makes a 40 day veg.
They are all just exploding with growth. Luckily I found a way to raise my light even more because they are pushing over 3 feet tall.
They all are hungry for nitrogen so I gave them all 2 tsp before the last watering.
The plants have a heavy citrus smell with some other smells I can’t quite put my finger on. I have my hopes set high for this flower cycle.

Likes
4
Share


@The_Doctor_Green
Follow
Hola a todos amigos! Esta semana la planta ha crecido con normalidad, hemos regado con namaste nutrientes, con TRICO+ y FLORA BOOSTER, 0.5 GR x litro de agua de trico más y 4 ml x litro de agua de florabooster, midiendo el ph notamos que estaba en 6.3.
También seguimos combatiendo los trips, con aceite de neem.
Likes
142
Share


@PapaNugs
Follow
After topping last week we've just been watching them grow. Bending down the branches to help them spread out. Over this next week I'll start my lst ties to help pull them down and out.

Likes
24
Share


@SMELLYBUDZ
Follow
Week 3 day 7.
Buds are getting icey and stretching around 1-2” a day.
Dropped the carboload and is going to be replaced by a PK booster (big bud).
Watering everyday. Plain RO on every 3rd water.
The kind LED is pissing on the hps if im being honest. Bud development and vigor seems a lot nicer.
Stay baked.

Likes
8
Share


@Bud_Koenig
Follow
The Trop Cherry was harvested on day 56 and dried in the tent at around 16-20°C with a humidity level of 60%. After a week, she was ready to be trimmed and then spent another two days drying in a cardboard box. Now the buds are in their container for curing. Updates to follow
Dry Weight - 40 Grams

Likes
4
Share


@badirama
Follow
So i went for quick vacation/holidays to Georgia (love it!) and asked a friend of mine that lives nearby to take care of me babies 😊 so he watered the girls every 3,5 days on average (4 times during 14 days) with just as little as 100 ml per plant. Now I come back yesterday and I’m very happy with my girls - they look super thriving and eager to grow! I’m surprised as so very different they look from my previous grow in same setup except hydroponics - this time in soil in same day of vegetation they look much more dense and just thriving! Wow soil makes huge difference indoors.
I saw 2 top leaves (on pictures & on video) with light nutrients burn (no idea why - I just added root juice). Also I know for sure that my light timer has broken - there were days when light was 24h on...I don’t know what might that cause... but now is all good - light timer fixed. I think that I will just keep feeding them water. What do you think guys? Would love some advice!
Oh and pictures and videos are from yesterday. Before topping and after topping. On 2 girls I have used new topping technique.
Thanks!

Likes
6
Share

@CadillacGreen_420
Follow
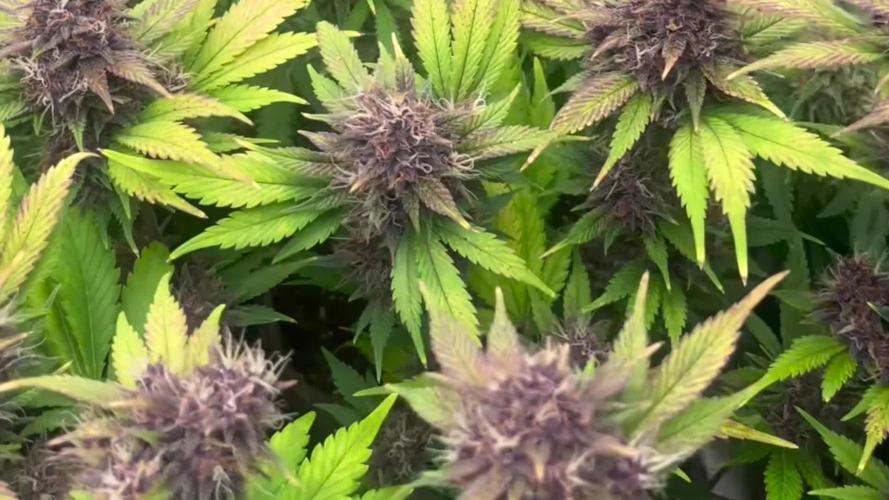
Balsamic and fruity aromas flood the air every time I open the tent. Nectar flows bright across the flower surfaces like sticky sugar glaze.
This time I will try to resist — I want those caramel-colored heads! 🍭🤤

Likes
Comments
Share


@Kannisho
Follow
Se me ocurrió hacer un scrog desde ceros, aunque es solamente un piloto ya que falta una defoliación y un arreglo en la estructura, pero eso nos da a entender que este ciclo de vegetativo le falta aun varias semana, realmente lo hago para divertirme 💚🤩
Likes
21
Share


Likes
9
Share


@Fede224466
Follow
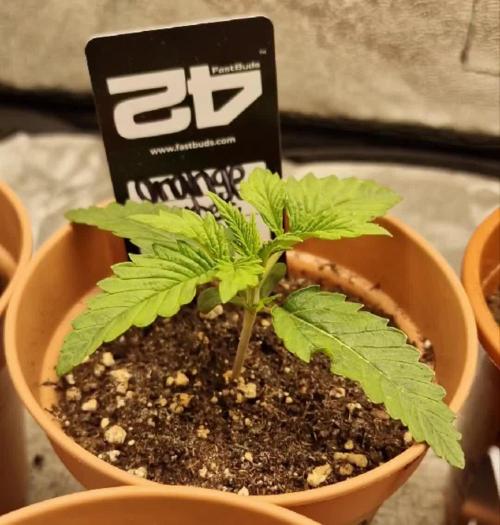
Day 10 0,15l x plant pure water pH 6.2
Week 2
I transplanted the plants into 4l pots, 80% biobizz light mix substrate and 20% humus, added 5 grams of Mycormaxx per pot.
For fertilization this week I will continue with vitalink Plant Start to avoid over-fertilization of the seedlings. pH 6.0-6.2 addition of Advanced Nutrient Sensi CalMag 1 ml to balance soft water. I keep the soil moist but not wet, and spray 2-3 times a day with the same solution.

Likes
8
Share


@Herbman420
Follow
Germination went well she was a beautiful large purple seed when I see her I knew she was going to be a nice phenotype . I use fish tank water as my base which is 350 parts per million then I added 1 ml of biogrow and 0.25 ml of biobloom . pH 6.5

Likes
Comments
Share


@Santaclaus
Follow
Bueno empiezo la 3 semanas día 15, con un unos LEDs rojos que me regalaron marshydro al comprar el fc800 evo , creo que se llama así 😝 es una auténtica bestia, ya no me imagino que pueden hacer los leds rojos, en teoría la luz roja aparte de hacer madurar los frutos, engordar y dar sabor, también ayuda a hacer crecer a los nuevos tallos que están más abajo y reciben menos luz, la luz roja profunda les da energía a esos brotes para que crezcan y busquen la luz blanca... Total.. quiero ver si crecen las ramas que están escondidas... También he añadido CO2 , cada segundo dos burbujas.. no quiero pasarme, porque tanto echar magnesio, me a dado un poco de exceso, lo he corregido echando más agua al depósito, y con la ayuda de CO2 hará que coman más las plantas, y corregiré antes el exceso de magnesio, en teoría jejeejje😅😅 todo en teoría

Likes
6
Share


@GingFreecss
Follow
A metà della terza settimana sembrano volere esplodere, ho dato per l'ultima volta oggi i nut per la fase vegetativa, alla fine di questa settimana inizierò con quelli per la fioritura.
Tornate a trovarmi domenica, grazie per essere passati ✌️🐵✌️

Processing
Likes
10
Share


@Barcelona_Farmers710
Follow
Buenas Farmers!
Otra semana más y pasaremos a Flora, esperando a ver si podemos obtener nuevo equipo de @todoGrowled para llevar el verano más llevadero... Después de recuperase de las Plagas empieza coger buen color esto.🍁
