
Likes
Comments
Share

@MadeInGermany
Follow
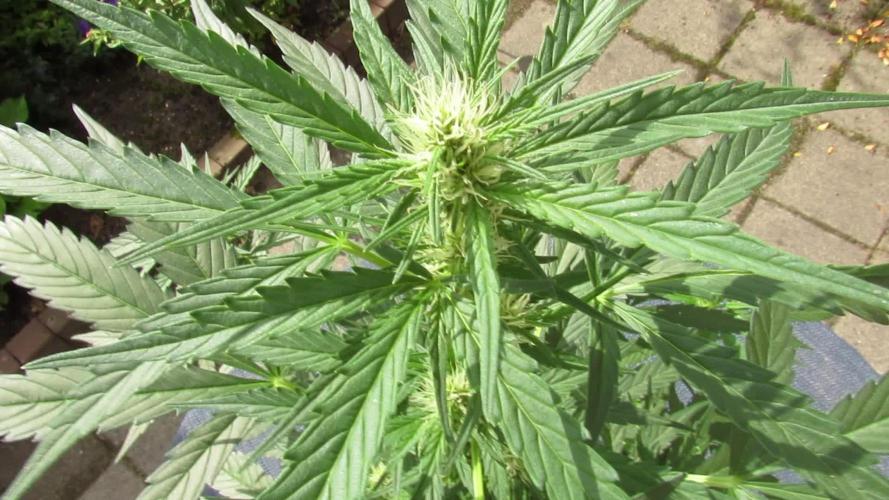
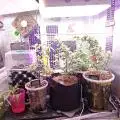
Flowering day 70
since time switch
to 12/12 h.
Hey guys :-)
Finally the time has come .
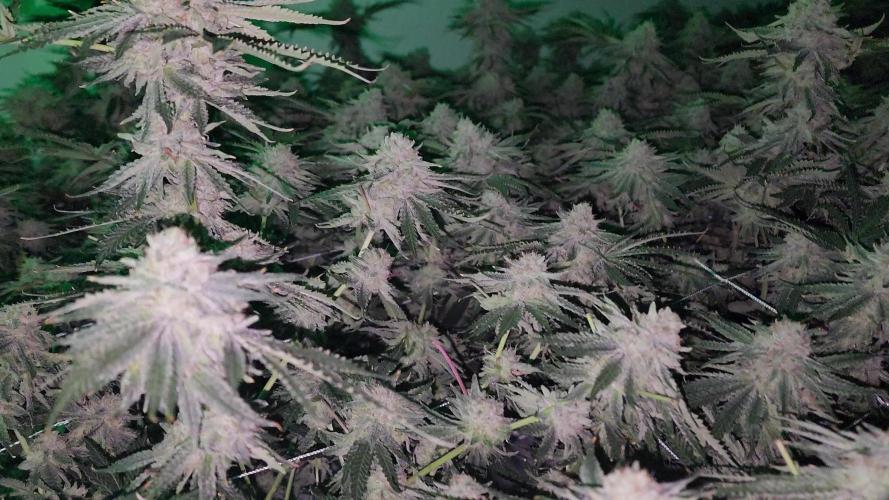
The lady was harvested and hung upside down in the dry tent 😍.
Before that, she stood in the drying tent in complete darkness for 2 days and the large leaves were removed.
The small leaves stay attached during the drying process so that they protect the buds and allow them to dry more slowly and evenly :-) .
In the dry tent, the temperature is 18-19.5 degrees and the humidity is 54-58% 👍.
In this environment they are now allowed to hang for 10-14 days before they are fine-tuned and trimmed clean by hand.
then after trimming they come to ferment for 6-12 weeks in dark jars with bobeda packs 62% to keep the perfect humidity.
After a few weeks, the Boveda packs 58% are used so that they can slowly dry out :-) .
Of course there is one last update after trimming.
Until then, I wish you a lot of fun with the update.
Stay healthy and let it grow 💚🙏🏻
👇🏼👇🏼👇🏼👇🏼👇🏼👇🏼👇🏼👇🏼👇🏼👇🏼👇🏼👇🏼
You can buy this Nutrients at :
https://greenbuzzliquids.com/en/shop/
With the discount code: Made_in_Germany you get a discount of 15% on all products from an order value of 100 euros.
👇🏼👇🏼👇🏼👇🏼👇🏼👇🏼👇🏼👇🏼👇🏼👇🏼👇🏼👇🏼
You can buy this strain at :
Clearwater Seeds
Water 💧 💧💧
Osmosis water mixed with normal water (24 hours stale that the chlorine evaporates) to 0.2 EC. Add Cal / Mag to 0.4 Ec Ph with Organic Ph - to 5.8 - 6.5
MadeInGermany
Likes
143
Share


@Roberts
Follow
It is harvest day for fast flowering number 7. Some big super buds that smell great and were very heavy. 5 hangers of dense buds to dry. Will be back for smoke report once dry, and trimmed. Thanks again fast buds 🌱🌱🌱
Thank you grow diaries community for the likes, follows, and subscriptions on my YouTube channel. There are some amazing people about. 😀🌱 Happy growing everyone 🤜🤛🌱


Likes
21
Share


@Bread_n_Buds
Follow
Here we are with another masterpiece of the Zamnesia catalog, as usual automatics never disappoint and Trainwreck is a shining example.
** We remind all users that we grow two plants per strain, one worked with specific techniques and the other left to grow freely and beautifully or worked with uncut techniques to preserve speed.
Description // This plant was left to grow, simple, nice and straight, with a lot of cleaning underneath, however in any case the lower part of the plant must remain clean.
It is really big, big and fat with plump flowers, nice plump and with a resin at the right point, it is not incredible at the highest levels I must say the truth but for the temperatures I am facing it is truly excellent. I am about to move to a new location where I will be able to control everything much better for now I have been forced to adapt to the fortunate and pro-cannabis climate conditions of my area.
The plants were a bit delicate at the start I recommend a bit more attention on the birth, overwatering, repotting if possible with autoflowering let's avoid them, let's avoid everything directly in a defined pot for autoflowering it is better.
I highly recommend you try it.
Trichomes and maturation // We did a thorough microscopic analysis 10x (and 10x x 1.6) and noticed a good percentage of milky/lumpy trichomes; The percentage of amber trichomes was non so good and still some transparent, but that's fine for us as we're not crazy about THC oxidation and hyper indica effects around here.
Fertilizers and soil // We used the Plagron organic fertilizer range, all the recommended additives and Pro Mix soil, both unfertilized and organic. Calculate the dosage according to your needs on the website
------ https://plagron.com/
The nutrients are available in convenient packs on the Zamnesia website
--------- https://www.zamnesia.io/en/11457-plagron-easy-pack-natural.html
Take a taste of this strain, it's a cross of legendary strains
https://www.zamnesia.io/en/11055-zamnesia-seeds-trainwreck-automatic.html
Short Description Zamnesia // Trainwreck Automatic is the autoflowering descendant of the popular cannabis strain Trainwreck (a stunning cross of Thai and Mexican landraces). Much loved for its 70% sativa genetics and sativa-like effects, Trainwreck Automatic is as easy to grow as an indica (even in cold climates).
This autoflowering strain goes from germination to harvest in 11–12 weeks, meaning you'll be harvesting sativa buds in no time. It prefers warmer climates, but thanks to its short life cycle, it can also be grown in more northern areas (provided it is germinated a few weeks early when growing outdoors)
Trainwreck Auto offers delicious lemon and lime flavors that enhance the classic sativa profile of its parents. Furthermore, thanks to the spicy and earthy notes, the overall experience will be even more intense, regardless of whether you smoke or vape it. In terms of its effects, Trainwreck Auto is euphoric, uplifting and energizing. Fueled by a THC content of around 21%, this strain is perfect for socializing and best suited to smokers who prefer to stay active after consuming cannabis, rather than lazing around doing nothing.
The whole world of cultivation and much more is from Zamnesia: just take a look at the site and you will find "all the best that nature has to offer" in various shapes and colors.
-- // www.zamnesia.com
Likes
6
Share


@SAC87
Follow
Hey Growers.
It’s going great around here. These girls are happy, healthy and growing like mad. They’ve chunked up so much that they’re starting to lay down. It’s just a couple at the moment so I’ll keep an eye on them and see if intervention is needed. The trichomes are so gritty it feels like table salt between your fingers and the Cali has a orange/lemon citrus and woody scent. The Jack is sour skunk and the cookies Kush is a sweet sugary scent.
I’m not 100% sure if they’re fox tailing from light stress or just natural Kush characteristics. I’ll be keeping an eye out for hermie’s and stress. I’ve added some Green Planet Rezin, as I think it’s awesome and helps with aroma and makes oily terps. I’m thinking this will be my last top dress and I’ll probably just do half dose and top up with monster bloom for the next couple waters then drop everything except cal and Rezin.
Happy Growing 🌱


Likes
35
Share

@Hologram
Follow
Black Opium is head- 'banging it' with her long hairs!
(I susppect its the CANNAZYM who is responsible for this.. 👍its great stuf it turnes the dead stuff*roots* in the soil into nutes!)
She is growing great, despite of the bad weather we were having last days..
Now sun has returned for a while.. (still a bit cloudy.. but i got HIGH hopes 👊)
..So the hedgehogs can get their hair permed and highlighted .. and really get the party started!😎👌
Happy growing 4 all✊
**KISS! growingtechnique: keepItSimple, Stupid!

Likes
1
Share

@Ketamine
Follow
Coming to the flush soon, this strain known for being a low yielder and has done better than expected. Buds are compact, and dense. I have noticed some really nice flowers underneath, so the Under canopy lights seem to be worth it, will know more at harvest.
Likes
20
Share


@Mosquito_Haarlem
Follow
De groeiperiode heeft ze doorgebracht op de vensterbank in de volle zon achter het raam(vegetation).
Toen ze wat groter werd en de bloemetjes uitkwamen heb ik haar in de tent geplaatst onder een ledlamp van 600 watt van aliexpress, omdat het de laatste weken voornamelijk bewolkt was.
De LST heeft haar geen kwaad gedaan, ze reageerde goed op het buigen en trekken.
Ik heb haar verwend met de producten van Plagron en Spa Reine mineraalwater (PH6).
Omdat ik haar in een air-pot van 38 liter heb geplant had ik verwacht dat ze een veel groter wortelstelsel zou hebben, maar dit is niet het geval zoals je kan zien in het filmpje.
Dit was mijn eerste grow en ben super tevreden met het eindresultaat.
Heb haar geknipt en opgehangen en wanneer alles droog is zal ik dit verslag voltooien.
Ben zeer benieuwd naar de smaak.
Wordt vervolgd... tot snel.
18 juli | de ganja van de lijn afgehaald, dikke takken weggeknipt en gewogen.
61 gram ben ik zeer tevreden mee🙂
Zojuist de eerste joint gerookt, de smaak is zoals je van Northern Light mag verwachten echt klassiek old school, kruidig, aardeachtig en het effect is op de bank hangend voor je uit staren.
Na een maand in potten curen is de smaak nog voller en lekkerder.
Growdiaries rocks, geweldige concept van een wereldwijde gemeenschap van kwekers.

Likes
29
Share


@eldruida_lamota
Follow
Esa familia, recta final de las green poison de sweet seeds, parece que quieren engordar así que habrá que alimentarlas bien con el PK.
Variedad con floración rápida, y con predominancia indica, veremos que tal acaban.
.
La humedad esta al 45% la temperatura está entre 21/28 grados , y como siempre el ph , ya que es de lo más importante,está en 5,8/6,0.
.
AgroBeta:
1 ml x L Flowering black line , vía radicular.
0,2 ml x L Beta shark, vía radicular.
0.5 gr x L mega PK , vía radicular.
0,8 ml x L Terminator, vía radicular.
0,5 gr x L Engordacogollos, vía radicular.
0,3 ml x L Tucán , vía radicular.
0,1 ml x L Betazyme, vía radicular.
0,3 ml x L Tricoma, vía radicular.
0,05 ml x L Gold Joker, vía radicular.
0,2 ml x L Silver, vía radicular.
.
Hasta aquí todo familia 🕸️ , un saludo y buenos humos fumetillas💨💨💨.

Likes
12
Share


@MicroHidroGrow
Follow
Esta por empezar el engorde final. Ya las flores estan casi formadas. La altura está al límite total. Uno o dos centímetros más y estaría en problemas de verdad. El engorde de muchas flores ya es notorio, pero creo que el uso de un bioestimulante que no es de primera línea, ha reducido el potencial de las plantas. De todos modos hasta no tener el resultado final no puedo afirmar nada.
La solución de esta semana fue cargada con más pk booster para ver cómo funciona la linea de greenhouse en esta etapa. Suelo usar pk 13/15 de canna. Pero esta vez puse el que tenía. Seguiré actualizando.
Día 31. Se nota mucho el engorde. Las hojas muestran pequeños signos de sobre fertilización, pero nada grave que no haya visto antes. Me suele pasar en esta semana en todos los cultivos en hidroponia. Pero las veces que ko me pasó, no tuve el engorde deseado. Por eso manejo mediciones de PPM superiores 1000. Se empieza a ver cuáles van a ser los cogollos más grandes, pero sigo con incertidumbre sobre cuanto más van a engordar. Estoy bastante conforme al momento. Hoy tuve contacto con plantas macho, pero me cambié toda la ropa antes de acercarme al indoor y le lavé. Además no sé si sumará, pero me rocío en alcohol cada vez que entro a casa, así que espero no tener problemas. Ya voy a ir preparando los esquejes para la próxima siembra. Quizá no logre sacar 10 de las madres que tengo. Pero quizá ponga menos y los haga crecer más tiempo y con bastante LST. Pero será en otro protecto. Por ahora espero que siga el engorde.
Día 33. Ya el engorde es un hecho. Por el momento estoy bastante satisfecho. La solución se concentró demasiado así que tuve que agregar agua. Pero más allá de algunos signos de sobre fertilización mínimos y pasajeros en las hojas, la plantas se muestran saludables y firmes. Todavía sigo buscando la posibilidad de agregar overdrive la semana que viene. Todo está por verse. Ya puedo asegurar que va a haber una séptima semana de floración, sino debería empezar el lavado en 2 días, cosa que a la vista, sería muy apresurado. Así que seguiré esperando a ver las flores con los pistilos más secos. Entre tanto los tricomas ya están formados, pero recién van a empezar la maduración en unos días. No saco foto porque el celular no hace buen foco con la lupa, pero ya intentaré mas adelante.
Día 35. Cierra la semana con una buena idea de lo que van a ser los cogollos. Según el calendario de la planta, debería empezar el lavado esta semana, ya que sería la última. Pero por la madurez de los tricomas, todavía le faltan entre 10 días y 2 semanas más. Así que se viene otra semana de sobrecarga de PK y voy a aumentar la dosis para aprovechar a medir el nivel de tolerancia de la planta a altos niveles producto. Al ser hidroponia y trabajar con el ambiente bastante controlado, confío en que voy a poder aplicar correctivos a tiempo, si empiezo a notar defasajes bruscos.

Likes
9
Share


@Cultivate
Follow
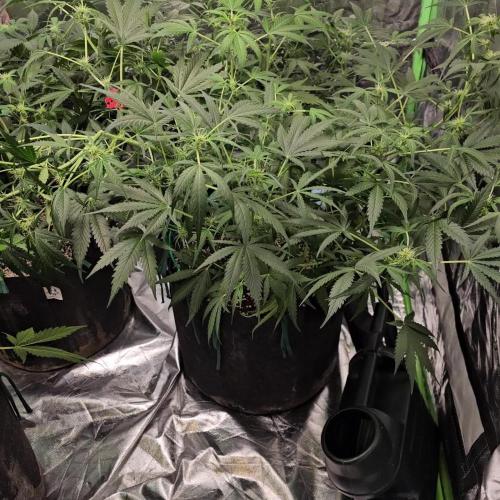
Spent some time just defoliating the girls last night, tried not to go too far but you get lost😂
Also did some Pruning/Lollipoping to Increase that airflow 💨
Happy so far! Stinking now
Likes
14
Share


@ill_noise_homegrown
Follow
So #3 and #4 were selected by me to go into the flower tent(video) and the other 2 are going to veg longer and get 5 gal airpots for their turn in approx 4 weeks, as soon as my autos are done and 3+4 are halfway done.

Likes
6
Share


@Aleks555
Follow
Hello everyone. We started growing. ROYAL QUEEN SEEDS-Blue Gelato has been delighting us since the first days.
Likes
9
Share


@XperencdGmanXG
Follow
As you can see here they have gone a much darker green thanks to the amendments starting to get broken down by the microbes. I will be doing some LST and FIM this week to ensure a bushy plant ready for the outdoor by the end of the month.
Processing
Likes
10
Share


@Barcelona_Farmers710
Follow
Bueno entramos en semana 3 de flora... pasaremos usar pl booster y esperemos poder pasar led antes que acabe esté cultivo. El calor lo hace insoportable para las plantas están bastante resentidas a ver que tal sale! Salut y força al canut farmers!🔥
Likes
5
Share


@420keef
Follow
Had to pull this one out of the tent because i had to make room for the bigger outdoor plants🤷♂️🏻
Likes
15
Share

@Kirsten
Follow
30.4.25:
This worked out very nicely 👌 I just found Ecothrives' new, Trace! I was looking for Cal-Mag with no NPK. I came across this, I'm genuinely so excited to get using this! Ecothrive has the best products, hands down.
As fate would have it, the plants are looking pretty dry!
I'm going to be watering with the Trace and Biosys. Let's see what happens 😁
6 litres of dechlorinated water PH'd to 6.1 contained:
♡ 3ml of Ecothrive Trace
♡ 1/4 Tsp (2.4ml) Ecothrive Biosys
The plants received 3 litres of this feed each.
PPM 475
PH 6.0.
So after I watered, i decided to tie down a very large branch that had grown significantly taller than the rest of the canopy.
It decided to bend instead. Luckily, it didn't snap. The outer membranes are all intact and unbroken. So I guess it needed a supercrop instead! 😅
I'm not worried at all, I just need to remember when I'm moving the pots around. Otherwise, it certainly will snap! 🤞
Let's see how we're looking in a few days after the first Ecothrive Trace application!
1.5.25:
I mixed a foliar feed with my new Ecothrive Trace.
I filled a 250ml spray bottle with dechlorinated water PH'd to 6.0 with 4ml Ecothrive Trace.
I used the entire bottle in 3 plants throughout the course of the day.
The fan is very strong, so it didn't take long to dry. However, I did keep the lights dimmer to ensure no leaves were burnt. Additionally, I spent more time than I care to admit massaging the foliar spray into the leaves 😅
I also moved the LED lights up as Northern Lights is still stretching. Par was about 600-700. Which may be too much. I'll keep an eye on it.
I also watered with 1.5 litres of dechlorinated water PH'd to 6.0 to Northern Lights.
I added 1/2 Tsp of Sea K(elp) by Greenleaf nutrients.
PPM was 645.
2.5.25:
I watered 1 litre today. With Greenleaf Nutrients Bud Explosion PK booster 1/2 Tsp dissolved in dechlorinated water PH'd to 5.9.
PPM came out high at 1300, so I watered another litre through just plain, PH'd to 6.2.
30.4.25:
This worked out very nicely 👌 I just found Ecothrives' new, Trace! I was looking for Cal-Mag with no NPK. I came across this, I'm genuinely so excited to get using this! Ecothrive has the best products, hands down.
As fate would have it, the plants are looking pretty dry!
I'm going to be watering with the Trace and Biosys. Let's see what happens 😁
6 litres of dechlorinated water PH'd to 6.1 contained:
♡ 3ml of Ecothrive Trace
♡ 1/4 Tsp (2.4ml) Ecothrive Biosys
Let's see how we're looking in a few days after the first Ecothrive Trace application!
The plants received 3 litres of this feed each.
PPM: 475
PH 6.0
1.5.25:
I mixed a foliar feed with my new Ecothrive Trace.
I filled a 250ml spray bottle with dechlorinated water PH'd to 6.0 with 4ml Ecothrive Trace.
I used the entire bottle in 3 plants throughout the course of the day.
The fan is very strong, so it didn't take long to dry. However, I did keep the lights dimmer to ensure no leaves were burnt. Additionally, I spent more time than I care to admit massaging the foliar spray into the leaves 😅
I also moved the LED lights up as Northern Lights is still stretching. Par was about 600-700. Which may be too much. I'll keep an eye on it.
I also watered with 1.5 litres of dechlorinated water PH'd to 6.0 to Northern Lights.
2.5.25:
I watered 1 litre today. With Greenleaf Nutrients Bud Explosion PK booster 1/2 Tsp dissolved in dechlorinated water PH'd to 5.9.
PPM came out high at 1300, so I watered another litre through just plain, PH'd to 6.2.
5.5.25:
FastBuds Mystery seed #1 is focusing on bud building. There are certainly chunky buds beginning to form here! 😍
She has pretty well stopped stretching, and so she's shorter than Northern Lights, which is still growing vertically, this is a little unfortunate as they're no longer a Sea Of Green. Unless Northern Lights is a tidal wave 😅
So because the canopy is no longer uniform, the lighting is difficult to dial in. Which has never been my strong point.
Her leaves are still very dark. I'm going to top dress with Ecothrive Life Cycle, but because of the darkness of leaves, I won't add the Ecothrive Charge. Which is mainly more vegetative growth needs. Which will contain more nitrogen, which we certainly don't need any more of at this stage.
Plant top dressed with;
♡ 2 Tbs of Ecothrive Life Cycle
♡ 1 Cup Worm Castings
♡ 1 Cup Canna Coco
♡ 1.25 Cups Perlite
I watered in with 2 ltrs of dechlorinated water PH'd to 6.3 containing .25g of Ecothrive Biosys.
This next week will just be monitoring of excess/ deficiency of nutrients and probably another foliar spray of the new Ecothrive Trace.
I have removed a few fan leaves at the lower canopies. As well as removing all the LST clips. Next week, we might remove all the fabric ties too, I'll see how we're looking.
That's pretty much it!
Thanks for checking out my diary and hanging out 💚✌️🍃😊🌱
Likes
2
Share


@Alejangrow
Follow
They're all showing nice little white pistols.♀️
The little one def got a little wind burn from my box fan. 💨🍃
I moved it so it wasnt blowing directly on her anymore.🤷♂️🏽
Other than that lots of foliage growth and a little stretching over the last two weeks.
Looking forward to watching these develop as the weeks progress. 🤓🌺
