Likes
143
Share
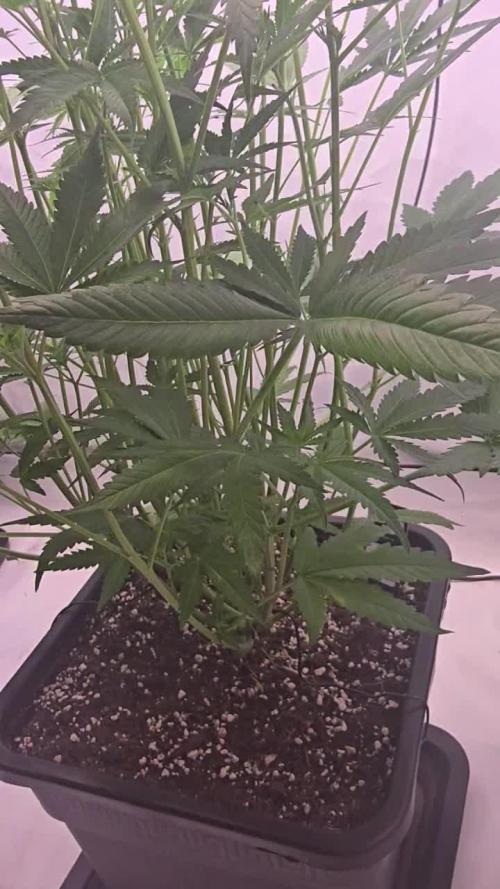
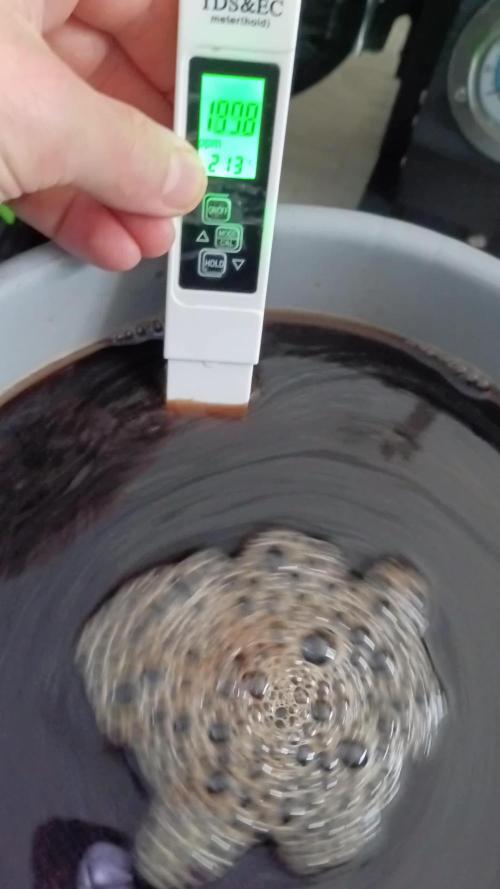
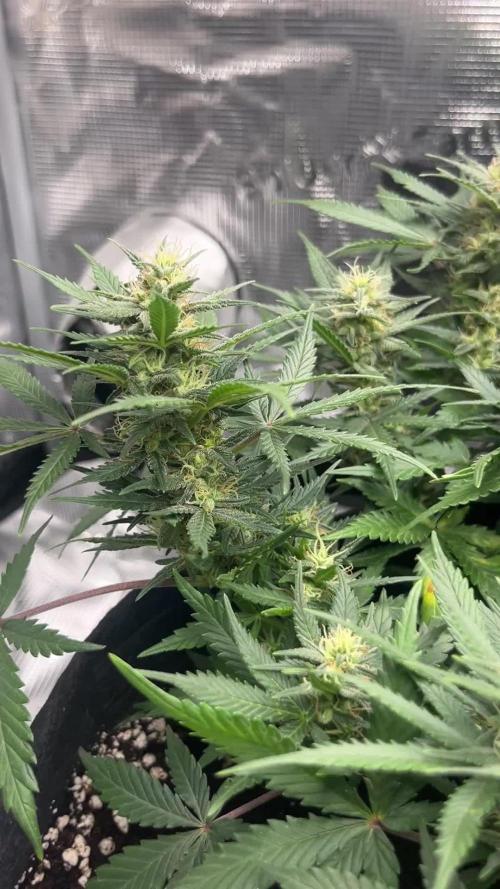
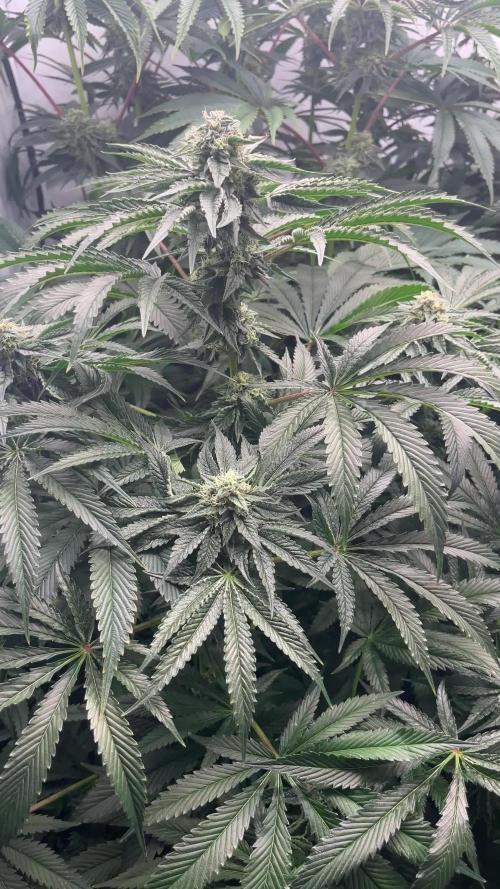
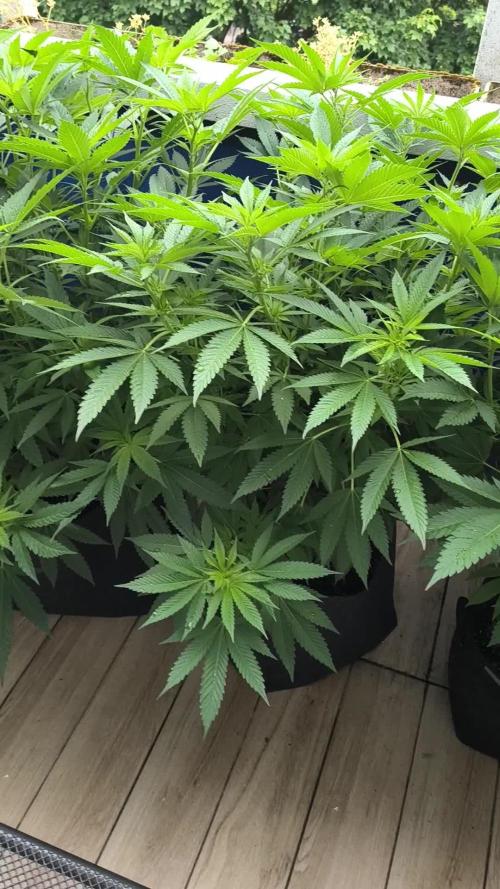
👉Alrighty Then👈 We are back this week and they are killing it 👏 😎 🙏 zero issues 😀 👉So we are now starting our forth week of Flowering and the stretch is almost done I hope , and the buds are pumping 🤪 👉I did a slight defolation and I've continue to emend my nutrients plan for full Flower ..... 👈 😳So I will be showcasing just 3 this round even thoe I am growing 7 plants 😳 👉Black Domina From Weedseedsexpress 👍 👉Permanent Marker From Weedseedsexpress 👍 👉Sleepy Joe OG From Weedseedsexpress 👍 The other 2 are repeats cause they are pure fire 👈 You can view these 2 in the 👉Summer Classic Diary 💪 Had issues with the Banana Biscotti germination, so it's way behind and also the extra seed I popped 👉Purple Oreoz From Seedsman 👍 👉Persian Pie From Greenhouseseeds 👍 👉Banana Biscotti From Seedsman 👍 👉Gorilla Cookies From FastBuds Soil by Promix Nutrients by Cronks Lights by MarsHydro & Vivosun Well this should be fun 🙃 Thanks to all my growmies out there for stopping by its much appreciated 👈 👉Happy Growing👈
Likes
4
Share
Almost time, weather been ok some sun to finish off
Likes
12
Share
@CheeRz
Follow
The year is almost over and I think we can look back on a very successful 2024. Happy new year 🎇🎆 and lets have a great 2025 🚀💚with big and juciy crops
Likes
5
Share
@most_dope
Follow
This is just for the gorilla zkittlez so far I will probably try to put all 5 on here but started 2 about 45 days apart from each other and the 5th seed about 3 weeks after the 2nd round. The 5th seed died from transplant shock (won’t be transplanting autos anymore) but the 2nd round of 2 plants just started flowering. I got 85 grams from the zkittlez and 60 grams from the afghan kush after drying. Not great but I’m happy it’s smokeable and smells/ tastes good. starting 2 bloody skunk today (5/11) because the gorilla cookies never germinated unfortunately :( . all out of seeds now so i will be maknig an order this week. still have 2 more strains to figure out when flowering kicks in more tho so that will be my fun for the next 1-2 months lol
Likes
90
Share
@Herbalize
Follow
Hello folks 😎 7th week of flowering and the heat is still here 😔 I hope to have cooler temperatures quickly, otherwise, the drying phase will be complicated ... Anyway the buds are not very big, but Wow this shit is frosty as fuck and the smell is strongly good ! at the beginning of this week, I gave her the last watering with nutrients ( about 430 ppm ) and in the middle of the week, I started the flush 👌 For the trichomes, many are milky but there is at least a week left on the announced time 😊 Good news, I will completely change my tent and my equipment for the next crop, bigger tent, better light etc. ( soon ™️) But that's another story ! 😁 Stay tuned and see you next week guys 😘 I also have another diary with two Toxic from Ripperseeds if you want to see Peace Love & Weed GD Fam😍👊
Processing
Likes
4
Share
@NPKgrow
Follow
Last defoliation before serious bloom phase. Started adding Bloom nutes. Trichomes forming heavily on sugar leaves. As a note, the day/night temps are incorrect throughout the entire journal. Regardless of the temp that's input into the journal template, the journal displays "50 F". Has anyone else experienced this issue? (Temps have been mid 70 to low 80's throughout most of Veg and Flower so far.)
Likes
4
Share
@Ensign420
Follow
|»» LOG DISCLAIMER: Not intended as a grow guide. Grow log entries are usually posted 3 weeks later and are for my learning reference. ««| Introduction - Week 26 Summary - Ensign's log, stardate 17608.3, Wow what a week! Drying is always pretty simple and been checking daily. Buds are drying nicely and terps are smelling pretty dank!! Most of the week has been in the veg tent with tissue culture! Mixed another batch of establishment media and took proper explant cuttings. Also super-cropped the mothers to even out the canopy. Ahh yea! Getting hyped for trim day next week! Next week will also be the last week for this grow log, but am already planning out the next cycle. Anyways! Onwards to next week! [START OF WEEK 26] ========================================================== ---------- [ 4x4 MAIN TENT ] ---------- Heady OG BX1 #1 [Round4 ~Wk19] - WEEK 26 - Dry Wk1 ----------- [ 3x3 VEG TENT ] ------------ TKO - WEEK 09 - Full Veg Gorilla Goat #1 - WEEK 05 - Full Veg Heady OG BX1 - WEEK 09 - Full Veg Garlic Budder OG#1 - WEEK 05 - Full Veg 10/13/25 → 10/19/25 This Week's Estimated Goals ---------------------------------------------------------------------------------------------- DLI: ~0 mol/m²/d PPFD: ~0 μmol/m²/s VPD: ~1.5 kPa This Week's Meter Readings & Averages ---------------------------------------------------------------------------------------------- Light On/Off: 00:00 - 00:00 | Wattage: ~000.0W [LV00] Distance From Canopy: ~00” DLI: ~0.00 mol/m²/d PPFD: ~0 μmol/m²/s VPD: ~1.17 kPa Soil %: [47.4, 34.1, 35.0, 55.7, 43.7, 43.6, 44.0, 43.3] ========================================================== Day 01 - Monday - 10/13/25 - Total Days: 183 ----------------------------------- Daily Averages ~[+01:00] - Temps: 78.8°F [26.0°C] - Humidity: 64.4% - VPD: 1.19 kPa - Soil %: [49, 34, 35, 57, 44, 44, 44, 42] ----------------------------------- - [22:05]: Night check on the 4x4 tent. --- Ca-Caw!! Looking great! --- Heady OG BX1 #1 is drying along and no signs of mold. Also airflow and RH is stable and within the 60-70% range. --- Getting stoked! Trim day is 9 days away! - [22:09]: Checked the Ecowitt soil moisture sensor data: ------------------ [ 4x4 MAIN TENT ] --------------- ------ 48% - [CH01 FT » G30 - Heady OG BX1 #1] ------ 35% - [CH02 FB » G30 - Heady OG BX1 #1] ------ 35% - [CH03 BT » G20 - TKO] ------ 56% - [CH04 BB » G20 - TKO] ------------------ [ 3x3 VEG TENT ] ---------------- ------ 46% - [CH05 BL » GR7 - TKO] ------ 40% - [CH06 BR » GR7 - Gorilla Goat #1] ------ 40% - [CH07 FL » GR7 - Heady OG BX1 #1] ------ 40% - [CH08 FR » GR7 - Garlic Budder OG#1] --------- Veg: 38% - 45% | Flower: 45% - 55% --------- General: 30% [Dry] «| 45 - 60% [Moist] |» 70% [Wet] - [22:18]: Checked the 3x3 veg tent. --- Looking healthy in the veg garden! --- All of the vegging mothers are looking great and the canopy is starting to even out. --- Also clones look healthy and no need to water yet. --- The stems, err, I mean, explants, don’t show any signs of contamination. --- Staying positive, glad the growth media is sterile and the overall procedure was successful. --- Anyways! Plan to create more establishment media and cut proper explants soon! - [22:21]: Checked the humidifiers. --- Tanks are still full and no leaks found. Day 02 - Tuesday - 10/14/25 - Total Days: 184 ----------------------------------- Daily Averages ~[+01:00] - Temps: 76.9°F [24.9°C] - Humidity: 64.8% - VPD: 1.11 kPa - Soil %: [46, 34, 35, 56, 43, 43, 44, 43] ----------------------------------- - [21:44]: Night check on the 4x4 tent. --- Looking good in the dry tent! --- Heady OG is drying along and humidity levels look great! --- Nothing to do but maintain and wait to trim in 8 days! - [21:55]: Checked the Ecowitt soil moisture sensor data: ------------------ [ 4x4 MAIN TENT ] --------------- ------ 45% - [CH01 FT » G30 - Heady OG BX1 #1] ------ 34% - [CH02 FB » G30 - Heady OG BX1 #1] ------ 35% - [CH03 BT » G20 - TKO] ------ 56% - [CH04 BB » G20 - TKO] ------------------ [ 3x3 VEG TENT ] ---------------- ------ 41% - [CH05 BL » GR7 - TKO] ------ 40% - [CH06 BR » GR7 - Gorilla Goat #1] ------ 47% - [CH07 FL » GR7 - Heady OG BX1 #1] ------ 46% - [CH08 FR » GR7 - Garlic Budder OG#1] --------- Veg: 38% - 45% | Flower: 45% - 55% --------- General: 30% [Dry] «| 45 - 60% [Moist] |» 70% [Wet] - [21:59]: Checked the 3x3 veg tent. --- Looking healthy and growth is raging! --- All mothers are looking beautiful! --- Clones are getting taller and looking healthy! --- Gorilla Goat #2 needs watering. Let’s go Ensign! - [22:03]: Here is the starting initial watering range: ------ Gorilla Goat #2 » 255.4g → 300.3g and was last watered 4 days ago. --------- General Solo Range: [Dry] «| [Initial Cup Weight] + ~55-100g |» [Wet] --- Took the starting weight before watering, ------ Gorilla Goat #2 » 230.8g --- While on a scale, --- Gently misted her straw mulch with RO water. --- Tried to keep the top growth dry. --- Misted 5-10 sprays. Waited a few seconds, then misted again. --- Made sure to reference the watering weights. --- Repeated this process until the cup weighted at least 300g. --- There was no runoff. - [22:23]: Took the saturated weight after watering, ------ Gorilla Goat #2 » 345.7g --- Marked the watering date on the side of the cup. Also marked the saturated weight on the back. --- Placed her back into the tent. --- Decided to train and super-crop both clones. --- Bent the taller branches to lower the canopy. - [22:38]: Checked the humidifiers. --- Tanks are still full and no leaks found. --- Onwards Ensign! Day 03 - Wednesday - 10/15/25 - Total Days: 185 ----------------------------------- Daily Averages ~[+01:00] - Temps: 75.6°F [24.2°C] - Humidity: 63.8% - VPD: 1.09 kPa - Soil %: [48, 34, 35, 56, 44, 43, 44, 42] ----------------------------------- - [+01:33]: Quick night check on the 4x4 tent. --- Looking great in the dry tent! --- Also starting to smell dank! --- 7 more days until the big trim! - [+01:37]: Checked the 3x3 veg tent. --- Veg garden is healthy and growth is green! --- Both the Heady OG BX1 #1 and TKO mothers will need another topping soon. --- Clones in the propagation tray also look great and no need to water. --- The explant media is still looking sterile with no signs of contamination. --- Easy night in the garden. Nice! - [+01:40]: Checked the humidifiers. --- Tanks are still full and no leaks found. --- Okay! Tomorrow plan to dive back into tissue culture and prep more growth media. --- Onwards Ensign! Day 04 - Thursday - 10/16/25 - Total Days: 186 ----------------------------------- Daily Averages ~[+01:00] - Temps: 74.6°F [23.7°C] - Humidity: 62.2% - VPD: 1.11 kPa - Soil %: [46, 34, 35, 56, 43, 44, 44, 45] ----------------------------------- - [11:41]: Alright! Back to tissue culture and time to start another batch of establishment media! --- Took the plant growth regulators out of cold-storage (my fridge). ------ [ » SMOKES A BOWL « ] --- While the products warmed up, gathered the necessary supplies and setup my workstations. --- Currently, focusing on: ------ PHASE 01 » ESTABLISHMENT --------- » DAY 01 » MEDIA - PART 01 - Mixing the growth media --------- » DAY 01 » MEDIA - PART 02 - Sterilization of media and tools [via autoclaving] --- Going to use the same establishment formula, but doubling the yield. --- Also using RO water instead of distilled water. --- Here's the establishment media formula: --- [» VER.0001 |» INITIAL TROPICAL PLANTS FORMULA |» 0.5L (500mL) RO WATER «] ------ MS [Muashige & Skoog] --------- » 2.22g ------ Sucrose [Cane Sugar] --------- » 15g ------ BAP [6-Benzlaminopurine | Cytokinin] --------- » 0.5mg » 0.5mL » 500μL ------ IBA [Indole-3-Butyric Acid | Auxin] --------- » 0.05mg » 0.05mL » 50μL ------ AGAR [Jelling Agent] --------- » 3.5g ------ PH [Potential Hydrogen] --------- » 5.7 --- [» 1mg/mL CONCENTRATION ratio | 1mg = 1mL | 1mL = 1000μL «] - [12:59]: Time to prep the growth media! --- Made sure to turn OFF the lung-room's oscillating fan. --- Filled a measuring cup with 400mL of RO water. --- Dropped a clean magnetic mixing bar into the measuring cup. - [13:05]: Placed the measuring cup on the magnetic stirrer. --- Turned the unit ON and have the unit on LOW. - [13:11]: Using a precision scale (sensitive to 0.01g) along with a micro-pipette (1000μL capacity along with tips) and disposable (100mL) weigh boats, ------ Added 2.22g of MS [Muashige & Skoog] ------ Added 15g of Sucrose [Cane Sugar] ------ Added 500μL of BAP [6-Benzlaminopurine | Cytokinin] ------ Added 50μL of IBA [Indole-3-Butyric Acid | Auxin] ------ Added 3.5g of AGAR [Jelling Agent] ------ Then filled the measuring cup to the 500mL line before covering the top with plastic wrap. --- Alright! - [13:46]: Let the media mix on the magnetic stirrer for a bit. --- Have the unit set to LOW with a steady vortex. ------ [ » ~20 MINUTES LATER « ] - [14:09]: Okay! Time to pH the establishment media! --- Gently removed the bottom cap of the AC Infinity PH Meter PRO [AC-PHM7]. Placed the cap in the storage case for later. Covered the top with plastic wrap (KCL solution still inside the cap). --- Swirled the probe in a cup of RO water to rinse off the storage solution. --- Shook the excess water out and wiped the unit with a clean paper towel making sure all mineral buildup was removed (kept away from the very tip of the probe). --- Temporarily placed the meter back into the cup of RO water. --- Removed the plastic wrap of the establishment media. - [14:13]: Using the AC Infinity PH Meter PRO [AC-PHM7], --- Took the establishment media's initial pH reading. --- The pH was at 5.14 --- Using the micro pipette, ------ Added pH Up solution. --- Made sure to let the media solution mix for a bit before checking for pH readings. - [14:21]: Adjusted the media's pH until it stabilized to 5.58 --- For this batch, tried to go for a range of 5.4 to 5.8 pH. --- Also glad that I did not need to add PH down. - [14:43]: Poured the pH'd establishment media into separate polypropylene containers. --- Made sure to re-mix the media solution between container fillings. --- Ended up splitting the media solution into 12 containers. ------ 8x » 125mL Polypropylene Bottles [with screw cap lids] ------ 4x » 236mL (0.5pt) Glass Mason Jars [with polypropylene jamming lids] --- Have the lids of all vessels loosely on and set each aside for later autoclaving. --- Also filled 12 empty polypropylene bottles with RO water and placed the lids on loosely (4 bottles are re-used). - [14:58]: Prepped the tools for sterilization. --- Took a new 5.25in x 10in sterilization pouch and added the following tools: ------ 3x stainless steel forceps ------ 3x stainless steel scissors --- Before placing into the pouch, wiped each tool with a paper towel sprayed with 70% isopropyl alcohol. --- Sealed the bag and marked the date. --- Time to autoclave everything in the pressure cooker! --- Filled a Presto 23qt-Pressure Cooker with 12 cups of RO water. - [15:06]: Added a few aluminum foil balls to the bottom of the pressure cooker. --- Placed the first rack on top of the foil. --- Made sure the rack was level and stable resting above the water. --- Gently placed the containers of media into the pressure cooker and onto the first rack. Lids are still loose. --- Made sure to give space for each container and kept them away from the sides of the pressure cooker. --- Placed a second pressure cooker rack on top of the containers of media. --- Placed the containers of RO water onto the second rack. Lids are still loose. --- Placed the third rack on top of the containers of water. - [15:16]: Lastly, placed the sterilization bag of tools on top of the third rack. --- Took the pressure cooker lid and made sure the release vent was clear of debris before placing it on. --- Sealed and secured the lid. --- Pressure vessel has been sealed! --- Alright! Time to sterilize! --- While keeping the vessel level and straight up, moved the sealed pressure cooker to the kitchen for heating. - [15:23]: Placed the pressure cooker onto a butane-gas stove. --- Turned the stove ON and set it to HIGH. ------ [ » ~20 MINUTES LATER « ] --- Once steam was venting out of the release vent, --- Placed the metal rocker onto the vent. --- Shortly afterwards, the pressure top-lock sprung up to indicate the vessel was under pressure. --- Then the pressure gauge started to rise. ------ [ » ~10 MINUTES LATER « ] --- At 15psi, the metal rocker started to rock! - [15:56]: Turned down the stove down to LOW. --- Set a timer for 15 minutes and began monitoring the pressure gauge. --- Maintained the 15psi by making minor adjustments to the stove. ------ [ » ~15 MINUTES LATER « ] - [16:12]: Turned the stove completely OFF and waited until the pressure cooker's top-lock dropped down which indicated that pressure levels were safe to open. ------ [ » ~40 MINUTES LATER « ] --- Once the pressure cooker was at safe levels (0psi) and the top-lock was down, - [16:48]: Moved the pressure cooker into the lung room. --- The pressure cooker was still quite hot so was careful to keep the vessel straight up and level during transport. --- Used towels for insulation. --- Rested the hot pressure cooker onto a stack of 5-gallon buckets covered with layers of towels and folded paper bags. --- Gently opened the pressure cooker and set the lid aside. - [16:57]: While wearing nylon gloves, sprayed my hands with 70% isopropyl alcohol. --- Gently removed the bag of sterile tools placed it onto a Pyrex dish. --- Removed the top rack and set it aside. --- Then one container at a time, --- Gently tightened and secured the lids of each bottle of sterile water before placing onto the Pyrex dish. --- Removed the middle rack and set it aside. --- Then one container at a time, --- Gently tightened and secured the lids of each bottle and jar of sterile media before placing onto the Pyrex dish. --- Throughout the entire process, kept the gloves on and sprayed my hands regularly with 70% isopropyl alcohol. --- Decided to store all the bottles in the Pyrex dish. - [17:16]: Have the dish resting on a shelf in the lung room. The jars of media are set right next to the Pyrex dish on a towel. --- To prevent dust, covered everything with towels. --- Done for now and will check on the growth media tomorrow. --- If all goes well, should be taking new explant cuttings in a couple days! - [17:39]: Night check on the 3x3 veg tent. --- Looking beautiful and healthy in the veg garden! --- All moms are getting bushy and getting pretty close to the grow light. --- Since I plan to take explant cuttings soon, not going to top or train quite yet. --- Clones also looking healthy and seem unaffected by the super-cropping. Nice! - [17:57]: Checked the Ecowitt soil moisture sensor data: ------------------ [ 4x4 MAIN TENT ] --------------- ------ 45% - [CH01 FT » G30 - Heady OG BX1 #1] ------ 34% - [CH02 FB » G30 - Heady OG BX1 #1] ------ 35% - [CH03 BT » G20 - TKO] ------ 55% - [CH04 BB » G20 - TKO] ------------------ [ 3x3 VEG TENT ] ---------------- ------ 43% - [CH05 BL » GR7 - TKO] ------ 45% - [CH06 BR » GR7 - Gorilla Goat #1] ------ 42% - [CH07 FL » GR7 - Heady OG BX1 #1] ------ 44% - [CH08 FR » GR7 - Garlic Budder OG#1] --------- Veg: 38% - 45% | Flower: 45% - 55% --------- General: 30% [Dry] «| 45 - 60% [Moist] |» 70% [Wet] - [17:59]: Checked the 4x4 main tent. --- Ca-Caw!! I got Headies! --- Wow! Heady OG BX1 #1 is drying along beautifully and she is smelling dank! --- Also no signs of mold and RH levels look stable! --- 6 more days until the big trim! - [18:11]: Checked the humidifiers. --- Tanks are still full and no leaks found. --- Wow what a day! --- Still gots more to do! --- Let’s go! Let’s grow! --- Onwards Ensign! Day 05 - Friday - 10/17/25 - Total Days: 187 ----------------------------------- Daily Averages ~[+01:00] - Temps: 76.0°F [24.4°C] - Humidity: 62.0% - VPD: 1.16 kPa - Soil %: [48, 34, 35, 55, 44, 44, 44, 42] ----------------------------------- - [22:57]: Night check on the 4x4 tent. --- Ca-Caw! Headies is smelling dank! --- RH levels are getting a bit dry, but are okay. --- Wow buds are frosty with trichomes! --- With 5 days until trim day, getting stoked! - [23:04]: Checked the Ecowitt soil moisture sensor data: ------------------ [ 4x4 MAIN TENT ] --------------- ------ 47% - [CH01 FT » G30 - Heady OG BX1 #1] ------ 34% - [CH02 FB » G30 - Heady OG BX1 #1] ------ 35% - [CH03 BT » G20 - TKO] ------ 55% - [CH04 BB » G20 - TKO] ------------------ [ 3x3 VEG TENT ] ---------------- ------ 46% - [CH05 BL » GR7 - TKO] ------ 40% - [CH06 BR » GR7 - Gorilla Goat #1] ------ 45% - [CH07 FL » GR7 - Heady OG BX1 #1] ------ 50% - [CH08 FR » GR7 - Garlic Budder OG#1] --------- Veg: 38% - 45% | Flower: 45% - 55% --------- General: 30% [Dry] «| 45 - 60% [Moist] |» 70% [Wet] - [23:11]: Checked the 3x3 veg tent. --- Looking healthy in the veg garden! --- Mothers are getting bushy and tall! --- Super-cropped and trained the taller branches down to lower the canopy. --- Plan to take tissue culture cuttings tomorrow so glad there are plenty of tops to choose. Still deciding on which mother to preserve next. --- Clones in the propagation tray look healthy! --- The original Garlic Budder #2 clone needs watering. - [23:26]: Here is the starting initial watering range: ------ Garlic Budder OG#2 » 256.4g → 300.2g --------- General Solo Range: [Dry] «| [Initial Cup Weight] + ~55-100g |» [Wet] --- Took the starting weight before watering, ------ Garlic Budder OG#2 » 258.9g --- While on a scale, --- Gently misted her straw mulch with RO water. --- Tried to keep the top growth dry. --- Misted 5-10 sprays. Waited a few seconds, then misted again. --- Made sure to reference the watering weights. --- Repeated this process until the cup weighted at least 300g. --- There was no runoff. - [23:40]: Took the saturated weight after watering, ------ Garlic Budder OG#2 » [000.0]g --- Marked the watering date on the side of the cup. Also marked the saturated weight on the back. --- Placed her back into the tent. - [23:45]: Checked the humidifiers. --- Tanks are still full and no leaks found. Day 06 - Saturday - 10/18/25 - Total Days: 188 ----------------------------------- Daily Averages ~[+01:00] - Temps: 76.8°F [24.9°C] - Humidity: 60.3% - VPD: 1.25 kPa - Soil %: [47, 34, 35, 55, 44, 44, 44, 47] ----------------------------------- - [15:19]: Decided to decrease the VPD level a bit. --- Within the AC Infinity App, --- Changed the schedule name from 'Flower [12/12]' to 'Drying [0/24].' Oops. --- For the Main Tent [4x4] controller, --- Adjusted the 'Drying [0/24]' Schedule for the exhaust fan. ------ Decreased the VPD LOW trigger value from 1.5kPa to 1.4kPa --- Adjusted the 'Drying [0/24]' Schedule for the humidifier. ------ Decreased the VPD target value from 1.5kPa to 1.4kPa --- This should increase the relative humidity a bit and will maintain a 60-65% range - [16:59]: Evening check on the 3x3 veg tent. --- Wow the veg garden is raging with healthy growth! --- Even with the lower veg temps, growth has been perky and bushy! --- The TKO mother has been looking a bit on the purple-side, but I plan to increase the temps back after trim day. - [17:23]: Okay! Time to continue the tissue culture journey! --- Checked on the sterilized media, water, and tools. --- Ooo yea! The growth media in the glass jars have solidified nicely! --- The media in the bottles also look great! Found only one that did not gel properly. --- Hmm. The sterile water bottles are not looking sterile. Unlike the first batch (using distilled water), each RO bottle had tiny white particles floating in the water. --- I think this was due to the water source. The RO water used was from the plant reservoir. For the next sterilization, will try using water straight from the tap. Will discard the entire batch and try again later. - [17:34]: Anyways! Time to cut and sterilize another batch of explant cuttings. --- Using the similar protocols as last time, but with a few changes. --- Instead of distilled, using reverse-osmosis (RO) water. --- Also simplifying the workflow and will not be using the sterile water. --- Only taking cuttings from one cultivar. --- Today, attempting to preserve Heady OG BX1 #1 --- Unlike the last attempt, going to be cutting apical nodes and will leave all leaf growth on. --- Last attempt was more for monsteras and not cannabis. - [17:35]: Made sure the lung room's oscillating fan was OFF during the entire process. --- Put on a fresh pair of nitrile gloves. --- Okay! Let's grow Ensign! - [17:47]: Filled a glass beaker with 180mL of RO water. --- Using a micro-pipette, ------ Added 20mL of Clorox bleach --- Mixed the solution. - [17:52]: Poured the bleach solution into a glass mason jar. ------ Added 1 drop of Dawn dish soap. --- Dropped a magnetic mixing rod into the jar before setting it onto the magnetic stirrer. --- Turned the unit ON and set it to a low setting. --- Placed a polypropylene lid loosely on. - [18:02]: Rinsed and filled the glass beaker with 70% isopropyl alcohol. --- Filled another glass beaker with RO water before adding a drop of Dawn dish soap. Mixed the solution. --- Okay! Time to take the cuttings! --- Using a clean pair of trimmers, - [18:09]: Gently cut two clone cuttings from the Heady OG BX1 #1 mother. --- Stripped each cutting down to 2-inch apical nodes making sure to leave about 0.5 inch of stem growth for planting. ------ Prepared a total of 2 nodal cuttings. --- Dropped the nodal cuttings into the cup of soapy water. --- Swirled the cuttings in the soapy water for a bit. --- Opened the jar containing the 10% bleach solution. --- Using clean tweezers, --- Took each cutting out of the RO water and carefully submerged it into the beaker of 70% isopropyl alcohol for about 30 seconds. --- Then transferred the cutting from the isopropyl alcohol straight into the jar of bleach solution. --- Once both cuttings were in the jar, sealed the top with the polypropylene lid. - [18:23]: Flipped and set the entire bleach jar upside down onto the magnetic stirrer. --- Started using the magnetic stirrer. --- But the cuttings were getting hit by the bar so ended up turning the unit OFF. --- Instead, made sure to swirled the bottle every few minutes to agitate the cuttings. --- For a proper sterilization, the cuttings should be agitated in the hypochlorite (bleach) solution for at least 20 minutes. --- While waiting for the explants to sterilize, prepped the still air box. - [18:39]: Unfolded and placed a Safloga still-air box onto my desk. --- Thoroughly misted the inside of the air box with 70% isopropyl alcohol making sure to coat the entire chamber. --- Then isopropyl misted and placed the following items inside of the still air box, ------ x1 » Jar of Establishment Media ------ x1 » Bottle of Establishment Media ------ x1 » Glass-Bead Sterilizer ------ x1 » Roll of Plastic Wrap [pre-cut] ------ x1 » Sterilization Bag Containing: --------- x3 » Stainless Steel Forceps --------- x3 » Stainless Steel Scissors --- Made sure to fully coat the outside of the tool bag and each of the containers with 70% alcohol. --- The bag had a torn corner (Oops), so made sure to spray the inside with a few mists of isopropyl alcohol. --- For the glass-bead sterilizer, ------ Wiped the entire unit with isopropyl alcohol. ------ Before filling the unit with the included beads, misted the heating chamber with a spray of isopropyl alcohol. ------ Misted the glass beads again with a spray of isopropyl alcohol. --- Set the cleaned glass-bead sterilizer into the still air box. - [19:02]: Still air box fully prepped for explants! --- Okay! Explant nodal sterilization complete! --- While still wearing gloves, --- Misted the outside of the explant jar with 70% isopropyl alcohol before placing it into the still-air box. --- Turned the glass-bead sterilizer ON. --- Made sure to re-seal the chamber. - [19:05]: Okay! Finally time to start the tissue culture transplant! --- Let's go Ensign! --- Sprayed my gloved hands with 70% isopropyl alcohol (also put on a pair of cloth arm sleeves), --- Placed my hands through the arm holes and into the still air box to begin the process. --- Started by laying out my initial workspace: ------ » Far Left Quadrant » Jar of Sterile Establishment Media ------ » Far Center » Bottle of Sterile Establishment Media ------ » Far Right Quadrant » Glass-Bead Sterilizer ------ » Mid Center » Bleach Jar with Explant Cuttings [Main Workspace] ------ » Near Left Quadrant » Empty [Trash Area] ------ » Near Right Quadrant » Bag of Sterile Tools & Roll of Plastic Wrap --- Opened the bag of tools and placed the forceps and scissors into the pre-heated glass-bead sterilizer. --- Set the bag in the trash area (near left quadrant). --- Loosened the lids of both containers of sterile media but did not remove the lids. The lids were resting on top and could easily be lifted. --- Also took lid off of the bleach jar and gently set it on the table. --- Took the jar of sterile media and set it in the center of my workspace (to the right of the bleach jar). --- Using my left hand, took a set of scissors from the glass-bead sterilizer and gently cut the bottom of the first cutting. --- Once the bottom cut was made, placed the scissors back into the glass-bead sterilizer. --- Using my left hand, lifted the lid off of the jar of sterile media and inserted the trimmed end of the cutting straight into the growth media (using my right hand). --- Covered the jar with the lid and placed the forceps back into the glass-bead sterilizer. --- Tighten the lid of the jar and set it aside. ------ [ » REPEATED THE ABOVE PROCESS FOR THE BOTTLE OF GROWTH MEDIA « ] --- Once the last cutting was transferred from the bleach jar into the sterile media, --- Turned the glass-bead sterilizer OFF. --- Cleaned up my workplace and placed the scrap stem tips and bleach jar out of the way (near left quadrant). - [19:28]: Wrapped the lid of each explant container with plastic wrap before setting it in the center of the workspace. --- Explant transplant completed! - [19:59]: Using a label printer (Brother DT410), made a set of labels for each container: ------ Heady OG BX1 #1 | 04.24.25 | Photo | Reg ------ Formula: v0001 | ExBatch: 0002 | Lot: 01 | Pod: 01 ------ Establishment Media | Sealed On: 10/18/25 --- Opened the still air box. --- Then one container at a time, took an explant out and wrapped the lid with a label. --- Set the labeled containers onto the propagation tray (in the 3x3 veg tent). - [20:07]: Done! ------ The explants are around 37 μmol/m²/s which gives a DLI of 2.40 mol/m²/d under an 18/6 light cycle. --- Will check daily for contamination. --- Ca-Caw!! Ahh yea! --- Heady OG BX1 is now officially my first true attempt at cannabis tissue culture! --- Using this new workflow, I may try reusing the TKO media. Do plan to take new cuttings soon. May even try using the liquid media. --- Shout out to microclone and Bill Graham! His 'Tissueponics' video contains tips and tricks of the trade that have straight up changed the way I think of DIY cannabis tissue culture. --- Plan to further refine my process and will continue to refine the workflow with each attempt. - [20:15]: Checked the Ecowitt soil moisture sensor data: ------------------ [ 4x4 MAIN TENT ] --------------- ------ 54% - [CH01 FT » G30 - Heady OG BX1 #1] ------ 34% - [CH02 FB » G30 - Heady OG BX1 #1] ------ 35% - [CH03 BT » G20 - TKO] ------ 55% - [CH04 BB » G20 - TKO] ------------------ [ 3x3 VEG TENT ] ---------------- ------ 43% - [CH05 BL » GR7 - TKO] ------ 48% - [CH06 BR » GR7 - Gorilla Goat #1] ------ 42% - [CH07 FL » GR7 - Heady OG BX1 #1] ------ 45% - [CH08 FR » GR7 - Garlic Budder OG#1] --------- Veg: 38% - 45% | Flower: 45% - 55% --------- General: 30% [Dry] «| 45 - 60% [Moist] |» 70% [Wet] - [20:56]: Checked the 4x4 tent. --- Ca-Caw! Looking great my ladies! --- Humidity levels are still a bit on the dry side, but still okay. - [21:08]: Checked the humidifiers. --- Tanks are still full and no leaks found. --- Wow what a day! --- Oh yea, 4-more days until trim day!! Ca-Caw! Let’s go! Day 07 - Sunday - 10/19/25 - Total Days: 189 ----------------------------------- Daily Averages ~[+01:00] - Temps: 76.7°F [24.8°C] - Humidity: 59.4% - VPD: 1.27 kPa - Soil %: [48, 35, 35, 55, 44, 43, 44, 42] ----------------------------------- - [07:08]: Quick morning checked on the 3x3 veg tent. --- The veg garden is healthy and perky! --- All moms and clones are healthy and raging with growth! --- Both Heady OG BX1 #1 explants also look alive and green! - [19:26]: Night check on the 4x4 tent. --- Ca-Caw! We got MENDO DOPE in the trunk! --- Wow terps are getting loud and buds are drying along nicely! --- Looking frosty and coated in trichomes! --- Three more days until trim day!! - [19:33]: Checked the Ecowitt soil moisture sensor data: ------------------ [ 4x4 MAIN TENT ] --------------- ------ 46% - [CH01 FT » G30 - Heady OG BX1 #1] ------ 35% - [CH02 FB » G30 - Heady OG BX1 #1] ------ 35% - [CH03 BT » G20 - TKO] ------ 54% - [CH04 BB » G20 - TKO] ------------------ [ 3x3 VEG TENT ] ---------------- ------ 40% - [CH05 BL » GR7 - TKO] ------ 43% - [CH06 BR » GR7 - Gorilla Goat #1] ------ 47% - [CH07 FL » GR7 - Heady OG BX1 #1] ------ 41% - [CH08 FR » GR7 - Garlic Budder OG#1] --------- Veg: 38% - 45% | Flower: 45% - 55% --------- General: 30% [Dry] «| 45 - 60% [Moist] |» 70% [Wet] - [19:35]: Checked the 3x3 veg tent. --- Vegging along beautifully in the garden! --- Mothers are getting taller and probably could train, but will wait until tomorrow. --- Clones and explants also look healthy and green! --- Gorilla Goat #2 needs watering! - [19:44]: Here is the starting initial watering range: ------ Gorilla Goat #2 » 255.4g → 300.3g and was last watered 5 days ago. --------- General Solo Range: [Dry] «| [Initial Cup Weight] + ~55-100g |» [Wet] --- Took the starting weight before watering, ------ Gorilla Goat #2 » 244.9g --- While on a scale, --- Gently misted her straw mulch with RO water. --- Tried to keep the top growth dry. --- Misted 5-10 sprays. Waited a few seconds, then misted again. --- Made sure to reference the watering weights. --- Repeated this process until the cup weighted at least 300g. --- There was no runoff. - [20:04]: Took the saturated weight after watering, ------ Gorilla Goat #2 » 345.6g --- Marked the watering date on the side of the cup. Also marked the saturated weight on the back. --- Placed her back into the tent. - [21:41]: With a few days before the big trim, decided to sample a few buds! --- Cut and trimmed branch for sampling and wow she’s got terps! --- Buds are dense and have a gassy diesel funk! Ca-Caw!! Wow! --- Without even curing, pretty sure she’s the one! --- Plan to grow out another cycle (in clone of the same pheno), but I think I found my female for my first breeding project! - [22:01]: Checked the humidifiers. --- Tanks are still full and no leaks found. --- Ahh yea! Three more days until the big trim! --- Also next week will be the last for this log. --- But already stoked for the next! --- Planning on popping more seeds and continuing the pheno hunt for another female! --- Since I lost TKO this harvest cycle, plan to grow a clone cutting of the same pheno (#2). --- As for seeds, popping more regulars and going to attempt to grow some of Mr. Grow-It’s Chillout OG! --- Got a pack of F3s and am stoked to give them a try! --- Also going to sprout some beans of Dead Ops OG from Zaza Genetics! --- Chillout OG, Dead Ops OG, and another round of TKO! Let’s go! Let’s grow! --- Hunters of the dank! Ca-Caw! --- Anyways! --- Onwards to next week! [END OF WEEK 26]
Likes
30
Share
@RakonGrow
Follow
Note : + jegliches Zubehör wird in der GermniationsWoche aufgelistet . Ich hab keine Ahnung was es wiegt , da ich keine Zugwage hatte. Warten wir also ab was es an trockengewicht wirklich wird. Aber da ist viel Drann , bei 116cm größe ist selbst der kleinste Bud noch groß :)) Es sind nach 5 Tagen Trocknung bei 22°C und 55%rH genau 204g
Likes
216
Share
Week 1 : Auto Colorado Cookies Biotabs sprouted quick bursting out of their shell, stayed in the propagator 4 days then straight and erly into the forever home prepared according to the @biotabsf69 method in 5 gal pots, all soil plus 23% perlite just eyeballed it dont know why i'm saying it was that precise lol. mixed in the startrex , added the mykos 3 in the pot and two in the cavity for the root plus, watered with orgatrex and bactrex then used boom boom spray to keep the humidity at around 70 for a day maybe a bit more. got some good pictures of the seedlings in but watered again with plain water 2L on day 3, now the medium is wet and wil likely remain so until late next week . just plain water until week 5 folks dont hold your breath. Just going to be using my special spray, co2 and kelp extract once a week some micro nutres in the spray of my own creation. Enjoy ! VPD .05 - 1.0 finally got it basically right after 3 days
Likes
13
Share
@Hempcules
Follow
After 11 weeks, I harvested the plants in two stages. It went faster than I thought, and the yields are impressive. The yields are much better for the four plants that I was able to keep shorter in height. They developed more dense, firm buds than the taller four plants, which is why I harvested them a few days later. I only watered with water during the last week and lowered the light to 600-700 ppfd. I'm drying now at 20 degrees Celsius and 55-60% relative humidity until the first stems snap, then the herb goes into hygrometer jars for curing. This time I trimmed wet because there were some really thick branches, and I didn't want to risk mold. All in all, it looks like a good harvest. I misjudged the height with this strain. I thought I could keep the plants relatively short by using topping and LST (low-stress training). This only worked for half of them. One of the plants was about 3 cm below the light, which is really suboptimal because I have no space above. I might have chosen a smaller pot size and swapped the plants' positions more often. I was also a bit too cautious with defoliation and pruning, but this was planned as an experiment to grow bushier plants, which didn't make me as happy in my application. Due to the high CO2 content, the cannabis grows exceptionally bushy and leafy. It requires regular pruning. The buds themselves have turned out really well. They are nice and firm, some quite large, and covered with many trichomes. The smell of the strain is less intense than I thought but still very pleasant.
Likes
5
Share
@Enki_Weed
Follow
..... Rückblick der letzten zwei Wochen –Turbulenter Start und wichtige Lektionen Die letzten zwei Wochen waren alles andere als ein Spaziergang, aber meine Pflanzen haben sich tapfer geschlagen, und ich habe eine Menge dabei gelernt. Der Start war holprig, hauptsächlich wegen einer defekten Luftpumpe, meiner langen Arbeitszeiten und der notwendigen Grundreinigung der Anlage. Die erste Woche: Der Kampf ums Überleben und die große Reinigung Die erste Woche war echt kritisch. Ich war viel in der Arbeit, und genau da ist meine Luftpumpe ausgefallen. Diese Pumpe ist eigentlich dafür da, meine Nährlösung mit Sauerstoff zu versorgen – lebenswichtig für die Wurzeln! Ohne sie bestand die Gefahr von Wurzelfäule. Die Pflanzen sahen gestresst aus, ein paar Blätter waren welk oder leicht gelblich. Das war ein klarer Hinweis auf den Sauerstoffmangel. Aufgrund dieser Probleme und um sicherzustellen, dass keine weiteren Komplikationen auftreten, habe ich die gesamte Bewässerungsanlage grundgereinigt. Das war zwar zeitaufwendig, aber absolut notwendig, um alte Nährstoffreste oder Ablagerungen zu entfernen, die die Funktion beeinträchtigen könnten. Das hat mir gezeigt, wie wichtig es ist, die Technik immer im Blick zu haben und regelmäßig zu warten. Dazu kam, dass ich durch die Arbeit kaum Zeit hatte, die Beleuchtung optimal einzustellen. Das hat anfangs auch zu etwas ungleichmäßigem Wachstum geführt. Die zweite Woche: Erholung und Stabilisierung – mit Klimaanlage! In der zweiten Woche konnte ich endlich eingreifen. Nachdem die Luftpumpe repariert und die Lichtverhältnisse angepasst waren, haben sich die Pflanzen sichtbar erholt. Das Wachstum nahm wieder Fahrt auf, und die Blätter wurden wieder kräftig grün. Es war eine Erleichterung zu sehen, wie widerstandsfähig sie sind! Aufgrund der aktuellen Hitze verwende ich jetzt zusätzlich eine Klimaanlage. Damit halte ich die Raumtemperatur konstant bei etwa 27 Grad Celsius, was für die Pflanzen im Moment optimal ist. Das hilft enorm, ein stabiles Klima zu gewährleisten und Stress durch hohe Temperaturen zu vermeiden. Ich habe gelernt, dass man auch bei Zeitdruck die wichtigsten Kontrollen nicht vernachlässigen darf und schnell auf Probleme reagieren muss. Die gründliche Reinigung war hier ein entscheidender Schritt. Trotz des holprigen Starts bin ich optimistisch für die Zukunft. Die Pflanzen haben sich trotz der Widrigkeiten gut erholt und entwickeln sich jetzt stabil. Die anfänglichen Schwierigkeiten haben mich definitiv aufmerksamer und proaktiver gemacht.
Likes
3
Share
@ohcibi
Follow
Update June 19th Next 3 liters. I also added the „vegan phosphor boost“ from S&R. First pistils are becoming visible. So far I’m counting 25 colas on Takti. Update June 16th 3 liters fed with another week of fertilizer schedule skipped because why. the fuck. not! I know the can handle it. They’re battle rappers! Update June 14th SFW - Second Flower Week. Things are going reasonably well. Had some drooping since I skipped watering for two days to combat fungus gnats, but it bounced back quickly after watering again. Takti even appears to be bug-free. The yellow sticky card in the pot has nothing on it. Fingers double-u’d this was only a short episode. Humidity was sky-high last week. Hoping it improves over the coming days.
Likes
75
Share
@DreamIT
Follow
🌺🌌 Runtz by Zamnesia 🌌🌺 I chose Runtz to start the next cycle with the sponsor Zamnesia. More news coming soon, yeah! 🤘🦄 🌌16.5 Germination begins today, 24 hours in water then in the napkin for 2 days . 🌌17.5 Day 2, all regular, the seed hatched slightly, now I put it in a damp piece of paper for 2 days, yeah 🌌18.5 The root has sprung up, but I still wait a day to jiffy it. I add a drop of water to the napkin. 🌌19.5 It is already about 4 centimeters long, but it came out particularly crooked. Not a problem, I put it in a coconut jiffy and cover it with cling film for 2 days. Everything is going well, it is well anchored to the ground despite the curve of the root. Tomorrow I proceed with the first transfer in 0.4 of soil. 🌌20.5 Nothing important today, I still wait one day for the transfer, yeah! 🌌21.5 After pouring, I put a bag around it to increase the humidity. Yeah! 🌌22.5 Nothing to add, new updates later 🤘 __________________________________________ ❓ Are you new to the world of the cultivation and don't know where to safely buy your seeds? 😮Zamnesia boasts the most complete and accurate site where you can find everything related to cannabis and the "psychedelic" world. Autoflowering, feminized seeds, mushrooms, salvia divinorum, afrodisiacim of everything, and more! ✅http: //bit.ly/ZamnesiaSeeds _________________________________________________________________ 👀 Are you looking for a good lamp to start with? 👀 🌞Viparspectra has something more than the others, take a look at their site. ✅ https://bit.ly/ViparspectraXSSeries ⏩ Use "GDVIP" for an extra discount or "DREAMIT" for an extra 5 %% discount 👀 Search for it on Amazon ✅https://amzn.to/3ttb2j9 ⏩ Use the code - lt10gdvip - for an extra 10% discount 👀 Watch my ViparSpectra XS1000 unboxing on YouTube, leave a like and write to the channel 🦄 ✅http://bit.ly/UnboxingViparSpectraDreamIT __________________________________________________________________ 📷🥇 Follow the best photos on Instagram 🥇📷 https://www.instagram.com/dreamit420/ 🔻🔻Leave a comment with your opinion if you pass by here🔻🔻 🤟🦄💚 Thank you and enjoy the growth 💚🦄🤟
Likes
11
Share
I did a bad job growing I feel like. The plant was great at first strong and decent size and I got a new job was busy and missed caring for her as much as I should have. Smells good and sticky looks good but I wanna do better.
Likes
48
Share
Gather 'round, because it's time for the grand finale of my Tropicana Cookies Auto journey. Week 10 has arrived, and boy, oh boy, this gal has been an absolute delight from start to finish. Let's dive into the final chapter of this epic adventure! I harvested my lovely lady at day 69 from seed, and let me tell you, it was a celebration of beauty and abundance. Picture this: a majestic all-girl harvest, suspended upside down for a glorious two-week drying extravaganza. At a temperature of 60 degrees Fahrenheit (15 degrees Celsius) and a relative humidity of 60%, the drying process unfolded like a symphony of perfection. Now, let's talk trichomes, shall we? Oh, those glorious little resin factories! This Tropicana Cookies Auto has blown my mind with the sheer amount of trichomes it boasts. It's like a frosty wonderland, sparkling like a million tiny diamonds. I've never seen trichomes in such numbers, shapes, and colors before. It's a trichome party, and everyone's invited! But let's not forget the benefits of the drying process. By allowing our precious buds to dry slowly and evenly, we're enhancing their flavors, aromas, and overall quality. It's like fine wine, my friends, getting better with age. Patience is the name of the game, and trust me, the reward is worth every second of anticipation. Now, let me take a moment to give a big shout-out to @Fast_Buds. They've truly outdone themselves with this Tropicana Cookies Auto. It's like they sprinkled magical trichome dust all over these seeds, ensuring a frosty experience like no other. They've got the genetics game on lock! So, my fellow cannabis enthusiasts, as we bid farewell to this remarkable journey, let's cherish the memories, the lessons learned, and the joy shared. From seed to harvest, this Tropicana Cookies Auto has captured our hearts and ignited our passion for the green wonders of the world. May your drying process be smooth, your trichomes plentiful, and your buds burst with flavor. Thank you, Tropicana Cookies Auto, for gracing my garden with your extraordinary presence. You've left an indelible mark in my cannabis-growing adventures. Keep cultivating with love, spreading the joy of this amazing and holy plant we all love so much, and remember, my friends, trichomes are like the glitter of the cannabis world—bright, beautiful, and absolutely fabulous! As always thank you all for stopping by and for supporting me on this journey, i am super passion about growing and fell blessed to have you all with me on this new journey <3 <3 <3 Genetics - Fast Buds Tropicana Cookies Auto Ligth - LUMATEK ZEUS 465 COMPACT PRO 
Food - APTUS HOLLAND 
 Tent - MARS HYDRO 
All info and full product details can be find in can find @ https://2fast4buds.com/ 

https://aptus-holland.com/
 
https://autopot.co.uk/ 

https://lumatek-lighting.com/ <3 <3 <3 Growers love to you all <3 <3 <3 Tropicana Cookies Auto is the perfect variety for growers of all levels, especially beginners as this strain performs very well outdoors and indoors, and can produce up to 500gr/m2 in 56-63 days without needing extra maintenance. Reaching up to 110cm, this strain grows fairly tall with medium-sized branching, showing its mixed heritage. Definitely the right choice for those with a high tolerance looking to get their hands on the strongest autoflowers out there. Thanks to the 27% THC, you can expect an extremely powerful and long-lasting high that’ll boost your mood and give you that extra push you need to start your days on the right foot. This variety offers the whole range of citrusy and woody flavors with a strong candy-sweet background that will keep you coming back for more and more. Bud description Tropicana Cookies Auto produces gorgeous dark purple flowers, so expect really dark buds with gorgeous hues of pink, purple and blue, and thick dark-orange hairs that get completely covered in resin by harvest time, giving them an almost shiny-white appearance. This variety develops a typical Indica-like structure and very few sugar leaves that will make your trimming sessions a breeze. But make sure to store your trimmings as the gorgeous flowers reek of a mouth-watering blend of lemon peels, orange juice, and sandalwood that gives it almost a citrus candy-like flavor that makes for the most aromatic hash and extractions.Smoke report Thanks to the 27% THC, Tropicana Cookies Auto’s effect starts with an energizing head rush that gets your mind up and running while leaving you in a nice calm state. As the Indica-dominant side kicks in, the powerful cerebral effect gradually moves downwards and hits your whole body with a deep relaxation that leaves you with a joyful stoney sensation that alleviates chronic pain while leaving you in an overall happy and positive state of mind. It’s the perfect daytime and nighttime strain as it can boost your mood and enhance a night out with friends but can also quiet your mind as you get ready for a good night of sleep. No matter the scenario, expect a powerful high that lasts for hours on end.Plant appearance Tropicana Cookies Auto reaches up to 110cm and develops a tall main cola with shorter side branches, typical of hybrid strains. You can expect a stocky yet tall main cola with medium-sized side branches and thin fan leaves that fade into a yellowish hue with a beautiful dark purple tint. Thanks to the excellent selection, this variety develops a short internodal spacing that makes the medium-sized flowers look like they’re growing stacked on top of each other. It’s the ideal choice for growers who want to get big yields without having to deal with huge plants, as this monster yielder can produce up to 150g per plant while growing relatively short. Grow tips This variety grows super dense buds so make sure to space out the branches by tying them down, this way you improve airflow which helps prevent mold and other pests. Tropicana Cookies auto reek of a delicious sweet and sour smell so make sure to flush thoroughly to enhance the aromas even more. This terpene heavyweight finishes with lots of resinous sugar leaves that make for fantastic hash and extractions so remember to have your trim bucket ready!Flavor Tropicana Cookies Auto boasts remarkably sweet flavors that resemble a blend of lemon peels and fresh orange juice, with subtle floral undertones that make it the perfect choice for extractors looking for unique terpene profiles. Expect an overall citrusy zest that’ll coat your whole mouth and leave a delicious tropical candy-like flavor aftertaste. The sweet and sour flavors get balanced out with a herbal background that gets stronger as you exhale and gradually opens up, bringing out the whole range of woody, floral, and spicy flavors, making it the perfect choice for the most flavorful extracts
Likes
6
Share
Week 13 (04/07 - 10/07) 06/04 Chopped her today, planned to keep her going until end of this week but needed space in flowering tent She is smelling real good Couple branches found some leaves with spider mites She foxtailed quite a bit on the top due to her being too close too LED, couldn't get it higher