The Grow Awards 2026 🏆 


Likes
Comments
Share
@Hazecat_420
Follow
Se viene próximamente la cosecha, cultivo limpio, estructura buena, buen olor y aroma intenso. Se aplica Flawless Finish para utilizar los últimos nutrientes de estas plantas, se espera el secado del sustrato y se comienza la cosecha

Likes
9
Share
@GrowingisFunkO
Follow
Week 16 - 06/28 - 07/04
Light - 200 W HPS & 265 W LED
Day Temperature - 78 F
Night Temperature - 68 F
Humidity - 40 +/-5
D59 Flower - Came home from vacation to some fat sugar coated buds! I flushed them with FloraKleen and molasses, this should be the last one before I snip down the main colas. Since they are close to harvest, I spent about an hour defoliating so harvest will go a little quicker.
D60 Flower - Took the ladies out to breathe, take some pics, and snipped the tops off the Royal Gorilla's. I'm going to allow the Hulkberry's to mature a little longer and probably do the same thing and snip the tops.
D61 Flower - Unfortunately HB #3 hermies on me, she had a bunch of "bananas". So I cut her down and hung her to dry, Sucks to lose her but she will do well in some RSO! Unmanicured wet weight was 251 g. I am also going to be testing out the bowl bud trimmer I just ordered on these buds to make sure they dont damage the buds too much.

Processing
Likes
176
Share
@Teamdirtbag2
Follow
Orinoco is definitely doing great.
Nightingale is the indica dominant pheno
Candida is getting her ass kicked by the fan. I need to move her.

Likes
47
Share
@GrowGuy97
Follow
This lady got cut on day 63, I am extremely impressed with how she turned out considering she got nothing but PHed water the entire grow! She is extremely sticky & frosty and has a unbelievable smell everytime you open the jar! Definitely one of my favorite strains I have grown so far can’t wait to see how she does using nutrients next grow! If you havnt already I highly recommend going to check out Doctors Choice seed bank for some fire genetics & all around great people! Thanks for following the grow & stay tuned for the Rock Machine & Doctors Choice #1 harvest coming soon! Happy growing friends!🌱✌️🏼🙏🏼


Likes
17
Share
@masterofsmeagol
Follow
8/23 I WATERED THE NATURAL MK ULTRA AND THE 10TH PLANET IN THE BACK WITH A GALLON AND THE TWO TENS SPLIT A GALLON. It's hotter today and the wind is picking up. I wish I had gotten rid of that plant when I thought to. Oh well. I'm going to have to bite the bullet and treat things. Smell is increases as well as flower size. However I'm noticing more leaves that are yellowing and falling off. Smell has intensified. The special kush in late flower doesn't seem to be producing trichomes like it should. Or maybe it's still early. I see some but by this time I would think it would be frosty as hell! It's rained like once this summer. I've put tons of work into defoliating. I'm not sure if I'll try a controlled spray trying to avoid buds or if I should use a sponge and just hit every leaf. At least I'm seeing that the buds are still expanding and smelling despite these invisible Bastards. It's not like I see them. Even my traps only caught like one. I'll update as I go.
EDIT: WATERED THE TENTH PLANET AND THE LATE SOECIAL KUSH 1 GAL. PLAN ON FEEDING TOMORROW. I DID A SHIT TON OF DEFOLIATION. I DONT SEE ADULT THRIPS BUT I SEE THE EGGS AND SHIT IN THE CREVICE AND SOMETHING IS COMING AND EARING SMALL LOWER FOLIAGE. I RIPPED TWO INTERIOR BRANCHES OFF THE PLANTS I TREATED BEFORE WITH CITRIC ACID BECAUSE I FOUND A COUPLE STOPS OF MOLD ON THE STEM. AFTER RESEARCHING THRIPS WITH A.I. UNTIL IT LITERALLY CHANGED PROTOVAL AND STOPPED HELPING ME SAYING IT DANT HELP CULT8VATE CANNABIS AFTER GIVING ME SEVERAL DIFFERENT INSTRUCTIONS AND OPTIONS. I SCREENSHOTTED THEM THOUGH. I USED THE SAME MIXTURE OF CITRIC ACID AMD DAWN ONLY HALF STRENGTH AND HIT THE 10TH PLANET AND PINK KUSH THAT ARE PATIENT ZERO. THEN I TOOK A SPONGE AND EITHER DEFOLIATED OR WIPED THE LEAVES WITH A SPONGE AND SAME CONCOTION ON THE SPECIAL KUSH IN THE TEN. I DEFOLIATED MORE AND THEN "SPOT TREATED" A FEW LEAVES ON A BOTTOM BRANCH OF THE 10TH PLANET WITH MITE X. I'M WAITING UNTIL THE MORNING TO SEE THE RESULTS AND BEFORE I MOVE FORWARD. I HAVE ORGANOCIDE BEE SAFE AND I KNOW IT WORKS GOOD BUT IT SMELLS LIKE SHIT. IM HOPING ILL FIGURE THIS OUT.
8/24 Didn't have time to do a video or take any pictures. I pit a lot of work in the garden yesterday. I removed a couple small branches that had mold on the stem. If I had listened to my intuition and moved that plant (instead of listening to my dad) I probably could've negated this mess. Windy as hell yesterday. Maybe that's why I don't see mich damage from the thrips. The runt in the 50 has some silver ingredients on it. I'm considering using spinosad. Those are way earlier in flower and that shit WORKS. WATERED TODAY;BIG MK ULTRA 1.5, THREE IN THE BACK ROW, CHEMDOG AND TENTH PLANET ALL GOT 1 GALLON. THE TWO TENS SPLIT A GALLON. I THEN FED EVERYTHING WITH A QUART OF FOOD. I'll keep an eye out on the dosage and see what the can handle. I left out plant doctor as I'm dealing with thrips. Took a leaf that looked like sep off the pink kush in the 50 with half used soil. I didn't have much time to look around but I will when I get back and I'll put some vids/pics up. The plants that I treated with citric acid looked no worse for the wear and actually BETTER than they hadcthe day before. The other 10th planet and the Pink kusg in the ten are the worst. If I can't beat it I may junk them. I'm planning on treatingvtge plants I didn't yesterday tonight. I may use a different treatment I'm not sure.
EDIT: Went back over and took a few pics and a video. I defoliated a SHIT TON of leaves. I can just tell the ones that the thrips have been sucking and laying eggs. It's windy as hell. Plants are going crazy. I'm wondering if the wind will hurt the thrips. Maybe I should've just stood with the wind at my back and throw a buNch of D.E. in the air and have it coat the plants. I'm scared of using d.e. because it absorbs so much water. It's like 80%! The year I had fusarium I put a bunch of d.e. on the soil and it retained water like a mofo. The plants I treated showed no I'll effects. I'm th8nkobg I'm going to remove patient zero and isolate it. And I'm considering using spinosad on the pink kush. What would you do? If you had to use something in the middle of flower or loss your crop which would you choose? I'll probably just use citric acid or the rubbing alcohol. I don't know. I'll keep it updated.
UPDATE: WENT OVER AROUND FIVE AND DEFOLIATED. I CHECKED THE PLANTS I TREATED AND THE ONE IN THE TEN HAD A FEW LEAVES THAT LOOKED LIKE SEP. ITS EXTREMELY WINDY SO I DECIDED AGAINST SPRAYING TONIGHT. I LOOKED ONLINE FOR PREDATORS BUT IT APPEARS TO BE TO LATE OR EXPENSIVE. I MAY LOOK FOR AN OVERNIGHT SHIPMEBT OF LOST COAST PLANT THERAPY OR SOMETHING BUT WILL THAT WORK SUBSTANTIALLY BETTER THAN A DIY VERSION? ILL EITHER ORDER SOMETHING TONIGHT OR PICK UP THE LAST FEW INGREDIENTS I NEED TOMORROW. LOOKING THROUGH THE GARDEN THOUGH EVERYTHING LOOKS GREAT! I WISH THE TRICOMES WOULD DEVELOP A LITTLE FASTER ON THE EARLY SPECIAL KUSH BUT IT IS WHAT IT IS. THESE GIRLS HAVE BEEN THROUGH HELL AND BACK ARE REAL TROOPERS.


Likes
91
Share
@DogDoctorOfficial
Follow
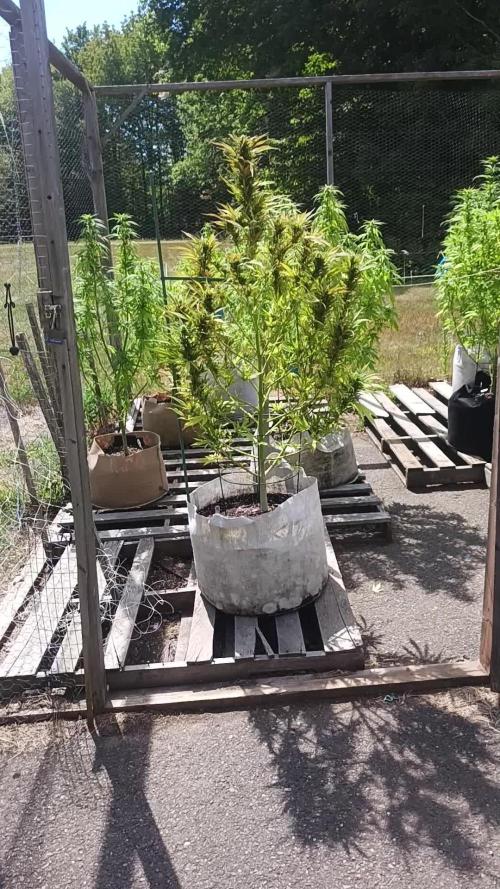
And this week wold not be the same if something did not came up, so lets take this in to different parts lol, they are way to big for this space and the LED power was just not felling enough, so and since i had finish my run on another closet with the Viparspectra P2000 , i decided to had it to the party and with this solve the not enough lights felling of mine loll
And as they are big af they also are getting heavy af lol so i had to instal a 3rd net to help and support, all good apart from the size and that i am not drone that can easy work from above them, and if i was one, there wold not be enough space for me to fly any way hahahaha
And wen doing all this i got full sticky all over me from top to bottom , direct to shower and closes to the washer, this girls are on fire and i am so but so glad that i decided to keep cuts from the chosen one that i liked the most wen i grew Zamnesia Runtz fr the first time, oh and by the way the passion fruit mixed with pineapple, pines and a walk in the woods smell is getting retarded intense , i think she is getting beter and better over time like a wine vine <3 <3 <3
And with this said this was the week so far , sorry jut now the update but at least was before next week one hahahaha
Oh almost forgot, dod not change the food supply but for next week i am cutting P and increasing the rest , just to let you guys know <3 <3 <3
They keep growing and growing , i almost can see them grow hahahaha
As always thank you guys for your love , your time, your support and it all, i fell blessed and i am truly thankful <3 <3 <3
All info and full product details can be find in can find @
https://www.zamnesia.com
https://aptus-holland.com
#aptus #aptusplanttech #aptusgang #aptusfamily #aptustrueplantscience #inbalancewithnature #trueplantscience #zamnesiaseeds #growerslove
With true love comes happiness <3 <3
Always believe in your self and always do things expecting nothing and with an open heart , be a giver and the universe will give back to you in ways you could not even imagine so <3 <3 <3
More info and updates @
https://growdiaries.com/grower/dogdoctor
https://instagram.com/dogdoctorofficial
https://youtube.com/channel/UCR7ta4DKLFMg2xxTMr2cpIg
<3 <3 <3 Growers love to you all <3 <3 <3

Likes
11
Share
@Synkery
Follow
Ha sido un cultivo de aprendizaje! He aprendido a entender lo que te pide cada tipo de planta. Las dos cepas han salido muy potentes i sabrosas!

Likes
18
Share
@Sti_Cazz
Follow
More defoliation and nutes this week, they are seriously getting hungry now! I ordered a new 30cm honeywell ground fan and dehumidifier to quickly solve the RH issues, I don't want to risk mold or other surprises.


Likes
10
Share
@steingrower
Follow
Not sure, but I may have stress her moving her from tent to BR, my other two critical's are also showing signs of flowering. So, it's back into the tent since it's 12/12.
So she's drinking more, it shows as she's grown quite a bit in tha last week. So much she's almost caught up to my blueberry that is 21 days ahead.
I was using FF trio nutes, but the kit I have was more for my Blueberry. From here on out it'll be jacks and Beastie Bloomz. Doing it mostly as a trial, if it works out it'll save me a little bit as well.
Holy cow, she's going for the stretch, going to catch up to my blueberry in the corner.
EC: 2.3
PH: 5-5-6.2

Likes
77
Share
@PersonalSmok3s
Follow
All appears well with these Ladies.
I decided to harvest the JB#2 on the 8th, she had predominantly cloudy trichomes and a few amber scattered throughout.
She’s still drying, I’ve sampled a few test pieces and 🙀

Likes
Comments
Share
@n1mbu5
Follow
OK guys I've shut them down to 4hrs light a day for 2 days now. They have really filled out those buds and are looking extra sugary.
I have been watering with 140ppm water at 6.2-7 pH with flawless finish for 6 days now.
I have just given them probably the last watering will leave them for another 3-5 days on 4hr schedule before turning lights off for 2 days and then harvesting.
Next diary will be the harvest!! I hope nothing goes tits up from here😂

Likes
9
Share
@mangodalat
Follow
Week 3 of bloom :
- Smell: smell weak
- Normal bud development
Everything is fine.
THANK YOU. SEE YOU NEXT WEEK.
Processing
Likes
3
Share
@Barcelona_Farmers710
Follow
Mientras yo me divertía en la spannabis las niñas se ponian cada vez mas resinosas farmers!! Solo basta ver la shining haze para darse cuenta que el mammoth p es brutal!!👌🏻


Likes
8
Share
@Growwbacca
Follow
Starting week 7 and her flush! 8 day flush tapering down the molasses, freezdried coconut water, and slf 100 as an enzymatic cleanser. Last 2 days will be complete darkness and no water before harvest!

Likes
9
Share

Likes
2
Share
@Black_RastamaN
Follow
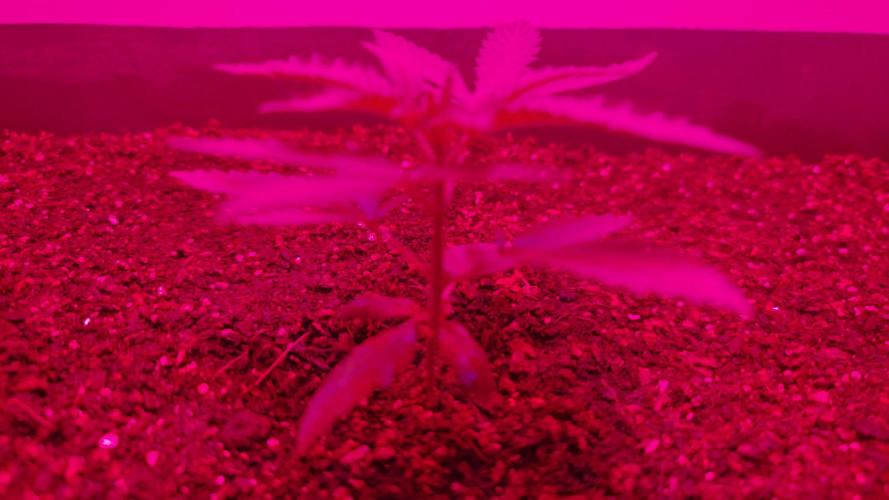
👋. После последнего посещения прошло 13 дней. Шли дожди, и возможности их проверить не было, только сегодня я смог туда поехать. Я был приятно удивлён 😊. Кустики после топпинга заметно подросли,. До дожей я их побрызгал с пульверизатора водой с удобрениями, обильно полил, а днем пошёл дождь ☔ . 👍☺️.Я их не поливал, там много воды,.Видео тоже есть.

Processing
Likes
11
Share
@Ledbelieve
Follow
Another nice week of beautiful weather. Have been on total cruise control this week on a little water here and there. Did some topping and super cropping. Not much at all to report the fast buds are in full flower and doing well. Happy growing folks🤙🏻

