
Likes
Comments
Share


@Miguels_Fuego
Follow
Buds are stacking nice. Resin productivity has increased. Will introduce dry Koolbloom soon.

Likes
15
Share


@northern_rookie
Follow
Less is more. Lesson learned. Without training these plants, having the fifth plant has really cramped the tent. Because I have limited space for the tent, access into the sides isn't possible. I have only the front entrance. Next time I think I will stick yo maybe three strains that have been positive and try and find the time to train more.
The WOS-Northern/Skunk has grown out so nicely into a Xmas tree type of posture. She is making her really good friends with her neighbours, perhaps to their detriment.
Seedsman Blueberry continues to be solid and unphased by anything. This is the first time I have smelled a plant that has such a fruity aroma. It really took me aback in surprise. Very cool.
HiFi 4G needs support. Did a McGyver solution for the time being. Doesn't appear to have bulked up much this week.
Jack is about the same. A bit of bulk up but not expecting this one to be a big yielder. Appears healthy overall so I'm happy.
CBD+ bulked up for sure on the main cola's. I'm skeptical she will be done at 60 days at this point....but have to trust what Dinafem are telling me.
Be safe folks.


Likes
28
Share


@Heregrowsnothing
Follow
And then there was one... This beast took over the tent and needed its own space so thats what I gave it and boy did it repay the favour! Plenty of really dense bud with a wonderful smell. It's beginning to look a lot like Christmas 💚

Likes
6
Share


@Terp_Derp
Follow
Do far so good. Fattening nicely. Going to give last nutrient feeding this week and flush around 04/04

Likes
9
Share


@Garamantes
Follow
As you can see, LST works well, Gorilla Strawberry tolerates LST very well, in almost all plants I managed to keep the branches at the same height
I made a minor defoliation of large leaves. The rest I slide under the twigs every day so that they do not make a shadow.
Due to a high wind that lasted 2 days and LST one of my Gorilla Strawberry broke in half and holds on about 20% of the stem.
I was thinking about trying the method HST and I will remove the cracked part of the plant, but I did not have the heart to cut it off, so I decided to use the patch that I carry with me in the first aid kit if I cut myself. From two twigs and a patch I made a primitive splint.
The next day I took an insulating tape with me into the forest and once again wrapped the splint for better strength. And as you can see, the plant lives and thrives :)
Next, I want to show you the pest Leaf Minner, which makes tunnels in the leaves and then pupates on the underside of the leaf
I tear off the leaf or crush the pest
Next, I would like to show you a very useful beetle, a ladybug that eats, for example, aphids, in the photo you see a pupated ladybug larva, do not kill it !!!

Likes
11
Share


@JaysBuds
Follow
Day 60 from flip for these girls and they're SO sticky and gooey it's kindof ridiculous. The camera just isn't doing it justice, and they're in bed now so no flash photos. The sweetness has really started to develop, and less vomit smell is most welcome - gassy strawberry apparently takes a while to get right, even with a fast strain.


Likes
201
Share


@MonyetDiablero
Follow
Hello everyone!
First of all I would like to thank everyone who voted for me, which made me come third in The Growdiaries 2026 in the category Best Autoflower Diary with the strain “Break-Up Cake Auto”. I would also like to sincerely thank Kannabia for their trust, which resulted in a second sponsorship.
I am proud to announce that I have been asked to grow a seed of choice from Kannabia.
My choice fell on the Do si Dos auto strain.
Strain info
https://www.kannabia.com/marijuana-seeds/autoflowering-seeds/dosidos-auto
I hope you will enjoy this new grow just like I will do.
Let's set another record for this strain, just like with the previous strain.👌
03-03-2025 -
ENVIROMENT:
Light schedule : 24/0
Humidity : 70%
Soilmoisture : 42%
Temp : 27 Celsius
Who am i ?
until last november i have always grown hydro for a little over 11 years. But growing started to look more and more like work because i was more busy with programming my controllers for the ph / humidity / lights / co2 / temperature. Also the realization that i have 2 children and my own house made me nervous for the authorities because where i live growing is not allowed. So i decided to grow smaller where i previously had 200x180x200 space i opted for 70x70x160 with the result that i can only grow 1 strain at a time. The intention is to remain self-sufficient in this way and still be able to exchange or give away something here and there at a party. Although I am sponsored I will not be able to grow every strain because not every strain can deliver the result I need to remain self-sufficient. If you know of an auto strain or photo strain that takes at least 11 to 15 weeks I would like to know so that I can grow it in the future and of course I will try to set a record for that grown strain. Because during the 4 grows that I can do per year I can only try to achieve a record since I cannot show you multiple strains at once. I am happy that after 11 years I have found growdiaries and that I have met you my friends.Greetings MonyetDiablero.

Likes
44
Share


@APOLLO
Follow
A busy week again.
White widow and x2 Renaissance are gone to the flowering room. Next week will be flipped lights for them.
Veg room has one white widow and 2 Green Gelato, once ready all will be sent together along with some clones hopefully.
Likes
7
Share

@ThatsmyGrow
Follow
She is getting soo wide, like i topped her and use lst, but nope.
Its the nature grow of the super lemon haze, i love it.
We will see how big she is getting.

Processing
Likes
8
Share


@Yiyis_Grow
Follow
Estas 6 plantas sobraron de 15 esquejes que hice para regalar (mis primeros esquejes) . Quizá mis amigos no las escogieron porque eran las más débiles y feas, pero en vista que nadie se las llevó, vamos a sacar algunos gramos.
Ellas viven con 12 horas indoor y 6 horas de mal sol interrumpido, quizá por esa razón se han espigado tanto esta semana. En todo caso, solamente voy a dejarlas 1 o 2 semanas más en vegeta y luego a florar y ver cuánto me dan.
Son esquejes AK47
Buenos humos


Likes
10
Share

@TrickzGrowz
Follow
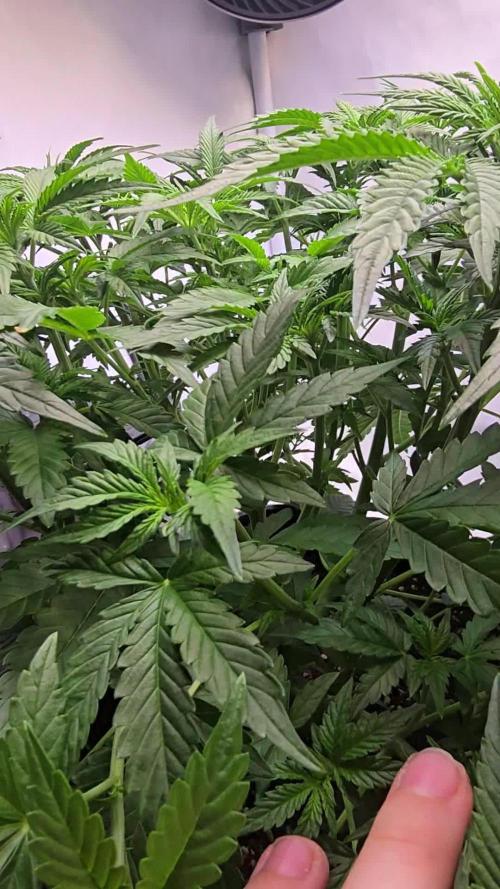
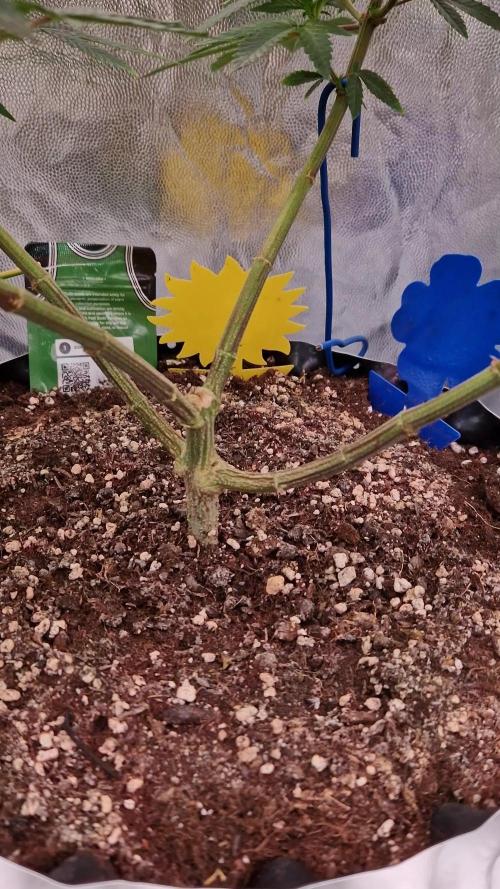
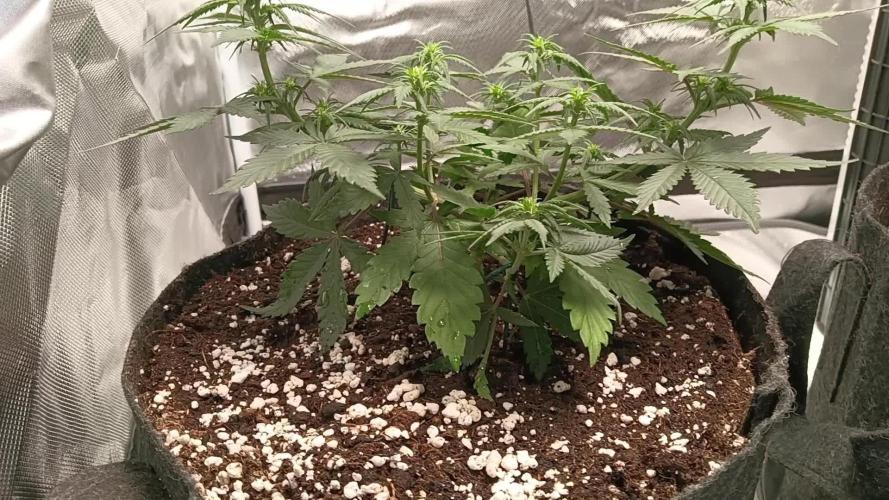
Der eine Trieb der durch das Training angerissen ist, hat sich bereits super erholt. Die Wurzeln sind bereits unten am Untertopf angekommen.
Gelbtafeln und Blautafeln angebracht.
Likes
29
Share


@Ultraviolet
Follow
Hope you are well. Thanks for taking the time.
Little main line defoliation to focus growth.
ATP (adenosine triphosphate) is the primary energy carrier in cells, including plant cells. It powers various cellular activities like nutrient uptake, protein synthesis, and cell division. Without ATP, the plant's metabolic machinery would grind to a halt, regardless of the presence of nutrients, oxygen, or carbon. Nutrients, like nitrogen, phosphorus, and potassium, are essential for building plant tissues and various molecules. They are incorporated into proteins, nucleic acids, and other vital compounds. While crucial, their uptake and utilization rely on ATP-driven processes. Oxygen is vital for cellular respiration, a process that generates ATP. While plants can produce ATP through photosynthesis, oxygen is essential for maximizing ATP production in mitochondria through oxidative phosphorylation. Carbon is the backbone of all organic molecules, including carbohydrates synthesized during photosynthesis. It's the fundamental building block of plant structures and fuels. However, its incorporation into organic molecules is also ATP-dependent.
45% Carbon.
43% Oxygen.
We don't grow we facilitate energy conversion.
Likes
17
Share


@Naujas
Follow
wow wow !!!! 404 gr ! from the suitcase!!!!!!!258 gr of wet dried buds!!!!!!! I am impressed with the result, and I don't really believe that I will ever be able to improve it :) It was a truly amazing journey with FastBuds Gorilla cookies auto, my house is filled with a wonderful sweet smell, the buds look really full and very very shiny :) I also collected a lot of sugar leaves from which I will make bubble hash:) the girl coped with high temperatures and high humidity throughout her growth, which is why I was afraid of rot, but everything went well!!!! She is amazing. smoke review and dry weight will be up very soon, good luck to everyone :)!!!


Likes
6
Share


@AustinRon
Follow
OG 4Q24 Harvest Log
Germination Date: November 20, 2024
Harvest: 2025-02-18T22:48:06-0600
Total Wet Weight: [ 3.084, kg]
Est Dry Weight: [ 0.6, kg]
Average Plant Height: [ 29.8, in]
Max Plant Height: [ 40, in]
Minimum Plant Height: [ 21.5, in]
Flower Day 70 - Harvest


Likes
63
Share


@Chubbs
Follow
420Fastbuds
StrawberryGorillaAuto
Week 4
What up grow fam. Weekly update on these 3 wonderful ladies. This week I did introduce some nutes and the plants seem to respond amazing. Starting to see little pistols so guessing this will be the last week of veg before the transition into flower. All in all Happy Growing
Likes
16
Share


@IQuSX
Follow
Salute, topman.
It is this bush that will be 160 grams, and all together with the neighboring ones - 780 grams of dry and 250 second-rate, although 1100-1250 was expected ...
Probably overkill with the far red 660nm booster (one of the bushes was super bubbly and airy, but gave only 100g when 300g was expected...).
In general, I try this beauty for the second time, the second time I am pleased, but this time with the most exquisite taste and smell.
To say I recommend is an understatement!
Look how it all began! ^^

Likes
7
Share

@Mikeyc420
Follow
Strawberry gorilla is growing nicely have transferred to a bigger pot (should of done it a week early) she has started to grow white pastels
Sticking with LST buy sting the branched down to allow more light in to other budsites
Don't forget your 15% off your next seed order at fastbuds by using discount code 420CLUB
Likes
7
Share

@PEAKYPLANTERS
Follow
We've reached the end of a really long but very satisfying journey! These girls have their heads covered in snow...even though it's very hot 😥 uffff😓