
Likes
Comments
Share


@Mosquito_Haarlem
Follow
Week 7 is begonnen en ze doet het goed.
Bloemen beginnen voller te worden en haar kleuren zien er gezond uit.
Ik heb ook wat onderste bladeren en takken weggeknipt.
Pomp het op 💪🏽
Ik zal gedurende de week nog verse foto's updaten dus hou het in de gaten 🧐

Likes
17
Share


@ChunkeyMunkey420
Follow
Plants doing well. Sfl 100 gets given with first water of week after feeding.


Likes
3
Share


@BRLGrow
Follow
Yellowing advancing brow spots, some leafs drying and falling off.
One girl I will flush tomorrow to cut on the weekend.
The other 2 have more one week or 2.
Is these yellowing hurt on the stage the girls are?

Processing
Likes
20
Share


@Mr_nugs_lover_David
Follow
She's looking so beautiful,very nice strain to grow for sure,I'm trying to give her a good shape before flowering starts. I add organic liquids nuts only once a week and looks like she loves it,let's keep up the work!! 💚💛❤️🌱🤩

Likes
5
Share


Likes
13
Share


@GrowGuy97
Follow
Flower day 10 - Everything is going great so far, currently trying to find a bigger dehumidifier cause RH is staying a little higher than I would like! Thanks for following & happy growing friends!🌱✌️🏼
Flower day 11 - Finally got the last 2 plants from the first run cut down & now these ladies have much more room! Watering tonight with just PH water. Happy growing friends!✌️🏼🌱
Flower day 12- Buds are starting to show, can’t wait to see how different they all look😍😍
Flower day 16 - End of Week 8, all the plants are coming along beautifully! Definitely will not have 10 In my next flower run though the tent is way to packed lol! Thanks for following & happy growing friends!✌️🏼🌱


Likes
85
Share


@Tropicannibis_Todd
Follow
Start of day 84 ...... January 1 2022 Start of week 12 ........ 58 DAYS INTO FLOWERING
😕 LOOKS LIKE THERE GONNA GO A LITTLE LONGER THEN EXPECTED ? 😕
( HAPPY NEW YEARS😋 🎅 🎄)
( SMELLING GREAT ) !!!!!!!
Check out the full grow video on latest weekly update
Super Exceptional Growth Daily
Still adjusting LST when needed and leaf tucking.......
Water Only when needed but its drinking more every otherday and adjusting lights when needed......
Rain Water Only .......
( DAY 26 AND BOTH NL 1 & NL 2 SHOWED PREFLOWERS )
( DAY 49 AND RESIN PRODUCTION HAS STARTED )
( DAY 57 , EQUIPMENT FAILURE , main FAN , over heated😡 tripped breaker , reset light timers , lost a DAY, REPLACED new Main Fan 😁 back up running 👌)
( DAY 70 DID ITS FINAL FLUSHING TODAY TO GET RID OF ANY BUILDUP )
( DAY 77 AND IT SHOWS A SLIGHT DEFICIENCIE MAYBE A CAL/MAG GETTING CLOSE TO END OF LIFE ) IM ALSO DOING VERY LITTLE, SLIGHT DEFOLIATION
( DAY 89 AND ALL IS GOOD , THERE FATTING UP )
DAY 89 .....NL 1 SHOWS CLEAR TO MOSTLY CLOUDY RESIN HEADS , STILL AWAY TO GO .......
DAY 89 .....NL 2 SHOWS MOSTLY CLOUDY RESIN HEADS , JUST WAITING ON THE AMBER TO GET STARTED , GETTING CLOSE BUT MORE TIME NEEDED......
I hope you enjoy my growlog...

Likes
6
Share

@GoodTimesOrganics
Follow
Hi liebe Community! 💚 Heute ist die erste Blütewoche in das Land gezogen
Sie hat in der ersten Blütewoche einen moderaten Stretch von knappen 10 CM hingelegt.
Der Wuchs ist sehr kräftig und die Pflanze bleibt bis jetzt sehr homogen.
Außerdem habe ich nun nochmal die Sonnensegel zurückgeschnitten und die unteren Triebe auf etwas 1/3 der oberen Höhe zurück geschnitten, damit die Pflanze ihre kompaktere Wuchsform beibehält.
Insgesamt ist die Pflanze sehr Vital und hat eine sehr schöne Wuchsform😉
Die Wachstumsbedingungen im Growzelt sind weiterhin am Optimum und Stabil:
———————
🌞 Temp: 25°C
🌚 Temp: 20 °C
💨 RH: 56%
VPD: 1,04 kPa
———————
Stay Tuned! 💚

Likes
17
Share


@The_Projexx
Follow
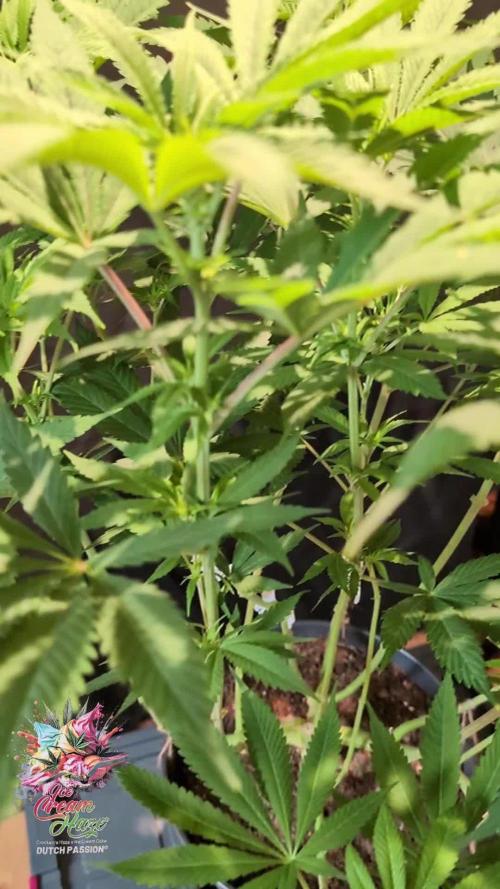
Welcome to week 7 of flower! Our new camera should be in this week so I'll be able to capture better photos! Things are just grooving along at a nice pace, I will be looking to check the trichomes this week to see where everythings at but I know for sure we still got some time left especially for Fuel D.og. Over all really excited to see what this week will bring and hopefully we will be starting flushing the plants by weeks end!
Huge Shout outs to the following for all their outstanding work with everything from equipment to genetics: @MarsHydroLED , @Seedsman , @PyramidSeeds , @GreenHouseSeedCo
HUGE HUGE shout outs to all my followers and people who stop into the diary alike! Keep inspiring to grow!
-The Projexx
Day#43F Plants reacting well to water increase! Fade continues to get more pronounced and the flowers still putting on mass but starting to slow down.
Day#44F Pictures N/A. Ladies continue to grow. Fuel D.og#2 is really starting to smell like my old shop now, a mix of gas and grease!
Day#45F Checked trichomes, Black Cherry Punch and Kings Juice will begin their flush at the end of this week, I will sneak in 1 final feeding with nutrients before flush.
Day#46F Ladies are grooving along, Fuel D.og is still putting on mass daily! New camera came in and I think it does the plants justice now!

Likes
67
Share


@HazeyBobby
Follow
The week starts Monday, Dec-23 in vegetative stage.
Installed the ScrOG net
Set at 20cm from the base of the plants, being 55cm from ground.
Great growth and more LST
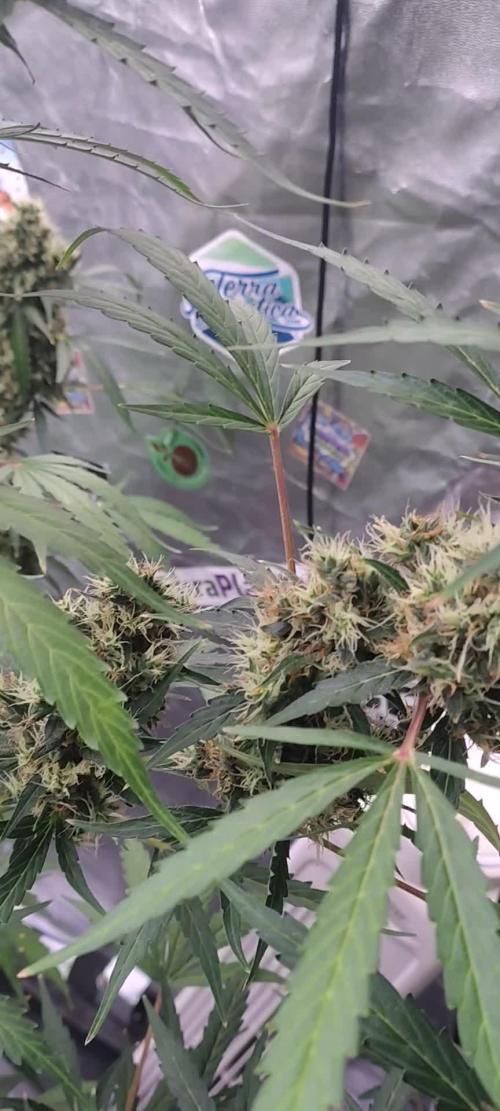
The plant is showing great growth, lots of branching and new growth sprouts. A few branches are beginning to come through the net and almost all main branches are now tied down horizontally after the two recent toppings. Applied more LST and will wait for the branches to reach the net and start tucking.
Adjusting the extraction fan Auto settings
The AC Infinity fan is currently only running intermittently with its current settings. This seems to impact the utilisation and effectiveness of the carbon filter in use. The desired outcome is for the fan to be running for longer periods whilst in Auto config.
Lowered the High Level Humidity from 70% to 60%, and more importantly, lowered the Max Speed from 4 to 2 with the intent that a lower fan speed will result in longer periods where the extraction fan is operated to remain below threshold targets for the grow space.
Plant growth continues to be strong at the end of the week. Big fan leaves near the top are beginning to look a little serrated and dark, similar to the start of this grow. This may be due to the extra CalMag being added which was the issue at the start of the grow. Will keep monitoring and half the CalMag dosage on next feed. Importantly, I have learnt nutrient mixing of the CalMag should be done prior to the Canna Coco A & B. To date I have done the opposite which may explain my earlier issues.
Fertigating daily at the start of the light cycle. One more week of vegetative growth before switching to flowering although I may need to switch earlier due to the vigorous growth and considering the stretch yet to come.
Likes
10
Share


@Blazeman
Follow
Auto looks done.
Pakistan Valleys look almost done.
Candy may need another couple weeks.
What do u think i should do guys? Should i wait and harvest all together? Or harvest the auto now, then the kush and lastly the Candy? What's the best way.
Also i had been planning to dry them all in my tent. If I do a staggered harvest, i have to build a box or empty out a closet to try and dry them in 😫


Likes
105
Share


@PEAKYPLANTERS
Follow
Respect for all of you, brother farmers! masters and beginners! thank you again for gathering on the pages of my diaries! we carry out our work with dedication and live on ambition!
This will be the last week of feeding before moving on to rinsing the roots in the soil
One of the girls is developing artichokes on the tops... nothing but gems😉😄😋💕

Likes
7
Share


@LACREME
Follow
Primeira semana de planta, por enquanto um broto.
Germinei no papel toalha + ziplock, e depois passei para o cultilene.
Assim que a raíz cresceu, como mostra no vídeo, passei para o Kokostec.
Na primeira rega utilizei ppm 340 e pH 6 e os produtos listados acima.
A ideia nesse ciclo é fazer um cultivo em coco, misturando a linha FloraSeries da GH com ferts KNF caseiros.
Qualquer critica e/ou sugestão, fico a disposição. Siga-me no Instagram, @LACREME710


Likes
7
Share

Likes
24
Share


@Ganjaman19
Follow
Going strong happy with the progress happy with the colour say no more and again please follow divine seeds anesia seeds barney's farm and hydro Pro washington


Likes
17
Share


@Hoodoo
Follow
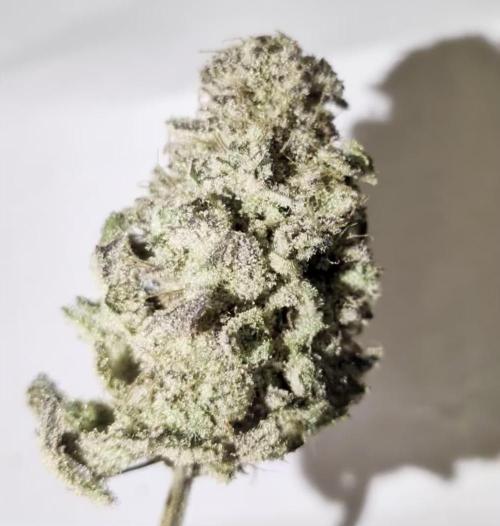
2020-08-16 End of week 8 of flowering! Nutrients are still stable with the same amounts (EC=1600/1200). Gonna ride them out until the end of the growth. Gonna start monitoring the trichomes daily so I can figure out when to flush. They look about 100% milky!


Likes
4
Share


@CK-OrgGrow
Follow
Woche 7
Blüte Woche 3
Die Money Maker lässt sich mit der Umstellung viel zeit.
Die Wurzeln entwickeln sich auch weiterhin gut auch wenn sie nicht Weiß sind und im Eimer das Wasser auch mal knapp wird, Sie trinkt sehr viel.
In dieser Woche habe ich an der Money Maker wenig gemacht außer das ich die Dünger Komponenten auf die nächste Phase der Blüte geändert habe.
Voodoo, Tarantula, Piranha und Bud Ignitor habe ich abgesetzt und B-52 und Tasty Terpenes zum Dünge Schema aufgenommen.
Bei Fragen einfach die Frage stellen, genauso bei Verbesserungen und Tipps für mich.
Danke und viel spaß mit euren Pflanzen.

Likes
6
Share


@Bakeryguy420
Follow
3 mother fucking bears og :)
All smiles for this one , started showing sex so hopefully another week she starts flowering :) lady bugs have been doing such amazing work along with my predatory mites:) been dealing with thrips and fungal gnats !! Been also feeding them weekly with compost tea by xtream:)
