


Likes
Comments
Share


@Mr_ZAF_Budz
Follow
So Day 60 of 12/12 and the girls are ripening perfectly. Trichomes are mostly cloudy but I think they need a few more days for sunset sherbet and another week or 2 for the Plat. GSC. Obviously the amnesia haze will go for another 3-4 weeks.
Hope you guys enjoy the update ✌️🏼


Likes
17
Share


@Gardengobblin
Follow
Vu que les tête étai un peut flufy sur les plant je ne m'attendais pas a ce résultat. Les tête son recouverte de trichome ses très collant au touché, les doigt reste coller ensemble .
Odeur est divine , sa sent vraiment les fraise 🍓🤤🤤 et ça goûte toute autant en bouche . Un délice tout simplement au risque de me répéter .
Je la recommande au la main.

Likes
Comments
Share


Likes
14
Share


@MadeInGermany
Follow
Info:
Unfortunately, I had to find out that my account is used for fake pages in social media.
I am only active here on growdiaries.
I am not on facebook instagram twitter etc All accounts except this one are fake.
Flowering day 40
since time change
to 12/12.
Hi everyone 😃.
The lady continues to develop very nicely :-).
The buds get thicker and look tastier 😅.
This week it was poured 2 times with 1.2 l each time.
The tent was cleaned and everything checked for functionality.
Have fun and stay healthy 🙏🏻
You can buy this Strain at
https://www.amsterdamgenetics.com/product/super-silver-haze/
Type:
Super Silver Haze
☝️🏼
Genetics:
Haze x Skunk #1 x Northern Lights
Type:
70% Sativa – 30% Indica
👍
Vega lamp:
2 x Todogrow Led
Quantum Board 100 W
💡
Bloom Lamp :
2 x Todogrow Led
Cxb 3590 COB 3500 K 205W
💡💡☝️🏼
Soil :
Canna Coco Professional +
☝️🏼
Fertilizer:
Green House Powder Feeding
☝️🏼🌱
Water:
Osmosis water mixed with normal water (24 hours stale that the chlorine evaporates) to 0.2 EC. Add Cal / Mag to 0.4 Ec Ph with Organic Ph - to 5.5 - 5.8


Likes
5
Share


@Jays_Not_Here_Man
Follow
Gorilla Cookies are doing great, they are stacking very nicely. I am liking the nose spacing on these girls so far.
Introduced some more of the Bonnie nutrients from Cronk not too much though, this is a potent nutrient mix and I would recommend using 1/4 of what they say to start with and see how the plant responds.
RH and temps have been consistent, trying to make them comfortable as to get a week or two more of veg before they flower. Happy Gardening 🇨🇦👊❤️

Likes
4
Share


@GrowInBavaria
Follow
Tag 29 - 03.01.2025
Es gibt keine Veränderungen.
Tag 35 - 09.01.2025
Die ersten Stigmen wurden sichtbar für mich befindet sich die Pflanze nun in der Blüte, außerdem wurde etwas entlaubt.


Likes
19
Share


@Robin87
Follow
30 weeks and she’s done!
Chopped 25/1/25
2 weeks hanging now at 60/60
4 week cure
Then I’ll be back with a smoke review.
Thanks for stopping by, there’s some lemon cherry cookies on the horizon so a new diary is not far off at all.

Likes
43
Share


@MrGrow
Follow
10.06.2023
RACCOLTO_RED HOT COOKIES
Sweet Seeds
🌱 142 giorni dal seme
🌼 70 giorni fioritura
⚖️ 2895 grammi non secchi totale di 4 piante
Tutto è andato per il meglio in questa corsa. Le 4 piante di Red hot cookies si sono dimostrate veramente forti.
Colori stupendi a fine fioritura, non rossi come speravo, profumo di terra, dolcezza e aspro mescolati con note di gas, un profilo terpenico molto interessante. Lo scrog effettuato da me, non credo abbia dato il massimo potenziale di queste piante, con il tempo migliorerò anche questo aspetto, ma spero di stare su 1 hg a pianta di media. Aggiornamento a breve con peso a secco, foto dei fiori ripuliti e rapporto sulla potenza di questa varietà.
Ringrazio tutti quelli che sono passati a vedere il mio diario, a tutti i like i commenti e ai consigli.. un grande love a tutta la community di growdiaries 💚🙏

Likes
3
Share


@Firepharmer
Follow
Cut a few clones to Secure the genetics rooting them in the eazy cloner
Everything’s growing good switch more them to flora flex nutrients lots cheaper for me


Likes
22
Share


@SirBudAlotts
Follow
So there is actually very little work this week ..
She has been a real joy to grow so far..
I do understand what they meant by pheno-hunting...
Likes
43
Share


@CrazyRussian
Follow
This week was just as usual as any other... The planta feel nice, ther wad no issue with them so far. I gave veg nutrtients for the last time. Next week I will start to give them flowering nutrients.

Likes
1
Share


@vidofighter
Follow
The 4. Week of Flowering begins...
Watering: ca every 3. day 1.5l per plant :
- - ->
Feed - Feed - Water only (ph 6.3) - Feed - Feed - Water only (ph 6.3) - Feed - ...

Likes
8
Share

@Foxtail89
Follow
Läuft würde ich sagen...
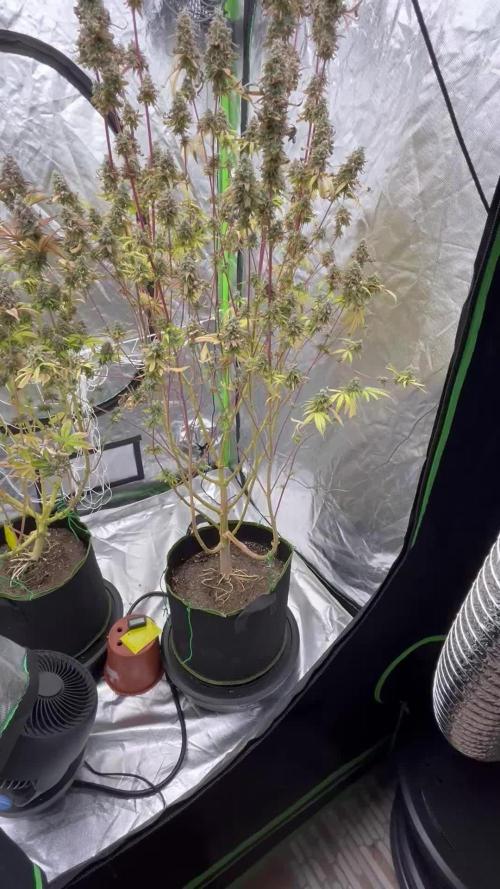
Unterste Etage jetzt an BT45 quasi komplett weg. Teilweise auch weggetrocknet da ich etwas zu sparsam gieße denke ich. Immer kurz nach dem Stresspunkt (untersten blätter verlieren Spannung) und nicht davor. Der Mulch ist etwas zu feucht, die neuen wurzeln die durch den Topdress kommen haben zu wenig luft...werde die nächsten Wassergaben (nur wasser) etwas 3-4cm unter die oberfläche spritzen (Kanüle 100ml Spritze).
Aber Alles über dem Netzt knackig Grün. Gelbe Spitzen waren vom Lichtstress letzte woche sind aber etwas "schlimmer" geworden trotz gedimmter Lampe. Könnte also auch ein leichter überschuss sein (Tee letzte Woche), dagegen spricht, dass in den Blättern im Schatten keine Spitzen gelb sind.
Gehe es also mit Dünger langsam an. Habe beim letzten gießen etwas! Melasse, ganz wenig Asche und noch weniger Guano mit Teichwassser gegeben.
Nächste Runde gibts noch einen Bananentee und ggf etwas Melasse. Das kommt alles ne woche später wirklich an. und dann sollte sie ab anfang Woche 9 hungern. Rechne normaler Weise mit ner Woche mehr als der Breeder sagt. Also 10 Wochen mit 1-2 Wochen Strakem Hunger am Ende. (Andere Vorschläge mit Begründung! willkommen)
RLF bei 42% was wichtig ist...habe etwas Budrot Angst...werde keine Blätter mehr wegnehmen, da mache ich zu viel Schäden und erstelle erst recht Eintrittststellen für den Grauschimmel.
Likes
3
Share

@PapaTerps
Follow
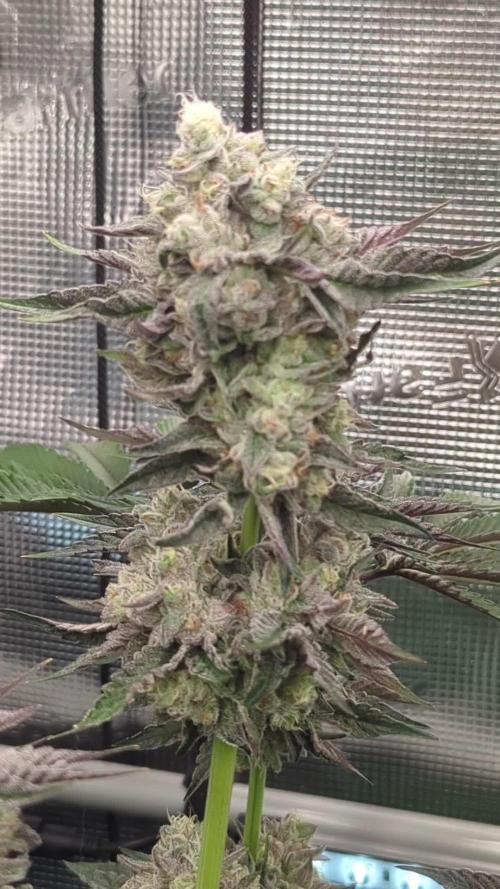
Zhampagne - Compound Genetics
Day 93
🚿 She was watered twice this week, with 3L of RO tap water pH'd to 6.5. She has begun her flushing stage and is now only receiving plain water, she is currently drying back and will be harvested in the next few days!
✂️ No work on her this week, she isn't very bushy and she is nearing the end of her lifecycle, so the next time she will see my scissors will be harvest day 🙌🏻
🌸 She has big dence flower that bulked up so quick and has now spent the last couple of weeks maturing! The majority of her trichomes have turned milky clear, but some of her pistils have yet to fully mature - I think she will be ready for harvest this week, but I will wait until she has fully matured before I cut her down 👍🏻

Likes
27
Share


@LSchnabel
Follow
Looks of frost developing and loads of purple showing. Starting to pack on the mass. Been drinking up 1.2 gallons of water every 2 days now.
Major defoliation this week to trim back all the extra leaves. Compost tea was made and added Cultured Biologix EZ Tea Bloom to it.
This plant has had zero issues this far and is really trucking along.
Processing
Likes
16
Share


@Max1973
Follow
Day 63 - haha.... mazar are lookin pretty good... one of the ssh was male, so
one of the mazar got moved into a big 19lt, IWS DWC Oxipot .......... lol
just kept it in the same established plastic top/basket, and just put it straight into the top of dwc pot....
fits ok, so there's no disruption to the roots..... 👍
fans arrived, 20w :)
just slowly moving along nicely.... not in any rush ... so just let em keep veggin...
might top em, or something... try to get their stalks alot stronger....
Day 66 - 2 vids... topped em, lookin good ...
👍😎
Likes
8
Share


Likes
18
Share


@Ananas_Comosus
Follow
Saturday, 19/02/2022
All plants looking OK. I realised I had no clear plan as to what I would do with the plants I LST'd so I removed the ties today. I really prefer the symmetry of mainlining so that is what I will be going for, specifically, quadlining.
Plants showed no ill effects to Cytokin treatment (drench and foliar at same rate) and seemed to like it. Fed on 15/02/2022 with 10ml/gallon CAB and 5 ml/gallon Real Growers Recharge (RGR) on 17/02/2022. No ill effects to RGR and plants seemed to like it. Ph'd with 1.5 ml/gallon Evergrow Ph Down Sulphur on the 17th, not sure about the 15th, I may have used rainwater. Top of soil and actual soil at depth was moist today so I did not feed but at this moment, 2:34 PM, there has been significant rainfall for the past hour. Really need to get a rain gauge. Apart from the pots being on bare soil (need to get them off bare ground with large saucers, blocks, stepstones or something similar). I really don't mind the rain because I think the "natural" water will be good for the beneficials introduced by the Recarge and subsequently the plants.
As I move the plants what seem to be whiteflies immediately flit about. Really, really need to get going on IPM!😣
5:13 PM, Saturday, 19/02/2022
Raised pots off ground with plant saucers. Treated pots, soil cover and plants with dusting of Insect Powder.