
Likes
Comments
Share


@myketb
Follow
WK2D2 - Everything is looking very good. Start giving them some 250 ppm nutrients today and they are still bathing under light CFL of about 350 ppfd.

Likes
8
Share

@TyRun
Follow
One more final week has started ))
After Mary Jane 2026, I honestly forgot everything — feels like ages ago. I only remember that we decided to see whether she would get even darker. Well... looks like she did )
The heat has arrived, with occasional rain too, so I’ll hold her out for one more week with the last bit of strength.
Likes
22
Share


@medicalhydro
Follow
Ripennig week
Day 63
600 par
Uv+IR+FR
16/8
Single Hydroponic
120*120*200
Light W= 240


Likes
18
Share


@BufoAlvarez
Follow
7/19 I’ve come upon the realize that I had been under watering to an extreme degree. I have since adjusted accordingly today and hope they look better tomorrow.
Did remove some leaves and then found out I really shouldn’t have, hopefully I didn’t stunt them.i believe they are now flowering and next watering I will be adding some tiger bloom at very low strength. the newts I’ve given them have shown tip nute burn often and I have been very minimally watering so my conclusion is my soil was so full of nutes I could have waited until now most likely to start my first feedings. I’ve read about this and w ocean forest this seems to be the trend. Still really happy about the progress. Peace

Likes
11
Share


@HIAZ_urbanbudfarmer
Follow
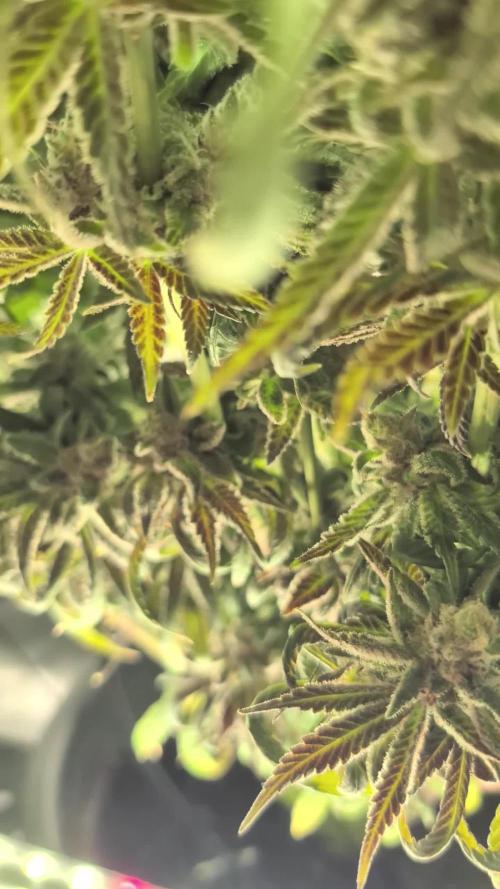
Every going well, no more signs of herming. Pistils are getting a golden colour, stands out a lot. Very cool.
Likes
14
Share


@NorthernChemist
Follow
July 31: Another week of warm sunny weather coupled with thunderstorms bringing a decent amount of rain. Flowers are stacking and resin coming on thick developing complex odor. Harvest coming in a couple of weeks.
Processing
Likes
18
Share


@Silverback_Guerilla
Follow
11/30:
I harvested the first 6 today, flushed 5 more for the second time, and fed everybody else for the last time.
I washed all the branches using the 4-step method ascribed by Doc Bud at High Times/420magazine and many other notable cannabis connoisseurs, with slight modifications:
4 x big plastic totes/bins
8 x ounces of 12% hydrogen peroxide (or 32 ounces of 3%)
2 x cups of concentrated lemon juice
2 x cups of baking soda
10 x gallons of water in each bin
Unless your tap water stinks, you're safe to use tap water for the procedure, but I used an inline carbon hose filter to fill my buckets.
Bin #1 - 10 gallons of water mixed with the hydrogen peroxide
Bin #2 - 10 gallons of water mixed with the lemon juice and baking soda
Bin #3 - 10 gallons of water as hot tap water
Bin #4 - 10 gallons of cold tap water
I was mainly concerned about removing as much lint and cat/dog hair as possible, but also rinsing off any residue left from all the various foliar applications of humic/fulvic acid, kelp, axiom, big bloom, and tiger bloom I did. First, I put my leaf blower on low speed and blasted my plants thoroughly, one at a time, replicating 50-60mph winds for about 10 seconds and watched as a whirlwind of debris and hair flew out the back door.
Bud-washing:
Pluck any necrotic plant material and any old fan leaves off while they're still on the plant. Then, take a handful of branches and submerge them in Bin #1 for about 30 seconds, agitating it, removing from water, submerging again, agitating, etc...then remove it and let it drip out for a few seconds...then repeat the process with Bins #2-4. Let it drip dry overnight with a little bit of airflow, then dry as you normally would...baskets, boxes, etc..
I hadn't watered these plants in a few days, so they were almost in draught, but after doing this procedure, they were fully hydrated(turgid) and seemed to have brighter colors than before. Nice!😍
12/1:
The bottom part of the closet seems empty with only 9 plants in there.. 😟
I cut the harvested plants up and put them into drying baskets in the top of my closet with a small oscillating fan on. I've got the temperature fluctuating between 68f and 75f and the RH is staying between 48% and 52%.
To do that, I had to take down the small light in the top of the closet to fit the drying baskets up there. So, I moved the 3 shorter plants still up there down to the bottom and put them on top of buckets. Now the bottom of the closet looks full again!😃
I'm anxious to finish up this grow so I can get busy growing the Fastbuds Fast Flowering Photo Testers!!! When I harvest the next 5, I'll flush the remaining plants really well and that will be all the flushing they'll get..I'll let them dry back out for a few days and harvest them. I've got to make some minor improvements to the garden (adding UV, blue and red/far red booster panels and intake fans) That should put me on track to start germinating them by mid-December if all goes well.
12/3:
...early a.m...
The harvested plants are already dry!?!?? And have excellent texture??? Wow..bud washing is for real..roughly 48 hours after I hung them to drip dry, and 40 hours after I put them in baskets in 50% RH/70f conditions with moderate airflow...usually takes 4 or 5 days to get a good slow-dry in the same conditions, so I'm convinced that this must be attributed to the bud-washing procedure. I'm sold!
Here's the talley so far:
plant #1 - 115g (plus 13g larf) - Candy Cane [F2]
plant #2 - 108g (plus 18g larf) - Candy Cane [F2]
plant #3 - 119g (plus 15g larf) - C4ndycaine [Candy Cane x C4]
plant #4 - 92g (plus 6g larf) - Candy Cane [F2] - the smallest plant in the main area
plant #5 - 112g (plus 22g larf) - Candesia [Candy Cane x Amnesia]
plant #6 - 75g (no larf) - Candesia [Candy Cane x Amnesia] - grown in upper area under 200w
...afternoon:
I flushed 6 of the last 7 plants for the first time today and harvested 4 more of them. I washed them and hung them to dry.....my dripping wet bathing beauties!😍
Likes
22
Share


@Damonkey
Follow
Steady progress from last weeks update. Although I may have mixed two of the plants up and the one I think is red dragon could actually be Zombie Kush, but I’m sure that’ll show in the next couple of weeks, there are actually 2 Zombie Kush in there, the mix around came at the time of repotting, if a mix around there was, ah the mystery of it all😜 smelling great in there. The purple strawberry really does have an amazing aroma, and the blue fire og has a super stench, I thought it might be a bit more fruity but I’m not complaining. The gorilla Zkittles is just pouring oil, the leaves and buds are covered, it’s been sticky for a while now the smell not so intense. The Zombie Kush are looking great (1 especially but this as aforementioned may be red dragon🙃) The red Dragon is also looking really good and filling up space along the stems with bud, not so much of a show of trichomes as far as this one goes but theyre there🤤 the critical orange punch is also doing well but isn’t that great to look at, I’m hoping as the buds fatten they’ll tighten up a bit. The smell from this one is gorgeous though and no doubt it will make great smoke. April is looking like a good month for flavours🤤🤤🤤🙏🏻🙏🏻🙏🏻


Processing
Likes
2
Share


@Cannibalgardens
Follow
Well as we come up on week 2 the plants are doing great and having no issues beyond the big stretch I had ... The plants all have the same height and leaf ratio all very uniform so far ... They were given a light feeding with the water this morning and the waiting game continues for a while once they big enough I will top and clone the main stem to try and see who is Amelia and female .. great genetics so far can't wait to see where these take me ..


Processing
Likes
70
Share


@CBD_Sweden
Follow
Illuminauto 21 - Sour Crinkle (Grape Crinkle x Sour Crack)
Two of our fastest and frostiest varieties collide to make a sweet and sour delight!
Expect super frosty, compact nugs that won't be a toke for novices.
Destined to be a great strain for extraction work too!
Plant size - Small - Medium
Cycle time - 60-65 days from sprout
Indica/Sativa - 80/20
Frost level - Extra Ridiculous
https://www.mephistogenetics.com/product-page/illuminauto-21-sour-crinkle
--------------------------------------------------------------------------------------------------------
2017-10-09. Week 7 starts now and when Mephisto say "Frost level - Extra Ridiculous" im starting to believe it. This frosty and compact girl is 30 cm tall and i believe she is going to produce some fire buds. What do you think? Added new video and pics.

Likes
19
Share


@A_Rolling_Stoner
Follow
All plants are fully blooming and create frosty leaves.
Caution! Very Sticky!
Amazing smell from the apple fritter and critical.
Really intense.

Likes
13
Share


@PatriciaGant
Follow
next week of flowering she is so huge no ideaa how this is going to end. thx for watching by have a nice day and an even better grow. see ya around.


Processing
Likes
13
Share


@Cheesefarmer420
Follow
This plant has a solid stench of pure ripe lemons. So much aroma and color in every bud, purples, to dark green, to lime green, to solid frost. This one definitely a fun strain to watch grow and tend too for the last few months. She’s definitely a hungry girl, seemed to be the only strain out of the three that accepted and thrived with full feed nutrients. Would definitely recommend this Strain to someone For a nice uplifting day smoke, also seems to do me good for some pain and stress relief.
Likes
11
Share


@LoccoMotive
Follow
🌿 Woche 8 - Zweite Erntewoche ️🌿
🌱 Wachstum🌱
Lady 2 wurde Ende Woche 9 also nach knapp 10 Wochen auch geerntet.
Bei ihr kam Erwarungsgemäß mehr rum bei rum. 47g bei Pflanze Nr. 2
Die Mängel sind kaum noch zu übersehen.
Ich bin überzeugt das die Pflanze zum Schluss ihr volles Potenzial nicht ausschöpfen konnte.
Trotzdem haben es viele gute Buds geschafft und der Rest sieht auch rauchbar aus 😋
🌱 Living Soil🌱
Ich bin mit der Erde so semi zufrieden.
Aber wenn man die Umstände bedenkt, und das eigentlich zu kleine Beet, für gleich 2 Pflanzen.
Kann ich mich doch noch glücklich schätzen. Nächstes Mal vllt nur eine Pflanze 😜
Vllt hab ich auch hier und da was falsch gemacht.
Der Blumat hat mich mitten im Run auch im Stich gelassen.
Vllt war es hin und wieder doch etwas zu Trocken. Grade in der 2. Hälfte des Runs.
Bevor ich den nächsten Grow starte , werd das wohl überholen müssen.
💡 Licht & Schatten
PPFD 📈 gegen Ende ca. 950 µmol/m²/s.
☀️ Wetter
Die Temperaturen sind und bleiben brutal: 25–31 °C 🌡️🔥
🎶 The Grow must go on! 🌱✨


Likes
46
Share


@eldruida_lamota
Follow
Vamos familia que ya actualizamos la cosecha de estas Candy Rain de Zamnesia, para el concurso POWER BUDS Plagron x Zamnesia CONTEST.
Ya era hora de cosechar, estoy bastante contento con los resultados.
Vaya flores que se han marcado repletas de tricomas, y las flores se marcan aromas dulces y afrutados.
Es una variedad bastante fácil de cultivar y muy resistente, crecieron desde el principio bien vigorosas, sin problemas y al final de todo recompensó.
Las condiciones ambiéntales han sido máximas en 25 y mínimas en 20 y una humedad estable en torno al 36% al final de floración y en el secado.
Os comento que tengo un descuento y para que compréis en la web de Zamnesia de un 20%, el código es ZAMMIGD2023
The discount 20% and the code is ZAMMIGD2023
https://www.zamnesia.com/
Espero que disfruteis este diario, buenos humos 💨💨

