Likes
Comments
Share


Likes
8
Share

@JamesBarre
Follow
On arrive en fin de parcours pour Hardy qui va bientôt rejoindre Laurel dans mes bocaux 😋😊👍🏽.
Les buds sont denses et dure ! Super résultat que je n'arrivais pas à atteindre en culture extérieure.
Je vais continuer de l'observer pour voir si les buds prennent du volume 🙏💪🏽🤲😋😊

Likes
25
Share


@Kakui
Follow
Veg15, han crecido como 2 centímetros desde el transplante, aún no necesitan riego, desde ahora regaré cada 3~4 días, cuando el sustrato este un 80~90% seco, han estirado un poco desde que subí la distancia del LED y bajé su intensidad, mañana haré Main Lining.
Veg16, hoy se torturaron las plantas con Main Lining, se cortó arriba del segundo nodo y se cortaron también las hojas de un dedo bajo el primer nodo, las plantas que tenían suficiente crecimiento de les hizo LST también, cuando se apague la luz se efectuará un spray foliar con B-52, y mañana un nuevo riego.
Veg17, riego con 5.5 pH y EC 1.8~1.9, se regaron con 1.5 litros y no se obtuvo drenaje, próximo riego tendrá que ser con más cantidad de agua para obtener drenaje, el agua se calentó a 23 grados y se oxigenó antes de regar, mañana se ajustará el LST ya que siguen creciendo muy bien.
Veg18, hoy solo se ajusto el LST, siguen creciendo bien.
Veg19, ajuste de LST, nada más que anotar.
Veg20, siguen creciendo, talvez hay que ajustar la cantidad de luz DLI.
Veg21, tuve que poner una estufa para aumentar la temperatura en el indoor y bajar la intensidad del LED a un 50% para alcanzar un DLI óptimo. Hoy haré ajuste de LST y revisar la humedad del sustrato.


Likes
3
Share


@Boscaglia
Follow
Still not touching the plant or setup and just letting it be pretty much. Did a full tank water removal and started to add some Calcium Magnesium as I'm seeing some deficiencies on the leafs.
So far this setup has been incredibly easy, haven't had to do anything, no topping, no training, etc. Could have used a scrog to keep the main branch a bit shorter but it looks like it should work out.

Likes
4
Share


@Growin_Ish
Follow
Day 29
50%/50% veg & flower nutes. 2Tbl of worm castings and a pinch of Azoz. Top dressed, watered it in at 6.3PH, leaf tucked, and gave her a Neem Oil top drench. Lights on 80% (320w).
Day 30
NY Diesel Auto #3 got a pony tail so her under growth can catch up. Light watering including Fish Sh!t, to start consuming the amended nutes (both plants). Tucked a few leaves.
NY Diesel Auto #2 has slight taco leaves at the top. Dialed the light back to 75%. Will reassess in 48 hours.
Day 31
NYD#2 is funky!!!😤💨
Day 33
NYD#2 Had a 2" growth spurt. When the lights come back on, I'm going to LST the branches and crank the light to 90%.
NYD#3 is bushing underneath main. She's almost outgrown the pony tail. Need to figure out how to handle the growth (LST, defoliation, tucking).
Likes
Comments
Share


Likes
31
Share


@KitaKush
Follow
78 grams roughly 2.8 oz! Pretty happy with that as I’m looking for quality and potency and no longer quantity and quickness.
She has a good amount of frost and super pungent stank radiating off her.
Unfortunately for me I had issues with drying and at one point a few hours of 70% humidity which led to a few areas of mold…I threw away those buds and the rest are top notch..probably my most resinous plant harvested so far and strongest smelling. I also grew a runt which will give me less than an ounce now I know it’s just best to call quits on those stumpy odd growing plants and start fresh.
Lastly my humidity stayed at 52-56% and I should’ve harvested 1-2 days earlier so the buds are much drier/crispier than I’d like. I’m still trying to find a good drying location..one room had that low humidity and my grow room had way too high at 70..will figure it out eventually.
Also 200watt for lighting I can’t go back and change it.
Likes
50
Share


@Hou_Stone
Follow
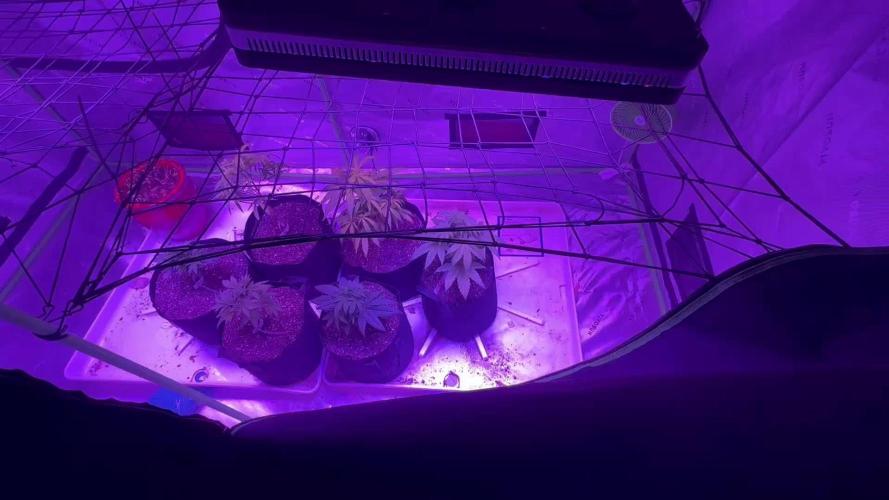
Here are my 3 nori cake that i keep 👶 They look in good shape to me💪🎊
For this grow, I plan to let each plant grow with a large main bud, without topping.
Next week I will cut the lower branches closest to the ground.
-----------------------------------------------------------
💧Watering each pot:
day 9 : 1L
day 12 : 0.5L
I use tap water, adjust the ph to around 5.8 and water
------------------------------------------------------------
🤩Equipment of the week :
Light FC3000 Mars hydro. power 80% at 50cm
Extractor 6 inch Mars Hydro. power 1/10. ON 24/24h
2 fans to circulate the air inside the tent. Each on for 30 minutes then off for 1 hour. this rhythm repeats itself in a loop
Heating mat Romberg 95x95cm. ON 45 minutes. OFF 30minutes. In a loop
I am adding anti-midge bird stickers 🐦
------------------------------------------------------------
Thank you for your visit and your support with the likes, comments. It's always nice to see you!💚
------------------------------------------------------------
My Instagram 🌱❤️️ :
https://www.instagram.com/hou_stone420/

Likes
49
Share


@masterofsmeagol
Follow
6/1 I'm anxious to get my plants in their final homes. Another 90 degree day today and then it will be cooling off with some showers. I plan to take advantage and utilize that to make the transition. I have some small burns on a couple plants bit considering the weather we've had its nothing. Temperature swings 50 degrees. I hope these girls do OK outside. I was tired and stoned last night and I accidently topped a plant I had already FIMed. Oh well. Transplants soon. Supports screwed in after the heat. Plants have been handling this weather like a champ. Big thick healthy stalks.
UPDATE PUT THE PLANTS IN AROUND 730. Cutting down on light hours I'm poverty close to where we are. It was 95 today. Plants have suprisingly little burning. My fan was taken so they go without that tonight too. In the next few days it's going to cool down and that's when I'll transplant. Only thing left before transplant is sanitizing trellis and supports. Easy peezy. Especially if it's supposed to be in the 50s. And people dent climate change lol. I'm hoping that all this adversity makes my flower a higher quality. I'm glad to have the quantity to pick the best phenos for the BIG POTS. Im trying to stay excited but it's just so dumb hot. Oh well. If the plants can do it so can I. I'm planning to give them some kelp me kelp you next watering and may start some light organic nutes.
6/2 Phone doesn't like uploading my videos. Broke record high temp yesterday 95 and tomorrow we will break the record low 50. Plants withstood the heat well and are doing great. Transplant soon. They were a little light but I held off on the water. Plan on it tomorrow. May transplant tomorrow. I have several videos that haven't uploaded. I thought they did but I was wrong. Oh well.
UPDATE: Forgot to water. Some were light and others could've held off. Did the half a powerade bottle ahain. A litt ke less on the heavier ones. However I'm looking to transplant into final homes tonight and into this weekend. I sanitized a fifty and a forty so my bags and two pots are sanitized. Cage is sanitized and ready and pallets are sanktized and in place. The 40 and 60 fit PERFECT in the small space left from the pallets. Plus the plants always lean the opposite direction so things should go smooth. Only thingvleft is sanitizing stakes, bamboo, plastic garden stakes and all the other plastic training stuff. I'll just soak it while I transplant. Gotta mix the soil first too though.
UPDATE. Heat went higher than expected and hit 90. I figured I'd go back around three and screw in suppirt stakes and begin getting everything ready for transplant (i.e. supports, mix soil, sanitize trellis) before I transplanted tomorrow MORNING was what I had planned. Unfortunately we got a huge thunderstorm with a shot ton of rain and it's gonna continue throughout the night. I think this is God's way of telling me to take a break. I can get up early and get those support stakes screwed in. Then when I get back from the wife's doctor's I can do the transplants. I'm trying to break the labor up into manageable chunks. Looking at my other diaries I can see that my plantscare fine in their three gallon homes. It'd a little disheartening seeing such big clones that I started so much earlier on the other diaries. However I always was fighting SOMETHING (usually more than one thing) and last year was a shit show. At least this year I stay away from anyone else's cannabis any clones and I'm extremely cautious. I've seen my cousin out perform me multiple times with healthy plants like this I'm excited to see how it goes. I really needed the break anyway but tomorrow morning the stakes will be in. Hopefully they'll be outside.
6/3 Broke the record for low days after breaking record for highs. I saw it 94 yesterday and the day before. On the way to my grow at 6am it was 44 degrees and it's not warming up much. Fifties at best. Rainy. I left the door closed. The big door on the otherside got opened as the other end of the garage neededcto he used. If the rain let's up I'm going to set up the grade stakes so I can transplant in the morning and throughout the day. I think I'm going to light dep a couple of them and leave them in the 3's. We'll see.
UPDATE: At 12:30 the temp today was 44. Yesterday it was 94. I can't believe this. Plants are doing great though and are in the garage under lights for the day. The BIG door was open part of the day. Didn't take any pictures (or even enter the grow area) as I sanitized the last 40 gallon pot and a bunch of grade stakes. I drilled the grade stakes to the pallets in the front. The first row is done. Just need to sanitize the plastic trellis itself and finish attaching the other grade stakes. I don't need the fill trellis up by transplant. I just need the bags to not knock over and have SOME support. I'll be back over there either to tonight to put more supports in or tomorrow when I actually plan to start transplanting. I'm getting excited. After dealing witb the stiff that I sanitized I didn't dare go fuck with my plants so I looked through the window. I'll finish sanitizing the net tomorrow. These plants look great. I'm wondering if doing the two diagonal I poles with zipties actually works. It would save me some kone for sure. I'll definitely update in the morning.
6/4 It's warmed up to a balmy 44 degrees. My plantsxare in the garage still. Weather sucks this whole week but after this heavy rain it should be perfect weather to transplant these girls. A little to chilly but it will warm up and I need to get this shit done. I'm trying to do to much at once. I need to just out dirt in bags and get them outside. I'm glad I waited until after this craziness. Breaking temp records for high one day then breaking it for low the next can't be good for the plants. I'll update what gets done today. I may mix soil or I might wait until tomorrow. It will let up some then. Plants still look fabulous 👌
6/5 50 degrees still raining like hell. Rain until Friday. Plants are inside under the onecworking light. Lots of indirect light through the massive windows though. I'm planning on mixing soil today and tomorrow and getting bags and pots half filled. Just trying to break the labor up into manageable pieces. It's probably a good thing I didn't put them in their huge containers before all this rain.
UPDATE: MIXED SOIL 1/3 of each (FOX FARM OCEAN FOREST, HAPPY FROG, AND ROOTS ORGANIC 707). I prepared I believe 11 containers for transplant. I need to sanitize two more containers and I'm good. I got a lot done. Might go back over. Set up extra cams too. I'm excited. Talked to my commercial buddy amd he motivated me. No reason my plants can't handle this shit. I've just had massive personal shit going on. Friday is the next GOOD day but these girls might go out earlier. I'm checking the forecast. I'll sanitize the other containers in the morning and fill them.
6/5 Today is usually my watering day but shit still seems heavy so I'm going to hold off. Despite that i need to transplant. I think they're wet enough. I could do it today. Plants are looking good and weather takes a better turn Friday. It's not raining hard though. It's just sprinkle right now. I may transplant some today depending on how things go. I'll keep the diary updated.
UPDATE: I went back over with the intent to just mix soil and let it acclimate. I decided to try to transplant one. I grabbed a 10th planet and started to go. I had done a bunch of manual labor already so i wasn't thinking. Of course the fucker was dry and didn't wanna come out ofcthe pot and the root ball pretty much decintigrated in my hand so I'm not sure how that will go. Tried again with the Blueberry Cheese Cake. I thought the roots just might not have been rootbound abdcthat could've been the case. After having another rough transplant I recognized I was tired, all the hard stuff is done and it's gonna keep raining until Friday. I wanted to transplant three and put them outside but with the wind and rain and the difficult transplant I let them sit under the light in the garage in indirect light. I had the doors open for a while. Should be open now but i don't want to have to go back over and shut it. Plus I'm not to keen on getting water on my light. Let's hope for a better day tomorrow. This was the only thing I had going good. Phrple punches are still behind. I've decided I'm oing to light dep ttwo of the plants in the 3 gallon pots. The two shittiest or smallest plants (probably purple punch will be light deped.
WENT BACK OVER AT FIVE AND IT APPEARS EVERYTHING IS ALRIGHT. WILL HAVE CHECK IN MORNING. Vid won't upload. Tried multiple times. I'll try again tomm.
6/6 Waiting for a doctor's appointment when I should be transplanting buy whatever. Everything is looking really good. Despite me disint9grating the rootball in my hands the two transplants look great! When I get back I'm planning to get some more work done. It's still lightly raining off and on but the door is up. I'm lettingvthe soil mix acclimate a little bit too. Hard labor is mostly done. Now the intricate part. Wish me luck. Not sure if it will be today bit I'm hoping.
WENT BACK OVER CAUSE IT WASNT RAINING BUT AS SOON AS I WAS CLOSE IT STARTED POURING SO THE PLANTS ARE UNDER THE ONE WORKING 150HPS AND THE AMBIENT LIGHTING FROM THE WINDOWS. TOMORROW IS TRANSPLANT DAY. I WONT HAVE A VEHICKE SO IT WILL BE TRICKY BUT IM GONNA MAKE IT HAPPEN. Opened doors at 530. Video still didn't upload
6/7 Still raining. It's off and on and a nice rain though. It's 53 degrees at noon. I transplanted two 10th planet's into 20 gallon pots. I transplanted these two a little differently. I put the bags in there final spot I side my cage andctransplanted in the misting rain. The first one came out and seemed to be heavier on the bottom and broke off. I tend to "throw" them in the hole before they collapse. With my anxiety I suck at transplanting. Plus these plants haven't filled the 3 gallon pots with roots yet but i want hem in their final homes and its time to go outside. I transplanted the other two plants indoors and let them have days in the garage with the door open and the light on then protection from the elements at night. I've been doing this for awhile. They would all be outside if the weather wasn't so shitty. This rain is supposed to stop. I'm curious as to what will be the fate of the two plantsci transplanted and left outside. I'm praying and hoping for the best. I also put my back tarp up so I have a wind break between rhe buildings. I stopped working because I didn't want to fuck anything up. Anxiety disorders suck. TOOK A BUNCH OF VIDS BUT THEY WONT UPLOAD. GOES FROM 9% TO 65% BUT ALWA7S TURNS RED "FILE FAILED TO LOAD". I'LL KEEP THE DIARY UPDATED. ESPECIALLY IF I GO BACK OVER. WAS ABLE TO LOAD A COUPLE VIDEOS. I GUESS ITS NOT AS BAD AS I THOUGHT. AT LEAST I HOPE. WENT BACK OVER AT 3 AND CHECKED THINGS OUT. THE TWO REXENT TRANSPLANTS I LEFT OUTSIDE SEEMED TO BE IMPROVING. DESPITE THE FACT I DUMPED A SHIT TON OF SOIL ALL OVER ONE OF THEM. IT SNAPPED A LITTLE BRANCH CLOSEST TO THE SURFACE. ITS STUFF I'LL REMOVE ANYWAY BUT STILL. IM REALLY CROSSING MY FINGWRS AND PRAYING THESE GIROS WILL MAKE IT. With everything i have going on tjis is my respite.IM GOING TO TRY TO SEE WHAT I CAN ACCOmplish TOMORROW. SOME OF THE PURPLE PUNCHES ARENT READY FOR TRANSPLANTING THOUGH. I ALSO ADDED TEO TARPS TO THE CAGECTO COVER THE WIND TOWER BETWEEN THE TWO BUILDINGS. THIS IS GOING TO BE A GOOD YEAR! Shut the door at seven. For some reason the two 10th planet's I transplanted (that fell all over the plant and I thought mightve broke it) look awesome lol. Despite the ridiculous pouring rain. It's going to let up soon and we are do fir some good weather. I'm trying to get everything (that isn't getting light depoed) into the cage. Four transplanted. Ten (I mean 8 more) to go.


Likes
Comments
Share


Likes
18
Share


@xtchill
Follow
Done a bit of defoliating and pulled them down a little.
Bit of a mess bit she will bounce back.
Hopefully.haha

Likes
9
Share

@Ribemarti
Follow
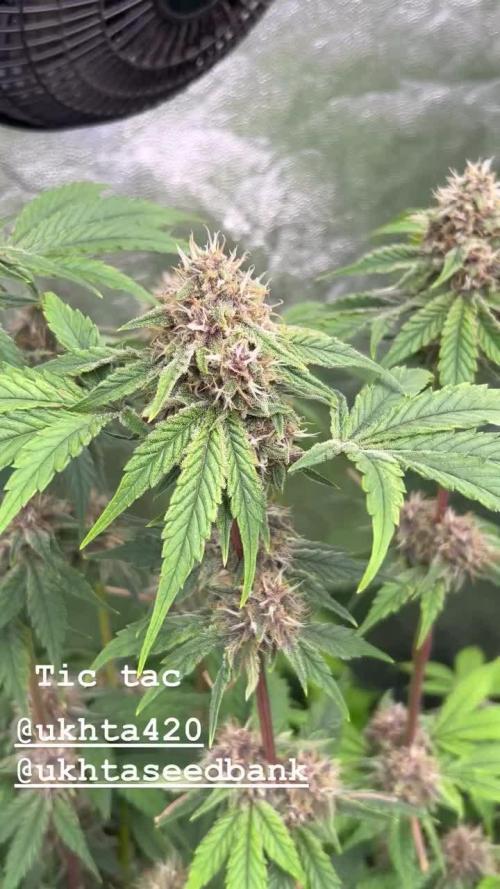
DIA 46 DE FLORACIÓN: SEGUIMOS REGANDO CON 2 LITROS CADA PLANTA CON UNA E.C 1850 PH 6,6 TEMPERATURA DE RIEGO 22 GRADOS.
ESTA VARIEDAD NO HACE COLAS LARGAS COMO LA SUPER BOOF, PERO DESPRENDE UN OLOR A CHICLE AFRUTADO MUY FUERTE Y ALGUNA A LA GOLOSINA DE MELON, UN ESCANDALO,
HAY PLANTAS MUY AVANZADAS EN 15 DIAS ESTARAN CORTADAS SEGUN ESTOY VIENDO, CUMPLIENDO LO QUE EL BANCO PROMEDIA DE 60/70 DIAS

Likes
26
Share


@GrowGuy97
Follow
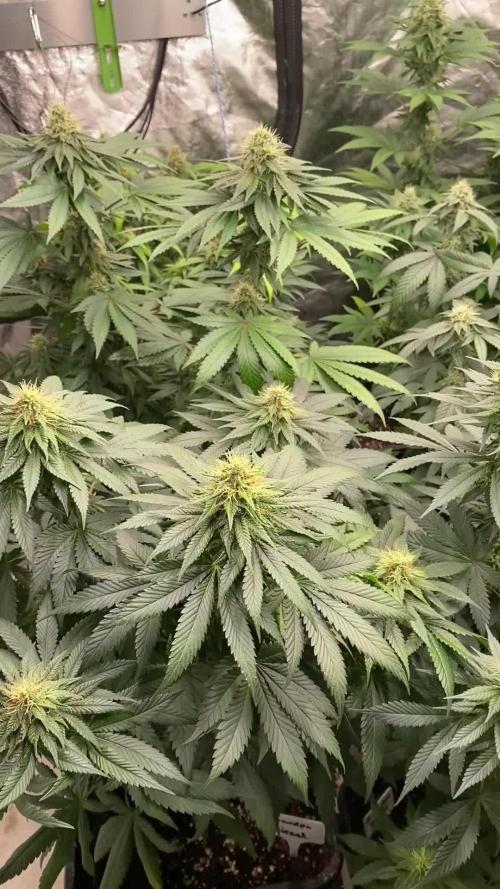
Day 35, start of week 2 in flower, everything is going great so far✌️🏼🌱
Day 37 - All the ladies are looking great✌️🏼🌱
Day 38 - ladies got watered today, looking good & starting to put off a nice smell😍
Day 40 - Still have a lot of yellowing leaves towards the bottom of almost all the plants can’t figure out exactly what’s wrong😅😅


Likes
3
Share


Likes
15
Share


@blazin_skywalker
Follow
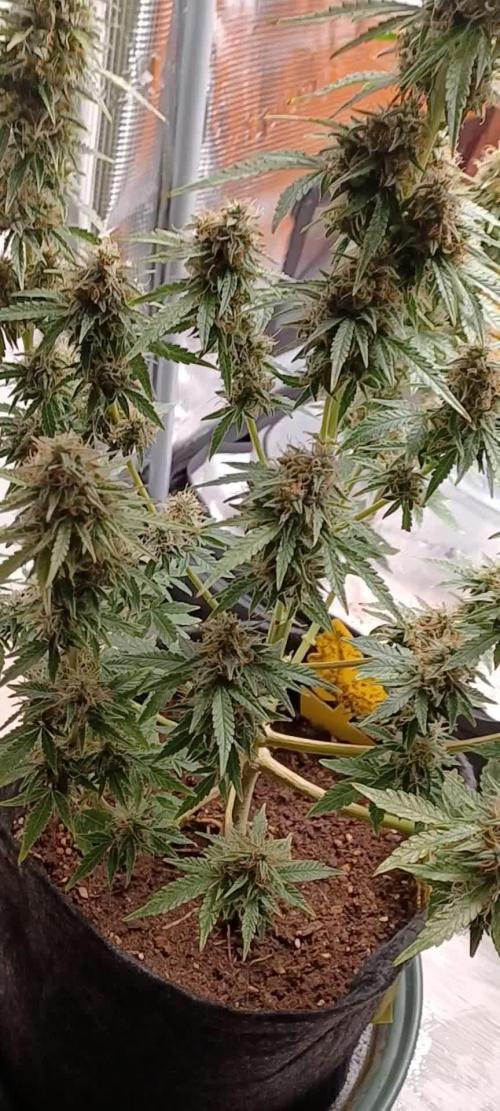
I guess I can't put it off any longer.... This plant officially needs some yoyos. She can no longer hold herself up, and I have too many colas leaning against the wall.
These buds are exquisite! The contrast of the trichomes against the purple bud is stunning! I want to make it my mission to grow all the purple FastBuds strains! They're just breathtaking!
The smell in this tent is phenomenal. If only I could upload the smell! 🍇🍇🍇
Processing
Likes
11
Share


@IndoorOrganix
Follow
This is m first GD Journal, I hope you guys like it, any tips and comments are always welcome! So, this is their first week of life, just sprouting. As you can see, one had a bit of shell stuck to it which slightly damaged the leaf but not too much to worry about.. Unfortunately due to various reasons I had to transplant them straight into their finishing pots which isn't ideal for watering and efficient root growth but it had to be done this time around. This round I will be using the full bio canna range along with their own soil too. I will add molasses and various other organic products that I will update you guys about as we go from week to week. I plant to LST and top these girls.


Likes
31
Share


@MadeInGermany
Follow
Info:
Unfortunately, I had to find out that my account is used for fake pages in social media.
I am only active here on growdiaries.
I am not on facebook instagram twitter etc All accounts except this one are fake.
Have fun with the update.
Hey everyone ☺️.
This week she made a nice boost.
I have decided not to use any more training and to send them into bloom next week :-).
This week it was poured twice with 1.2 l each.
The tent was cleaned and the humidifier was refilled.
I wish you all a lot of fun with the update.
Stay healthy 🙏🏻
You can buy this Strain at :
www.Zamnesia.com
Type:
Runtz
☝️🏼
Genetics:
Zkittlez x Gelato
👍
Vega lamp: 2 x Todogrow Led
Quantum Board 100 W
💡
Bloom Lamp : 2 x Todogrow Led
Cxb 3590 COB 3500 K 205 W
💡💡☝️🏼
Soil : Bio Bizz Coco
☝️🏼
Nutrients : Green House Seeds Company Powder Feeding Bio
☝️🏼🌱
Water: Osmosis water mixed with normal water (24 hours stale that the chlorine evaporates) to 0.2 EC. Add Cal / Mag to 0.4 Ec Ph with Organic Ph - to 5.8