


Likes
Comments
Share


@Roberts
Follow
Quebec Blast is doing well. She is showing first signs of flowering a week into light change. I adjusted nutrition more to her current demands, with a solution change today. Everything is going well, I don't expect a lot of stretching. I could be wrong. I am growing her under a Spider Farmer SE5000 light at 70 percent. She is in New Level Hydro 5 gallon bucket. Thank you Spider Farmer, New Level Hydro, and Quebec Seeds. 🤜🤛💪🌱
Thank you grow diaries community for the 👇likes👇, follows, comments, and subscriptions on my YouTube channel👇. ❄️🌱🍻 Happy Growing 🌱🌱🌱
https://youtube.com/channel/UCAhN7yRzWLpcaRHhMIQ7X4g
SE5000
https://amzn.to/3qFpAML
Spider Farmer Official Website Links:
US&Worldwide: https://www.spider-farmer.com
UK: https://spiderfarmer.co.uk
CA: https://spiderfarmer.ca
EU: https://spiderfarmer.eu
AU: https://spiderfarmer.com.au
Coupon Code: saveurcash
Www.newlevelhydro.com
Www.hygrozyme.com

Likes
2
Share


@Saintvicious
Follow
Can't Lst this thing enough. Seems like every other day it needs readjusting. Autos are crazy when they start going.
Likes
14
Share


@ThatoneAKguy
Follow
Day 29 of flower and I couldn’t be happier with the way she’s coming together. The real magic should start this week and she should start to fill out. Everything is stating to connect and I pulled some branches apart to make sure there was ample light and air to every part. So far my favorite auto to date.

Likes
34
Share


@RFarm21
Follow
Boas growmies! Tenho dado uma alimentação alta por causa da deficiência de nitrogenio para ver se melhora.
Alimentada dia 12 de Dezembro, nutrientes misturados em 2l de água. Runoff pH: 6.3/ EC: 2.10
Já se.comeca a sentir o cheiro delicioso desta strain.

Likes
13
Share


@Elpicor
Follow
04/05/2025 - 84 day
Finally harvested😇 both strains smells like a mix of tropical skittles also if they're quite different, Flushed 2 week ago then just watering, very happy with my harvest, waiting summer time for enjoy it, harvest week for dried buds pics in three weeks or one month.

Likes
21
Share


@SkunkyDog
Follow
Hallo zusammen 🤙.
Das war es für die Auto Overdose.
Sie hat 137 Tage vom Samen bis zur Ernte gebraucht.
Sie hat kein Schimmel 🤙 und auch sonst hat sie keine Probleme gemacht.
Kann die Sorte für Outdoor in Deutschland sehr empfehlen.
Wir sehen uns in 3 Wochen mit dem Erntebericht 🤙


Processing
Likes
278
Share


@love_2_grow
Follow
D64.
A new week starts, and the stretch continues. Sigh.
The first girl stopped at 80 cm, while the second is over 130 cm and still stretching.
If she doesn't stop soon, I'll be in real trouble. Quite frustrating since it will affect both yield and quality.
I added a few sachets with predatory Cucumeris mites to the girls. There are no problems, and I haven't scouted any bugs, but since I had thrips in the tent in the previous grow, I want to be proactive in case some bugs survived.
I gave the second girl 2.5 liters of water @ pH 6.5, with bokashi and fermented fruit juice.
------------------------------
D67.
The second girl stretched even more to a point where one of the tops touched a light.
To combat this problem, I removed the first girl and put her in my small drying tent since my LSD-25 was just done drying. It's a wee bit tight, and I had to add some side-lighting to get enough photons to her, but it should work out. The yield will take a hit, but I suspect the second girl will more than make up for it.
I moved the second girl into the middle of the tent and thus could bend the tops outward, creating more space to the light. I also removed additional foliage in her lower canopy.
The second girl is massive, by far the largest auto I've grown, and she drinks a lot and requires daily watering.
Considering her size, I am concerned that she will run out of nutrients, so I need to devise a strategy for keeping her fed. Topdressing will be tricky as the pot is already quite full, but I will add as much as possible and then feed compost teas often.
------------------------------
D70.
We're at the end of the sixth week of flower, and the second girl is still stretching. She has slowed down, but one of the tops I already had bent hit the light, so I had to bend it even more.
I top-dressed the second girl today to give her a boost, considering her size. I used kelp powder, rock dust, neem meal, calcified seaweed, and worm castings.
She then got 2 liters of water @ pH 6.5, with fulvic and humic acid.
------------------------------

Likes
32
Share


@BigDaddyK
Follow
one is flushing, the otehr ill start next week
Starting the flush with DragonForce Sunday 5/1/20
Processing
Likes
8
Share


@Peter_Panther_420
Follow
Girls are doing great the gelato and gg4 are already frosting up and there is bud sites everywhere these plants are stacked! Green crack still vegging but surely the stretch is coming soon they will be monsters 🤙🏼💯

Likes
13
Share


@Grow_for_Happiness
Follow
Late update this week, life was busy.
Similar week to last week. A LOT of rain and thunderstorms with heavy winds, with one or two sunny days. Got to hand water once with nutrients mid week on a sunny day after a day of heavy smoke conditions.
Both girls still suffering from aphids. Should see natural bugs soon, but have been fogging them 1-2 times a week to try and get rid of them. Damage has significantly slowed but hasn't stopped yet. Otherwise things going well. Stalks really thickening up which is good because these plants are really growing and there will be a lot of bud weight for them to support if we make it that far!

Likes
2
Share


@Csokolom_tzitzi
Follow
Week 12 ! still making new budsites, she stayed like a month in preflower. The slowest autoflower but she is a beast

Likes
7
Share

@KannaGrowing
Follow
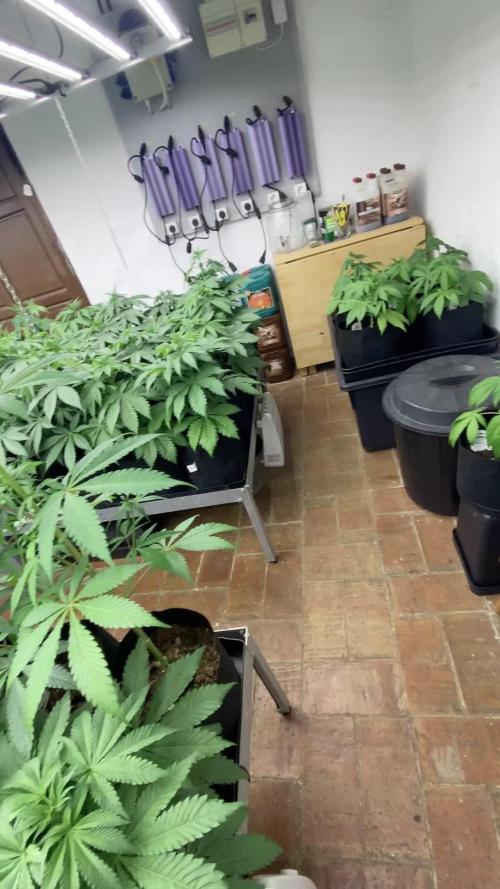
VARIEDAD EN FASE DE TEST. NO DISPONIBLE COMERCIALMENTE. RESULTADOS EN EVALUACIÓN POR KANNABIA.
Ya estamos en prefloración, así que comenzamos a añadir a nuestra mezcla de fertilizantes, Bio Flores y Bio Boost.
Sin eliminar Bio Vega y Bio Rhizotonic, por el momento.
Regamos una vez con agua y otra con fertilizantes, solo cuando el sustrato se ha secado.
Mantenemos las luminarias y extracción a máxima potencia.
Likes
23
Share


@Zuppler
Follow
🤤**Grow Report by Zuppler - Week 5 Flowering Phase** 🌅
Yooo, what’s good? Zuppler here with that Week 5 flowering update, straight from the capital. We’re deep in the game now, and these girls are lookin' like straight-up champs. Buds are swellin’ up nice, and the resin’s startin' to drip like syrup on pancakes, ya feel me?
The canopy’s thick, them colas just stackin' higher every day. That front-left queen I mentioned last week? She’s still flexin’, lookin’ even better than before. Buds on her are fattenin' up like she knows she’s the star of the show. Definitely a keeper, no doubt about it.
Environment’s still locked in tight, no changes on my end. Lights are sittin' right where they need to be, and them girls are lovin’ every minute of it. Advanced Nutrients still doin’ the trick, and the RO water’s keepin' everything clean and mean. Ain’t no issues here – just lettin’ the magic happen.
Trichs are startin’ to cloud up, and the smell? Bruh, it’s gettin’ loud in here, like a bass drop in the club. We’re just lettin’ them do their thing now, and it’s lookin' like we’re on track for some serious heat. That front-left queen, she’s gonna be somethin’ special when it’s all said and done.
Zuppler out. Stay hard!

Likes
Comments
Share


@VirginiaGrownExotics
Follow
She’s getting nice a frosty and budding up nicely growing in sohum just add water
Likes
13
Share


@ButterfliesLittleFarm
Follow
Hello Diary,
Titan F1 is developing incredibly fast, I think he will be the first ready to harvest.
It reached just over 50 cm in height, which is great for smaller spaces like mine.
It has a nice pronounced main cola and branches filled with nice hard flowers.
She looks really impressive.
The leaves are of a healthy dark green color, the smell has become more intense, which gives me special pleasure when I open the grow box.
Watering has become more frequent, every three days each plant on the Farm receives about 2.5 liters of water.
I continue adding Bio Flowering Booster and Easy Bloom tablets.
Conditions on the farm are good. The temperature is around 28 degrees, while the humidity is around 45%.
Here's what it looked like last week.
06/06/2023 - Day 38.
Watering.
I added all three components from the Bio Flowering Booster.
pH I lowered it to 6.0. Each plant received about 2.5 liters of water.
09/06/2023 - Day 41.
Watering.
This time I put one Easy Bloom tablet in 7 liters of water and watered all three plants on the Farm with that amount.
10/06/2023 - Day 42.
End of the sixth week.
I photographed the plants and removed three or four yellow leaves.
Titan F1 - 52 cm
That's all for this week, thank you all for your support and see you soon.
Likes
10
Share


@Cannabot
Follow
Transplants been done into final containers(20l)and started LST.They doing really well,they've started sexing so I reckon from next week I'd say week 1 flower.Havent fully saturated the medium as yet with fertigation ,want that stem thicker before I do that. Weathers been decent but the wind has been strong on 1 or 2 days.
Likes
4
Share

@Bear_Grows_Green
Follow
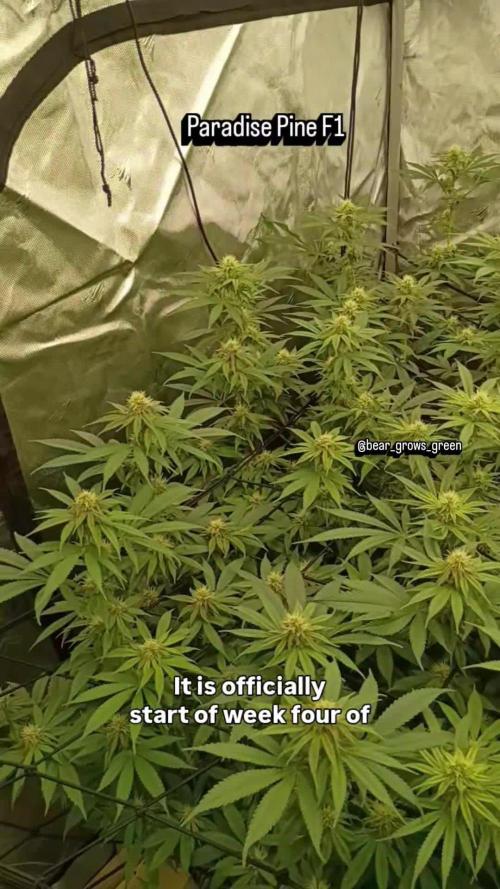
01/29 day 23 start of week 4 and things are popping!! Haven't fed at all this week should tomorrow .
01/30 bed for 7 gallons water 2.5 gallons feed full bloom recipe
Likes
12
Share


Likes
41
Share

@GermanGrow182
Follow
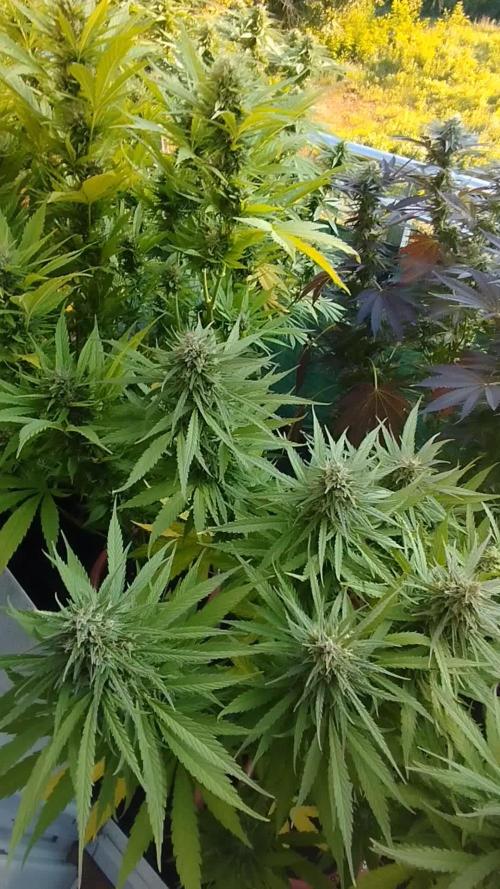
War ne gemischte Herbstwoche. 3 Regentage, 2 warme Tage, 2 kühle Tage und 3 Nächte unter 5 Grad.. AK zeigt ihr Herbstkleid in dunkelviolett.
Die Blüten beim Larry og sind nicht mehr weit von der Reife entfernt. 2 Wochen noch. Ak braucht noch mindestens 3. Lemon kush ist die kleine (neben fat banana) fast fertig. Nur noch milchige trichome, keine Bernsteinfarben. Die andere Lemon braucht noch etwas länger. Banana auch noch mindestens zwei, wenn nicht 3 Wochen. Das Wetter soll kalt werden. Bis zum Gefrierpunkt.. die Hoffnung stirbt zuletzt.
Noch läuft es gut 👍
Bis nächste Woche ✌️
Likes
11
Share


@Barbagrows
Follow
Day 29 - Topped both ladies at the fifth node and removed any growth below. Growth exploded since transplant and first dose of nutrients.
Day 30 - Watered both ladies with around 100ml of water. They recovered from the topping and look as healthy as can be. Very happy with progress.
Day 32 - Misted both ladies.
Day 33 - Watered both ladies with around 250ml each. Increased dosage slightly from last feed to see how they take it.
Day 35 - Misted both ladies to keep them hydrated.
Maria is doing well, showing vigorous growth. Planning to top her again next week and remove any growth below the topped nodes.
Juanita has fallen behind, new growth points seem to be growing sideways. Keeping an eye on her progress, hopefully she turns out ok. Not planning to top her again until normal growth resumes, do not want to stress her out.
