
Likes
Comments
Share


Likes
4
Share

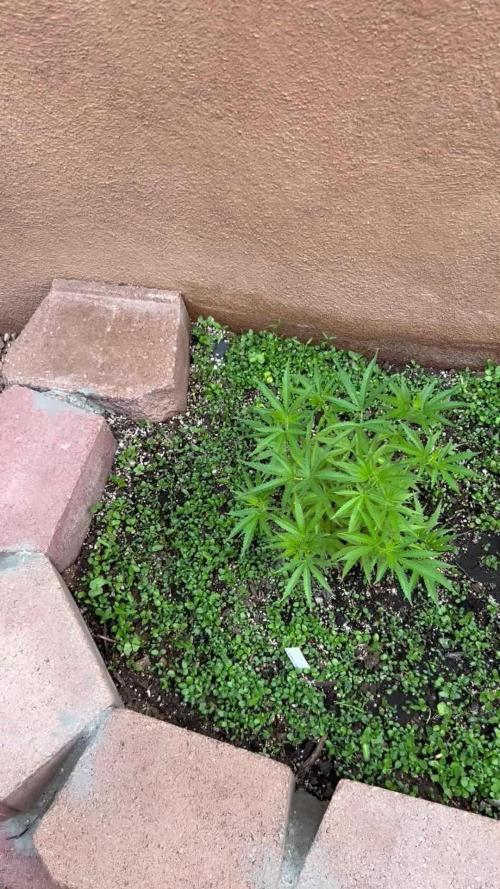
@AstrasGrow
Follow
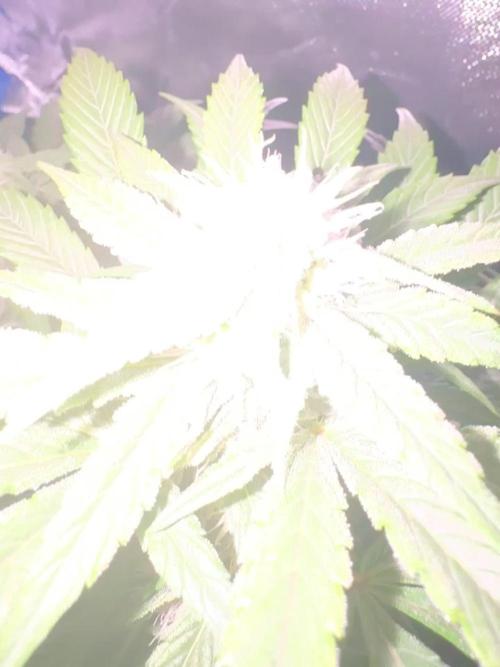
Nur mit Wasser gegossen. Die Blüten bekommen langsam keine Orange Haare

Likes
34
Share


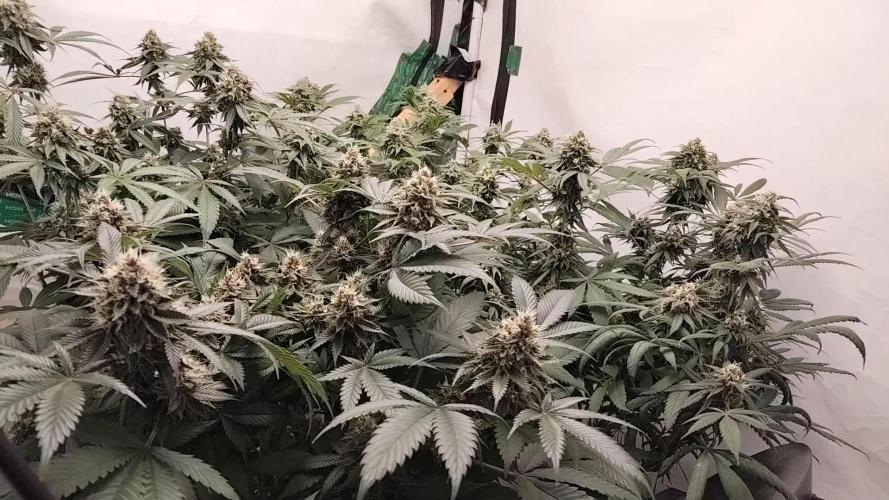
@Grey_Wolf
Follow
I smell dogshit 💩
Connoisseur genetics Dogshit deadhead haze
24th Jan 2022
This will be the last week of veg as she transitions into flowering 😀
I dosed her up with enough Bio bloom to last the first 6 weeks then by then I should have some guano
I really hope those long branches fill in nicely with bud rather than being airy we'll have to wait and see.
Thanks once again for stopping by 👍

Likes
56
Share


@Prilyfe13
Follow
May 17, 2024 Day 92
This is the last week of the Flowering phase. I'll be harvesting most likely next midweek or earlier. The goal is to harvest by the end of the week, but I don't think they will be done.
Banana Purple Punch A looks amazing! Her branches are nice and leaning. Not too much, just enough. She's also starting to show signs of fade. Or at least unhappy leaves turning yellow. One weird thing I noticed is the back leaves all have signs of nitrogen toxicity. What's weird is that I haven't used nitrogen in over a week and the last time I used it, I did a quarter dose. This should not be happening. I'm confused.
Other than that, it's the end and I'm not worried about it, but it's still weird. Any insight?
Banana Purple Punch B looks great as well. Tons of orange pistils and lots of frost. What's nice is that a lot of that frost is still clear trichomes. Imagine what they will look like in the end. I'm so excited!
Both plants still have water in their basins, so I'm going to let them drain out and most likely not water again. It should be about a week for them to dry out completely. Perfect timing for harvest.
I may put Banana Purple Punch A in a dark period while Banana Purple Punch B finishes up for a couple days. I'm doing the same thing with my Tropicana Cookies.
Lighting. Well, it hasn't changed. Lol. Duh. Hahahahaha. Another week of this light intensity.
I've all but given up on the environment. It's got tons of airflow and lots of light. The temp is fine. It's just the damned humidity. I give up. I'll just keep removing the plants from the tent as need be.
I didn't touch Banana Purple Punch A today though. She is propping up the last Tropicana Cookies for the next 2 days. I will however, make sure to inspect her as much as I can. And as soon as she is freed up, I'll be flipping her around. And pulling her away from the side of the tent. Same with Banana Purple Punch B. Both are squished for the moment.
I also managed to get all 4 Sour Diesel plants in the tent after pulling one of the Tropicana Cookies. So these ladies are a bit tight for now. But only for a couple of days. If that. I was considering putting the Sour Diesel in the back and keeping the Tropicana Cookies up front for ease of access, but that will just cause chaos with bendy floppy branches. So I'm leaving it. It all fits. Snug as the Tetris skills I had to use to make it happen.
Grow System Environment:
Temp: 76.4°
RH: 61.4%
VPD: 1.17 kPa
Quick update on lighting:
I had to increase the light power up to 80% for the Sour Diesels now in the tent. They were at like 16 mol/m²/d instead of the 20 to 25 mol/m²/d it should be. Anyway, so the light was increased. It didn't change much. Some spots went back up to 40 mol/m²/d, and some went up to 38 mol/m²/d. Overall the spread is 34 to 40 mol/m²/d. These 2 should t have any issues with the light increase. I wonder if it will help along the maturing process. I don't know science. Maybe the dark does? Maybe they both do and just in different ways. Yah, that's it.
May 18, 2024
Watering day. Both ladies got a full gallon reservoir refill of plain water today. No sense in running the Flawless Finish anymore. They have mere days left to maybe a week. I'll just keep extending the time until I'm right. Lol. Hopefully it will be the last watering. Neither plant is thirsty at all, so it should take around a week for the reservoirs to empty.
Banana Purple Punch A looks great! She is nearly ready. No fade yet though. I don't really understand. Is she not fading because she isn't done yet? Or is this just how it's going to be? Insight? Lol.
Banana Purple Punch B is coming along nicely. I don't think she is near done yet. I don't get why they are taking so long. Either way, when she's done, there will be some amazing bud.
The light isn't hurting anything that I can tell. So it will stay the same.
The environment is an absolute mess now. With more power to the light comes more heat. Now I'm stuck in the mid 60s for humidity and 78° for the temp. All bad. I've been checking each plant for mold, mildew, bud rot and anything else that doesn't look right. So far we're safe.
Grow System Environment:
Temp: 75.4°
RH: 64.2%
VPD: 1.06 kPa
Can you say horrible environment? I'm so screwed. Even if I don't get any issues like bud rot, the humidity is doing a toll on trichome production.
Update: After some research, I have found that high humidity can cause plant production to slow down significantly. That could be the problem I'm facing right now. My humidity is entirely way too high and the plants aren't able to take in water. And some other science I'm sure.
Also, I've noticed the leaves on Banana Purple Punch A are really shiny and clawing just like nitrogen toxicity, but I'm in the second week of plain water and flushing agent. What gives? If anyone knows, I would greatly appreciate a comment or a DM. Thanks!
May 19, 2024
Not a lot to do today. No watering or trichomes.
Banana Purple Punch A is being weird with this nitrogen toxicity during flush. How would that work? Anyway, her leaves are starting to die off a little but no fade. Still, she has huge buds that smell wonderful.
Banana Purple Punch B is starting to show a bit of color in her leaves. Just a hint of purple but just a hint. If she fades, it won't be for a bit.
But it's time I don't really have. Let's hope she starts to fade quickly. Both have been in plain water for a week and before that a week of Flawless Finish. Must be more nutrients in the soil.
Nothing to talk about with lighting. We all know where it's at.
The environment. I'm really confused. So a week of high humidity and my room is also humid. Today, it's low humidity and my room is still high. Even with the door open from outside it's still high. Why? What sorcery is this? Anyway, the tent is still stuck at 65% humidity and temps are down to 73°.
Grow System Environment:
Temp: 72.5°
RH: 68.3%
VPD: 0.84 kPa
May 20, 2024
We are starting to fade! Finally! Both ladies are starting to fade in their own way. No watering today. They definitely don't need it at all. Maybe a half gallon before the drying period.
Banana Purple Punch A is fading in her own messed up unhappy way. Her leaves are super shiny and clawing like she has nitrogen toxicity, but she's flushing. I don't get it. Leaves are canoeing and turning yellow. Maybe this is her fading in the most messed up way. But she's fading. Some of her leaves are starting to get a purple hue. Her buds are super fat and stinky. It's wonderful.
Banana Purple Punch B is the picture of a perfect small plant. She is fading like a normal plant. She's getting purple hues on her leaves, buds are developing purple as well. By the end, I hope to have a couple deep purple plants. I'm still wondering why it's taking so long. They should have been done weeks ago.
The lighting is the same.
The environment is the same. Although, it dropped to 40% outside yesterday and the humidity stubbornly stayed in the mid 60s. It makes no sense. Anyway, I'm stuck at 65% still and the temp is finally under control again. I have it a bit low for the last bit of flowering at 73° it's going to be hot today, so I'm hoping my room stays cool. Maybe the humidity will drop again and I can try to get the humidity to come down.
Grow System Environment:
Temp: 72.6°
RH: 67.7%
VPD: 0.86 kPa
May 21, 2024
Trichome day! Some good things happening today.
Both ladies are looking great! They finally have some fade going on. Not a lot, but some.
Banana Purple Punch A is almost out of water. I'm going to let her dry out a bit more and then add another half gallon to her reservoir. Her trichomes are starting to show more amber. Maybe 5% now? About 10% clear and the rest are cloudy. She still has a bit more time to go. I'd say another 5 to 7 days? Maybe slightly less? Hopefully slightly less.
Banana Purple Punch B has a saturated bottom. I think it's because the roots never grew out of the container, so the soil is sucking up all the water and I guess the roots are not? I'm not sure, but I can def say that she is barely drinking. I'll pull the wicks tomorrow.
Her trichomes are looking great. She has around the same as her sister plant. About 5% amber, 10% clear and the rest cloudy.
Both plants have huge dense buds. I can only imagine how much more dense they will get over the next few days while they finish up.
We finally got the central air on in the house. It made all the difference in the environment. Well, that was until it shut off and then my room needed assistance. In the form of wet cold air. Definitely not good there, but the AC will kick on in no time. It's 80° out today, so I expect the central air to kick on anytime now.
When it's on, the humidity drops to 56% and the temp stays at 74°. Very nice.
Grow System Environment:
Temp: 72.7°
RH: 62.9%
VPD: 1.00 kPa
May 22, 2024
Nothing to do today with these two. I might have to water Banana Purple Punch A in a little while. I was hoping I could get away with it, but I think she is dried up enough for another half gallon of tap water PHed to 6.1.
Banana Purple Punch A looks good but has clear signs of previous stress. Interesting. Her tops are leaning even harder now. Those buds must be super heavy. The branches are pretty thick.
Banana Purple Punch B looks amazing. Purple is coming in quickly. Her buds are definitely denser and fatter now. Probably as big as they will get. Now it's just time for her to mature.
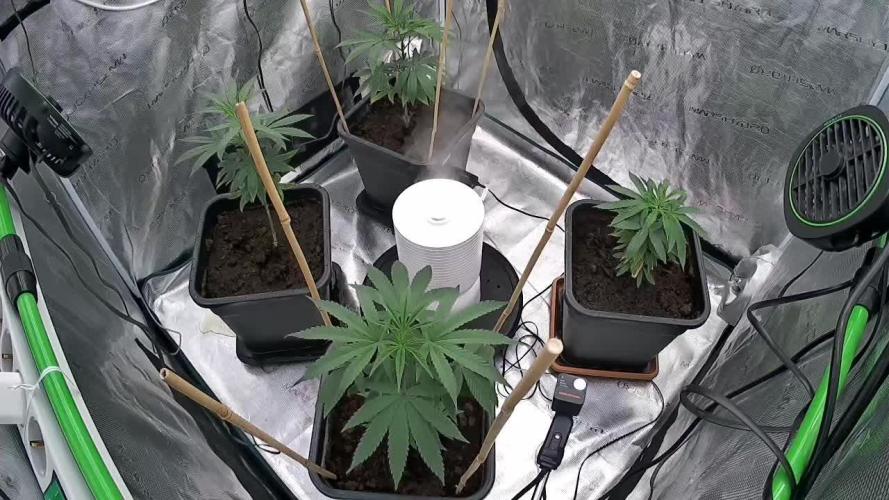
I have a small problem. I have 1 Tropicana Cookies left and 4 Sour Diesels in pre-flower in the tent as well. Suffice it to say, I need to make room for the Sour Diesels to stretch. And that could start anyway now. I'm concerned I'm going to run into massive crowding and cause mold. As it is, the humidity is still really high, so I don't want to risk it.
All that being said, I might now be able to wait for perfect doneness with these ladies. I might have to harvest them in a matter of a couple days. The last Tropicana Cookies in the tent should be pulled either tomorrow or the next day, unless the Sour Diesels start to significantly stretch, then all three including these two will have to be pulled.
So there you go have it. My current issue is space for 7 plants in a 3x3 tent. I know, I'm ridiculous. But you gotta do what you gotta do.
On a side note, I'm wondering what I'm doing wrong to always have plants go way past their time. Seriously, it kind of messes with my schedule. For example the Sour Diesels. Those were planted on 4/20 and these ladies were supposed to be fully done a week later. But it's been 4 more weeks and they still aren't done. Total wrench in my plans. What could I be doing wrong?
The environment is still a mess. The central air hasn't kicked on yet, so I'm relying on my own portable AC. The problem with that is it blows out really humid air when the compressor kicks off. So my humidity is high again. Over 60% yet again. The temp is fine at 75°.
Grow System Environment:
Temp: 75.7°
RH: 59.4%
VPD: 1.20 kPa
May 23, 2024
Last day of the week and we have some real purple coming in now. Especially on Banana Purple Punch B. Most of her tops are now a nice deep purple. Leaves are also getting the nice purple hue as well.
Banana Purple Punch A looks great. Lots of leaning branches now. She should be ready for harvest in just a few days. Not as much purple as I'd hoped, but it's fine. Her buds still look fantastic.
Banana Purple Punch B is quite nice. She has super heavy tops and should be ready in maybe 5 days. There's still too many white pistils on the lowers. I can't express how nicely the purple is coming in. A little late from what I've seen in other grows, but here nonetheless.
She still hasn't finished her gallon of water and it's been well into a week. I think I'll turn off the bottom feed system for her tomorrow. It should be perfect timing for her last week of life.
I definitely cannot change the lighting for these two. The Sour Diesels need more of it. I'll have to drop it down soon, they are growing pretty fast and starting to seriously pray. Too much.
So the light will remain her for now. I might still lower the light and turn down the intensity. I'm not sure yet.
The environment is starting to calm down. Not quite fast enough for my liking to be honest. Currently the temp is around 76.5° and the humidity is still high at 61%, but it will drop in a little while. Maybe we can get down to 50% today.
Update: I've decided to give these two no more than a week to finish up. Both of the Tropicana Cookies are out now and they are taking around 5 days to dry, maybe 7. But no longer than that. The other reason is the Sour Diesels that are now sharing the tent are in pre-flower and will need the space ASAP.
Grow System Environment:
Temp: 76.2°
RH: 60.6%
VPD: 1.18 kPa

Likes
1
Share
@Olduffybastard88
Follow
Can't beilve how fast these girls are packing on the weight I know there fs didn't expect them to be so good fast and massive a couple more weeks and we will be done

Likes
22
Share


@NanoLeaf
Follow
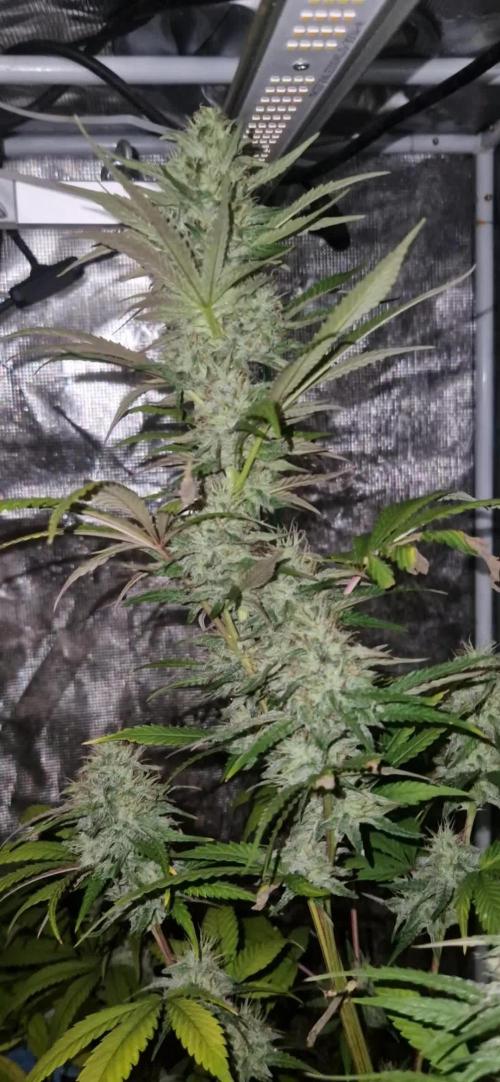
End of Week 12 (Fifth week of flower)
The ladies are smelling reDANKulous and are so frosty and sticky I can't remove fan leaves without getting my hands sticky. Next level terpene profiles.
I did a final increase in CO2 to 1500ppm.
The main top-sites are taking shape.
I have been keeping a cooler average temperature - and also keeping the relative humidity lower.
Pest Report: None

Likes
6
Share


@AlpineGoat
Follow
Now that I finally removed the other plants i have total control of the space! I moved the light diagonally so the girls can take max benefit from it..
I think i fucked the ph once since I saw a little deficit on the plant after the last watering... I dont know if ifs ph or something else :/


Likes
2
Share

@fadedgreentaurus
Follow
Gained 4-5 inches growth on every plant since moving outdoors. Been feeding compost tea I formulate myself brewed in concentrated and diluted 50-50 I’m ramping up my soil nutes for a week window I’m going out of town and having someone water for me. I getting exactly the results I’ve intended so far and couldn’t be happier. I’m rotating neem and bt. I’ve top dressed castings and guano as well as some other light dressing of other organics to promote micronutrients, I can’t recall everything as I tend to sort of wing it as I see fit. Soil coloration near black and teaming with life great aeration as green mulch becomes more prominent above ground, signifying penetration and good oxygen supply to established cannabis rootball. Teaming with the smell of signifying proper biome health. As spring establish new life the health of the yard has me feeling optimistic for the rest of the season. Most plants have near doubled in size and kicking off new stems from most recent topping. Survived a couple colder nights also which I hope to be the last that low for the rest of the year near 38-40 F*. Hardly fazed plants remain healthy as ever.
Likes
54
Share


@Roberts
Follow
I just harvested her today. Frosty looking nuggets with a pine citrus earthy aroma. Super sticky as well. I had about a 5 to 10 percent amber trichromes. I might of been a pinch early, but she was starting to foxtail. The colas look really nuggy.
I had issues with mites early when I switched to flowering. This likely impacted some of the yield potential as she was neem oil treated for a week during that time. She did way better then I expected after that big stressor in play. Mites are long gone now. The plant will now hang dry 24 hours then get a light to mild agression wet trim, and end up in the cannatrol. To start a 8 day dry, and cure process. I will then run it in the bud trimmer. Then hand trim to finish.
The G3000 light is a great quality light. I just ran it 19 weeks on a photoperiod grow, and had no issues with any of the Spider Farmer Equipment used. I used the 2.3x2.3x5tent, G3000 light, germination mat, 4 inch inline smart controller exhaust fan, and I will be using the new 16 inch Spider Farmer bud trimmer bowl when time comes. Excellent equipment from start to finish in my grow. I want to thank Spider Farmer, and Pure Instinto Seeds. 🤜🏻🤛🏻💪🏼❄️🌱
I also want to sat the biggest thank you to the grow diaries community for the 👇likes👇, follows, comments, and subscriptions on my YouTube channel👇. ❄️🌱🍻
Happy Growing 🌱🌱🌱
https://youtube.com/channel/UCAhN7yRzWLpcaRHhMIQ7X4g
Spider Farmer G300w: https://amzn.to/3S2zvsd
Spider Farmer 10X20 Heat Mat Kit - https://amz.fun/lsa0J
Spider Farmer Amazon Store: https://www.amazon.com/spiderfarmer
Spider Farmer Official Site: https://spider-farmer.com
Discount code: saveurcash (stackable)


Likes
4
Share


@AestheticGenetics
Follow
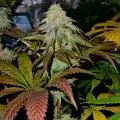
6/24/25 this genetic stanks of rotten fruit. like a spicy over ripe fruit. it smells really good and the purpling is starting to come through in under parts of the
Likes
4
Share


@m0use
Follow
***Sponsored Grow*** = Medic || https://medicgrow.com || Grow = ***Sponsored Grow***
Not a lot is happening with this shit show, its fattening up and doing its own little autoflower thing. Still sad about how it was not what I was expecting. Will need to chop this in a week or two and call it a day.
Lights doing well. The V1 spectrum is good on the medic grow mini sun-2's 240w. No issues so far, dimmed at 80%
.
Till next week.
***Sponsored Grow***
Official Website: https://medicgrow.com/
Facebook:
https://www.facebook.com/medicgrowled
Twitter:
https://twitter.com/medicgrow
Instagram:
https://www.instagram.com/medicgrow420/
YouTube:
https://www.youtube.com/channel/UCNmiY4F9z94u-8eGj7R1CSQ
Growdiaries:
https://growdiaries.com/grower/medicgrowled
https://growdiaries.com/grow-lights/medic-grow

Likes
29
Share


@JeyGanesha
Follow
8°settimana...gli do ancora 2 settimane di solo acqua,con un pochino di melassa,così la addolcisco un po'...ma sicuramente già sono super dolci al raccolto.......
Mah! Guardando le mi sa che una ultima settimana di flush andrà più che bene... Faccio l'ultima settimana, dandogli solo flawless Finish e via.......dopo sarà prontissima,😋🤤😜

Likes
8
Share

@Mati_86
Follow
ende der 6. ten BW. finde das trotz schädlingsbefall am anfang der blüte sich die pflanzen gut entwickelt haben. die cherry poppers hat für meinen geachmack etwas zuviel blatt material im vergleich zur rainbow melon. dasselbe auch bei der runtz. die super boof entwickelt krasse terps die nach kaugummi, süße mandarine und bischen gas riecht. hat auch etwas mehr blatt anteil aber die terps sind echt nice...bin auf das Endergebnis gespannt. die rainbow melon ist der sieger in diesem grow. alle sorten sind neu und noch nie von mir gegrowt worden. auch zum ersten mal 420 fastbuds probiert und bin echt begeistert. die seeds sind etwas teurer aber ich kann auch sehen wieso😅 . werd in zukunft mehr fast buds probieren... es kann ja sein das ich bei dem pheno einfach glück hatte. aber auch die buds die tiefer liegen bekommen eine schöne härte und größe was zur Qualität des phenos beiträgt.
die cherry soll 9bis 10 wochen brauchen...die anderen ca 8bis 9. es ist aber schon lange her das ich eine sorte nach 8 wochen ernten konnte 😅✌️✌️✌️

Likes
12
Share


@WestToEastBerlin
Follow
Englisch:
We have now reached week 2 and the ladies have tolerated the early repotting a little worse than expected.
But they recovered from the shock.
All 3 biscotti plants are now growing wonderfully and look great so far.
With the Gelatos, 1-3 are very uniform and growing well, but 4 and 5 are lagging behind. Time will tell if all 5 will make it to flowering.
The two Cookies x Key Lime Pie are unfortunately also a little slower growing than the Biscotti and Gelato 1-3, but I'm so interested in the strain that I'm keeping both plants.
Now we come to Herz OG, the strain I was most looking forward to.
Heart OG 1 is growing relatively OK, but is clearly lagging behind the Bisottis and Gelatos.
Heart OG 2 is growing quite slowly so far. Even slower than number 1.
It also shows a mutation on the first pair of leaves. Let's see how it develops...
The fertilizer has also been added since the beginning of week 2. Here I use the Athena Blended Line and stick to their feed schedules and the hand watering strategy.
Deutsch:
Nun sind wir in Woche 2 angekommen und die Ladies haben das frühe Umtopfen doch etwas schlechter vertragen, als gedacht.
Aber so langsam erholen sie sich von dem Schock.
Alle 3 Biscotti Pflanzen wachsen wunderbar und sehen bisher toll aus.
Bei den Gelatos sind 1-3 sehr einheitlich und wachsen gut, jedoch hängen 4 und 5 hinterher. Es wird sich zeigen, ob alle 5 es bis in die Blüte bringen werden.
Die beiden Cookies x Key Lime Pie sind leider auch etwas langsamer im Wachstum, als die Biscotti und Gelato 1-3. Der Strain interessiert mich jedoch so sehr, dass ich beide Pflanzen behalte.
Nun kommen wir zum Herz OG, die Sorte auf die ich mich am meisten gefreut habe.
Herz OG 1 wächst relativ OK, hängt jedoch klar hinter den Bisottis und Gelatos hinterher.
Herz OG 2 wächst bisher recht langsam. Noch langsamer als Nummer 1.
Sie zeigt außerdem eine Mutation am ersten Blattpaar. Mal schauen wie sie sich entwickelt...
Außerdem wurde seit Beginn der Woche 2 der Dünger mit eingebracht. Hier verwende ich die Athena Blended Line und halte mich dabei an deren Feed Schedules sowie die hand watering strategy.


Likes
11
Share


@High_And_Hydro
Follow
- Ich hab die erste Woche des Biobizz Allmix Düngeschemas gestartet und gebe wie immer erstmal vorsichtige 100%, da meine Erde an sich durch den Kompost recht potent sein sollte.
- Außerdem hab ich mit meinem Calmag-Rechner mein Leitungswasser angepasst. Die Werte könnt ihr auf den Bildern sehen.
- Den PH-Wert passe ich ebenfalls auf 6,5 an.#
- Die Lampe bringt zur Zeit etwa einen PPFD-Wert von 350 - 360 µmol/s/m² bei 18 Stunden Beleuchtungszeit (DLI von 22 - 23 mol/d/m²). Sie wird aber nur eingesetzt bis es warm genug draußen bleibt. Tagsüber stehen sie jetzt schon draußen, sofern es nicht regnet oder stürmt.
Die Tropicana Cookies macht sich hervorragend und sie ist sehr uniform mit den anderen Fastbuds Strains bis jetzt. Sieht gut aus finde ich 💪😁👍
YT: www.youtube.com/@High-And-Hydro
Processing
Likes
10
Share


@MichaelMan
Follow
Noticed that on one plant leaf tips are curled down and some of them are yellowish. As I am giving them enough nutrients and using ph perfect advanced nutrients it still may be the ph because these nutrients are meant for hydroponic system. Thinking that they might have a nutrient excess because how dark green they look.
After topping their growth have stunted a bit but it’s normal.
Overall they seem very healthy