Likes
Comments
Share
@Rinna
Follow
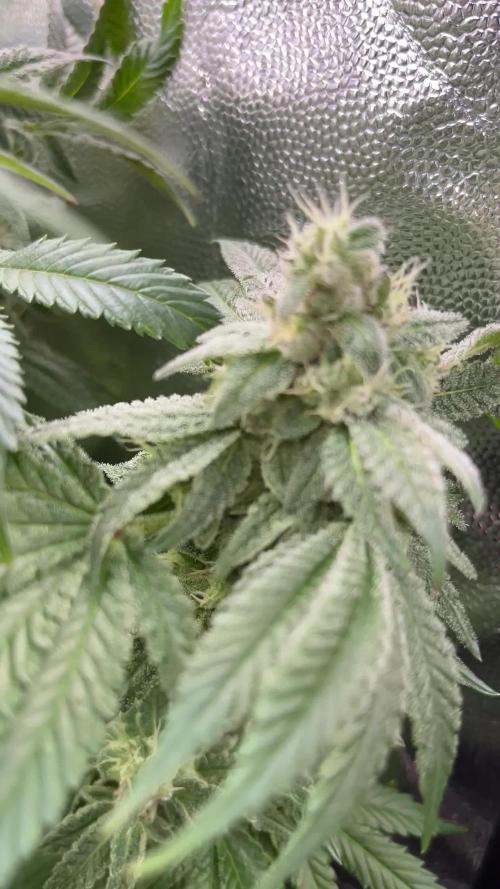
First day of week 10! She’s doing better and forming some nice icy buds, still very small especially compared to the others. Hoping those flowers will get a bit bigger 🙏🏻 Still dont really know what’s wrong with her, starting to think she’s just a weirdo!
Processing
Likes
20
Share
Started doing some light defoliation a bit each day on the very low level offshoots and any big leafs blocking main bud sights. Looking back I should have done a bit more earlier on as these are very heavy and leafy plants. At the start of the week my light was at 55%, on 13 Nov I put it to 100% to see how they react. I will monitor to see if they are ready for it but they really took off this last week. My one plant in the back left always appears droopy compared to the others because the leafs on it are so big it weighs down the whole plant. The plant in the back right was always janky and I considered not even growing it. The seed came through a few days later than the rest and I almost wrote it off. Figured I would use it as an experiment and try and learn from it instead.
Processing
Likes
88
Share
@Fergie
Follow
Hey guys so here we are week two into flower and the tent is filling right up now got some awesome bud sights forming and my aim of 1kg dry out of the 2 plants is on course . Root structure is amazing and I have always had good results when I get the wrapped root over top as can see in pic . Anyway til next week guys
Processing
Likes
2
Share
Ya se nota el cambio de tiempo diss más cortos y más fríos pero aún así está tirando como.esperabs. por las noches las cubría con plástico.pars protegerlas del.frio
Likes
2
Share
@habibi
Follow
Macht zwar langsam Fortschritte ober es geht vorwärts.
Likes
10
Share
@Jerrza
Follow
New week, plants start to produce loads of sugar and a strong smell is coming trough
Likes
5
Share
81 days from seed to harvest. Last 6 day dry cycle. Last 24 hours total darkness and upped the fan speed. Hang them all up in tent. Aiming for low 60% humidity and around 19 - 20 C. No oscilating fans active, only 2 exhaust fans on low setting. Report back when dried. After two weeks drying they still need to cure, Got around 200 grams of nice bud out of it all. Had a little taste and was pretty good. Very piny/earthy taste. I like it. Overall easy plant and im pretty pleased with it for my first grow. Setting up for next grow: Watermelon Candy F1 auto.
Likes
16
Share
@willertex
Follow
📅 D77 - 16/01 📜 Almost ready, Waiting for final flush ✍️ 1.5 EC ♒ 9 pH 🌊 10 L 📏 90 cm 📅 D80 - 19/01 📜 Final flush started ✍️ 1.5 EC ♒ 9 pH 🌊 10 L 📏 90 cm 📅 D83- 22/01 📜 Not yet ready - 3-4 days more I think. Suggestion accepted ;) ✍️ 1.5 EC ♒ 9 pH 🌊 10 L 📏 90 cm
Likes
25
Share
@Aleks555
Follow
Anesia Seeds - Chimera Cut, hello everyone! Our beauty is 60 days old, and she looks absolutely stunning. 12 days ago, we pruned and tied down her branches, and the results have been fantastic. You can see for yourself by checking previous weeks and comparing. This lady has quite the appetite, and Xpert Nutrients are clearly to her taste. Just look at the color and shape of her leaves, and it’s obvious that this lady is surrounded by care and love.
Likes
76
Share
Day 15 - She is still wanting light but gonna leave it at 11" cause she is taking off like a rocket. Sorry for the crappy pic. Day 16 - She is growing, little worried the stem is not going to hold her up for long she is growing so fast, kinda worried there. Gave a bit of silica/calmag (maybe 1 oz at the ratio in my diary) then about 4oz of water.. Day 17 - She is blowing up! Hard to see in pics but she is getting bigger! I was worried the purple light is what threw my DFL into flower if that was closest to that LED . I tried to quarantine her 600w more purple Light off of my DLF.... Day 18 - Still looking good, gave about 2 oz of calmag/silicia solution and spritzed with water Day 19 - Was a little dry so watered and spritzed leaves with water. Growth underneath is picking up. She is still growing so I am happy. Trying to keep Air temp up above 75F Day 20 - It is getting thicker and bigger. Not growing much taller but getting bushier it seems. Spritzed leaves with water. Day 21 - Undergrowth seems to be growing, not getting much taller but is getting a bit thicker... Spritzed leaves with water.
Likes
8
Share
Trauermücken mit SF Nematoden bekämpfen/ Gelbtafeln Aufgestellt und Begleitpflanzen hinz
Likes
1
Share
Getting really close now. Should be down within the week. This has been a super good grow. ILGM always comes thru with good stuff!!
Likes
18
Share
Mazar has a unique design that has us in awe, this is definitely a rare looking plant with features that remind us of strains that grow in far away lands. Our only upset with this girl is the powdery mildew that has started to set in, this is disappointing at this stage because we prefer not to use any type of spray. We used tap water with a ph above 9 to see if that would help, regardless this is a sign that she may not be the best strain for outdoors in our climate. Epsom salts have been added to our rain barrel once a week and Mazar has had a few dustings of coffee grounds added to her soil bed. Either way we appreciate her beauty and hope she can stay free of the rot as the bud thickens and the cooler air sets in.
Likes
269
Share
Day 92 Day 30 Bloom 42ish days remaining. Pour some SUGAR on meeeee.........wowzers the sugar is really starting to cake the sugar leaves now. Got tons of healthy bud sites forming and the smell is just delightful. Did another decent defoliation to keep all the buds site in the light. Keeps it nice and clean with great air flow. Speaking of air flow I added an oscillating fan to keep the air moving under the canopy better. There is a problem forming that I'll need to take care of this week. Another purchase?? 😡 lol De-humidifier......the humidity is very slow starting to raise. I started with 2 humidifiers on full, then 1 on full, then 1 on min for a bit then no humidifier and now its starting to raise with no humidifier so I'm gonna need to deal with this asap as it will become a very big issue in the future if I let my girls get moldy, but no chance I would let that happen! so i'll be on the search for a decent used one this week or purchase a new one unless I learn something new here, which I probably will. A question this week too. about Harvest. mayb 2 questions. So I hear alot of tricks regarding harvest. 24-48-72 hours of darkness before harvest then cut them in the "dark" meaning dont let the bloom lights come on again before harvest. different flush times and so on. what works best for you guys?! I'm thinking 7 day flush since thats why my nute sched says and it hasnt led me astray yet. I'm considering doing a tiny mid bloom flush reccomended by a friend, i like the idea to give just pure water for 1-2 days and kind of give the plants a break from the massive ppms i'm putting them through although I might skip this step if not needed either. 2nd part of the question, if the flower time for this strain is 70-75 days, I realize I should harvest when most of the tricones are milky and some clear with very little to no amber ones. but if I flush for a week before harvest, how do I know when to start the flush, how long is my harvest time frame for maximized potency. I'm guessing with experience I'll be able to know my girls and say yup harvest is x days out but for this one not too sure. 40ish days til harvest is bittersweet, feels so long but part of me loves it, how big can/will these buds get with another 42 days! Thanks again friends for following, this week the sugar came now I wanna see the weight really start being packed on.
Likes
15
Share
@Kominest
Follow
.just watering with monomagnesium and starting flowerbooster . She’s starting to yellow up from the down to upper parts . It’s getting hot like 26-28 degrees that’s not optimal and leafes are hanging a bit on the lower parts . Overall she’s still doing great . Added a 2nd mars hydro fan to the lower part of the tent. Should’ve listened to my bro @laxx who said it ain’t that smart growing in the tent at this time of the year . He was unfortunately right . But we keep going let’s see if the weather gets better or if she’s fighting through it or not :D Every day is a learning :D
Likes
9
Share
I soaked my seeds for 24 hours in a mixture of 6.3 ph water, BioAg Ful-a power & Aloe Vera. i then inoculated the soil with the mixture of all the nutrients I listed above then placed the seeds 1/4” down into the soil. I then sprayed the top with my pump sprayer & put them under a humidity dome. 75 F degrees & 89% humidity.
Likes
29
Share
28.05.2026 Tja, Partypeople, es ist soweit. Heute ist ihr letzter Tag an der Sonne und ich glaub, die Nachbarn freut es. Sie riecht nämlich gewaltig und der ganze Block darf daran teilhaben 😅. Ich bin wahrlich zufrieden mit dieser Sorte, aber das war von einer Skunk ja auch nicht anders zu erwarten. Habe eben die Trichome kontrolliert und ja, heute Abend wird sie gefällt werden. Und jedes Mal das gleiche Theater, dass mir doch so schwer ums Herz wird 😔. Happy growing 🌸 💜
Likes
17
Share
It’s the eighth week of flowering, and the plant is looking absolutely gorgeous! The buds and leaves have turned a deep purple with rich autumn hues, giving the plant such a unique, almost magical appearance. The sweet smell has become even stronger and fills the whole grow space with a powerful, sugary aroma. 🍬🌿 I’ve noticed the trichomes starting to turn an amber color—just the sign I’ve been waiting for! Most of them are still milky, but the amber hints show we’re getting close. This week, I’ve started the flushing process to clear out any remaining nutrients and prepare for harvest. 💧 Everything’s on track, and I couldn’t be more excited for the final steps! 😁✨
Likes
40
Share
@Dingle
Follow
Really happy with the amount of growth this week both girls seem happy with the setup so far. I have had a few signs of nutrient burn on both plants but thankfully I don’t think it’s too bad. I am not sure if I have maybe feed them too quickly or too much this week.🤔 I tested the run off for the first time and got a reading of 400ppm so I need to figure that out for the next feed 😐 Not much else to report this week. ✌️🙃
Likes
44
Share
**Encontrarás la traducción a español al final de la descripción** From/Desde: 10/05/19 || To/Hasta: 16/05/19 From day/Desde día: 78 || To day/Hasta día: 84 You can find the Money Maker Diary here: ** Podéis encontrar el diario de las Money Maker aquí:** https://growdiaries.com/diaries/25667-gorillamakingmoney-gorilla-vs-money-m -----IMAGES & VIDEOS----- 5 - HomeMade Organic & Cheap CO2 generator (more info in week summary) 9, 10, 11 & 12: The bud on the right is a Gorilla one, the buds in the left or/and in the middle are Money Maker ones. 15 - Same Gorilla plant buds, one affected by CO2 in the roots and the other not. -----WEEK SUMMARY----- The smell is more sweet and intense every day, friends that came home turned them eyes into crystals when they see this little babys. The size isn't awesome, but the high ammount of buds full of crystals plus the strong sweet aroma makes them awesome. Buds are growing and fattenning very very well. This week i added a boost of HomeMade CO2, i never measured the results of this invention so i can't give CO2 measurements. This method is widely used in home aquariums and there is where it comes from. For those interested i'm going to write here more detailed instructions. The 4 liters i've made will last for about 2 weeks. ---NEEDINGS--- - 250 ml Bottle - 6~10 l Bottle - 400 g Sugar / l water - 1 Envelope of organic baker's yeast / l water (CHEMICAL WILL NOT WORK) - 3 mid plastic tubes 40~50 cm - 1 short plastic tube 5~6 cm - 4 tube adapters - Hot glue to seal adapters The process of creating CO2 is simple, mix water, organic yeast and sugar in a bottle, and the sugar will free CO2 in the process of fermenting to alcohol due to the yeast. 1. Make a hole in the center of the big bottle cap, insert an adapter and secure it with hot glue 2. Make 3 holes in the small bottle cap and glue the other 3 adapters 3. Link both caps with one of the mid tubes and insert the other tubes on free adapters 4. Insert a short tube in the bottom of the small cap in the adapter that came from the big cap 5. Watch the Video!! -----WATERING CALENDAR----- Plants are beginning to drain the pots a bit faster so from now on i will raise the water ammount on each watering day 0.25 l. 11/05/19 - 1,5 l with All week nutrients -(Nirvana & Blombastic) also Big Bud half dosed @ PH6.4 & 2 E.C. 14/05/19 - 1,5 l with Bud Candy, Big Bud, Nirvana, B52, Bud Factor-X, Sensizym & Blombastic @ PH6.4 & 1.5 E.C. *****ESPAÑOL***** -----IMÁGENES Y VÍDEOS----- 5: Generador de CO2 casero, barato y orgánico (más info en el sumario semanal) 9, 10, 11 & 12: El cogollo que sale a la derecha es de una Gorila, el de la izquierda y/o el de en medio son de una Money Maker 15: Dos cogollos de la misma planta, uno afectado por CO2 en las raíces y el otro no -----SUMARIO SEMANAL----- El olor es más dulce e intenso día a día, los amigos que vienen a casa a verlas se quedan ojipláticos al verlas. El tamaño no es una maravilla, pero la gran cantidad de cogollos llenos de cristales añadido al aroma que entra por las fosas nasales las hacen increíbles. Los cogollos crecen y engordan de maravilla. Esta semana he añadido un boost de CO2 casero, nunca he hecho mediciones de los resultados por lo que no puedo darlas. Este método es ampliamente usado en peceras caseras y de ahí saqué la idea. Para aquellos interesados dejo aquí instrucciones más detalladas. Con los 4 litros de agua que he preparado yo da para unas 2 semanas. ---NECESITAMOS--- - Botella de 250 ml - Botella de 5 a 10 litros - 400 g de azúcar por litro de agua - 1 sobre de levadura de postre orgánica (LA QUÍMICA NO FUNCIONARÁ) - 3 tubos de plástico de tamaño medio 40~50 cm - 1 tubo de plástico de tamaño pequeño 5~6 cm - 4 adaptadores para los tubos - Cola caliente para pegar y sellar los adaptadores El proceso de generar CO2 es simple, mezcla agua, levadura orgánica y azúcar en una botella, y el azúcar liberará CO2 en el proceso de fermentación a alcohol. 1. Haz un agujero en la tapa de la botella grande, inserta un adaptador y séllalo con cola caliente 2. Haz 3 agujeros en el tapón pequeño y haz lo mismo con los otros 3 adaptadores 3. Conecta los 2 tapones con uno de los tubos y conecta los otros 2 tubos a los adaptadores restantes 4. Conecta el tubo pequeño en la parte libre del adaptador del tapón pequeño que viene del tapón grande 5. Mira el vídeo -----CALENDARIO DE RIEGO----- Las platas comienzan a secar los tiestos un poco más rápido, asi que de ahora en adelante incrementaré 250 ml de agua adicionales en cada riego. 11/05/19 - 1,5 l con todos los nutrientes semanales -(Nirvana & Blombastic) BigBud mitad de dosis @ PH6,4 & 2 E.C. 14/05/19 - 1,5 l con Bud Candy, Big Bud, Nirvana, B52, Bud Factor-X, Sensizym y Blombastic @ PH6,4 & 1,5 E.C.