
Likes
Comments
Share


@Brick_Bazuha
Follow
Неделя прошла вроде бы хорошо, поливаю сейчас чисто водой, довольная, правда медленно медленно стала цвести, ну ничего пахнет и выглядет всё краше и краше)

Likes
29
Share

@RockoCalenberg
Follow
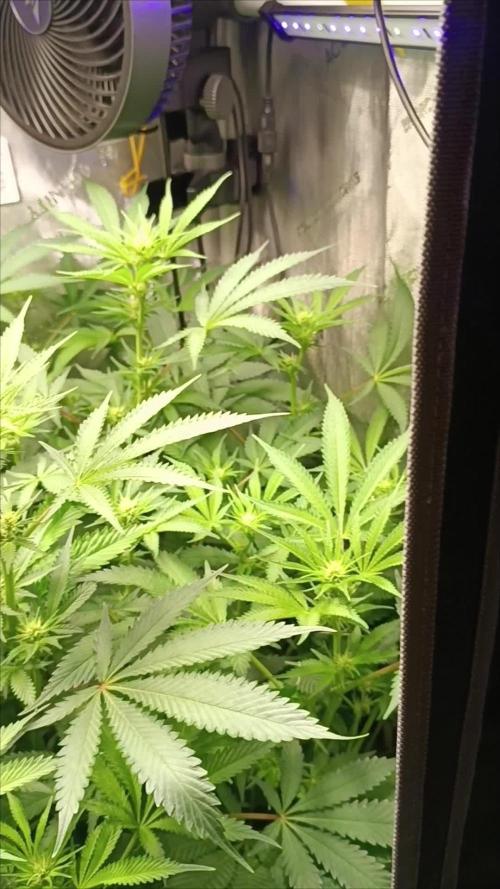
Tag 77 / Blüte Tag 17
Endlich ist das Fenster zu gebrauchen
Die Pflanzen stehen hervorragend da. Der dreistellige Zentimeterbereich ist geknackt – 1-Meter-Marke erreicht! 🎉
Allen voran die White Gushers 33, die aktuell minimal die Nase vorn hat. Die Kush ist etwa einen Zentimeter kleiner, wirkt insgesamt etwas heller und noch nicht ganz so weit. Die Gushers zeigt sich dagegen schon deutlich weiter, was Reife und Lichtreaktion angeht.
Der Stretch läuft spürbar aus. Genau so, wie er soll. Ein paar Zentimeter dürfen es von mir aus noch sein – aber bitte jetzt nicht mehr eskalieren 😅
Meine Wunschhöhe lag eigentlich bei 96 cm😉, die ist inzwischen überschritten, aber gut: Das Zelt lebt noch, ich auch. Ein Umknicken möchte ich nach Möglichkeit vermeiden, und aktuell sieht es so aus, als würde die Energie jetzt endlich in die Breite und Struktur gehen. Erste Anzeichen einer Stretch-Verlangsamung sind klar erkennbar.
Blütentechnisch sind wir bei Tag 17. Die Pflanzen sind inzwischen deutlich mit Härchen (Pistillen) versehen, die Blütenansätze sind klar sichtbar – und genau deshalb warte ich mit dem großen Eingriff noch ein paar Tage.
Der Friseurtermin ist aber fest eingeplant: Es wird Zeit, die Klingen zu schärfen ✂️
Die Entlaubung wird kein Spaß, da ist ordentlich Material dran. Ziel ist ganz klar: Luft, Licht, Fokus auf die Blüten.
In der kommenden Woche steht dann auch wieder eine Mikroben-Gabe an. Ich bin sehr gespannt, wie sie darauf reagiert – idealerweise genau dann, wenn sie voll in der aktiven Blütenproduktion angekommen ist. Einen weiteren Wachstumsschub brauche ich jetzt definitiv nicht mehr. Jetzt darf sie liefern.
Und dann dieser Moment:
Das Fenster im Growzelt macht endlich Sinn.
Man schaut rein – und sieht nicht mehr nur Grün und Stretch, sondern direkt davor echte Blütenbildung. Das ist diese Phase, auf die man Wochen lang hinarbeitet. Eine richtig schöne Zeit im Grow.
Ich freue mich sehr auf die kommende Blütephase.
Jetzt beginnt der Teil, für den man das alles macht 🌸✨
Finally, the window actually makes sense”
The plants are looking excellent. We’ve crossed into the three-digit centimeter range — the one-meter mark is done! 🎉
Leading the way is White Gushers 33, which is currently just a bit ahead. The Kush is about one centimeter shorter, slightly lighter in color, and overall doesn’t seem quite as far along yet. The Gushers, on the other hand, already looks a bit more advanced, especially in how it’s responding to the light.
The stretch is clearly slowing down now — exactly how it should. A few more centimeters would still be fine, but no more wild growth, please 😅
My target height was originally 96 cm, which we’ve now unfortunately exceeded. Still, everything is under control. I’d really prefer not to bend her over again, and right now it looks like the energy is finally shifting from vertical growth into width and structure. The first clear signs of reduced stretching are definitely there.
In terms of flowering, we’re at Day 17 overall. The plants are now clearly covered in pistils, with visible bud sites forming — which is why I’ll wait a few more days before doing the major cut.
That said, the hairdresser appointment is already scheduled: the blades need sharpening ✂️
There’s going to be a lot of defoliation. Plenty of material on these plants. The goal is clear: better airflow, better light penetration, and full focus on flower development.
Sometime next week, the next microbial feeding is planned. I’m really curious to see how they respond — ideally right when they’re fully locked into active flower production, so they can really use that boost. Another growth push is the last thing I want at this stage.
And then there’s this moment:
The grow tent window finally makes sense.
You look inside, and instead of just green stretch, you now see actual flower formation right in front of you. This is the phase you wait weeks for. A really beautiful part of the grow.
I’m genuinely looking forward to the coming flowering phase.
This is where it all comes together 🌸✨

Likes
1
Share

@WHITE_sleeper
Follow
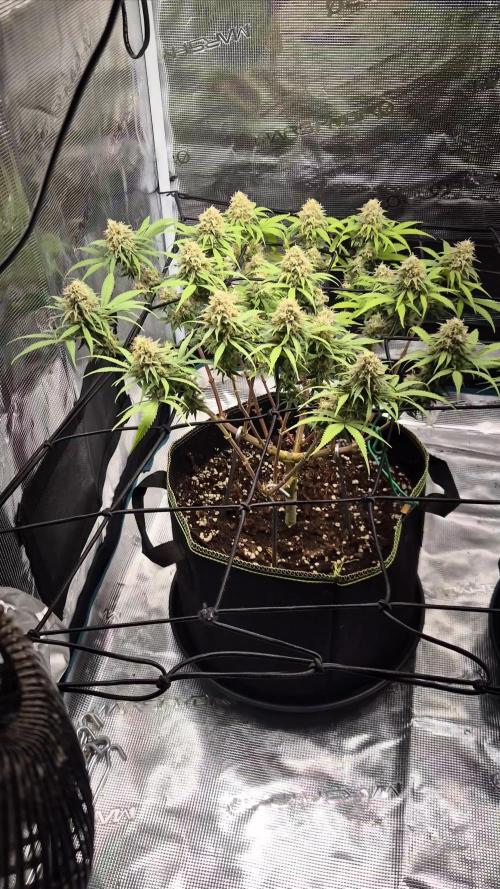
She has entered senescence with mostly milky trichomes.. She should be ready to chop in a week or so..

Likes
12
Share


@Lysidious
Follow
Was bummed out plant got red mites at the end but that’s fine, it didn’t not impact the grow (or at least I didn’t notice.)
Harvested at the end of the 6th week of flower. Trichomes had already started turning amber due to heat degradation (couch lock party) what trichomes that were not dust ridden or amber was milky so I’d say it’s ready.
Choosing the best time to harvest is still puzzling for me due to the fact that this is my 4th time harvesting cannabis.
Thanks for reading... more info to come ...TBC
Likes
81
Share


@NugLife420
Follow
Well it has finally come to an end. Well, at least the growing part; still need to dry and cure. I will update when I have a dry weight. Thanks to everyone who supported me in this grow. 😎

Processing
Likes
12
Share


@GYOweed
Follow
Added a 37w 5k few days ago and sat it ontop of another 2 gal so now closer to a bluer vegetation light spectrum.
Not bad at two weeks for an organic auto in a .75 gallon dollar tree pot!

Likes
5
Share


@BeefslayerBuds
Follow
Going well, have a small light burn on one of the Skrilla colas..sad, but must soldier on. Still very frosty. Colors are developing in the hair now and there is a noticeable change in each cultivar.
Nana Glue developing a red-brown hue and delicious Earthy, creamy terpenes. Skrilla is packing on weight and stacking, lowers are crowned in orange hair. Smells like Like Jolly-Ranchers.
PLCG is packing on some weight, all the buds are getting that spherical addition. Also, some of the frost on the leaves, termed 'frost rails' by a friend, have begun to turn a nice pink color.
Let's see where this grow goes this week. Maybe some color or weight.
The smell is very good. PLCG is like a scented highlighter, very lemon. 🍋
The Skrilla is like a sweet and sour candy, quite delicious.
Nana glue is Earthy and cream, very rich.

Likes
15
Share


@CzAlmighty
Follow
First time , i am tried cmh lights. and i am satisfied. beautiful harvest. Thank for watch🤟🏼

Likes
9
Share


@pzwags420
Follow
On day 1 the rez is at 6.2. The highest cola is 8.5" from the light.
On day 2 the rez is at 6.2. The highest cola is 7.75" from the light.
On day 3 the rez is at 6.1. The highest cola is 7.5" from the light.
On day 4 the rez is at 6.3. The highest cola is 7.125" from the light.
On day 5 the plants are smelling and doing well.
On day 6 I changed out the rez and PH to 6.1. The highest cola is 7" from grow light stretch is deff slowing down and should be over shortly. My avg PPFD at canopy is around 800.
On day 7 the rez ph is 6.0. The highest cola is still 7" away from light 😅 close but not too close in my small space.


Likes
3
Share

@PigBearMan
Follow
Hey there,
Everything‘s fine so far.
EC is 1.6, pH is ~6.
SanLights are now at 100% and ~40cm above the plants.
Since Flower Day 25 I give Green Sensation.
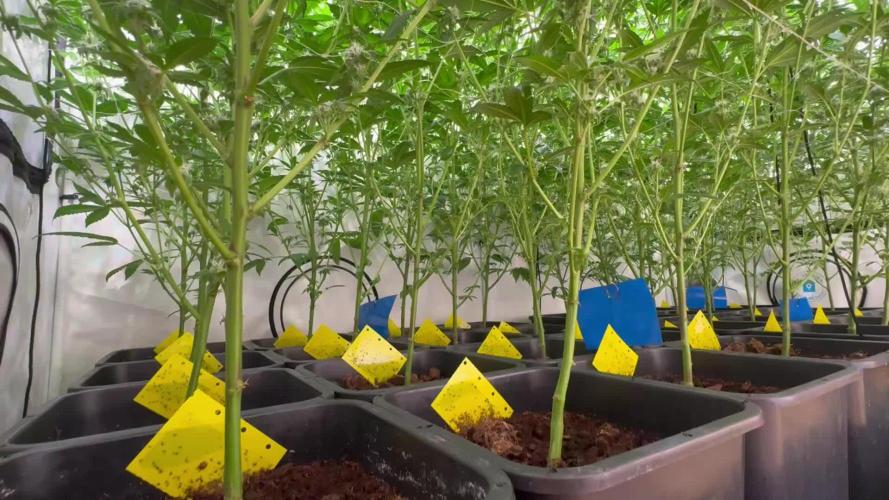
How do you like the field?
See you.

Likes
43
Share


@Johnny2Fire4U
Follow
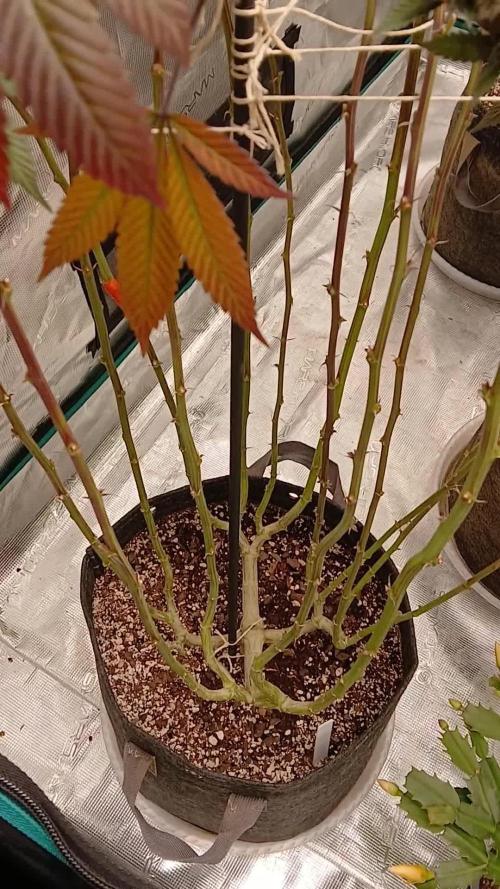
Well I finally had some time to really be up in the garden and I noticed pollen sacs on one of these females so I kicked her ass out the club she is now going to be outdoors if it messes with resin production so be it but I got her outside and I castrated every pollen sac off her so we will see if she still produces bomb buds.

Likes
36
Share

@GYOweed
Follow
New rule:
If your fan leaves aren't bigger than your hand and super green after a month of veg in 3 gallon pot then you got the wrong genetics or something.
Likes
21
Share


@Trickybis82
Follow
Hi all,
Finally at that stage and I am so excited to be able to write this out.. have been Flushing these 2 beautiful girls since Friday just passed.
They have also been flushed for 2days with flashclean so I just cannot wait now :)
Will have a harvest next week with some weights to follow early after that...
Good luck growmies.. stay tuned 😉 🌿🌱


Likes
9
Share


@Barb420
Follow
👋👋Hi 👋
Week 1 of veg🌱
Soil, Living soil 💦water only 💦
💦water Ph 6.3💦
Day 10 added live soils crop cover 27g
💦Water ph 6.3 x 300 millilitres💦


Likes
10
Share


@Jerrza
Follow
New week, plants start to produce loads of sugar and a strong smell is coming trough


Likes
12
Share


@Pinhead9169
Follow
This is week 3 with the addition of a purple kush auto (middle) I'm amazed at how well they are doing outside 😊