
Likes
Comments
Share


@Organic473
Follow
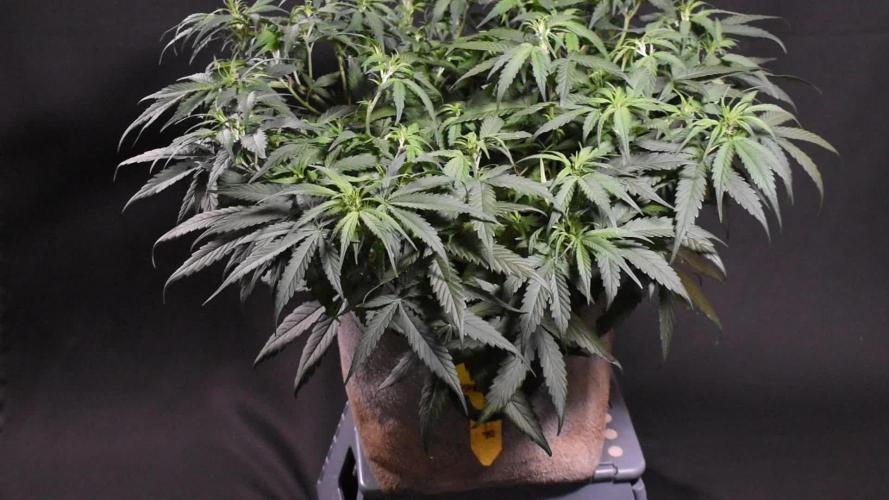
By the looks of her on week 9 I can say I Am impressed...she was fed some black strap molasses which I Know she loves...I expect some more heavy rains from tomorrow as the tropical storm passes through let’s see how she holds up after…airflow on this mountain 150M above sea level is really good so she dry out in no time….fingers crossed!

Likes
12
Share


@leafy_greenz
Follow
Note: Moisture and Temp readings are done in the mornings.
Lights are on an automated 17/9 schedule unless stated otherwise.
Drip water system waters 1 Liter every 9 hours.
Quick Notes: I notice as I go into full-blown flower, the plants are starting to need less frequent waterings, especially North. The watering system overflows her pot often, and the AKs soils feel relatively damp before the auto-watering starts. All plants are stopping their growth also. North is the furthest into flowering and is starting to smell and get sticky, the microscope is showing trichome development also.
📏: AK1: 36 in (91.44 cm), AK2: 44 in (111.76 cm), North: 24 in (60.96 cm)
Day 64 (Jul 29) - Manually watering today. All plants drinking a bit slower, especially North (probably had a 0.5 liter overspill). Refilling drip water system tomorrow to get a better pace for watering.
💧: Tap: 7.45 pH
Adjusted with pH down.
AK1: 1.5 liter (5.95 pH, 1 ml FloraMicro, 2 ml FloraGro, 3 ml FloraBloom, 2.5 ml CalMag) ~1220 PPM
AK2: 1.5 liter (6.05 pH, 1 ml FloraMicro, 1.5 ml FloraGro, 3 ml FloraBloom, 2.5 ml CalMag) ~1150 PPM
North: 1.5 liter (x pH, 1 ml FloraMicro, 2 ml FloraGro, 3 ml FloraBloom, 2.5 ml CalMag)
💦: 57% (37-67) - 🌡️: 27C (22-30)
Day 64 (Jul 30) - Noticing Plants drinking slower. Soil not completely dry in the mornings as usual. Defoliated AK2 a bit more. Attempted to Supercrop but decided not to follow through (crushed main trunk between fingers without bending it over)
Watered all plants and refilled drip water system with 14.2 liters.
💧: Tap: x pH
Adjusted with pH Down.
All: 14.2 liter (6.2 pH, 14.5 ml FloraMicro, 14.5 ml FloraGro, 33.5 ml FloraBloom, 33.5 ml CalMag) ~1250 PPM, ~2250 EC
💦: 49% (38-70) - 🌡️: 28C (20-30)
Day 65 - Plants look healthy. Set drip System to water 1 liter every 9 hours.
💦: 38% (36-65) - 🌡️: 26C (20-29)
Day 66 - Plants look healthy.
💦: X% -🌡️: xC
Day 67 - Trimmed some leaves below. Humidity spiked unexpectedly, buying dehumidifier.
💦: X% (40-79) - 🌡️: XC (21-29)
Day 68 - Humidity spike overnight. Manually watered AK1 & AK2, not North (didn't seem like she needed it).
Looks like the plants are needing a bit less watering overall.
💧: Tap: x pH
Adjusted with pH down.
AK1: 1.5 liter (6.05 pH, 1 ml FloraMicro, 1.3 ml FloraGro, 2.3 ml FloraBloom, 2.3 ml CalMag)
AK2: 1.5 liter (5.95 pH, 1 ml FloraMicro, 1.3 ml FloraGro, 2.3 ml FloraBloom, 2.3 ml CalMag)
💦: 45% (39-71) - 🌡️: 27C (20-29)
Day 69 (week 9) - Humidity spike overnight. Set water system to water 1 liter every 11 hours. Dehumidifier came in mail, monitoring effectiveness throughout the day and tomorrow. Refilled water system and set to water 1 liter every 10 hours.
All: 14.2 liter (6.2 pH, 14.5 ml FloraMicro, 14.5 ml FloraGro, 33.5 ml FloraBloom, 33.5 ml CalMag) ~1550 PPM
💦: 44% (36-70) - 🌡️: 26C (19-29)

Likes
23
Share


@elementhc
Follow
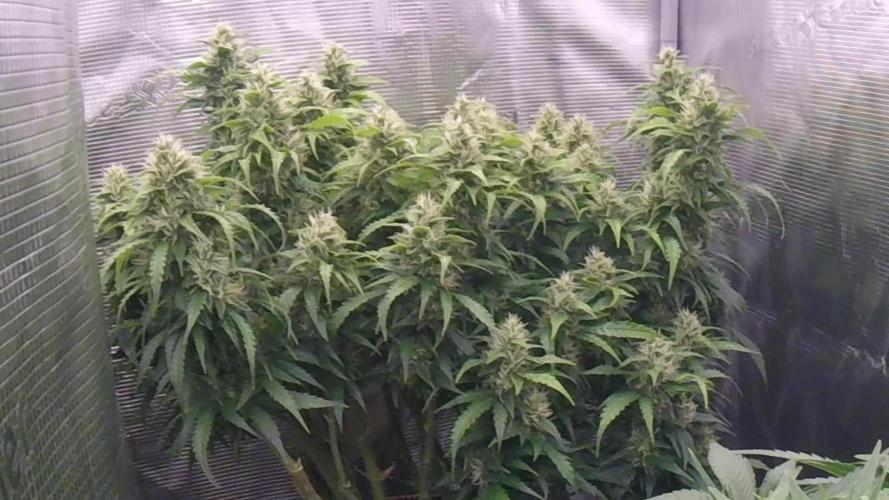
A few of the autos have mostly milky trichomes but no amber yet. Maybe another two weeks.


Likes
114
Share


@Natrona
Follow
Lemon Cake & Lemon Drizzle
Week 5 This week 5/5-5/11
Germination April 6.
Vegetation
Week 1 water only
Week 2 water only
Week 3 added recharge and TPS1 increased ppm to 570.
Week 4 continues with recharge and TPS1. I added Fox Cal mag increasing ppm to 685 - 805.
Week 5
TPS1 9ml/gal
Recharge 5 ml/gal
Fox Cal-mag 5 ml/gal
This was an exciting week for my ladies. It started out with the usual feed and defoliation and training. With my upcoming vacation, I am going to be hardening off these ladies to relocate to their outside location. I checked the expected weather forecast for the week. Looks good to start hardening off. Partly cloudy with temps in the low to mid 80s just like in their tent. So that’s good. Night temperatures were in the 50-60s. This is much cooler than what they are used to as our house is at 73. Our summers are hot and humid with frequent thunderstorms. They need to get used to what mother nature will provide.
I had planned to bring the plants back in the sunroom but since conditions were similar, I let them stay outside every night. And every night but 2 it rained. I did not water or feed nutrients this week.
I am attempting the scrog technique on all plants. I am using a peony cage as the support structure. The cages are about 2 feet high. This may not be enough side or top support as she grows and may have to resort to tomato cages.
Took pics May 6,9, & 11 Lemon girls both had mutations at germination. Lemon Drizzle split ot topped herself. This creates two main plant stalks. The primary and a smaller secondary stalk.
Lemon drizzle has stretched above the scrog top opening up her structure. Today she has an erratic top canopy in multiple levels with multiple bud sites. Interesting her nodes have for this week started to develop off set from each other.
Does that mean she is going into flower sooner than expected?
Thanks for the visits, likes and comment, I appreciate all the plant love💚.
Have fun & love what you grow 💚
Sending you good vibes of love, light, and healing 💫
💫Natrona 💫
BARNEYS FARM- LEMON DRIZZLE
Lemon Drizzle Cannabis Seeds
Type: Feminized Weed Strain
Lemon Drizzle Strain by Barneys Farm
Indulge yourself in the tantalizing aroma of our Lemon Drizzle strain, a sensually crafted cannabis strain that is sure to tantalize your senses and leave you in a state of blissful euphoria. Bred from a seductive blend of Super Lemon Haze and OG Kush, this sativa-dominant weed strain will transport you to another plane of existence.
With a flowering time of 60-65 days, Lemon Drizzle's exquisite buds are bursting with a potent THC percentage of 20-25%, ensuring an unparalleled and satisfying high. The complex terpene profile of this alluring strain is sure to captivate your senses with notes of zesty lemon and a hint of earthy Kush undertones, providing a flavor explosion that you won't forget.
This tempting beauty grows to a height of 1m - 1.2m indoors and 1.5m - 2m outdoors. You'll be impressed by the generous indoor yield of 550g/m2, while the outdoor yield of up to 1.5 - 2kg is beyond substantial. Experience the ultimate in relaxation with Lemon Drizzle's outdoor flowering time, which begins in early October, allowing you to bask in the sweet sunshine and savor the heady effects of this tantalizing strain. Succumb to the charms of our Lemon Drizzle strain and discover a world of unadulterated pleasure that will leave you in awe.
Is Lemon Drizzle Indica or Sativa?
The Lemon Drizzle strain by Barneys Farm is 85% Sativa 15% Indica.
What is the best way to store my Lemon Drizzle strain seeds?
To properly store Lemon Drizzle seeds, it is recommended to keep them cool and dark in an airtight container ideally in a refrigerator with proper labeling and dating, avoiding freezing.
Lemon Drizzle Cannabis Seeds Strain Specifications
Type: Feminised
Genetics: Super Lemon Haze Strain x OG Kush Strain
Photoperiod: Normal
Sativa %: 85%
Indica %: 15%
Flowering Time (days): 60 - 65
Feminised Outdoor Harvest Month Week: 1st-2nd week - October
Indoor Height (cm): 100-120cm
Indoor Yield (g): up to 550-650 gr/m²
Outdoor Height (cm): up to 150-200cm
Outdoor Yield (g): up to 1500 gr/plant
Taste: Sour, Lemon, Sweet, Citrus Fruits
Aroma: Sweet, Sour, Citrus, Pine, Earthy
Effect: Energizing, Uplifting, Focused, Motivated
PREMIUN CULTIVARS LEMON CAKE
Lemon Cake Seeds
Lemon Cake strain seeds generate typical Sativa buds known for their heavy trichome covering against a bright green background. Let's look at this great strain and learn about its genetics, growing information, and how to obtain it.
Cultivar Profile
Terpenes Caryophyllene, Myrcene, Terpinolene
Strain Type Sativa
Difficulty Moderate
Height 30 in – 78 in
Yield (oz/ft2) 1 – 3
Flowering Time 9 – 10 weeks
Harvest Month October
Pack Size 3, 6, 12, 24
Seed Type Feminized
Brand Premium Cultivars
The History of Lemon Cake Strain Seeds
Lemon Cake by the European-based firm Heavyweight Seeds is a strong Sativa-dominant hybrid of Lemon Skunk and Cheese. Lemon Cake seeds are easy to cultivate, especially outdoors, with a 9-10 week flowering cycle, squat shape, and large output.
How to Germinate Lemon Cake Strain Seeds
There are several ways to sprout your Lemon Cake strain seeds, but they are more complex, inexpensive, and efficient than the paper towel technique. Premium Cultivars suggests this method since it is simple to implement, involves commonly available tools, and ensures germination. Here’s a 9-step process for geminating Lemon Cake seeds:
1. Collect your essential tools: Lemon Cake seeds, dinner plates, distilled or bottled water, tweezers, and a working table.
2. Wet your paper towel sheets and gently squeeze the excess water.
3. Set one of the paper towels on the dinner plate and the other aside for later usage.
4. Pick your Lemon Cake strain seeds with tweezers and spread them on the towel sheet, allowing an inch between them.
5. Cover your cannabis seeds using the second paper towel. Check if the towel is moist, and if not, add water.
6. Lift the towel sheets and ensure no standing water is present. Return the paper towel and your Lemon Cake seeds carefully.
7. Place the setup in warm, dark areas, particularly a cupboard or drawer (20-120 hours).
8. Check to determine whether your Lemon Cake cannabis seeds are sprouting regularly, and if the paper towel remains moist, add water if it does not.
9. Once taproots have emerged from your Lemon Cake seeds, transplant them to your ideal growing medium.
Why are Feminized Seeds Better than Regs?
Feminized cannabis seeds yield only female plants (or around 99.9% female). Conversely, regular seeds generate a mix of male and female plants. Each seed strain has advantages and cons, with the grower’s specific needs ultimately determining the best. Gardeners mostly use regular cannabis seeds to create their strains, but feminized cannabis seeds are great for farmers looking for a cannabinoid-rich, bud-producing crop. Male cannabis plants generate just pollen sacs and no resinous blooms.
This resin contains cannabinoids and terpenes, which are responsible for cannabis’ desirable properties. If male plants pollinate female plants, their blooms will cease releasing resin and begin producing seeds. In short, male cannabis plants do not aid in pursuing massive, powerful harvests. Nonetheless, male plants are critical to the survival of the species as well as the breeding and improvement of cannabis strains. So don’t dismiss them right away!
Growing Lemon Cake Strain Seeds
The Lemon Cake cannabis strain has grown in popularity due to its ease of cultivation and high yields. It’s a medium-sized plant with long branches that can use some assistance toward the end. It is rather ordinary in terms of temperature and disease resistance since it is not overly prone to unfavorable circumstances or pests. However, if you grow with hydroponics, you won’t have to bother with any of that.
Should I Grow Lemon Cake Strain Seeds Indoors or Outdoors?
Lemon Cake thrives in both indoor and outdoor environments. The height of this cannabis strain is one factor to consider: it can reach heights of 200cm, requiring either a large grow space or a yard to attain its full potential.
Growing Lemon Cake Strain Indoors
If you want to cultivate your Lemon Cake seeds (you can buy these finest seeds from Premium Cultivars) inside, you should invest in exhaust fans or carbon air filters due to the room’s strong odor. Also, if conditions are ideal, growers should expect a large yield after 9-10 weeks of flowering.
Growing Lemon Cake Strain Seeds Outdoors
Outdoor growers can harvest their Lemon Cake buds around the middle of October.
How Much Do Lemon Cake Strain Seeds Yield?
Lemon Cake can produce roughly 25 ounces per plant outdoors and 21-25 ounces per square meter when grown inside. Although you might be tempted to cut it down right away, waiting as long as possible before harvesting it and curing it correctly to enhance the quality is recommended.
How to Get Better Yields from Your Lemon Cake Strain Seeds
Harvest rewards are frequently a mirror of cultivation care, so be kind to your Lemon Cake plants, and they will be gentle with you. However, growers should regularly top and prune their Lemon Cake plants to improve airflow and light exposure, thus raising yields.
The Best Grow Medium for Lemon Cake Strain Seeds
Cultivators can grow Lemon Cake seeds in hydroponic or soil systems. However, experts propose using a precise hydroponic arrangement to achieve optimal production and control its occasionally unpredictable growth rates.
The Best Climate for Lemon Cake Strain Seeds
Lemon Cake strain enjoys warm, semi-humid areas and is inherently resilient, having excellent mold and disease resistance. Growing outside is only acceptable in warmer climates, as this cannabis strain needs sunlight.
Problems to Look Out For When Growing Lemon Cake Strain Seeds
When cultivating Lemon Cake cannabis seeds, the primary issue to watch out for is dehydration and overwatering when the crops are little and susceptible. If the leaves of your Lemon Cake plant turn yellow, this indicates that the plant isn’t receiving enough oxygen to the roots.
How Difficult is it to Grow Lemon Cake Strain?
One of Lemon Cake’s noteworthy characteristics is its simplicity of cultivation.
Are Lemon Cake Strain Seeds Suitable for Beginners?
Yes, these cannabis stain seeds are great for novice growers, and they will obtain outstanding results.
The Best Grow Techniques for Lemon Cake Strain
Topping
Topping encourages the plant to grow horizontally rather than vertically, but when it does so is determined by soil condition, plant health, light, plant size and age, and growth goals. Topping cannabis reshapes the crop in a way that improves light dispersion significantly. Cutting one tall branch to make multiple new ones at the same height guarantees that lower (buds on lower branches) also receive more light.
Another essential reason to top your cannabis crop is for better height management. Logically, the two new branches develop slower than the one branch. Topping a cannabis plant separates its development into several branches. Making the plant grow less in height while putting more energy into expanding broader. This is incredibly convenient for growers, especially for limited indoor plants.
Trimming
Trimming can be an excellent technique for cannabis producers who have been cultivating a plant for a long time to connect with it while boosting the quality and form of the buds. There are two methods for trimming cannabis plants: wet and dry. Wet trimming, as the name implies, happens when the cannabis plant is still wet. This means you harvest your plants and immediately begin the trimming procedure. Conversely, dry trimming will necessitate drying your crops out for a few days before you start trimming the bud.
If you’re cultivating cannabis at home, you’ll almost certainly have to perform all this by hand. For devoted producers, machine trimmers are available, making the operation considerably less labor-intensive. However, due to their high cost, commercial farmers mainly utilize them. Trimming can be time-consuming for many growers, but it’s also thrilling since the growth process is almost complete, and your cannabis is almost ready to have. After you’ve completed trimming, there’s one more step left until you have a great bud: curing.
Pruning
Pruning is the practice of eliminating extraneous shoots, branches, and leaves from a plant to push it to redirect its limited energy into its present and established development. When left to its own devices, a cannabis plant will frequently grow too large to sustain itself properly with the quantity of energy it generates. If left untreated, this can lead to several minor bud sites as the plant strains to survive while creating bud during flowering. By eliminating unneeded and weak growth, you push the cannabis plant to focus on what remains, resulting in a stronger plant capable of producing a few huge buds rather than many little ones. This frequently leads to higher total yields.
Equipment and nutrients
Pots: 5gallon Air pots
Soil Fox Farm Happy Frog Amended with worm castings, dolomite lime and mychorihiza Recharge
=================================
Equipment: AC Infinity
CLOUDLAB 844 – Advance Grow Tent 48”x48”x80”
CONTROLLER 69 PRO – Grow Tent Controller
CLOUDLINE LITE 6 - Inline Fan 6"
IONBOARD S44 – LED Grow Light Board 400W
CLOUDRAY S6 – Oscillating Circulation Clip Fan
Carbon Filter 6”


Likes
20
Share


@STAYINGONMYMAINCBATORUNTWO
Follow
This was my best experience yet with growing and am quite proud of myself! Training went almost perfect and the plants handled the resistance strengthened up and sprouted so many buds! All we’re dense and frosty by the end time! I dried in brown paper bags in 17.5-18.5c temps with a humidity of 40-50% and took 7 days to dry! I have them curing in 3L glass jars with 62% Boveda pack inside! I’ll be able to really taste the flavour then but it’s already strong and tastes great! Royal queen seeds are definitely worth a top place on seeds!
Added a few photos after cure! The smell is like sweet pungent and flowery and the high is full body and u get itchy eyes and dry mouth!


Likes
1
Share

@Nickeluring
Follow
There have been some serious training this week. LCC is flowering quickly and hasn't needed anymore training. She has had some leaves removed. Guava and Apricot are a bit behind LCC in flowering. They have been trained heavily this week. They now both have an insane amount of top bud sites. These babies will get very interesting in a few weeks...
Their heights:
Guava: 28 cm
Apricot: 36 cm
Lemon Cherry Cookies: 50 cm

Processing
Likes
5
Share


@Cannibalgardens
Follow
She has been doing better then her sister ... pH issue as usual and over watering too , my tent is bigger and I've got the temperature dialed in was at 55 lows and 65 highs for a week which hurt the whole garden a lot .. glad things are better and once it's healthy next week hopefully I'll flip her over to flower and get this show moving along quicker .. thanks for stopping in canna family .. cheers

Likes
12
Share


@2Stones1Bird
Follow
Checkout my Instagram @smallbudz to see the Small budget grow setup for indoor use, low watt, low heat, low noise, step by step.
13/12/2019 - Change the light schedule to 12-12h after 8 weeks of no signs of flowering I think is a photo not and auto.
16/12/2019 - Fed her 1.5l of 6.5PH water with 0,5ml of each: Grow, Bloom and Max, and 1ml of each: Heaven, Alga-mic and Vera, noticed about 10% run off, I use about 1/3 of the nutrient dosage on the chart, to achieve about 200/300PPM (500 scale).
17/12/2019 - Did some defoliation on the lower branches mainly.

Processing
Likes
34
Share


@DudeGrowsWeed
Follow
Sour Diesel Haze looking and smelling wonderful!! She still has a few weeks til harvest, but she's getting close. I have a feeling this will be my Diary of the Month entry for June. 😃

Likes
15
Share


@Insaniac_0
Follow
Flower Week 6 Day 42 to 48 - 3/26 to 4/1
Stepped up my attention with these this week and hope I didnt let them go too far for a decent harvest. I defoliated for the last time this week and spotted more purple leaves. The buds are super dense so I have higher hopes than I did last week
Feed this week was 1.25 gallons 2 times. 700ppm total before add-ins. I used 400ppm Bloom concentrate mix (recipe week 5). Then I added 1ml/gal of CaliMagic (General Hydroponics 1-0-0) PH balance this week was 6.6
I plan to feed 1.25gal 2 times with 6.6ph and half nutes. This will also be the same for all remaining feeds before harvest. From this point Im simply watching for signs to harvest in the pistils, calyx, and trichomes


Likes
1
Share

@hinterhofgrower
Follow
.
🌱 : test harvest on day 86, 40,3g wet, day 88 44,5g wet
💧 : 4l day 85, 4l day 88 no nutrients
💡 : Dli: 45 mol/m²/d
🤔 :
Likes
1
Share


@Greenpalace_420
Follow
Ya vemos q están desarrollando unas buenas hojas y hemos incorporado 2 esquejes q nos dejo un amigo q estan medios flojitos y vamos a echarlos para adelante seguimos


Likes
13
Share


@DaisyNabis
Follow
cada dia mas glotonas mis bellas, estoy aplicando riego casi día por medio, solo una vez a la semana las abono, el resto solo con agua. hice algunos amarres a los tutores ya que están en pleno crecimiento
Likes
11
Share


@DesDeGrower
Follow
Pow pow and welcome in Week14 - official Week8 of bloom 😃
There is no much changes from last week apart from buds getting more dense with pistils changing colour to orange all over.
Skywalker is absolutely full of knuckles or “good foxtails” as some of you will say.
LemonWalker bending as mad due to bud weight 😍
At this stage both girls are in flush mode getting nothing but plain water.
Pinched small stem from each of them to run some pre-test...couldn’t resist haha.
Stay tuned for updates 🙌
Video Update Day 5 of week 8 (week14)
=> check this fist size Budz 😍 ...they are hard as a freaking stone and I’m not able to grab it in my big hands 🙌
That’s the last update before the harvest this weekend.
- last two days in light before 48h darkness.
Stay tuned as in next couple of weeks last harvest update with reviews and weight results ✊🙌

Processing
Likes
10
Share


Processing
Likes
8
Share


@gothboiclique
Follow
Hubo muchos cambios, no pude asegurar las hojas y se terminaron marchitando la mayoría, ahora creo yo que esta recuperándose, espero que sea este el caso. Solo estuve regando con agua y nada mas, me da lastima todo lo que le paso, tan bien que iba, y ahora le paso de todo, por otro lado se ven bien los cogollos, no tan desarrollados como me gustaría pero creo que en estas semanas van a mejorar.
Likes
14
Share


@goeser
Follow
The ladies started to flower
They dont need a lot of attention even if the leafes are looking a bit meeeh .
Lets see what the next days being
Likes
9
Share

@DaisyNabis
Follow
aplique preventivo de la semana, mis bellas han ido creciendo paulatinamente,manstengo hidratadas con agua y solo alimento una vez a la semana.
