
Likes
Comments
Share


@NCgrower252
Follow
Next week will flush plants with flavored extract and unsulfured Molasses. All is great!


Likes
19
Share


@MrWolfe
Follow
Day 56 starting flush then another round. No washing machine in the next round.:(
Rotten cookies 8 had 2 stamen that came out of a bract so possible hermaphrodite there. That's why we hunt, number 6 is frosty as heck and 1 and 4 have the craziest bud structure I've seen so far

Likes
13
Share


@CalimannpackZ
Follow
Sorry I didn’t upload week 5 Ngl it was a bad week i suffocated 4 plants I had to defoliate some leaves because of nutrient defeincies making the plant look diseased I managed to pull through there back healthier again I got a few yellow spots but there goint but other then them 4 there’s some nice bud and bud spots really starting to come through excuse the 4 shittier looking plants and the defoliated skimpy one! Other then those problems that I have resolved I’m happy again last week not so this week happy!!! It’s all trial and error first go I haven’t trained any plants I will do on my next grow definitely!


Likes
39
Share


@AestheticGenetics
Follow
4/15/25 Things are progressing nicely. Some plants dont seem to be doing too much but 3 of them or so that are really standing out.
Im curious if some of these are going to be longer flowering time than anticipated with the very obvious sativa dominant plants.

Likes
67
Share


@Clutch
Follow
Hello everyone
A fun week again. Plant is showing nice development.
I really try to focus on exposing the future budsites.
Last year I didn't tuck away the fanleaves enough.
This grow I'm tying them all down as much as possible.
I find it hard to place them right so every 2 days I do some adjustments.
The evolution I have right now is exactly the same as last year so I gotta have faith in the next 2 weeks that she will grow big. Previous grow I had about 60% of the possible canopy.
With the right techniques I'm sure I can reach about 80% canopy coverage.
I know I'm not the best LST student but I'm trying 😄
Any advice is welcome
I'm still giving water with a bit of nutrients but I'm gonna add plain 6,5 PH water from now on. Every second watering during the week plain water. A good rain now would also be very welcome 😄
So far so good
Hope everyone is okay
See u next week
Happy growing 🙏

Likes
1
Share

@RageTdavis
Follow
Im enjoying this autoflower run so far its showing me a little nutrients can go a long ways. Not just 10ml or plus every feed out of the bottle. I've been feeding 1ml or less. Ph is simple easy I barely have to go no more then .4 each feed to up my ph. I hope I she stretch well before flowering 💐
best of growing
Likes
6
Share


@Growbody
Follow
Tag 88: Die Epsilon F1 Automatic von Royal Queen Seeds hat den besten Zeitpunkt zur Ernte erreicht. Blütetag in der Erntezeit. Das verspricht den höchsten Ölgehalt und damit die höchstmögliche Aromaausbeute. Die Buds sind klebrig und sehr hart. Ich versuche die Schöne langsam zu trocknen, ich schalte nur abends für ein paar Stunden den Venti an. Das Nassgewicht ist mit einer Küchenwaage gemessen und nur grob über den Daumen ernst zu nehmen. Schliesslich zählt das Trockene. 🥦 😀
Likes
3
Share


@WeedWagon
Follow
Day 21-28:
- watering plants 2l/every 2 days
- was on a trip humidifier didn't run
Big shout out to my mom watering my plants while I was away.
Likes
2
Share


@GrowTF
Follow
Es Fehlen noch paar Wochen zwischen drine wenn ich mal dazu komme wird es noch aktualisiert.
Leider ist mein 80x80 zelt deutlich zu klein.
die Linke Pflanze 94cm wurde absichtlich um 0.2 mS überdüngt und ist doppelt so groß wie die Rechte.
Likes
6
Share


@Weedganja420
Follow
Muy buenas!! Pues asi va esta bonita Gorilla Snow Ultra CBD. Lleva 2 dias con el fotoperiodo de floracion. Ahora estirara algo mas buscando la luz, antes de empezar a producir sus bonitas flores

Likes
Comments
Share


@Papapeyote
Follow
Entre la semana pasada y esta pasaron muchas cosas..
Tuve un problema con acaros que me termino costando algunas plantas jovenes, a las cuales sustitui por unos clones

Likes
11
Share


@Andres
Follow
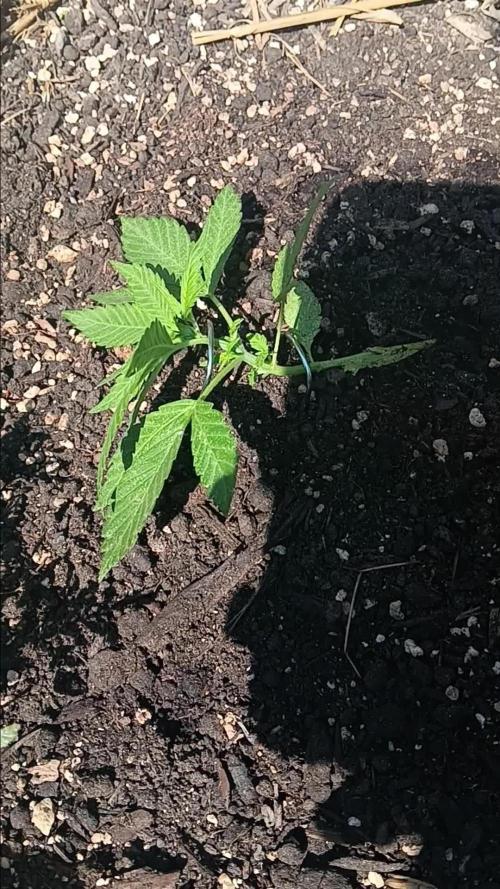
she is growing healthy ... in her fourth week ... outdoors she has grown in form ... moderately ... and just waiting for her to show her great potential.......
Likes
2
Share

@Ekoms
Follow
Today add plagron guano ..cca 150 g /20L .one girl have a smal flowers . Others looks good .. and video with new 60x60 box for veg phase with sunpro sunboard 240w ..( super boof and mimosa orange punch)

Likes
15
Share

@PavementPunk
Follow
Did one more molasses water 2 tsp molasses to 1 gal water then a final plain water ph 6.3 a couple days later. I think tomorrow is harvest day. I believe i wouldve gotten a better yield if i had the lights lower and or turned up higher. Also only 50% strength pk booster on autos from now on. Lessons learned hopefully next harvest is better.


Likes
95
Share


@Canna96
Follow
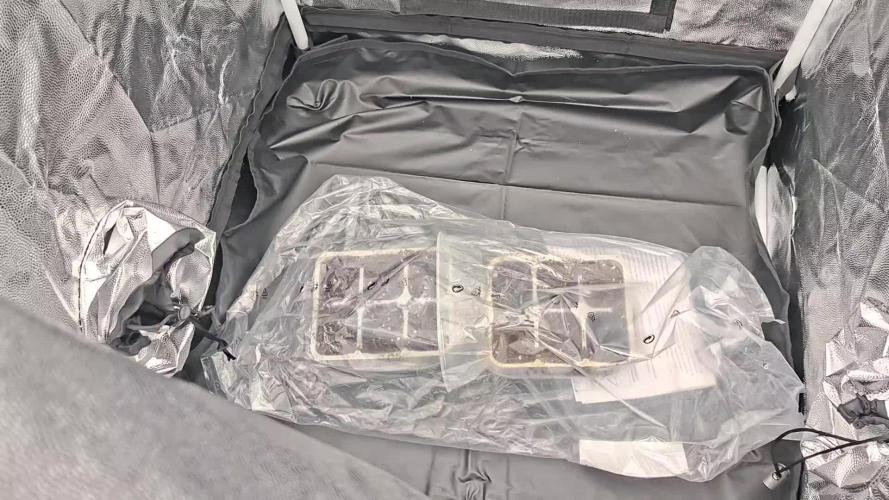
So I was in week 2 with the Cream Mandarin when I realized I was not happy with her growth for what I want her to do, and it was totally my fault, and not the Breeder, so I decided to re-start as to represent Sweet Seeds properly as they have sent me pretty much whatever I have requested. I was attempting to start seeds in coco coir, which was very tough to satisfy the coco with Cal-mag and not burn the seedlings in the process. So I started using ProMix seedling starter and have been very happy with it so far. The other issue I ran into was satisfying the humidity levels for my seedlings, and also keeping my flowering auto happy. So, my final decision was to purchase a small 2x2 tent to double as a seedling tent and a drying tent. I hooked up a little 4 inch exhaust fan, put a heat mat on the floor, a small fan, and a Spider Farmer SF1000, a hydrometer, and a humidifier which is keeping it around 70% RH even with the little exhaust fan running 24/7. The toughest part of learning to grow Cannabis for me has been days 3-17. Once I get there I seem to be good. If anyone has any tips please hit me up. Thanks for stopping by, be safe, and Blaze On!

Likes
20
Share


Likes
20
Share


@GR0WER
Follow
Hello, my growing friend! I'm downloading new photos and day comments every new day, so go back and see full last week diary right now!
---------------
New week starts.
🌞12.12.2022
My girls looks healthier then ever after I flushed them both with 'GHE Clean' solution and gave them 75% of nutrient's 'Pre flowering' doze. I hope this trend will last till the very end of this run. Flowering in progress!
I sprayed them with 'SeaWeed' as usual and that's all for today's treat.
🌞13.12.2022
Today I watered my babies with 75% of 'GHE' nutrients plus 'Advanced PK' in a half of recommended doze. Their leaves looking downwards after the lights was ON and i think it's because of poore watering cycle or it's overheating. I increased lamp to plant distance to 40cm. I'll try to water them more often from now.
I sprayed them with 'GHE Protect' solution to stimulate immune system and it's a last time i using this nutrient.
Upd: 10hrs after watering they looks fantastic. It was water deficit. Flowers developing and smell increased.
🌞14.12.2022
I think my ladies like PK complex i gave them yesturday. Plus 2cm per 24hrs. More stigmas. Healthier look.
Ph don't want to go down, it stays ~7 ignoring sulfur I putted in substrate two waterings ago.
'SeaWeed' spraying today and nothing more.
🌞15.12.2022
+1cm today.
I changed girls diet.
Now they'll take 'GHE SeaWeed' with water directly. Plus 'Advanced PK' in a 80% of recommended dose. Also I stopped giving them 'GHE Mineral Magic' and 'GHE Diamond Nectar'. They aren't necessery when flowering in progress. All other nutrients ('GHE Flora TriPart', 'GHE O.G.Bloom') - goes in amount of 75% from recommended doze. I don't want to overfeed my babies. Also, EC of solution is ~1.2 as well. PPM is 830. I think this are max numbers to reach.
They were good sprayed with 'GHE Protect' once more. I'll spray them with pure water from now.
Upd: Before watering all leaves are bent down (I watering my plants every 48hrs) and they are rising up in a couple hours after the procedure. I need to water them more often, but I have my job wich cause me to hold some steady watering periods. I'll wait some time more and then will shorten watering time to once per day graphic.
🌞16.12.2022
And again +1cm per 24hrs.
It's nothing planned for today, only clean water spraing.
Watering stays for tomorrow.
I turned ON my main ventilation with two charcoal filters. There is no signs of a smell now, but it's too noisy. It's like a car engine running near my bed all the time. Well, I need to sacrifice something to get good results...
I love how my BPPa#2 looks. It's big and bushy. Now You can clearly see it's future bud brunches and I'm really satisfied with it growth. #1 is much smaller and it forming not so much yields. There are signs of overfeeding on it's leaves and that's why it goes like this. I think #1 was too small when i started feed them bouth in a 'pre flowering' mode. #2 swallowed it, but #1 couldn't.
I think she'll made it, with slightly smaller size, but as delicious as #2 will be.
🌞17.12.2022
I fed my girls with a seme mixture without 'G.H.Bloom' since it is bloom activator. It was really hard, because I got ill yesturday and have 38° temperature. But feeding is feeding. And clean water spraying, of course.
Upd: +4cm per 36hrs (I forgot to do mesurments in the morning).
🌞18.12.2022
Nothing special today, only fresh water spraing.
+1cm per 12hrs (almost 2cm)
My BPPa#1 and #2 looks different. #2 already has violet colour in its stigmas nodes. #1 all white and it has smaller hight (20cm, and #2 has 28cm). It looks like different strain. I don't think it is so, but interested, why.
------------------------
Week ends.
Likes
422
Share


@Crashoverite
Follow
Hi all,
Welcome to my🍌💜👊 week update
Thank you so much for all support on this bananas journey. Much appreciate all your likes, follows and comments. 🙏💚❤️💜
Week 13
Jan 8- Jan 14
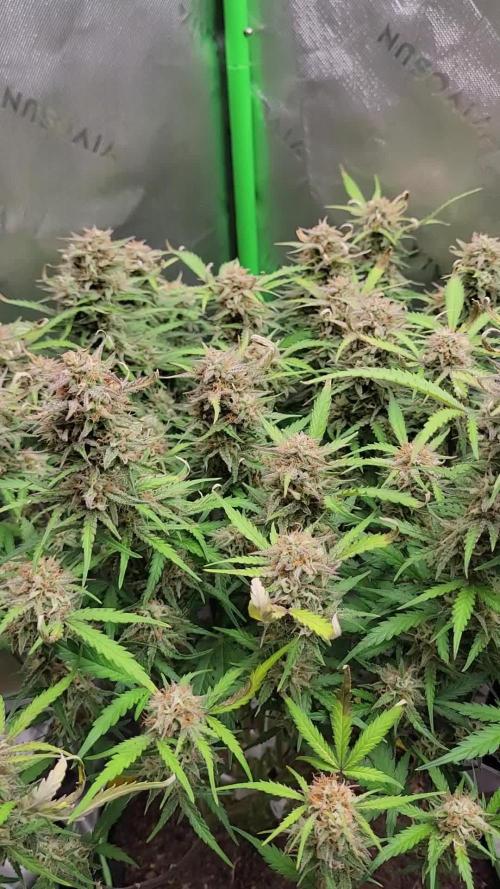
This was another amazing week. Girls are behaved very well. Drinking their juice like crazy. 2 waterings of 9ltrs on Jan 10th and Jan 13th. Runoffs at ph 6.2. Buds are gaining some serious weight and the trichomes development is of the charts. Girls are covered with frost. Trichomes are mainly milky now with individual ambers here and there. On Jan 10 noticed on one Athena top colas a white topped bud! It's something that has never happened to me. It may be only led bleach or it's something abnormal and phenomenal. It's white and has red and amber pistil hairs in between and all covered with trichomes. Few days after. White coulour is not spreading and not seeing any damages. The smell in my cabinet its insane. Very sweet scents. I wouldn't say bananas but definitely sweet berries and gummies 🤤 new dehumidifier doing an amazing job. Humidity when light is on is between 49-54% and 52-58% when lights are out.
It's all looking that my 🍌💜👊 girls will be ladies very soon. Harvest is coming big time. Next week planning to gradually cut nutrients down and prepare for flush.
Stay tuned for new week update very soon!
Peace and love brothers and sisters ✌️💚👨🌾
Links
https://2fast4buds.com/seeds/banana-purple-punch-auto
https://plagron.com
https://www.biobizz.com/
https://fishheadfarms.com/
Likes
2
Share


@Passionatos
Follow
The plants are very healthy I am running the low feeding chart from Terra aquatica at the moment. Ec is 0,9 ph 5,8