


Processing
Likes
Comments
Share


@Green_Friends_Inc
Follow
Commencing Day 36/Week 6 on November 28th
D36
Still slow and steady growing. Some much more slow and steady than others.
I am hoping by the end of this week or by sometime next week I can flip to 12/12 and get cuttings.
My goal is medium/small size plants with medium sized yields and to hopefully 🤞 find at least one keeper of the bunch. Reason being I have a lot going on and want to see whats the best I can get with light work load. Bigger plants=bigger work loads.
I also noticed the Boss Hogg1 must be Canadian 😄 one of the leafs is a maple leaf shape with no finger separation (aka duck foot mutation 🦆; see photo). This is the same plant I called a Purple Tarantula in one of the earlier weeks. Definitely a freak.
Day37
Filled all buckets till water line was bubbling into net pot. Filled with oxygenated &(dechlorinated) house water. Added 10ml Clonex per bucket. Some needed pH but not much on .2 off from 5.8. ppm is around 800-900. Leaving lights on again overnight. (Cold front coming).
Day 38
Added 5ml Cal Mag to each bucket. Added more fresh water to bring PPM back down to 800. pH sitting around 5.9
Noticed 818 Headband was hiding a tiny clover friend. I'll keep it there for now. Maybe find a four leafed clover for good luck 🤞
Also noticed that the sativas phenos are being picky eaters compared to the rest.
Also noticed the 818 is catching up a little more. Definitely a nice healthy steady growth. Just quite a bit slower then the Gorilla Zkittles.
Lastly tonight the plants will go into 14 on 10 off. This is to induce stretching (they are sooooooooo short; due to 8 on 4 off light schedule) and maybe preflowering also. Won't be long!😄👍
Day 42
Few days in the new light shedule is working great. Plants seem to be getting ready for me 👍
I've also switched the plants around to accommodate the grow a little better (ie in order of size)
The 818's and Raspberry is catching up slowly to the GZ giants. (& looking great 😄) but man these GZs are thirsty girls, they drink the ppm and water levels in one day what the others take in 3 or 4.
Needless to say I've been pHing everyday basically and adding water and light nutes to keep around 800ppm and 5.8pH. maybe only mentionable is that the GZs needed more nutes (ppms dropped about 200ppm to 600 in two days) and pH balancing (pH shot up to 6.2 in two days) than the others.
I'm getting anxious to flip and cut. The GZs are right where I want them. The others, not yet. I'll have to find a happy medium where the runts are at least so big with out letting the GZs get too big.
Thank you for reading and watching



Likes
9
Share


@TheBulldozerSicily
Follow
Queste piante sono state fatte al massimo dello stress, al minimo dei consumi. Con 300 watt totali, niente riscaldamento, solo ricircolo d aria e luce, anche nell'acqua pochi nutrienti, si vede il risultato finale abbastanza scarso, non ho avuto tempo d stargli dietro, ma con tutto ciò qualcosa ho raccolto.

Likes
16
Share


@Chubbs
Follow
420FASTBUDS
FBT2107 WEEK 7
These 2 beautys couldn't be growing any better than the way the are. Both have a bunch of flower sites that are maturing nicely. I did give a light defoliation to the lower nodes on the branches. Could almost say a little lollipoping.
Happy Growing

Likes
15
Share


@FishTankGrow
Follow
Day 32 - Heater was blowing directly on a couple of the leaves that turned brown. Cut them off. Raised lights up again. I think my development is a little slower than others but I have had a lot of trial and error.
Day 33 - added tomato rack for LST. growing nicely.
Day 34 - Stopped nutes as I was getting a little leaf burn in lower leaves. Looks good otherwise. Lights are dialed in.
Day 35.- This is what too much light looks like.
Day 37 - Switched to the grow light. Moved the heater. Growing nicely.
Day 38 - Lights dialed in REDUCED water. Stopped watering for 2 days.
Day 39 - Full Lights on now. Put more holes in the pot. Draining nicely now.

Likes
42
Share


@Master_weeda
Follow
Bonjour à tous les padawans et les maîtres jedis
Cette plante est vraiment exceptionnelle! Elle représente la force et j'en suis fier 😍
La semaine 4 est déjà la ! Ma plante est saine le LST ce passe relativement bien je l'ajuste tout les jour je le combine avec la technique du pincage d'Apex cela me permettra d'avoir une canopé plus homogène donc une meilleure pénétration lumineuse et par conséquent un meilleur rendement.
Le pinçage est une pratique courante en horticulture.
Beaucoup de cultivateurs l'utilisent pour améliorer le rendement de leurs plantations cannabiques ou autres.
Il est souvent question de 'taille' des bourgeons apicaux.
Cette taille se pratique également mais il n'est plus alors, à proprement parler, question de pinçage.
A l'instar d'une taille, le pinçage va permettre de stimuler le développement des ramifications tout en préservant les sommités en vue de la floraison.
Il est très utile pour uniformiser une canopée.
Pour réaliser le pinçage, il vous suffit de presser 'fermement' la tige [entre le pouce et l'index] aux environs de l'apex jusqu'à sentir un léger 'crAck'.
Cela aura pour résultat d'endommager les vaisseaux impliqués dans la circulation de la sève [situés dans le pourtour de la tige], la tige conserve toutefois une certaine rigidité.
Pour obtenir le même résultat, il est également possible de vriller légèrement la tige sur elle-même.
L'interruption du circuit d'alimentation entre le ou les apex et le reste du plant va provoquer un déséquilibre hormonal qui aura pour conséquence le développement des ramifications antérieures au point de pinçage.
Jour 25 j'arrose mon pot normalement avec un quart de son volume en eau toujours avec un PH de 6.3 à cette eau j'ajoute 0.7 gramme de greenhouse feeding enhancer pour favoriser son développement racinaire.
Par la suite je n'aurai plus qu'à ajuster mon LST jusqu'au stretch et surveiller mon arrosage, Je pincerai mes apex suivant la pousse de la plante pour uniformiser la canopé.
Petit rappel de ce que est le LST et comment le pratiquer le plus efficacement possible:
Quand commencer à appliquer la technique LST
De nombreux cultivateurs commencent la manipulation dés que les plantes possèdent entre 3 et 6 nœuds ou une paire de feuilles. Durant cette première étape de la croissance, le tronc encore flexible est pliable sans risque qu’il ne se casse, même si au fur et à mesure du développement de la plante il sera de plus en plus difficile de le plier. Nous pouvons continuer à guider la croissance des branches durant toute la culture, même durant la floraison, ce qui pour cette étape représente un grand avantage face à la taille, qui n’est pas du tout recommandé une fois que la formation des têtes commence, cela stressera en effet la plante, ce qui aura pour effet de retarder la récolte.
Comment appliquer la technique de guidage LST
Si nous sommes prudents, la flexibilité naturelle des fibres du cannabis permet de plier leur tronc et branches avec une relative facilitée, même durant la floraison des plantes.
En utilisant une corde fine, nous pouvons accrocher la pointe de la plante à la base du pot par exemple ou à un tuteur que nous aurons planté dans le substrat. Nous plierons le tronc avec précaution et nous le fixerons avec la corde, à partir de là, nous pouvons augmenter progressivement la tension de la corde, chaque jour un peu plus, jusqu’à obtenir la position souhaitée. Soyez attentif à la réaction de la plante, essayez de ne pas appliquer trop de pression sur la corde et rappelez-vous que la flexibilité des branches peut varier d’une plante à l’autre.
Pour obtenir de meilleurs résultats, il suffit de suivre quelques règles simples. Pour commencer, nous devons choisir une corde fine mais pas trop pour ne pas blesser les troncs au fur et à mesure qu’ils grandissent et qu’ils deviennent plus gros.
Nous pouvons utiliser des crochets en plastique souple ou de n’importe quelle autre matière flexible pour éviter d’endommager les plantes. Spécialement en intérieur, utiliser des cordons en plastique de couleur (voir les diaries de @Silky) est très pratique pour voir facilement les accroches et faciliter le travail au milieu du réseau formés par les cordes, les tuteurs, les mailles ou les supports que nous aurons dans la culture. Bien entendu, en culture extérieure et surtout en guerilla nous ferons juste le contraire et nous utiliserons des matériaux de couleur qui n’attirent pas l’attention pour que notre jardin reste discret.
Pour stresser les plantes au minimum, la mieux est de réaliser ces manipulations le soir ou juste après que les lampes en intérieur s’éteignent, ce qui leur permettra de se remettre durant la nuit. Normalement, le jour suivant nous pourrons observer comme les pointes des branches que nous avons pliées se dressent de nouveau vers le haut à la recherche d’une source de lumière.
Je combine un pincage d'Apex (explications plus haut) au LST cela me permettra d'avoir une canopé plus homogène donc une meilleure pénétration lumineuse et par conséquent un meilleur rendement.
Que la force soit avec vous 💪

Likes
24
Share


@nonick123
Follow
Día 37 (08/07) Ajustes de LST en todas las plantas! 🚀
Día 38 (09/07) Ajustes de LST en todas las plantas. Las ramas inferiores están creciendo como un cohete! 🚀😍
Riego con 250 ml H2O pH 6,5
Día 39 (10/07) Las plantas se muestran sedientas! Creo que el cepellón está lleno de raíces y piden el trasplante!
El crecimiento no se ha visto afectado de momento
Riego con 500 ml H20 pH 6,5
Día 40 (11/07) Paso a regar con 500 ml / día, ya que hace mucho calor (30 ºC) y efectivamente las plantas ya han copado la maceta de raíces
OnionOG y KS1: Las ramas de nodo inferior se han quedado enanas tras el entrenamiento, de modo que las elimino y aplico canela en polvo en los cortes
Riego con 500 ml H20 pH 6,5
Día 41 (12/07) Riego con 500 ml H20 pH 6,5
Clones! Mi experimento vuelve a demostrar que NO necesitas complejos productos de clonación ni sistemas para obtener clones!
Hace 15 días puse 2 clones con el tallo sumergido en miel durante 5 minutos en una maceta de 400 ml con PRO-MIX HP BACILLUS + MYCORRHIZAE
He mantenido la humedad alta con una cúpula de humedad casera hecha con una botella de agua PET de 5 litros cortada por la mitad y pulverizando a diario.
Han estado los 15 días en mi terraza con luz indirecta, y temperaturas que rondan los 30 - 32ºC durante las horas centrales del día
Hoy los he trasplantado a una maceta de 1 litro porque ya habían formado raíces y empezaban a formar nuevas hojas!
🐥🐥🚀🐥🐥
Día 42 (13/07) Riego con 500 ml H20 pH 6,5
Día 43 (14/07) Trasplante a maceta definitiva de 21 litros de ROOTPLUS Pot de GSKOREA GLOBAL!
Estas macetas son una maravilla!
Proceso de trasplante:
Se prepara con 17,85 Litros (85%) de sustrato PRO-MIX HP BACILLUS+MYCORRHIZAE + 1,05 Litros de Humus de Lombriz (5%) + 2,01 Litros de Insect Frass (10%) + 210 gramos de Earth Vibes Super Soil (10 g/L substrato)
Se llena la maceta de sustrato con las manos (limpias) y rompiendo los trozos más gruesos, para que el sustrato esté aireado y esponjoso, sin presionar
Se coloca una maceta vacía de 6,5L para que quede la forma perfecta de la maceta donde están actualmente
Se espolvorea la parte proporcional de la probeta de microorganismos sobre el agujero de trasplante
Se saca la planta de su maceta actual (bonitas raíces 😍) y se coloca en la maceta final
Se riega muy lentamente hasta percolación profunda con H2O EC 0,5 pH 6,5
Una vez asentada, complemento con un riego de 500 ml con 25 ml/L de Humus de Lombriz Liquido
Se coloca mulch (acolchado) de paja para evitar traspiración excesiva y cuidar a los microorganismos del suelo
A ver como reacciona al trasplante!
Aplicación foliar Kelp hidrolizado de Lurpe Solutions a 0.25 ml/l
Realizo ajustes de LST aprovechando el trasplante a la nueva maceta. De momento tienen una canopia muy bien formada!
💦Nutrients by Lurpe Solutions - www.lurpenaturalsolutions.com
🌱Substrate PRO-MIX HP BACILLUS + MYCORRHIZAE - www.pthorticulture.com/en/products/pro-mix-hp-biostimulant-plus-mycorrhizae

Likes
9
Share


@newenglandgrowers
Follow
Cut the plants down on the 24th of April, drying room levels are 72°F and around 60%RH, I'm currently on Day #14 of drying and the buds don't feel fully dry yet, the main tops feel crunchy and dry but the lower smaller buds are still quite moist and smell like chlorophyll, I think I may harvest the main tops so I don't overdry and leave the rest in the tent for another few days, either that or put the rest of the buds in a brown paper bag to finish drying. Finished dry trimming the plant ended up with 200 grams dry weight not including trim there's another 2 ounces of trim which if you want to include that would bring the total weight from this 250W LED to 256 grams. I'm super happy with the result of this especially for my first grow and from one autoflower, it can only get better from here on out. FYI Not sure why I can't edit the lights I used but the bloomgro 600W LED is PULLING AN ACTUAL 250W FROM THE WALL so the gram/watt should be .8g/W

Likes
1
Share


@MrLahey
Follow
I put in some work yesterday and today. Chopped the clover, added some buildasoil craft blend and cased it with BaS compost and transplanted her from the 1g to the 20g.
I also set up the Blumat irrigation system and the tensiometer. I’m excited to see how much better it waters than I do. Based on the tensiometer it seems I was greatly under watering.
Trellis net going up in a few days.

Processing
Likes
2
Share


@Patillac31
Follow
●Day 49, end week 7. Added bembe, Boomerang, and blackstrap molasses to the diet. Noticed some brown freckles on a handful of leaves. Hopefully the cal and mag in the molasses will help get me through another week before the big flush🤞 recalibrated my p.h. meters. On to week 8
●Day 44 just picked up a new microscope (Wireless Digital Microscope, ROTEK 50x and1000x Microscope Magnification with HD 1080P 2MP Camera, Mini Pocket Handheld Microscope Camera with Light Compatible for iPhone Android, iPad Windows Mac) via Amazon. So, sorry for the blurry trichome pics. I'll work on it. This diary will focus primarily on Big Bud by Seedstockers for the remainder. But the agent orange will finish her journey. Pretty pleased with how things are going. Any suggestions or comments are always appreciated. Happy Gardening ✌️🌱🤙🖖


Likes
25
Share


@chee_52
Follow
👉🏽 Day 78 (5/17): Watered for the last time and will harvest on either Day 80 or 81, with 24 hours of darkness the day before harvest. Reduced light intensity to 50% due to emergence of white stigmas. Loving the fade and the bud structure with this plant.
👉🏽 Day 81 (5/20): Harvest day! Will be doing a dry trim, so I just removed fan leaves. Now drying in the tent at 75ºF & ≈55% RH. (Will post harvest info/page after drying, since I forgot to weigh her wet.)
Thanks for dropping by! 🖖🏽🌿

Likes
34
Share


@pHilosophy420
Follow
Original Auto Amnesia Haze - She is very bushy and growing very well. One more week till flowering so the next watering will be with bloom nutrients :-)
Likes
59
Share


@Johnnyb__blazin
Follow
Well a couple issues in the grow room this week. The ladies got much bigger that I had expected! They trippled in size and now I have an issue of them getting a bit too tall. The light I am using says 30-36" above canopy...light is high as it can go and I'm about 28-32 above the canopy. From the info I've looked through I think I had light bleaching going on. I turned the light down 20% and doesn't seem to be happening any more.
I am also having a war with the weather. I'm in canada and the weather is all over the place rite now. Drastic temp swings and humidity up and down.
Other than this the ladies seem to be rolling along well . Can't wait for the colas to fill !
Staked all the branches in preparation for some hopefully big buds

Likes
20
Share


@Ohey_fu_kyu
Follow
Very happy with 100% germination rate! They all popped within 36h then put into 70% happy frog soil 30% perlite


Likes
14
Share


@SugarandTerps
Follow
Bloom W6 Fastbuds Mendo Frost ❄️❄️
9.7
Die Temperaturen ziehen wieder an. Es geht wieder über 30°C.
Nährlosung 3L PH-WERT 6,3, Plagron Silic Rock 1ml/L
Power Buds, Green Sensation und PK 13/14 je 2ml/L
10-15.7
Die letzten Tage waren es immer zwischen 29-32°C. Nährlösung wie am 9.7 gabe es alle 1-2 Tage
Likes
33
Share


@microgrowshow
Follow
One of my favourite plants to grow so far. I learned a TREMENDOUS amount, especially all the ins and outs of supercropping. Although I did end up breaking my stalk, she turned out quite nice! I can definitely see myself supercropping plants in the future just to play around. The terpenes are also really nice on this girl. I can't wait to make some bubble hash and rosin. And I generally can't wait to grow this girl again knowing what she needs now in terms of training. Will also be nice to see the difference with organic dry amendments vs the FF wet nutrients I used.
Likes
20
Share


@Grow_Outside
Follow
Jetzt ist Woche 3 für die junge Auto Candy🍬 angebrochen.
Sie wurde getoppt und erstmalig gedüngt💚
Die Auto Candy hab ich nach dem 3ten echten Blattpaar getoppt, runter auf die Erste Nodie.
Daraufhin hat sie 2ml auf 1 L Gießwasser von S&R Organics den 5in1 bekommen!
Laut Düngeschema kann man die Pflanzen ab Woche 1 anfangen zu Düngen😅 Bin ich persönlich kein Fan von, da im Medium in der Regel genug Nährstoffe vorhanden sind (BioBizz Lightmix)
Aber auf Cocos wäre das jetzt was anderes😉
Bislang eine sehr robuste Genetik, mal schauen wie sie sich macht💚
Infos:
Gießwasser: 100ml in 24-48Std
PH-Wert: 6.3
Nährstoffe/Dünger: S&R Organics 5in1 2ml/1L
Luftfeuchtigkeit: 55%
Temperatur im Zelt: 22-24 Grad
Lichtdauer: 18 Stunden
PPFD: 416
EQUIPMENT:
Licht🌞: Marshydro TSW2000 300watt ✅️
Rohrventilator💨: S&P TD 350 silent.✅️
Aktivkohlefilter💢: Can-lite 300
Zelt⛺️: Marshydro 80x80x160 ✅
Luftbefeuchter: Spider Farmer 6L. ✅️
HAPPY GROWING
Update 14.07
Die kleine scheint das Topping gut vertragen zu haben, dafür das es erst 2 Tage her ist.
Da haben die Blätter ganz schön Fotosynthese betrieben 😅😅

Likes
8
Share


@hooolian
Follow
This grow quickly became a mammoth watering session due to the amount of plants - Had to harvest earlier due to issues with the location in which it was grown in. Overall a good crop I think - the OG Kush grow alot taller than the widow and with dense buds - I am looking forward to seeing the end weight once all is dry.
Likes
34
Share


@cannasaxx
Follow
Sie wachsen und wachsen ohne Ende... Die Blüte zeigt sich langsam, also wird nächste Woche der Dünger umgestellt auf Blüte. Bis jetzt bin ich zufrieden 😎🍉🌈
Likes
12
Share


@2Stones1Bird
Follow
Checkout my Instagram @smallbudz to see the Small budget grow setup for indoor use, low watt, low heat, low noise, step by step.
21/12/2019 - Fed her 1.5l of 6.4PH water with 0,5ml of each: Grow, Bloom and Max, and 1ml of each: Heaven, Alga-mic and Vera, noticed almost no run off, I use about 1/3 of the nutrient dosage on the chart, to achieve about 200/300PPM (500 scale).
Did some light pruning also.

Likes
5
Share


@84ruk
Follow
The strain is really good. I harvested it when the trichomes were milky and it had a very energizing and uplifting effect. I'll definitely grow it again now with better care and the knowledge I've gained. I harvested around 20 grams dry.

Likes
4
Share

@CheeRz
Follow
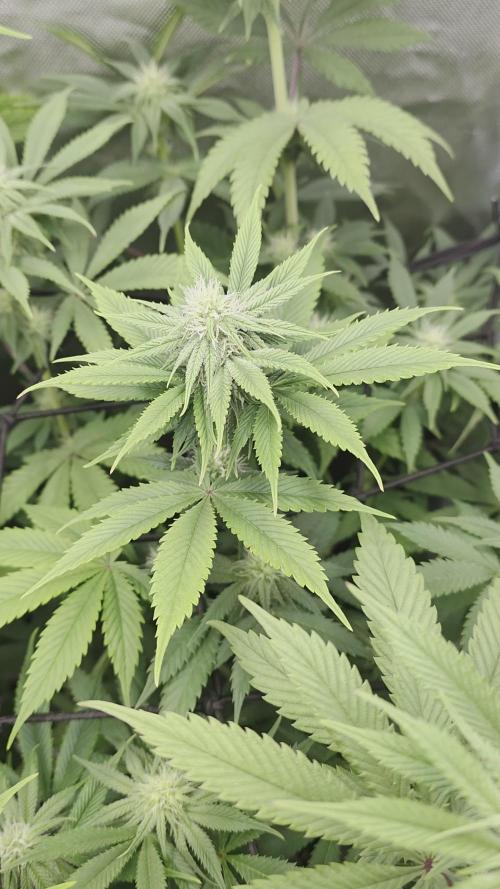
It is week 4 of flowering, and both plants are now receiving 1.5 ml/L of Calmag. I suspect this was due to the cold temperatures falling below 19°C during the dark phase, which prevented the Calmag from being transported properly. However, since the outdoor temperatures are currently rising to around 12 °C at night and 20 °C in the tent when the lamp is off, this should solve the Calmag problem.