
Likes
Comments
Share


@Maryjane23
Follow
Ciao ragazzi!!!
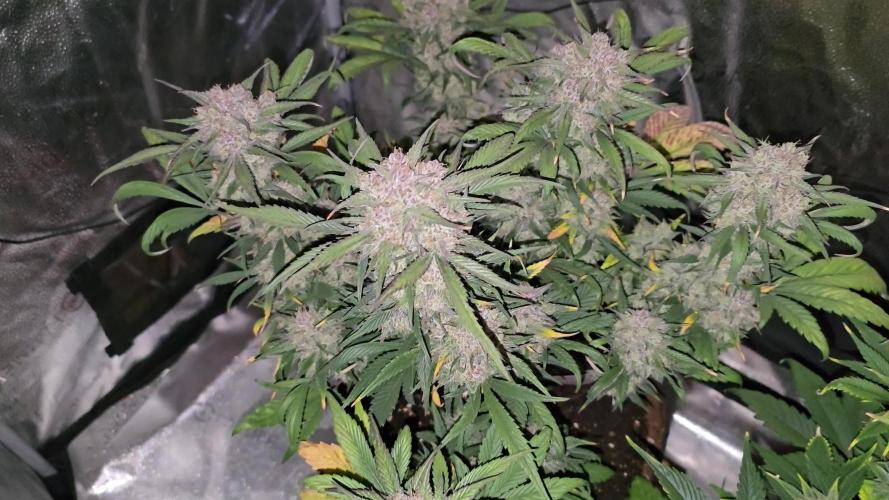
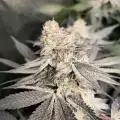
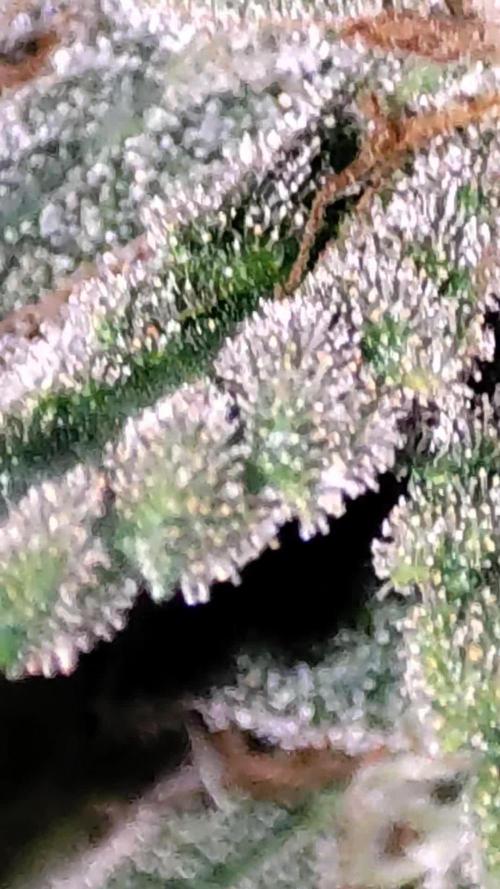
Eccoci e finita la seconda settimana di fioritura le piante hanno smesso di fare lo stretching e hanno iniziato a formare i fiori.
come si vede nel video ho fatto la tecnica chiamata lollipop,ovvero defogliato ed eliminato tutto ciò che non si era ben formato o che non avrebbe preso abbastanza luce.
A livello di fertilizzante ho dato per 1.5 L di acqua
1.5ml di enzimi
2 ml di top bloom
ringrazio per la collaborazione viparspectra adesso è parecchio che utilizzo la loro lampada e devo dire che vedo i risultati. Ottima lampada led nel mio caso sto utilizzando Viparspectra XS2000 in uno spazio di coltura 100x100x200
this well-known brand offers different solutions look at the official website https://viparspectra.eu/
or Search for it on Amazon:
Amazon US: https://amzn.to/30xSTVq
Amazon Canada: https://amzn.to/38udUVe
Viparspectra UE: bit.ly/ViparspectraUE
Viparspectra USA: bit.ly/ViparspectraUS
continuate a seguirmi 💪
lasciate un like 👍
maryjane23😛

Likes
19
Share


@AsNoriu
Follow
Day 50. Tallest Kush chopped by breeders recommendations, but in my conditions like a week at least away. Had max 20% milky, most clear, plant suffered some deficiency and was faiding slowly, still. Instead of Christmas flowers - 5 colas surprised my friends, colours and crystals are amazing.
She was watered last 4 rounds with water and i will compare taste and effect , but i think it's a loosing tactics - such early crop. Not more than 40 expected from what left ;))) 5 out of 17 colas was taken away. I will add a third of weight, for real feel in totals.
Day 67. After 24 hours of darkness all girls are chopped. Will make review and update in a week or so.

Likes
174
Share


@PurpleWorship
Follow
This is the best strain I've grown so far. Taking in consideration the growing process, buds quality & effects.
This plant was my 4th attempt to find a specific taste I'm searching since I started to grow, in 2020.
My "Purple Quest". Once again, it's not the right one 😔 But it's still the best plant I've grown so far.
10 Weeks of veg. Topping, main-lining (nebula's method), defoliation, LST. Everything went well :)
But I may try to have a shorter veg period with my next grow. Arround 6-7 week.
8 weeks of flowering. Matching perfectly RQS estimations.
Mention : Made 3.4g of Bubble Hash out of the trim of two plants (leaves only).


Likes
6
Share


@starke
Follow
Day 85, first day of Week 13. She gives off the most beautiful smell since today, wow, never smelled something like that 😍She is also still foxtailing like a freaky little monster, fading nicely. With her I'm a bit confused as to where I should be looking now, new foxtails trichomes or the older calxy behind the foxtails? Probably a mix. Read somewhere on Reddit, that they apparently pack on proper buds, so the foxtails get fat as well. I guess we will see. Happy days
Day 87, checking trichomes everyday, still milky. She got more yellow since the last time I took pictures. Some of the foxtails have developed. Both plants got watered yesterday, with 2ml Flawless Finish. Smell still strong. Could be any day now aaaaaaaaaaaaah happy 😍
Day 88, at her daily trichome check she looked ready all of a sudden. Even on foxtails I see amber trichomes, funny mix actually, amber and clear 😁All over her buds she is a good 20% amber now. I think that should be fine for a Sativa. I chopped her and put her stem in a vase with ph water. A friend once told me a fairytale story, about how this does something good when compared with darkness. We will see, can't remember properly, it won't harm 🙏 She is a pleasant lady and weighs wet with stems 469g, which is more than my other wedding cake (244g). I guess that's great yeay. She is currently sitting in the drying tent together with wedding cake. Happy days
Update Day 1 of Darkness in a vase full of water: She initially weighed 469g yesterday when I chopped her and put her in the vase. 16 hours later I had a little look inside the tent and checked the water in the vase, she drank quite a bit, about a quarter the amount. I weighed again and she now weighs 489g, not a big difference but still, I feel slightly sciency 👽Her buds seem sucked in and more dark but also more rich looking, if that makes sense. I also imagine some other parts to be more green, ok, I like it. Check for yourself in the pictures added, if you like. Exciting yeay

Likes
13
Share


@GrowGuy97
Follow
Flower day 5 for mainline - This lady is really stretching! Can’t wait to see what the buds look like on this!😍😍 thanks for following friends & happy growing!🌱✌️🏼


Likes
7
Share


@Kirsten
Follow
💚 ORION F1 ORGANIC DRY AMENDMENTS 💚
The plant has well exceeded my 💚 ORION F1 LIQUID NUTRIENTS 💜
So far really happy, has taken very well to the topping.
She has shown good growth which I'm very pleased to see.
This is what I watered this week:
18.6.25:
I watered with 1.2L of dechlorinated water PH'd to 6.1 and containing the following nutrients per 2 litres;
♡ 0.5 ml Ecothrive Trace
♡ 1/4 Tsp Ecothrive Biosys
PH: 6.1
PPM: 373
23.6.25
I gave 3 ltrs of dechlorinated water PH'd to 6.3 with no nutrients.
PPM: 307
PH: 6.3
28.6.25:
I watered with 2ltrs of dechlorinated water PH'd to 6.5 and containing the following nutrients per 2 litres;
♡ 1/4 Tsp Ecothrive Biosys
♡ 2ml Ecothrive Trace
PH: 6.5
PPM: 418
Thanks for stopping in this week 💚😊🍃✌️🌱
Likes
4
Share


@Andres
Follow
she stopped growing and now she's just getting fat, they eat only organically with earthworm humus and red bird guano...just wait for this flowers...

Processing
Likes
13
Share

@GrowGuy97
Follow
Flower day 17 - All the ladies are looking great, starting to see a lot of bud sights & the smell is definitely getting stronger everyday I open the tent! Thanks for following & happy growing friends!🌱✌️🏼
Flower day 19- Got a bigger dehumidifier because I was having problems on days I would water the humidity would go through the roof at night so to prevent mold I bought a bigger dehumidifier but now it is throwing off so much heat the tent is pushing 90 degrees F at some points throughout the day so I’m not exactly sure how to fix the issue! Will definitely not be running so many plants in the next run for the 5x5! Hopefully things get better!😅😅


Likes
22
Share


@420_TRON
Follow
wet trim, nice buds, will update when more details are available
---
got 0.3g of crazy scissors hash - vaped a tiny bit of it and the high is amazing 🤩
---- 11/6/20
started curing & made some RSO of the trimming (~3ml)
---- 11/7/20
made a 2nd batch of RSO (~10ml)
Processing
Likes
6
Share


@Ferenc
Follow
Day 61: I left them in darkness for 3 days and just switched on the lamp for 12/12 with today the foirst day of the 9th week.
Fertilization goes on the same days with the nutrients above and water intake approx 250 ml per plant per day.
Nice green color comes they always look nice after darkness :) Lets' go.
Day 66: Growing growing growing...


Processing
Likes
5
Share


Likes
5
Share


@Radagast_
Follow
01.07.
Blue Sunset Sherbet
Day 63#
Well, like this... the situation is much better, the plant has completely recovered, even if it was the least affected, but it was, for sure.
She started extracting a little nitrogen from the lower leaves, but no big deal, the last two waterings only received clean water, so it's not surprising, although she was a little hungrier from the beginning because I thought that in the country where there is more food, however, it turned out that there is less, and again I can't exaggerate because of the accumulation of salt, and it wouldn't make sense to suddenly increase the dose of food or the number of feedings, I could only cause a problem. Just slowly and gradually.
I will leave those leaves until the next watering, because then I will feed her, and then I will remove them, so that she does not extract nitrogen from the next leaves.
One thing that caught my eye is that the plant is quite thin and tall, so it might be a male, I wouldn't want to guess, but it's not impossible even if the seed is feminized.
I'm very suspicious of everything, but maybe I'm just tripping, maybe it's only up to the pot, it's not wide and it's not a big volume, although I've had much wider and thicker plants in slightly bigger pots than this one and at this time, the stems on this one are a little thicker than inside.
Today is the end of the ninth week for the plant.
Stay High and Keep Growing!!!


Likes
81
Share


@m0use
Follow
SPONSORED DIARY===SPONSORED DIARY===SPONSORED DIARY
Good week, plants has a bit of a nitrogen issues and corrected that with some feed. Found out the mediums levels were below normal and causing some issues. Guess I forgot to top dress with dry amendments in the mess of the twin plant disappearing. Gave them a top dressing this week with some Acti-Sol as I also ran out of Gaia Green. I think I am going to get the big bags of it and store it in my locker. 10KG-20KG each of bloom and Grow. Can use that in my garden as well not just for cannabis should be good I like the product and how it performs overall.
Still no word on the missing plant, As the "Show Us What You Got" contest comes to a close I was reassured by @Dynomyco that my progress thus far would be used for the evaluation of how I place in the contest. I will miss out on how the buds and yield compare but I can get this none Dynomyco plant up to speed and even inoculate the medium with some Dynomyco just in time for flowering.
SPONSORED DIARY===SPONSORED DIARY===SPONSORED DIARY
This is my diary entry into the Dynomyco Show Us What You Got Contest!
#DynomycoShowUsWhatYouGot!
@DynomycoShowUsWhatYouGot!
@Dynomyco
Big Shoutout to @Dynomyco for picking me in their contest. Happy to be involved and as a user of Dynomyco I am curious to see this side by side with my own eyes. I will be honest I am a little skeptical it will show any major differences. but we will see what happens. Some disclaimers, I am still using LABS serum I made, This is also beneficial to the root mass however it's a bacteria based product and not fungal or mycorrhizae like Dynomyco.
https://growdiaries.com/giveaways/DYNOMYCO_Show_Us_What_You_Got
Likes
11
Share


@UrbanBoer
Follow
If only I was not broke, I wouLd get a home testing kit, and be able to test the potency of all my babies, Monday’s Blue has a sweet and fruit scent, due to growing in the greenhouse all 5 plants with noticeable scents cancel each other scents, so I have to hold the bud directly to get a more accurate waft to better deduce the scent.
This lady is most definitely a sativa strain, just don’t know the percentage or is it a well balanced hybrid.
Likes
2
Share
@Smev1337
Follow
hey all! this week is starting off strong in bud development and also the trichomes are going milky slowly which you can actually see on the pictures, the left plant is doing way better than the right plant but i got other plans with the right plant which will be probably made into bubblehash 😋 happy growing all! ✌️💚😎


Likes
3
Share


@123Grow
Follow
This bean is during me CRAZY 🤣🤣🤣 I had some slow growth with my RuntZ, but they are on the go. This strain —- I gotta get the conditions right for it. It seems to prefer less water and more heat?? I am not flowering this strain until I can take 5-6 Clone’s off of it.
It’s been feed SST, LABS, bacteria, fungi, rain dances. Just isn’t responding like I assumed, but I am taking responsibility for the issues, NOT the cultivar.
11-3 And……we are back in the game!!! The inputs began showing the effectiveness. Leaves are larger, no stretching. The bean just took a second to “kick” in gear with some added help.
This is going to be a very long VEG…we are talking 4-5 months before I flower this. I want multiple clones off this strain so my summer grow outdoor is going to be SICK ( 6 ft tall ladies).
Likes
48
Share


@Igrowneil
Follow
Thanks to all the sponsors of this run
@Vipraspectra (LEDs) #xs4000 #p2000 #p2000 = 880watt full spectrum
@Zamnesia (seedbank )
@Emeraldtriangleseeds
@RoyalQueenSeeds
Hey growers @IGROWNEIL (now on Instagram)
this last week has seen amazing growth the plants have been super happy with the bigger feeds and the lighting moved to 18/6 saving on electricity is a must , 12£ gbp per day to 8£ gbp
, saving 4£ a day is about 300£ per run saved which will now pay for new pots and more nutrients from @terra_aquactia and mabey there light mix soil
The watered method of flood and allow to dry out works really good from seedling 🌱
Really happy with these results and really happy with my @viparspectraled lights #xs4000 and #p2000s also I'm using bio roots on this run which I do think is adding to the overall growth formation along with the lights themselves.
Plants appear to have alot thicker stems from very young , plants all seem vigorous in growth and appearance seem all quite healthy plants .
The new soil / coco @canna_terra professional plus is great stuff and also another factor I've changed to a lighter soil mix which is definitely helping out as it doesn't seem as compressed as the other soil without coco coir .
@Terra_aquatica nutes being used along with @vitalink dairys have ratios being used but @terra_aquatica bio roots is doing me well and my plants seem to love the bigger feeds
I will be moving over on my next run to @terra_aquatica nutrients line only I literally love the brand and how the owner relates to his own business and plant research 🙌
Extraction and intake @blackorchid @ramfilters
All 12 liter fabric pots (amazon basic) and Thhefabricpot companys
Soil - @canna_terra professional plus ➕
Had an amount of fungus knats that still presist having to make sure my soil is dry and ruffing up the top layer to stop any eggs being layed down the knats are a problem and this has put doubts in my usage of this soil again as I used about 240liters which is 5 bags at 18£ GBP each 90£ on soil to then cause me more money and additional problems in a big run isn't something I can let slide as this could seriously harm financially by reducing the amount at harvest.
Okay plants
@zamnesia
Gorilla glue
Doing amazing, thicker stems , bigger leaves , did notice some calmag or N defenices leaving me to increase calmag and nitrogen, but doing really well with the LST also and start to increase the size of the Bottom branches as we can create many tops instead of the one main on weeks 3 and 4 days 21 to 35 will see the main phase of stretching
Girl scout cookie's loving the growth and the girl with the leaves purple 💜 underneath are pretty cool 😎
Runtz 🚫 automatic
Study looking plant doing super under some LST hopfully see some more of the bottom branches catching upto the main colas before I hit them with netting
@royalqueenseedsrqs
#dosido
Expected more from these girls but there starting to come back a bit faster now hopefully this keeps up
@emeraldtriangleseeds
#lemonhazeauto
Doing well under LST being a sitiva I'm gonna watch closely for major sprouting.
#headlightskushauto
Doing well also under LST any defenices you see on plants will be me getting used to this new soil which I'm finding tempermental and a problem with knats
#blueberryauto
Coming back to life this little girl has surprisingly gained some traction keeping a close eye on her as I can't wait to finally try Blueberry weed , proper stuff 🙌
Thanks all for liking and commenting 🙂
Please follow me on Instagram @igrowneil
