
Likes
Comments
Share


@Tropicannibis_Todd
Follow
💩Holy Crap Growmies , we are outdoors and in the Ground and there Doing Great💩
The Frosty is amazing 👏 She got hit the hardest , with bud rot , I had to remove alot , which is sad , but it had to be done ....
👉It's been another full week 63 days from seed and she's doing great , very nice Growth, considering shes been up against the wind and rain 👈
I GOT MULTIPLE DIARIES ON THE GO 😱 please check them out 😎
👉THANKS FOR TAKING THE TIME TO GO OVER MY DIARIES 👈
👉NutriNPK NUTRIENTS USED FOR FEEDING 👈rain water to be used entire growth👈
👉www.nutrinpk.com right now get 10% off using SPRING2022 as the coupon👈

Likes
1
Share


@SessionMeister
Follow
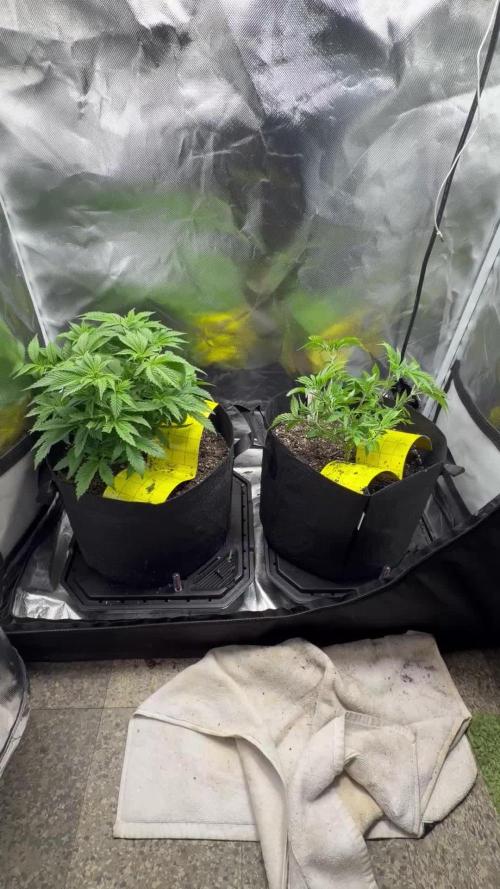
I put the clones into bigger Pots once their roots were fully established. Immediately started LST and put in the clones at an angle so that light is distributed more evenly. Autos also growing well but Panty Punch is lacking because of crippled leaves. I still let her live to see how she develops. I plan to bend the clones in a circular shape so they grow into an even canopy.


Likes
7
Share


@AZMamaBear
Follow
Been growing this one since Feb. Achieved a 32 node main-line. Towered over 7' tall. On 8-10, discovered that my feminized seed was actually male. This plant was the only one that I managed to successfully clone, so I had two boys.
Chopped the bigger one down. Decided to move the clone to another part of the garden and cross breed him with my small Big Bud and Gold leaf plants. Will put up some plastic sheeting to keep the pollen contained.
Hubby took him down. He considers killing a plant akin to murder. Not a good day in the garden.

Likes
9
Share


@LetsGrowSome
Follow
Starting week 10 now. Ran into some more underwater issues as well as I think I did not supply enough dry nutes in the beginning to pot since had some slight deficiencies showing before underwatering. Getting close to harvest so just gonna ride it out. Also in process of changing the ventilation system so have had a couple of high temp issues over 80f. Under control for now till I get the setup finished and noted to add more fertilizer to next grow. Even with my errors the girls are sticky and smelling good.

Processing
Likes
43
Share


@MUDBUG
Follow
This has been going smoothly the growth of MELLO YELLOW has impressed me i mean shes 31 inches and still rolling she at 1200 1300 ppms right now theres 3 phenos on this BlackBerry all 3 will be updated 🍇🍇🍇🍇💥💥💥💥💥💥💥11-17 Going smoothly 👌👌👌👌🍇🍇🍇🍇🍇🍇🍇Mello YELLOW is rolling she has shook back with VENGEANCE BERRY-BLACK has picked up she slowed down wen i topped her i should of let her be she is at 1275ppms on her 2nd gallon of nutes i will have a separate gallon made up with my calmag i havnt been ph ing my water distilled stays the same but my ph has dropped because of the ph perfect bloom im using so from around 6.2 im guessing for veg dropping to 5.6 5.8 is a big swing calmag is best in the 6 range those few points MATTER i see a slight mag lag in the leaves HAPPY SAINTSGIVING 👍👍👍👍👍👍

Likes
3
Share


@Rumyn88
Follow
Hey all, its our 2nd week after casing drop. Facing some issues with Night temp, sometimes it could fall to +12C, thinking about how to improve it. Also concerned about slow growth because of that. Using just 1/3 of Plagron recommended dose.
Modified a bit my tank, made some technical window. Also set up automatic irrigation, because wool started to dry up during the day
Upd Sunday 10.12.2023, Decided to put Babys finally to Seramis.
Washing ceramics is some kind of hell:
-First, I decided to sift all the dust through a sieve, stood in a half-bent position with bags of Seramis for 30m (my back didnt like it), but there was a lot of dust.
-then I decided to check the Ph and rinse thoroughly. Although the package says 5.5-5.7 Ph, after the first flush with a balanced solution at 5.5 Ph, there was 6.5 in the drainage.
- I was concerned by the very muddy brick colour water, then got tired of mixing 5.5 in a bucket for flushing and decided to rinse it with tap water from shower and then balance it back to 5.5 Ph . As a result, I poured from the hose for another 30 minutes until the water became more or less transparent.
-I also tested FloraFlex discs, they drip great and, although round, fit perfectly into my square grow bags.
-Meanwhile, the Milwaukee Ph meter broke down, even the readings of the calibration buffer were changing from 4-6 Ph within one minute. In the end, I spent another 30min and half a bottle of buffer on this too. It’s good that i had yellow Chinese Ph meter, which even after 3 years of rest in the box showed accurate buffer readings.
-Finally, the Ph of the drainage was 5.5-5.7 and it was transparent, so I began to move it into the growbox. I sprinkled it as much as I could, it was impossible to dig deeper. The plants do not yet reach the matrix disk, so for now they will grow with the usual felt.
-The cap of the tank is very thin and cannot withstand the weight of 2 grow bags, I’ll have to come up with something else, maybe I’ll put some kind of drainage grid.
Watering will be from a tank with a mixed solution of 5.8 Ph and 1.1 EC.


Likes
43
Share


@Sabac
Follow
Plantitas en su semana 12.
Crecen y crecen espero dejarlas entre 13 y 14 semanas.


Likes
Comments
Share

@Budhunter
Follow
Week 1 flowering - Day 6 of flowering & Day 62 of life
Finally flowering here. It’s been 5 days on flowering, still pre flowering but finally the best is coming.
Lemon cherry pie is going well, many bud sides, let’s fatten up them 💪🏼🔥✨
Likes
60
Share


@Clutch
Follow
Great strain, germinated after 24h in a glass water and came out of the cocosproutpad after like one day and a half later, started a bit slow because of overwatering (extreme heatwave here) but managed to recover very well. A nice fast growing plant in vegative stage with lots of big fanleaves and a pretty bushy under area. Transferred to flowering really fast and then had a little bit of stunt in growth, I expected her bigger but this has a lot to do with my growing conditions and overall temperature and air. Buds kick in really nice and start showing frost early and thickening buds around week 4 of 5. She can handle nutrients like a boss. Not one single sign of nutrientburn throughout the entire grow. The final 4 weeks were pretty tough to keep her happy since I had a lack of light, no good airflow and lots of rain. Also bugs and some budrot but I can't blame the plant for that. She fought her way through it and delivered nice buds. Not too compact but it's an outdoor grow. After 10weeks of flowering she looked done for me. I will grow her again next year and do better. Learned a lot on my first Growdiary experience 😊
Will update with smokereport and total weight/outcome after curing.
Many thanks to everyone who has been reading, following and mostly gave comments and answers. U guys and girls rock. See u next grow or in the commentsection of ur grow😉👊
Adios
Likes
8
Share


@Brocolis_Grow_Br
Follow
Fiz a colheita cedo (pelo menos acho que ela tinha mais para amadurecer ainda). Fiquei dividido entre largar ela no estado que estava por mais 10 dias (com pragas não tratadas e sem poder acompanhar) ou simplesmente colher cedo e ter o risco de deixar secando sem supervisão.
Optei pela segunda opção.
A colhei foi tranquila, achei que ela deixaria mais resina na luva e na tesoura, mas foi ok, nada diferente do que já vi antes.
Cheiro de mato ainda muito forte, passando por cima do cítrico diesel dela ainda.
O top bud ficou imenso e a planta igual um pinheiro (estou com outra plantada, testando LST).

Likes
9
Share


@XperencdGmanXG
Follow
Its finally time for THE POT PATCH 2023! I have been put behind schedule this year, yet again lol. Now lets see if I can get 6 weeks of growth in 3. I hope all the work I have been doing on natural plant growth regulators pays off, only time will tell. But I have so much planned for this season. IF everything goes right I will be pollinating one of these fine females with an authentic male God Bud from Jordan of the Islands and we should get some God's Hemi and we will see where that takes us.
Inoculated the soil with a microbe tea to kick start the biological processes. I find this the best way to get things going while minimizing any possible root burn from the initial kick off of bio activity.
Likes
10
Share

@Prilyfe13
Follow
02/07/2026
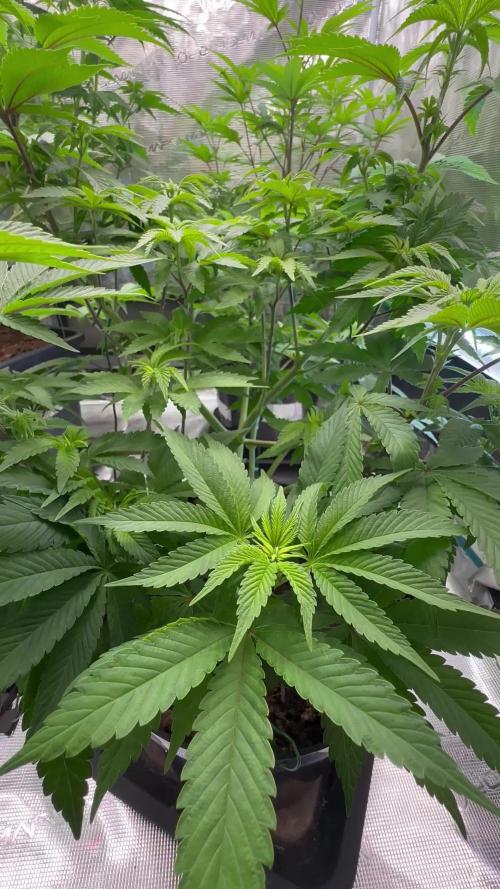
A new week and the last week of veg. The stretch is just around the corner. So before hand, I did a tiny bit of trimming. Just the main stem fan leaves and a couple lower hanging leaves. I also took the lowest branch off. It wasn't gonna make it anyway.
She's still super full, but has plenty of open space for air flow.
I'll be increasing the light intensity at some point this week. However if she starts to stretch like I expect, I shouldn't need to increase the power much. I'm just trying to get to the bottom of the canopy. Currently she's short enough. So all the light is reaching. But when the stretch starts, I'll need a deeper penetrating light source. Mine. Turned up.
I'll also be changing the nutrients out at some point this week. I'm pretty sure we start transitioning from grow nutes to bloom nutes. Adding in some bud ignitor, bud factor x and big bud in small doses. I'm just waiting for the bud ignitor to come in.
It's absolutely frigid outside today, so the environment in the tent is off. The humidity is fine, but the temp is low. And I already overheated one heater. Hopefully the other one gets the tent back up to snuff. Once that happens, the devices will level off finally and run at low settings if at all. We just gotta get there.
As for her looks, she looks full and vibrant. Beautiful green color. Super strong branches standing straight up. S couple of them are starting to spread out now, but the majority of them are standing up close to the main stem. They are too thick to use the bud clips and I don't have tie downs, so it's all natural for her. Maybe a little push down on the top just to get the lower branches pumping.
02/08/2026
Looking good today. She is really starting to look like a little fat Christmas tree. Still no training though. The branches are long enough, but too thick. So I'm still waiting for the stretch to start. Although, I'm pretty sure it started already. Maybe. It could be a couple more days.
The water is low. I was thinking about topping it off, but I'm changing it tomorrow when my bud ignitor gets here. I think that's what I'm gonna do. Either way, I'm waiting for tomorrow. She might need a gallon or so if I were to top her off. I'm not sure now. Maybe I should top off.
I will say that she is hungry. She's sucking up all the nutes in the water. She'll be fine. When I swap the water out, I'll make sure to give her enough food. However, I don't really know what she needs for nutes. Maybe 550 ppm? She's drained the nutes down below 300 ppm from 450 ppm or something like that. At least she's not overfed this time.
The fucking environment. No matter what I do, it just stays fucked up. There pardon the language, but it's definitely needed. So I set the humidity ton55% now it's stuck at 52%. Where yesterday it was at 57% with no problems. I don't get it. And the temp is just low. AGAIN! It was 75° yesterday. WTF.
02/09/2026
I still haven't decided what to do about the water change. I'm definitely doing it today, but I'm still waiting for a nutrient to show up. I can't decide if I want to stay with the current feed or start the transition from grow to bloom.
I think I'm going to start the bloom nutrients. Just at a really low dose. So I'll be adding big bud, bud factor x and bud ignitor. We'll be keeping the voodoo juice, Tarantula and Piranha out for the rest of the run.
She looks absolutely amazing. Beautiful vibrant green, thick branches and side branching coming out everywhere. She's definitely gonna be a bushy one and I'll need to defoliate a good amount. That's ok. She's healthy enough to take a pretty good hair cut. But I won't be doing so until after the stretch.
I moved the humidifier around and put a hose it came with on it. So now the humidity is put in above the canopy. Hopefully it keeps the humidity in check and not constantly running. The temp is also kinda good. So no complaints there today.
I also took measurements. She's 14" tall now and about 21" from the light. I was considering lifting the light up and increasing the intensity for a bigger footprint, but I don't think I need to quite yet. I'm thinking in the next couple of days I'll need to adjust it anyway. Especially because of the Apple Strudel which is 16" tall and only starting to stretch now. She's gonna be a beast. This little lady won't be small either. I don't think she is beast material though. Well, who knows maybe she is.
02/10/2026
So instead of swapping the water out today, I topped off with a half gallon of the new stuff. She's drinking about a half gallon a day, so I'll continue to feed the normal dose but in half gallon intervals over the course of the week. Then I'll change out the water with the regular dose. Regular as in 1/3 dose from what the manufacturer says. It should be fine.
Update: I decided to swap out the water. Lol
Readings:
pH: 5.8
EC: 898
TDS: 450
Temp: 64.7°
We will have to see how she likes this mix.
A couple hours later:
So far it looks good.
I'm not exactly sure what to look out for. According to both the Advanced Nutrients app and the FastBuds autoflower schedule, I'm perfectly in range.
Anyway, she looks fantastic! Beautiful colors. Strong side branching. Best of all, it's starting to spread out. So more and more bud sites may be grown. I'll just have to cut some select leaves after the stretch. We'll see how it goes. I have a good feeling about this plant. Not sure how big she'll get, but her buds should be POTENT.
02/11/2026
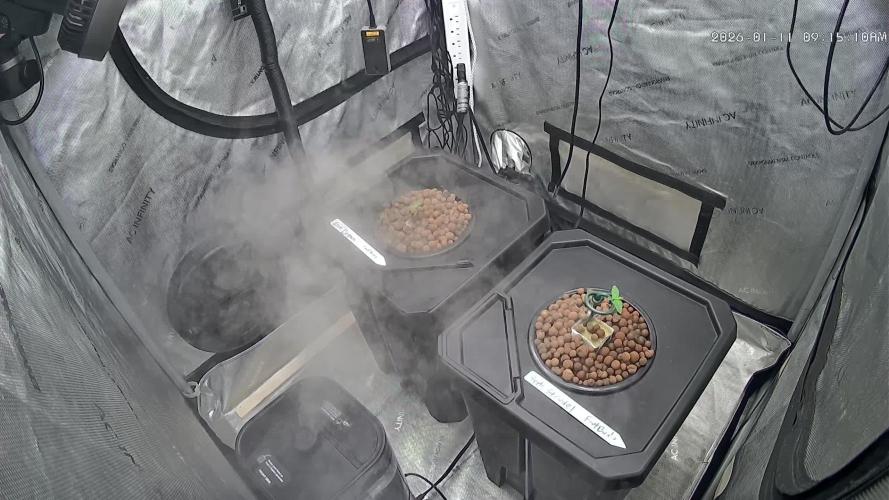
So I forgot to add an ice bottle last night. Now there's big bubbles on top of the water and on the roots. Not really sure what it means, but both plants did it. This one and the Apple Strudel. Maybe it's the mix with the new nutrients, like bud ignitor and bud factor x. Maybe the water was too warm and I screwed up. We'll find out at some point today or tomorrow. I'm gonna have to check the EC and TDS to make sure it's staying the same. If it's raising, I know I have too much nutrients. But I don't think so. I hope it's not another algae bloom. It didn't look like this before though. Maybe a new issue? I'll keep an eye on it.
Other than that, she looks amazing. Taking a very nice shape all by herself. She has clear layers of leaves and branches. Directly from the side, you can see them. It's very nice.
Don't get me wrong, unless she stretches considerably, I'll definitely be defoliating after the stretch. Plus I'm expecting bigger leaves.
The environment seems pretty decent as well. Doesn't seem any equipment is having issues either.
Something I'll note is the color of the leaf tips. They are dark, but barely. No claw either. So I'm only noting it. Not too worried about it. We'll see how things go throughout today. It's not like I'm pumping her with like 1000 ppm or anything. It's like 450. There shouldn't be any issues whatsoever except for maybe being a little underfed, but this doesn't seem to be the case. She seems very happy and healthy. Wanting for nothing. She has all she needs.
02/12/2026
Not much to report today. She's stretching and her leaves are all filling out making her explode with growth. She looks amazing. Still growing one main cola though. I can tell. It's gonna be short I think, but the rest of the plant will have caught up by then.
I don't expect small buds from this plant either. She's definitely gonna pack them on. But, if this is in fact a blue dream, the buds will be pointy and long. Let's hope these branches grow long enough for a hand full of foot long colas.
The environment looks pretty good too. Equipment is running just fine.
The water this morning wasn't warm, so that's good. I did however replace the ice bottle. The pH is fine. I haven't taken it, but I'm guessing with the pH perfect technology, it's 6.1 to 6.3. perfectly within range. I'll check numbers this afternoon and report then. Also, from the looks of it, the water seems fine. No films, no smells, just bubbles. I wonder if they make a styrofoam bucket insulation thing. That'd be nice to have instead of always swapping out ice bottles. Oh well.
I also have to top her off today. I just checked. Looks like maybe a half gallon? Maybe a little more? I'm trying to wait for a gallon, but the water looks so low. Oh well. I'm still topping off today. Lol.
Update: So I added a half gallon of the current dose and the EC and TDS are lower than what they were when I swapped out the water. Am I supposed to increase the dose as needed? But I don't know what I need exactly. I'm pretty sure she is hungry and needs more nutrients, but I don't want to overdo it.
Plus I have to figure out a way to not take the plant out of the bucket. She's getting big and cumbersome. Plus with the other plant in the tent, maneuvering around without pressing too hard against the other plant and the walls is damn near impossible. The heater is in the way. Like really in the way. I would need to take the heater out, move all the wires and hoses just to put the reserve bucket in place. I suppose I can pump out a gallon, add more mix and then dump it back in and let the bubbles and top feed system mix it in. I'd rather mix it in by hand, but again, I can't lift the plant from the bucket. I mean, maybe I can pump out the full bucket, dose it properly and then pump it back in. That wouldn't be too bad. 🤔. I might do that. At least with this plant. The other plant has a lot more space to move around. I can lift that one out... for now. She's gonna be big.
Anyway, that's all for today.
02/13/2026
Lookin good today. She definitely exploded in growth. No height yet, but definitely filling out. I expect the height to come soon enough. She's only like 15" tall. I need double that. Lol
I swapped the ice bottles out. She wasn't warm so that's a good thing. Keep it cool.
I'm starting to think that maybe this isn't the stretch or just the very beginning. The upward growth is like a vegging plant. Not one that in a super stretch mode. Maybe I was off by my stretching timing.
We'll see.
The environment looks good today. Or well, has been looking good. I guess not that it was all that bad, but a little cool. It's fine.
I've still got the humidity at 55% and temp at 75°. I think when I start to see actual buds, I'll drop it to 50%. Oh, I won't be turning the humidifier off. It's staying right where it is because the humidity in the house is like 29%. Unless the plants get big enough to start putting off their own humidity. Then, well, it'll just turn off and do nothing except sit there. I'd much rather not use it, but it's ok if it turns on a little bit. I doubt it will turn on much. It still might even at 45%.
Readings:
pH: 6.35
EC: 777 cm
TDS: 382 ppm
Temp: 66°
Likes
18
Share


@Manic
Follow
The budlets have fully developed and are now starting to fatten up. There hasn't been any deformed leafs or signs of nutes burn so the flush of distilled water from last week seemed to work so I'll b using 1/4 the the recommended dosage for there first feeding this week. Ap is really showing her purple color with the budlets and her sugar leafs. Blueberry is more potent smell so we will see what this week has in store.

Likes
10
Share


@CVK31
Follow
I actually harvested Sunday, Tuesday, and Thursday. First harvest was tallest buds only, they were probably 30% amber. Second harvest was the rest of the upper canopy three days later. Third harvest was the lowest buds.


Likes
20
Share


@BurningTreezz
Follow
day 13! the girls look great!!! next week i will defoliate. 2 more sanlights EVO 5 are coming soon! any suggestions?


Processing
Likes
112
Share


@Dunk_Junk
Follow
Day 105 - She's not far off now, next few days I'm guessing. I'm gonna need help trimming this up. Any volunteers? 😂
Update: I will revise the harvest. Upon much closer inspection most of the trichomes are clear. So she's going on for a while.
@commandercannabis suggested I put lights on her 😂
Processing
Likes
58
Share


@Joah420
Follow
Another week on, minds still blown at how fast these plants grow and develop! 😂 started upping their watering amounts, and introducing some more nutrients, and my exhaust fan & carbon filter is currently being ready to be set up 😁😁
Flowering starting to show more and more daily, excited ive made the half way mark 🙏
