


Likes
Comments
Share


@xtchill
Follow
Oh my god.
Apart from the yellowing they are looking fire.
Lovely dense buds and smells insane.
Loving how formed they are only doing a 7 week veg from seed.
Probs my best looking plants so far but don't think I'm going to yield massive.
Quality over quantity tho.

Likes
19
Share

@EllysGrow
Follow
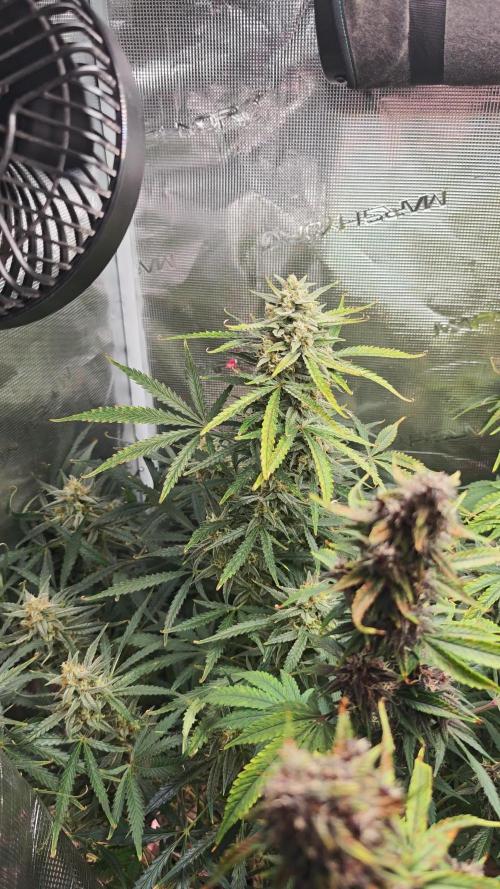
Anfang Woche 9 und es duftet.....die Tropicana Cookies versprüht wirklich einen mega tropischen Duft. Der Hammer!!!! Danke für so viele tolle Genetiken @Fast_Buds 😊

Likes
8
Share

@CalGonJim
Follow
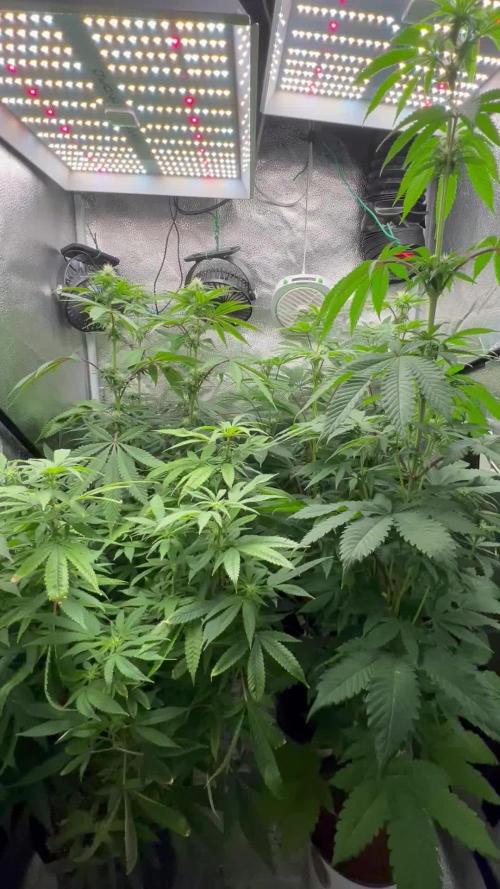
2/23 4 AM all the photos are in one grow. They’re doing OK Ricky‘s doing surprisingly well I really tortured that plant. I think I’ll keep Ricky for a permanent grow. I’ll flip her back to edge when I’m done. She’s a lot of fun to grow really strong. All of the grim brothers are incredibly strong. Doing great much better now that I have general hydroponics as a nutrient made all the difference all of the Tyson 2.0 seeds are doing great. I have punch pie and gelato 44 going and they’re fine. Montel is doing good in a small container and so is ice.T body count. 👍👍👍👍
2/28 1:58AM https://www.youtube.com/@KittenAcademy KITTEN ACADAMY REAL KITTIES....SO DISTRACTED :)


Likes
26
Share


@BatGuano
Follow
D22 - It is the 6th day of planting in soil and the change is amazing. She grows very fast.
Topping: I pinched the plant above the 5th node to mail-line the plant in future.
D24 - After the topping, I gave two days to her to recover herself. I want to have two main branches. To achieve this, I removed 4 new emerging stems and left only 2 stems in the middle. For those stems to get more light (and grow more), I removed the top two leaves, too. I watered her, sprayed and left her to rest. Watering schedule decreased to 1 in 2 days which I interpret as she will need a pot change within a week.
D27 - I change the pot to 11-litre regular pot. Her growth was stalled due to topping, but I hope she will recover quickly after changing the pot. I always put Bat Guano to the soil when I change the pot. Powder Bat Guano 100% dissolve in the soil after 10 weeks and it coincides with the mid/late flowering when she is growing vigorously. It is fertilizing the plant even after the flush with. I flushed the whole pot to merge soil with the plant.


Likes
45
Share


@chapadux420r
Follow
Wazzuuuup guy’s?
So it’s week 7, the lady’s are officially on the flowering stage!! (Since 4/10)
It’s all going very well, they are happy and so am I, been watering every 3-4 days with 1.2l each (before flowering I’ve watered with approximately 2l) and they have good colour and you can see some stretch. Well, not much but they are trained after all 🤷♂️🏻
Just some yellow leafs below the canopy but guess that’s normal, they are really needing some defoliation but I’m going to wait 2-3 weeks because I don’t want to stress them on this early stage
I’m thinking about adding the scrog net but I don’t know if it’s too late for that, what do you guys think?


Likes
19
Share


@MaxGrowCanada
Follow
Another fun week!
Really starting to believe in this strain.
We have now filled 80/81 squares with atleast 1 bud, most have 3. The lower flowers have made a sprint for the surface so happy with that. Applied some high stress training this time around as I really wanted a flat canopy from this point. A dozen or more branches bent off at a 90 degree angle to achieve that. Only one casualty.
Upped the food to about 125% what ghe recommends along with some future harvest ton o bud. Did a really good flush and clean with half strength solution as I refilled. Decided to add a little phosphoric acid as i hadn't been for a few weeks.
Flower set is coming along nicely. Plant 1 is still way ahead, but fairly docile whereas plant 2 finally put on some flowers and had started to stretch. Plant 1, oddly enough, has actually slowed its internodal growth and is starting to pack on the buds🤷♂️
As far as the phenotypes go, I think I lucked out and got two different purple varieties. I could be dead wrong, but both plants seem to show purple on early flower set.
The mature fans look oddly lanky for a pure indica🤔
I have a half dozen clones that will hopefully take as I'd really like to give this strain another go.
Til' next week🙌


Likes
37
Share


@DogDoctorOfficial
Follow
🌱 Germination Journey with Terpyz Mutant Mentha de Croco 🌱
Hey Grow Fam! Today kicks off an exciting adventure with Terpyz Mutant Mentha de Croco genetics. I’ve got 10 regular seeds ready to sprout, and I’m looking forward to discovering some beautiful female phenotypes—and maybe even a standout male for potential future breeding. It’s been a while since I’ve worked with regular seeds, so I’m thrilled to dive in!
Germination Process Overview:
Here’s a step-by-step rundown of the germination setup and process, with a special focus on the equipment and nutrients that are helping these seeds thrive right from the start.
Step 1: TheCannaKan Germination Pod 🌱
For germination, I rely on TheCannaKan—a device I’ve come to love and trust. It’s designed to create the perfect microclimate for seed germination, and within just 24 hours, the seeds started showing signs of life. By the 32-hour mark, they were all ready to be transferred to the next stage! I can’t recommend this gadget enough for anyone serious about getting strong, early growth from their seeds.
• Why TheCannaKan?
• Humidity Control: Ensures seeds stay hydrated without oversaturation.
• Stable Temperature: Maintains an even temperature around the seeds, so there’s no shock or stalling.
• Enhanced Oxygenation: Keeps fresh air circulating, helping prevent mold and ensuring seeds don’t suffocate.
Step 2: Transfer to Root Riots & Aptus Holland Supplements 💧
Once the seeds were sprouted, I transferred them into Root Riots, known for their excellent water retention and structure that encourages strong root growth. Root Riots also have a pH-balanced, spongy texture that makes it easy for roots to penetrate, promoting sturdy, healthy root systems.
At this stage, I started using Aptus Holland’s Regulator and Startbooster at 1ml/L each. Here’s why I chose these products for early growth:
• Aptus Regulator (1ml/L): Helps strengthen the plants against environmental stresses by supporting cell wall structure. It’s a fantastic choice for giving young seedlings an early boost in resilience.
• Aptus Startbooster (1ml/L): This product provides essential microbes and nutrients that stimulate root growth and early plant vigor. Especially for regular seeds, the early root development makes a noticeable difference in later growth stages.
Step 3: Lighting with Future of Grow (FOG) LED at 200 PPFD 💡
For lighting, I’m using a Future of Grow (FOG) 600W LED. For the germination stage, I’ve dimmed it to around 200 PPFD (photosynthetic photon flux density), which provides just enough light for healthy, strong seedling growth without overwhelming them.
• Why Low Intensity?
• 200 PPFD ensures that young plants aren’t exposed to too much light, which could cause stress or stunting. This level of intensity is perfect for encouraging healthy development without risking “stretching.”
• The FOG LED provides a balanced spectrum tailored to plant growth, setting up these young sprouts for success as they grow.
Step 4: Environmental Control with TrolMaster Tent X Controller 📲
For monitoring and control, I’m using the TrolMaster Tent X Controller, which lets me dial in every aspect of the environment to make sure these little ones have the perfect conditions for germination and early growth.
• TrolMaster Benefits:
• Precision Control: Adjust temperature, humidity, and lighting all in one place.
• Notifications: Sends updates in real-time to my device, so I can make adjustments as needed without being physically present.
• Consistency: Maintains stable conditions around the clock, reducing stress on seedlings and ensuring they’re thriving.
Grow Tips & Reflections:
Germination is one of the most crucial stages in a plant’s lifecycle. Starting with strong genetics like Terpyz Mutant Mentha de Croco, combined with a solid germination setup and the right nutrients, creates the foundation for a successful grow.
💡 Quick Tips for Fellow Growers:
• Hydration Balance: Don’t oversaturate! Moisture levels should be high enough for the seeds to sprout but not so wet that they drown.
• Light Management: A low PPFD for young seedlings prevents stretch and keeps nodes tight, preparing them for a healthy vegetative phase.
• Environment Consistency: Use a reliable controller like the TrolMaster Tent X to manage your settings, and consider monitoring tools for real-time adjustments.
Shout Outs to the Community:
Big thanks to Terpyz Genetics for these incredible seeds, Aptus Holland for their top-notch nutrients, Future of Grow for the stellar LED lights, and TrolMaster for the amazing controller. Also, shout out to all of you in the growing community—you make this journey exciting and filled with endless learning. Let’s keep growing and sharing together!
That’s it for the germination update! Next up, I’ll be monitoring growth closely to identify strong females (and maybe a standout male for breeding). Stay tuned for updates on our Mutant Mentha de Croco adventure—this is just the beginning!
Genetics - Mentha De Croco
https://terpyz.eu/products/menta-de-croco-fern-type?_pos=1&_sid=e9237cbcb&_ss=r
DogDoctorOfficial Discount Codes @ terpyz.eu - DOCTOR 15% off
Nutrition - @aptusholland
https://aptus-holland.com/
Led Power @ F.O.G. Future Of Grow
https://www.thefuturofgrow.com/en/online-store/BLACK-SERIES-600-p489093171
Controls @ TrolMaster
https://www.trolmaster.eu/tent-x
As always thank you all for stopping by, for the love and for it all , this journey of mine wold just not be the same without you guys, the love and support is very much appreciloved and i fell honored with you all in my life
With true love comes happiness Always believe in your self and always do things expecting nothing and with an open heart , be a giver and the universe will give back to you in ways you could not even imagine so
Growers Love To you All 💚


Likes
4
Share


@GREENPHOENIX6262
Follow
* Week 6 Veg/Early Flower - She has grown a little over an inch and a half since last night (11.5 inches total ) - Veg nutrients will begin to be fazed out early this week to prep for flower*
* End of Week 6 Veg/Flower - 11/4 - She has begun flowering ( 14 Inches ) - Hard defoliation on bottom small budsites as well as bigger fan leaves above.
Likes
22
Share


@DeepRootsGrowTrees
Follow
Week #16 GSC By KANNABIA SEEDS
Week #5 Flower
This week half way through the flower stage. You can really see the trichomes and orange color in the buds to the purple contrast in the plant this week. She looking outstanding has smaller really tight dense buds with a aroma that's amazing!! Thank you for stopping by and taking a look!!

Likes
2
Share


@Gardens_of_Of
Follow
I keep increasing the light and she seems to enjoy it, growing new bud sides and leaves everyday. Defoliation continues. I can’t go below 25-26 Celcius due to increased light though. She has also been moved to back middle.


Likes
8
Share

@tuzeus
Follow
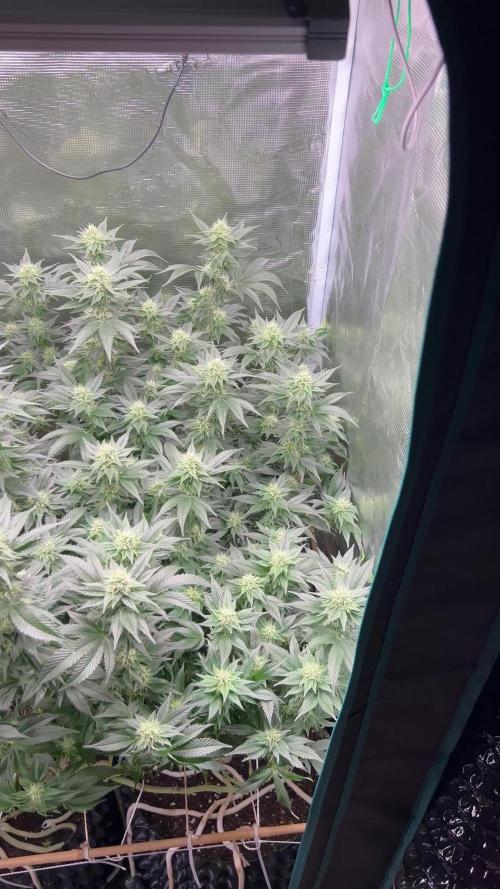
I think I ran into a slight nitrogen toxicity as the leaves are dark green and have a slight tip burn. I think I will change my calmag to use one that has lower nitrogen. Still looking good

Likes
Comments
Share


@Jbcultivates
Follow
This plant was a show-er for sure! The plants sprung up from the very beginning with huge leaves and thick colas! Nice purple hues and dense nugs! Would definitely grow again!

Likes
62
Share


@Reyden
Follow
🔸Davvero una grande notizia! Una nuova collaborazione con @Spiderfarmer è iniziata e sono felice di poter creare dei contenuti per una azienda seria come la loro!!! Questa mattina è stata montata questa bellissima #SF2000 nella tenda da coltivazione più grande dove dovrà lavorare per far fiorire tutte le signorine che passeranno di qui prossimamente 😁😎🔥
Voglio fare i complimenti perché siete riusciti a creare veramente una luce bellissima con materiali super leggeri ed esteticamente geniali ❤️🔥oltre che consumare veramente poco (2.7 Umol/J)per il raggio di copertura ( 4x3 in crescita )(4x2 in fioritura ) e intensità uniforme in PPFD
Mi piace molto anche il fatto che monta anche diodi IR utili per accelerare la fase di fioritura e aumentare la resa 💡
Ci saranno diversi aggiornamenti rimanete connessi e grazie ancora per essere passati a trovarmi 😃
https://www.instagram.com/reel/Cl_EEAbu_vQ/?igshid=YmMyMTA2M2Y=
Funzionalità principali
2022 NUOVA VERSIONE COSTI DI ESERCIZIO INFERIORI E RENDIMENTI DI QUALITÀ SUPERIORE: Le luci progressive a LED SPIDER FARMER SF2000 utilizzano la più recente tecnologia LED ad alto rendimento oggi: diodi Samsung LM301B, alta efficienza energetica con 2,7 umol/J, creano la migliore penetrazione della luce del baldacchino. Copertura vegetale 3 x 4 piedi, fiore 2 x 4 piedi. Potenza estremamente elevata ma consuma solo 200 W di elettricità, rendendola più efficiente delle tradizionali lampade HID e di altre lampade per piante sul mercato.
NUOVO DISPOSIZIONE DEI DIODI E DESIGN DIMMERANTE: Luci crescenti SF2000 aggiornate. Più perline leggere ai bordi, meno al centro. Aiuta a ottenere una PPFD più uniforme. e la manopola di regolazione della luminosità regola liberamente l'intensità della luce. Connessione multi-luce con regolazione unificata particolarmente vantaggiosa per un'ampia area di coltivazione indoor e piantagione commerciale.
IDEALE PER TUTTE LE FASI DI CRESCITA: Eccellente spettro completo: bianco, blu, rosso e IR (3000K, 5000K, 660nm e IR 760nm). Diodi 3000K che forniscono più luce rossastra e 5000K che forniscono più luce bluastra. La luce rossa e IR da 660 nm è particolarmente utile durante la fioritura, dove accelera i tempi di fioritura e aumenta i raccolti. Trasforma i tuoi semi nella tua scorta. E la luce sembra abbastanza naturale, quindi è utile per monitorare accuratamente la salute delle piante.
COSTRUZIONE BEN FATTA E SOLIDA: nessuna ventola senza rumore. Il driver ad alta efficienza, affidabile e staccabile ha un'ottima dissipazione del calore. Il dissipatore di calore in alluminio è spesso e robusto, coperture protettive per i cavi; Imballaggio intuitivo. Componenti di qualità significano che la luce dura più a lungo, SF Light si prende cura di te con un design più attento, puoi facilmente risparmiare denaro senza acquistare frequentemente luci.
In qualità di produttore professionale di luci di coltivazione a LED da oltre 10 anni. Spider Farmer ha sempre insistito per creare attrezzature per la semina domestica più efficienti, adatte e di alta qualità per la crescita delle piante e si impegna a diventare un partner fidato per ogni coltivatore! Riceverai una lampada da coltivazione Spider Farmer SF2000, un manuale di istruzioni, un paio di ganci d'argento, un paio di ganci neri.


Likes
77
Share


@klimfish
Follow
9/25 - Top dressed with 3-9-4 flower girl a couple days ago. It had been 3 weeks since my last feed. Also watered on 9/22 with Fish Shit, CalMag Plus, and Tree Trunk at my usual doses.
The plants look amazing. Flowering is such a beautiful process. Can't wait for the next few weeks!
I've been doing light defoliation every day to keep top bud sites in the light and also keep airflow going.
Lesson learned, 2 plants in a tent this size with the way I train and top is plenty! Otherwise I run out of room!
9/27 - Did some defoliation and lollipopping today. Will likely water tomorrow.
9/28 - Watered today with my usual nutrient combo described in this weekly entry.
9/29 - Plants are SO happy. Leaves are up and praying! Flowers are starting to show a little density too!

Likes
7
Share


@herbalistssword
Follow
Installed new heater and temperatures are back to normal. She was not growing at all from the cold, she finally started growing again.
She was looking well so decided it was time to train her, tied all the branches to open her up to give more light to lower branches and to increase my chances of an even canopy.
I defoliated some leaves but left the smaller branches forming in the middle of the branches as I'm hoping to get some clones out of them.
Mawed the alfalfa down and left as cover crop.
Fed the soil today:
1/2 tablespoon ecothrive life-cycle
1/2 tablespoon epsom salt
1/2 tablespoon fish blood and bone
Sprinkling of mycorhizal
Sprinkled on top of the mulch, then watered with 2 litres of water. For the water, I squeezed the gel from the leaf of an aloe vera plant we had.
She is looking really hope she takes well the to the training and grow a little