
Likes
Comments
Share


@Paflucy
Follow
Heeloo everybody :)
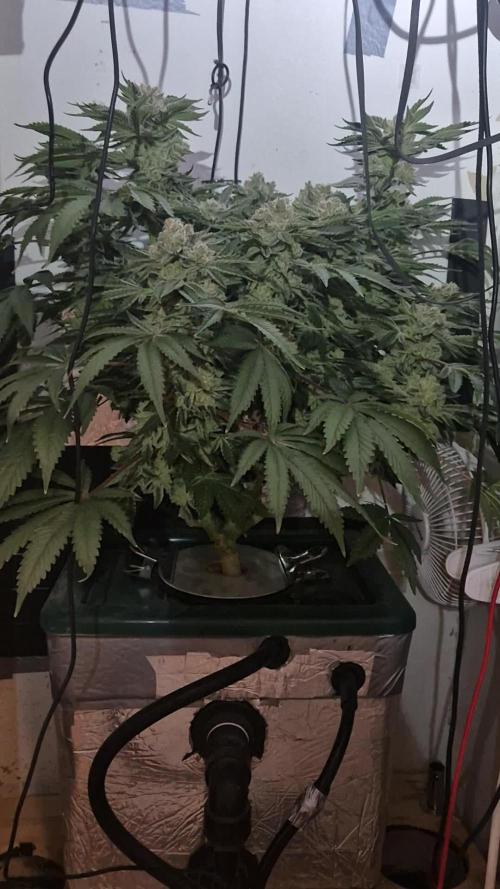
After huge problems on veg, finally we start blooming :) First day after older ladies break into flowering. Right now they are on 12/12 lighting cycle and they just get the final boost of nitrogen.
When the girls were at 10 level I cut them down into 5, 4 and 3 level or 4 and 3 level. I had also erased all the bottom levels. After removing top level I waited 3 days and removed the lower one. The stem had maybe 3 cm but I decided to try and make a clone off it, just as an experiment. I was super suprised when I saw some roots after only 10 days :)
Grow Medium - Biobizz light mix + with acid humus + dolomite + perlit + Great White Shark ( when transplanting)
On the bottom and top Plagron Coco 60 - Peebles 40
Check the lamp, it's something really innovation in my opinion.
https://bilberry.pl/en/home-page/


Likes
4
Share


@QixxGrows
Follow
Day8: First day of the new week. I assume still pretty much focusing on roots, as the top didn't really do much today.
Day9: Nothing special. But she's growing
Day10: Still roots, it seems. Very little happening up top.
Day11: Effort being put into growing the top leaves. They increased in size. I assume that the next node will start tomorrow - kicking off the switch into Veg.
Day12: Next node already showing :D
Day13: I put in a humidifier and changed the cycle of the extractor to keep more moisture in the growbox. My humidity was way too low.
Day14: This time the humidity was too high. It was sitting at around 95% when the lights went on.


Likes
18
Share


@AcidBurn_40
Follow
11.01.25 VD#1
Good evening everyone ✌️😁
Welcome back to the Eternity Grow Cup 25' from Zamnesia & Plagron. The Runtz is doing wonderfully.
The first 3 finger leaves are coming so I'm counting Vegitag#1 as of today, anything before 3 fingers has always been the seedling stage for me.
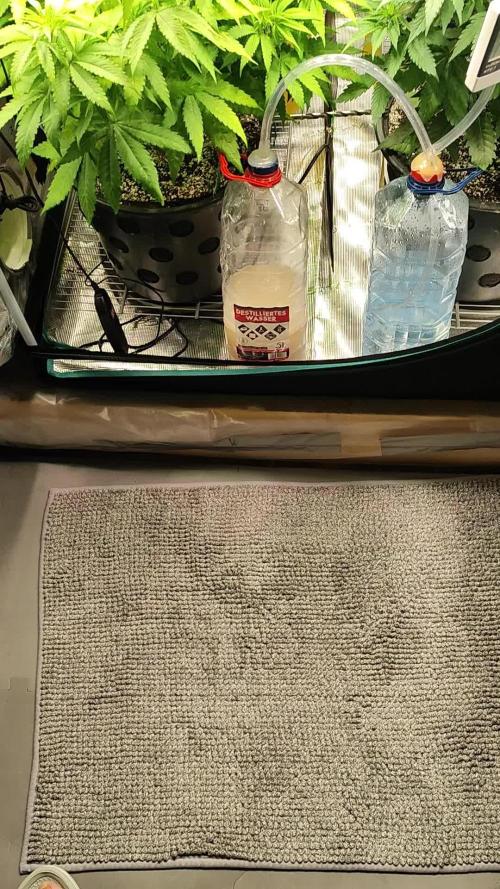
It is now in the 4.5L pot where it can spread and strengthen its roots for a while before it goes into the 30L fabric pot. At the moment, until Vegitag #21, the little lady is only getting Soil Activating Hesi PowerZyme 2ml/L& Hesi Root Complex 5ml/L.
I add Biobizz Calmag from Vegitag #1 in a preventative dose until rinsing.
Starting with 0.3mlL, then increasing with 0.2ml per week of the vegiphase.
The irrigation water has a pH of 6.5, so all nutrients can be absorbed by the plant in this phase.
I'm happy for everyone who has stopped by and good luck to all participants.
Stay healthy and stay high.
May all your ladies grow healthy and splendid and provide you with tasty stuff 👌
■■■■■■■■■■■■■■■■■■■■■■■■■
11.01.25
VD#1
Guten Abend zusammen ✌️😁
Willkommen zurück zum Eternity Grow Cup 25' von Zamnesia & Plagron. Der Runtz geht es wunderbar.
Die ersten 3 Fingerblätter kommen so zähle ich ab heute Vegitag#1, alles vor 3 Finger ist für mich schon immer die Keimlingsphase.
Sie ist jetzt in dem 4,5L Topf dort kann Sie erst mal eine gewisse Zeit ihre Wurzeln ausbreiten & stärken, bevor es dann in den 30L Stofftopf geht. Zur Zeit bis Vegitag #21 bekommt die kleine Lady nur Boden Aktivierende Hesi PowerZyme 2ml/L& Hesi Wurzel Complex 5ml/L.
Biobizz Calmag gebe ich ab Vegitag #1 in vorbeugender Dosis bis zum Spülen bei.
Angefangen mit 0,3mlL, dann pro Woche der Vegiphase steigernd mit 0,2ml dazu.
Das Gießwasser hat einen Ph von 6,5 somit sind für die Pflanze in dieser Phase alle Nährstoffe aufnehmbar.
Der Biobizz Light Mix ist vorgedüngt die Erfahrung hat mir gezeigt das der Hesi TNT Complex erst ab Woche 3-4 der Vegiphase nötig ist.
Freue mich für jeden der vorbei geschaut hat, weiter hin viel erfolg für alle Teilnehmer.
Bleibt alle Gesund and stay high.
Mögen all eure Ladys Gesund und prächtig wachsen und euch mit schmackhaften Stuff versorgen 👌

Likes
16
Share


@eldruida_lamota
Follow
Vamos familia hora de cortar estás Blueberry Cheese de ZambezaSeeds, ya tenia ganas.
La verdad que el secado muy bien 7 días en Malla y a los botes, 40% humedad y 24 grados es la temperatura ambiental que han tenido en el secado.
Por lo demás de miedo os la recomiendo.
Gracias a Agrobeta y Mars hydro , sin ellos este proyecto no sería igual 🙏.
Agrobeta:
https://www.agrobeta.com/agrobetatiendaonline/36-abonos-canamo
Mars hydro:
Code discount: EL420
https://www.mars-hydro.com/
Buenos humos.

Likes
229
Share


@OrganicNature420
Follow
Germination date 🌱 12/07/2021
Day 106 29/10/2021
Strain 🍁 SinCity seeds Frosted Biscotti
(Biscotti Sundae x Whitenightmare)
THC% • Unknown
💡 Mars Hydro FC4800
• Power draw 480W + 5%
• Max coverage 5 x 5
• LED 2070pcsSamsungLM30B1&Osram660nm
• Max Yield 2.5g / watt
• Noise level 0 DB
• Removable Driver +2m cable
• Daisy chain (multiple lights)
https://marshydroled.co.uk/products/mars-hydro-fc-4800-led-grow-light-samsunglm301b-commercial-greenhouse-medical-indoor-kit 🇬🇧
https://www.mars-hydro.com/buy-fc-4800-480w-4x4-energy-saving-full-spectrum-commercial-led-grow-light-mars-hydro-for-sale 🇺🇸
PROMO CODE • (ORG420) DISCOUNT 👍🏻 marshydroled.com
⛺ Mars Hydro 120 x 120 x 200cm
📤📥 AC infinity 6inch
💧 10lt dehumidifier
❄️ 3.1kw air con system
💉 Nutrients GreenBuzzLiquids
Organic Grow Liquid • 1-4ml until 2wk flower
Organic Bloom Liquid • 2-4ml flower stage
Organic More PK • 2-4ml +wk3 of flower
Organic Calmag • 1-2ml/lt whole grow
Fast Plants Spray • first 3days at night lights off
More Roots • 2-5ml veg +2wks flower
Fast Buds • 5ml +wk2 of veg until 1wk flower
Humic Acid Plus • 2-5ml whole grow
Growzyme • 2-5ml whole grow
Big Fruits • 2-5ml flower stage
Clean Fruits • 5ml flush 1wk
Ph powder
Root Gel
Living Organics
https://greenbuzzliquids.com/
PROMO CODE • organicnature420 15% off ✌️🏼
🥥 Growing Media • Coco Coir
Notes 📝
I can't wait to consume this 🔥.. I know anyone looking at it will think the same. Smashed this strain out of the park for looks, let's hope its a killa smoke. Tricones turning orange so will keep an eye on her. Praising the ganja gods 💚🍁
Discount codes in bio for Mars and GreenBuzzLiquids 👍🏻

Likes
10
Share


@Jozef_Balcerek
Follow
Lampa na 50%. 65cm po LST 70cm. Warunki temperatury i wilgotności stabilne. Wydaje mi się ze po LST rośliny stanęły. Zobaczymy jak będzie dalej. Opóźniona panna bez LST.


Likes
6
Share


@Cannabis4Crohns
Follow
Plant starting to flower. Removed a few fan leaves that were blocking the centre if the plant.
Started to increase the power of the light slowly while keeping 12" (30cm) away from the top of the plant.
Increased the feed by adding: 2ml of Seaweed and 2ml of Miracle-Gro to 2 litres of water with a 6.1ph - 6.5ph range.

Likes
6
Share


@Barcelona_Farmers710
Follow
Aquí empezó los problemas por el regulador...no podíamos bajar la potencia de 320w y los pelos se quemaron un poco, apesar de todo los colores empezaron a florecer! Buenos humos compañeros 🍁


Likes
3
Share


@UrbanBoer
Follow
This one has me confused, she seems to be stuck on the first week of flowering, while she revegs she seems to love defoliation or like Monday’s Blue she is in good grow medium, because Blue and Unknown share the same grow medium, she really surprised me how far she has grown, she is one of my tallest lady with less soil 2nd to Blue. The crazy part is she got a heavy trim before leaving for a month, then I defoliated again and a High Stress one, when I got back, she recovered and forced me again to give her another defoliating session a heavy one to add,and had to do it because she was depriving Mexican Peach Punch with light, resulting in her having an even bud development, one side grows faster than the other. I hope this trim will force her to focus on bud development.
Likes
16
Share


@Diips
Follow
Both plants looking good.
The cheese, is really frosting and flowering up, really crazy! shes gonna become a beast and is so early into flower
13-08-2024. both plants been given a 5 ml shot of Calmag. also the cheese got her mid bloom dose of Biopk
16-08-2024. the ladies got some water today, and the Orange Apricot Glue has overtaken the cheese in height, compared to the cheese being the bigger one for most of the “grow”.

Likes
128
Share


@PapaNugs
Follow
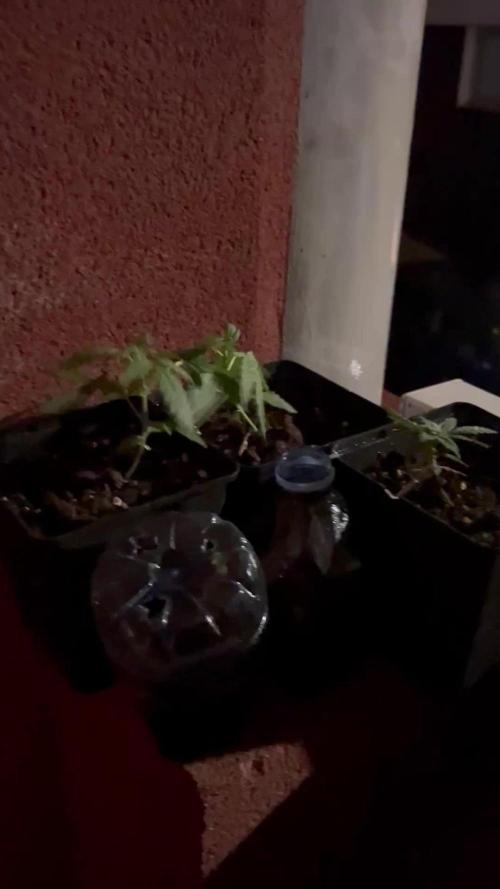
The girls survived. Always the biggest stress in the beginning. Getting sprayed with water twice a day. Gonna do the first watering soon. Hoping for growth!

Likes
2
Share

@Daniss98
Follow
What’s going on growmies? Hope you had an amazing week and plenty of 💨.
I had a really bad weather this week it rained 4 days straight and the wind was horrific it was like a small hurricane. Also 1 of them looks like dead already so probably im gonna take that space and use it for the 2 green poison im growing leaving this diary either only papaya cookies.
Still 1 of them isn’t flowering. This first grow of auto is really giving me headache but ill keep it up!
I’ll keep you updated next Sunday hopefully we get a poker with all sunny days around here. Goodsmokes💨🏻
Likes
14
Share


@Jamiebigs10
Follow
Nothing but plain pH adjusted water from now until chop,
Any comments appreciated
Missed aot of footage on herebut not really ram into any problems.
Likes
7
Share


@Hommero75
Follow
End of week 4 for the Purple Lemonade. She just got fed with Goldleaf feterlizer and cal-mag.
So far no new changes. She keep growing slow, no signs of pre- flower. She's been a hand full. Leave are still getting the brown spots and dying even with cal-mag added to the feeding. Let's see how week 5 goes.
Likes
6
Share


@MissSolasolita
Follow
End of week 1 of flower
Started LST today
She is doing very well
The other Bruce Banner in shared pot is in full flower by 1 week and measures 41 cm

Likes
38
Share


@Teamdirtbag2
Follow
It's all about #5 Sour Stomper. Some hard training. She has no branches. So we will try to make a full circle. Just for fun & to say I did.