
Likes
Comments
Share


@Nyabinghi420
Follow
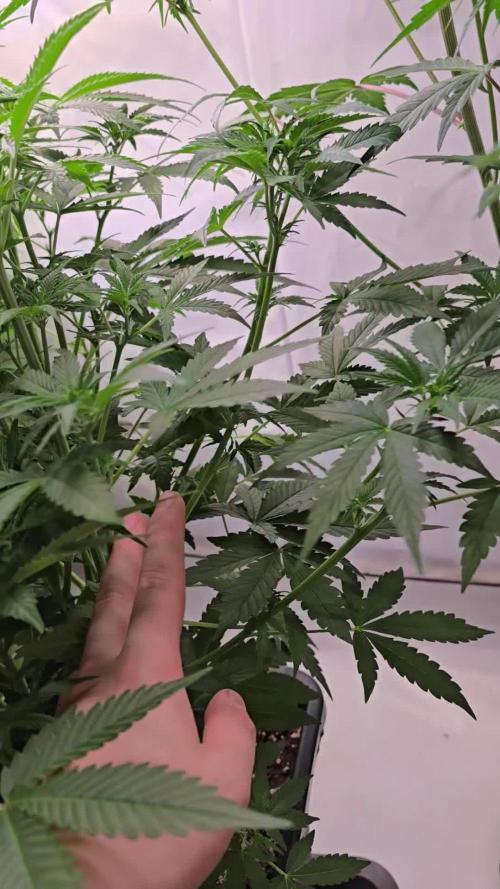
We’re back again fellow growers! How ya been?
Tried something different this time around with the pics since ya can’t really see much plant color with the purple lighting ha
One new discovery I’ve made with the last slurry is these girls are getting HUNGRY - Feeding is at an all time high - but that may have something to do with a freaking 10 week veg 😂😂😂
Also I accidentally bumped a nug as I was bending some stems around and my god.. the smell emanating from these girls is AMAZING! 10 years ago I would have just squeezed a nug, now I know that’s not the best to do lol
Speaking of the past - Does anyone else kinda miss the classic undercover nature of growing from the days old?
Where you were watching a guy with a mask & sunglasses on YouTube at 2am climbing in his closet with a bottle of big bloom?
Or Chubbs with his late night dabs and stories? (Still remember when he got in that road rage fight years ago) INSANE.
Those were the times!
Make sure you catch the short video, until next time - I’m out boys!

Likes
11
Share


@Ieiogrow94
Follow
Eccoci di nuovo qui!!!
Super eccitato per questa nuova collab con Kannabia Seed Company, team davvero al top, che mi ha dato l’opportunità di testare questa nuova genetica e di condividere i progressi con tutti voi!!!
Come sempre partiamo nei bicchieri per poi travasare.. Questa volta verrà svolto tutto sotto la Lumatek Zeus 465 ProC, mi aspetto molto da questo ciclo!!
WOOOOOW!!
Pianta DEVASTANTE!!
Grazie a tutti per il supporto ❤️🍀🔥

Likes
11
Share

@ThatsmyGrow
Follow
What a great start in the flowerstage, thats why i love growing so much. The super lemon haze that i got is a super pheno, i hope the buds will be amazin like the grow.

Likes
18
Share


@bradleycherry
Follow
Chopped her wet trimmed her now waiting till it dries lil nugs that I cut off to dry faster to get a taste and effect test she smokes beautifully ands she tastes like mango

Likes
19
Share


@Brustwehr
Follow
2018-11-19 Flowering in full swing. Pulling slows down. In the morning, on the day of the compote replacement, my PPM-meter broke down. Therefore, the new solution was kneaded by eye. Tomorrow a new device will arrive and I will clarify what I have mixed there.
2018-11-24 Buds swell, there is time to figure out how to do time lapse video.
Likes
19
Share


@Naujas
Follow
the girl looks good, the leaves are a little burnt, but it's really not a big problem. she doesn't have much time left until the finish:) I'm on vacation, so I can't take pictures myself, that's why I asked someone to visit her several times a week :) I'll be with her in a week :) ❤️


Likes
7
Share
@MetropGrower
Follow
Bulk runs good
She is now 97 Days old
About 3/4 weeks until the possible harvest point
Likes
2
Share


@Dr_Green_Thumb87
Follow
8/12 day 64 plants in smaller pots suffer a bit from nutrient deficiency.
Living soil seems to fit better in large setups, anyways they will be feeded with tap water only until i chop them.

Likes
48
Share


@Wackytabacky_420
Follow
Sorry guys I had covid this week of my diary. I didn't get any pics or data. I avoided my tent as much as possible as I was really sick. This was my feeding schedule 4 the week though...
2/1/2022
2ml micro
1ml gro
2ml bloom
1/4ml ph down
Ph 6.47
372ppm
Solution temp 74.1°F
2/5/2022
Water 6.3 ph
180 Ppm
Solution temp 73.2°F
I am much better now so hopefully will get on track. The photos posted are last weeks pics.
Likes
18
Share

@Northern_Ent
Follow
Sep 6: Tropicana Cookies FF is doing great. Maybe not as much flower maturation last week as I expected but we’re just starting week 8 of flowering. So likely the end of September which is fine for the late start on this plant.
Sep 7: decided on a final top dressing of malted barley and Power Bloom. Seems they need a bit more P.
Likes
3
Share


@Simon_Says_Smoke
Follow
This was my very first indoor grow in my cupboard with my 1 strain Do-Si-Wine and the other 1 Sunset-Sherbet.
Growing the Do-Si-Wine was very fun and this strain especially is also quite tricky to LST because during the Vegetation the plant grows long and slinky, because of this I experienced a snap on week 6.
(Here are my notes of the 6th Week)
30th September 2020
( 11cm in height )
The Do-Si-Wine is growing very well, a very moderate growth as it says in it’s subscription, but none the less still a very beautiful grow so far.
The bottom 4 colas are all stress trained to the edges of the pot to ensure each branch from each cola gets to grow outwards in its own space and to get more light.
The stem is about 0.7cm thick which is not that thick compared to the SunSet Sherbet.
While writing this I noticed my she has SNAPPED from her previous stress straining session, I was checking out the stem thickness and noticed the main stem had snapped. But luckily this is not the first this happened and I know how to fix this. To fix this all you need is some tape, now see if the plant didn’t completely break off you can still tape the plant back together and the plant should heal itself within a few days, although I need to wait a bit before I stress train this one again.
She started making pistols🤗, but I’m not sure if this is because of the snap or if it’s getting ready to start blooming.
All the side branches from the bottom 4 colas are all nice and long growing at a nice rate.
The leaves are nice and strong reaching ( 11cm in length )
My experience from growing Do-Si-Wine 🎶🍷 from Cape Ape Seed seed bank is very good so far, on the site it says moderate growth difficulty and it is quite accurate compared to the Sunset Sherbet’s easy growth difficulty, it’s quite fun working with a moderate growth because the plant needs more tending to, for instance the side branches are thinnish and need to be stress trained often to reach the end of the pot, the plant is also very stiff because she snapped without me realising and had to tend to the break a day later.
Also while growing this plant I noticed that the plant’s leaves are very dark green and the bud it’s going carry is going to be white so I can’t wait to see how she makes her buds.
(Notes Done)
So when I harvested on the 29 December 2020 (Week 19)
I have definitely learned a lot about this strain, this strain is extremely exotic and is impossible to find and growing this strain was such a blessing as well being able to smoke top shelf exotic weed straight out of your Cupboard


Likes
3
Share


@Willy_Balls
Follow
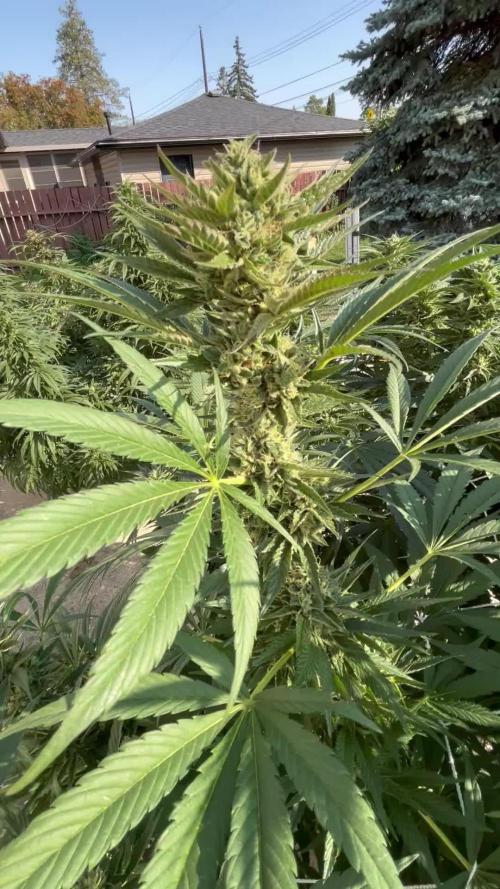
Getting chunky and frosty. Some very nice specimen in these. Lovely terps and I feel they are going to be a looker. Some colors are already poppin. And they still have a lot to go.


Likes
7
Share


@mrpineweed
Follow
last feeding,ripping for 1 week then harvest my 1st grow yea😎 they turnedcolor durning harvest moon!!!! added veido today


Likes
7
Share


@Marihuanacali89
Follow
Bueno familia ya estamos entrando en 5 semana de flora con mucha fuerza ,mucha resina y muchísimo olor... La verdad que para ser un cultivo con nuevos fertilizantes y el riego automático la verdad que ni tan mal ..pensaba que el siguiente cuando me hubiera adaptado a lo nuevo es el que me saldría bien ..pero cuajo a la primera jejejeje
@marshydro_amazonled @130.devin_mars
@marshydroled_amazon @coco_pan2022 @marshydro_amazon @co.ol9055 de 120x120x200 con el Fce-6500 con 650 w
Con humidificador
Dos ventiladores
Extractor con filtro y intractor
Y controladores de @wifiindoor mediante WiFi desde app movil
Todo con la gama mineral de @intensenutrientsspain @lidiacomercial
Sustrato de @millsspain
@geckoseeds
2- #thebigjeff
2- #lagalleta
3- #geckolope
3- #stramberrymint
@art_genetix
3- #zerodosi
Y todos los demás productos de mi nuevo grow @locamariagrow
buenos humos mi manada ganja 💪💪💪💪🤘🤘🤘🤘🤘💚💚💚💚💚💚💚🐺🐺🐺🐺🐺🐺🐺🍋🍋🍋🍋🍋🍋🍋🍋🍋


Likes
12
Share


@CheeRz
Follow
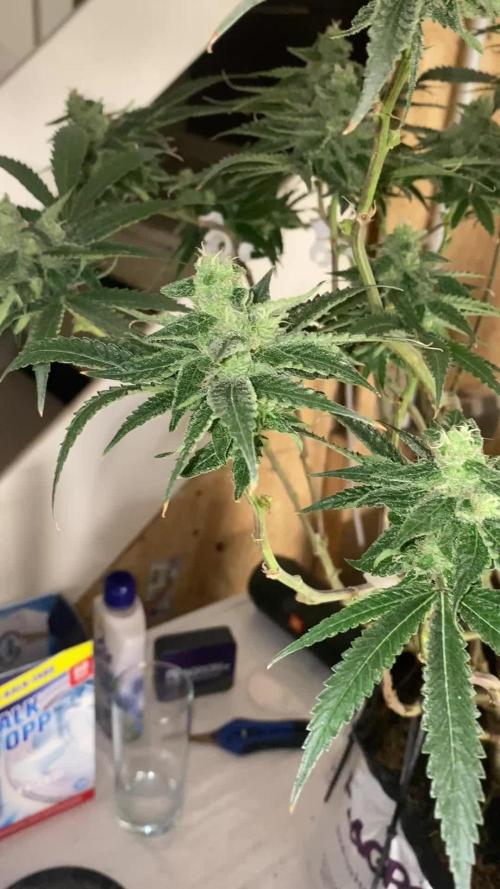
The buds slowly gettin' bigger and some trichomes started to gettin' milky but I can't see any amber ones.
Processing
Likes
14
Share


@kevgrow
Follow
Hey friends, end of week 4 from seed :)
- I had to transplant plant #2 from a 2 gallon pot to a 5 gallon fabric pot because roots were coming out from the 2 gallon pot, I began noticing some change in the color on leaves so I immediately decided to make the change.
- Plant #2 still hasn't revealed its gender to me, I can't figure it out because I see small pistils all around the leafs but there is just one area on the main stem with to very small round balls. I am hoping pistils come out from these balls as it did on other parts of the plant.
- Thinking of purchasing a bigger tent, I feel this one will fall short once this plant matures. I might leave it another 1-2 weeks in vegetative stage.
- Trimmed some leaves
- Performed some LST on plant #2
Likes
2
Share


@TommyBVRSA75
Follow
Video - middle growing phase on 9th week ( ending of 3rd flowering week ) - Blooming start.
Explaining my grow area - LED settings - temperature and humidity conditions - Strain descriptions