
Likes
Comments
Share


@AZMamaBear
Follow
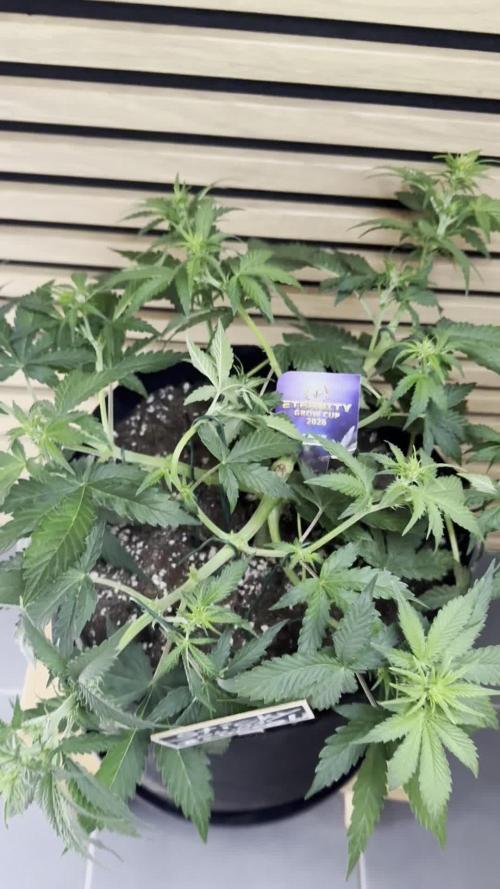
Been growing this one since Feb. Achieved a 32 node main-line. Towered over 7' tall. On 8-10, discovered that my feminized seed was actually male. This plant was the only one that I managed to successfully clone, so I had two boys.
Chopped the bigger one down. Decided to move the clone to another part of the garden and cross breed him with my small Big Bud and Gold leaf plants. Will put up some plastic sheeting to keep the pollen contained.
Hubby took him down. He considers killing a plant akin to murder. Not a good day in the garden.

Likes
43
Share


@GODSGIFT_2005_JM
Follow
🍼Greenhouse Feeding BioGrow & Bio Enhancer
⛺️MARSHYDRO
The ⛺️ has a small door 🚪 on the sides which is useful for mid section groom room work. 🤩
☀️ MARSHYDRO FC 3000 LED 300W
☀️Also special thanks to VIPERSPECTRA P2000 (200W) & XS2000(240w) LED growlights
🌱 FastBuds 420

Likes
13
Share


@rkomaaa
Follow
A lot of problems with run off PH
It drove me crazy, and i gave up
Now is aprox 6.5 and i will see how it will go
Likes
15
Share


@SweetheartOG
Follow
Started the girls with some LST to see how they all coped and they bounced back well.


Likes
69
Share


@nonick123
Follow
Día 44 (15/07) Wow! No hay shock de trasplante! 😍💥😁
Todas las ramas se han estirado hacia arriba tras el ajuste de LST y se están formando nuevos nodos rápidamente
Esta combinación de nutrientes de Lurpe + substrato de PRO-MIX HP es una maravilla 😍
Día 45 (16/07) Ayer tuvimos ola de calor (37 ºC) y han aguantado muy bien!
A última hora de la tarde (cuando ya no había sol directo) les apliqué H2O en spray foliarmente para refrescar los estomas
Hoy parece que vuelven las temperaturas estándar para esta época del año: 29 - 30 ºC en las horas centrales del día
Riego con 1 litro de H20 pH 6,5
Día 46 (17/07) Pequeños ajustes de LST
Hay algunas ramas inferiores que no se han formado / estirado mucho
Lo más probable es que haga una buena limpieza este domingo, 7 días después del trasplante, para dejar solo los brotes por encima del 4º nudo
Día 47 (18/07) Riego con 0,5 litro de H20 pH 6,5
Este domingo (día 50) haré limpieza de partes bajas y tal vez también de nuevo topping en las 4-6 ramas principales 😁
Día 48 (19/07) Día de muchísimo calor con 37 ºC. A ver como lo llevan!
Riego con 0,5 litro de H20 pH 6,5
Día 49 (20/07) Para ayudarles a llevar mejor el calor de las horas centrales del día, coloca una malla de sombreo (70%) sobre el invernadero
Lo cierto es que se nota que baja mucho la temperatura debajo de la malla! Van a estar más fresquitas! 😍
Riego con 0,5 litro de H20 pH 6,5
Día 50 (21/07) Training session!
Hago limpieza del tercio inferior de la planta, de todas las ramas y nudos que no superan la línea del dosel marcada por el 4º nudo (1er topping)
También hago topping (2º) a todas las ramas principales
La idea es tener 12 ó 14 colas principales para que no se hagan muy altas
De paso saco unos cuantos clones de las ramas inferiores eliminadas 😁💥
Para superar el estrés, hago las siguientes aplicaciones y riego:
- Riego con 1 Litro de Té Vegetativo de Lurpe Solutions. Preparación: 24 horas con bomba de aire (oxigenación) con ingredientes:
Green Sunrise 8 ml/L + Insect Frass 16 ml/L + Hummus Lombriz 8 ml/L + Melaza 1 ml/L + Kelp Hidrolizado 0,25 g/L
- Aplicación foliar Kelp hidrolizado de Lurpe Solutions a 0,25 ml/l
💦Nutrients by Lurpe Solutions - www.lurpenaturalsolutions.com
🌱Substrate PRO-MIX HP BACILLUS + MYCORRHIZAE - www.pthorticulture.com/en/products/pro-mix-hp-biostimulant-plus-mycorrhizae


Likes
20
Share


@Alpha_Green
Follow
1st week generative phase:
Pre-flowering and the next problem with the two topped specimens:
Yellow leaf tips - too much nitrogen.
I just thought:
Close your eyes and go for it.... Organic cultivation regulates itself - well, at least in theory.... 🤣
Cannazym works wonders! I love to highly recommend. I work with it from pre-flowering to harvest and gently increase the dose.
A word about water quality... 💦
I now use oxygen-enriched reverse osmosis. Since here in Berlin the pH value is basically very hard (very calcareous water) and not all plants can cope with it, I decided to invest there.
Not cheap, but incredibly effective.
Likes
33
Share


@Hawkbo
Follow
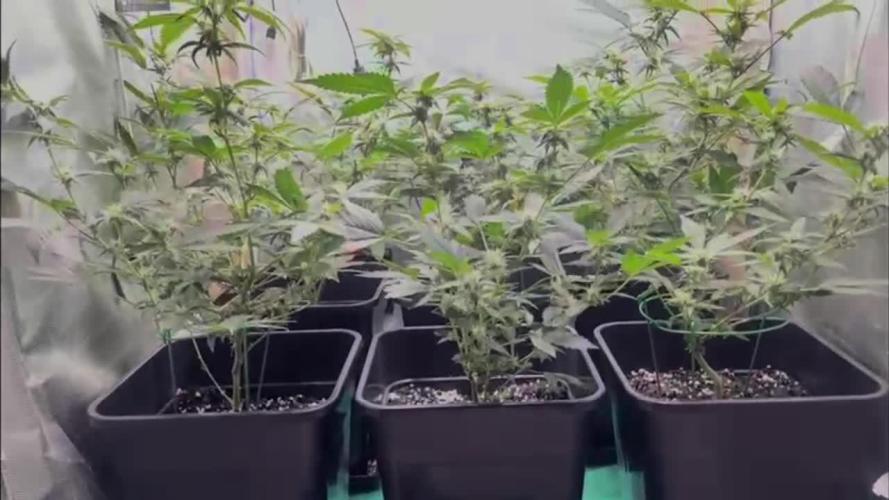
Did a full leaf strip on everything this week, the pics and videos were taken 2 days ago I just havnt got around to uploading them. Everything bounced right back after the strip but the pots arent drying out as fast and humidity went down a little bit.
Use the code bangdang for 10% the following sponsors..
@greenbuzzliquids
@rainscience_growbags
@gorilla_grow_tent
@growlightscience.led


Likes
43
Share


@WAWAWEED
Follow
My pH meter was troubled that make my plants got lower pH you can see brown spot on the leafs that's it.🌱✌️
Likes
12
Share

@SundancerS
Follow
Erste Blühwoche und der Sticky Brokoli hat beschlossen, dass Kompaktheit zwar nett war, Höhe aber jetzt auch ganz charmant ist. Der Stretch ist deutlich, aber wohlerzogen, kein wildes Spargeln, eher ein kontrolliertes „Ich könnte noch“. Viele Triebe mussten trotzdem gehen; keine Tragödie, sondern klassische Personaloptimierung. Wer es nicht rechtzeitig Richtung Licht geschafft hat, wurde höflich, aber endgültig aussortiert.
Nach der Entlaubung wirkt das Blätterdach wieder wie geplant und nicht wie ein schlecht gelüfteter Dschungel. Licht kommt durch, Luft zirkuliert, die verbliebenen Triebe stehen stabil und selbstbewusst da. Technisch bleibt alles angenehm unspektakulär: EC 1,8, pH 5,9
Bisher ein entspannter Grow, gute Struktur, Stretch unter Kontrolle. Der Brokoli wird langsam sticky, und man ahnt, dass das hier kein Snack, sondern ein Hauptgericht wird. 😎

Likes
44
Share


@ElRojo
Follow
Day 60, week 9 a Little video update, i switched to 12-12 and seems working, the lady Is growing a lot during night time.
Day 61, what the fuck Is wrong with this leaf, what i can do? I was checking the lady and found this leaf on the main cola, i cutted It Off and now i'm worried could be some fungus 😟
Day 63 end of week 9, today i feeded calmag let's see how the lady turn out
Likes
Comments
Share

@Raster893
Follow
Entramos en su 4 semana de floracion y despues de una defolacion tardia por mi parte así van respondiendo :) seguimos usando la gran mayoria de los productos de biobiiz.pensando en si empezar añadir bio-heaven o no. Un saludoo :D buenos humooos!👽👽👽👽👽🙏

Likes
6
Share


@TheGreenHoodlum
Follow
Pas vraiment le temps de mettre à jour mon growdiaries..mais tout se passe bien les filles deviennent des monstres!
Je laisse une courte vidéo de visite de ma jungle!
Bonne saison les growers


Likes
13
Share


@GrowGuy97
Follow
Day 36 - This beautiful lady is starting to show some purple, she does seem to have a bit of nutrient & or light burn been trying to figure out but overall she is doing great! Thanks for following & happy growing friends!✌️🏼🌱

Likes
8
Share


@CanarianGrow92
Follow
Week 2 and nice and green, we just gave some more organic nutrients like palm tree ash and some guanokalong powder, for the moment its seems to be all good, in 2 weeks I'll be adding some sugars and some more PK
