


Likes
Comments
Share


@JUNGLE_B4RNS
Follow
Bio RootBooster + AllZymes
4 x FC6500 @ 37.5%
4 plants / FC6500
Growth A+




Likes
5
Share


@Do_it_Dan
Follow
She's starting to fatten up now and she's getting rather greedy for water, fed 3 litres yesterday and today she's feeling a little light so probably feed in another 2 days, I'm happy she's happy were all happy 😊 l, happy growing and stay green ✌️ 💚 👌

Likes
21
Share


@darb35
Follow
Day 29 - Starting to give first week nuts, full schedule
Day 33 - Trim big fan leaves
Day 34 - Lolipop and more trim
They look very healthy and have a very nice texture 🌱


Processing
Likes
2
Share


@MephodMan
Follow
Topped to 4th node. Started brewing ~5l of neem/kelp/aloe
Trying out LST clips for the first time. Added a couple of small LST clips on the 4 largest fan leaves.
One of the large lower fan leaves snapped off this morning when I was adjusting the LST clips. It looked like it had already snapped yesterday.
Adjusted VPD to lower humidity

Likes
30
Share


@BC_Green
Follow
It has been another amazing week of the plants growing. I have been watching as the Fruity Freak leaves become progressively more fern-like, and ornamental as a result!
Based on my Banizzle grows, I knew I needed to understand plant nutrients in a more meaningful way if I wanted these plants to thrive. So, I decided to get a soil test (see Ref. 1 below on how to perform a test) to understand what nutrients my plants needed. The report I received advised that I needed to add 200 lbs/acre of nitrogen, 150 lbs/acre of phosphorus, and 190 lbs/acre of potassium (see picture labeled Pic.1 (FYI you can't see these images unless you login to growdiaries)).
I then researched what to do with my results (Ref. 2 helped), and I figured out that my nutrient needs of 200-150-190 fall close to a 2-1-2 ratio. I then looked at different types of organic fertilizers (see Ref. 3 and Ref. 4) and considered that I already had a 3-10-5 fertilizer (Vermibloom) on hand. I discovered Dr Earth’s Alfalfa Meal is 2-1-2 and includes beneficial bacteria and mycorrhizae (to promote healthy plant growth and disease resistance). However, I knew I would be low on nitrogen if I only used those two fertilizers. Therefore, I decided to buy some blood meal (12-0-0). I also liked that blood meal is more fast acting while the other two are more moderate.
I hunted around for a solid fertilizer calculator and found an amazing tool from the University of Georgia Extension (Ref. 5). I entered all three fertilizers into the calculator, and it kicked out the exact amount of each fertilizer I needed to apply to 1 square foot (see Pic. 2). As I am using 10-gallon fabric pots (that can hold 1.5 cubic feet, but I put stone on the bottom and there’s space left at the top) I decided to use the one square foot application rate as I can always add more later, but I can’t take it away.
Not only did I want to understand the nutrients I needed, but I also wanted to understand the structure of the soil (as it was not included in my test results). North Dakota State University has a nice page that discusses this (Ref. 6), and I performed a soil ribbon test (see Video 1) based on this information. I determined my soil to be medium textured (which is great), but I have seen occasional water pooling on the surface, suggesting that it may be more of a medium-fine. This means adding peat moss, coco coir, or other amendments might improve drainage (and plant hydration) and allow for roots to grow more easily. In the long run, I plan to use compost to enhance the soil structure and nutrients.
I filled the bottom of my 10-gallon fabric pots with a ½” of pea stone to allow for drainage (Pic. 3). I then partially filled two 5-gallon buckets with topsoil from near where I will plant (but not in an area the roots will reach). I used a digital scale to measure the amount of fertilizers recommended by the calculator (Pic. 4, 5, and 6) and added it to one of the 5-gallon buckets (see Pic. 7). I mixed the fertilizers into the soil as evenly as possible (Pic. 8 and 9). I then poured a two-inch layer of non-fertilized soil, then peat moss, and then fertilized soil (in a roughly 2:1:1 ratio) and blended them together. I repeated this until the pot was full (getting additional soil as needed), and then I repeated the process for the other three pots.
I set the filled fabric pots in my garage (Pic. 10) for two days to allow any upset bugs to flee into my garage instead of my house. I then moved the pots (wrapping them in a contractor garbage bag to prevent making a mess) into the room with the grow light. I placed a board on top of the fabric pots to insulate the plants (in their smaller pots) from the cold soil (Pic. 11). Once the soil in the fabric pots reaches room temperature, I will transplant.
(Ref. 1) This video shows the method I used to take a soil sample. I didn’t have a field to test, so I took four samples from the area where I will eventually plant outdoors and blended them together. I then mailed my soil sample off to the lab, and about a week later, I received an email with a PDF of my results (included with my pictures this week).
https://www.youtube.com/watch?v=N9AwxmFxBwg&t=8s
(Ref. 2) This video from the University of Minnesota Extension (many universities have agriculture extensions that can assist you with soil testing and growing information for your area) discusses what to do with your soil testing results:
https://youtu.be/HYrkcfE62Pg
(Ref. 3) This is a nice article that discusses organic fertilizer solutions:
https://www.grow-it-organically.com/npk-fertilizer.html
(Ref. 4) This article lists the NPK values of many organic fertilizer solutions:
https://www.epicgardening.com/organic-fertilizers/
(Ref. 5) Many websites tout a fertilizer calculator…but this one is hands down the best I have found. If you scroll down to the bottom, you can enter any fertilizer type you want (and the cost, if you want). It will give you the exact blend of multiple fertilizers to solve your nutrient deficiencies (I included a snapshot of the solution I used in my pictures).
https://aesl.ces.uga.edu/soil/fertcalc/
(Ref. 6) This is an excellent article that discusses how to evaluate your soil:
https://www.ndsu.edu/agriculture/extension/publications/evaluating-preparing-and-amending-lawn-and-garden-soil
Likes
8
Share


@TheGreenLeopard
Follow
big leafs , strong and stout. the are doing well so far all together. check ou t the other diaries , more exciting stages .. thanks for visiting.
Likes
4
Share


@Canadian_Bud
Follow
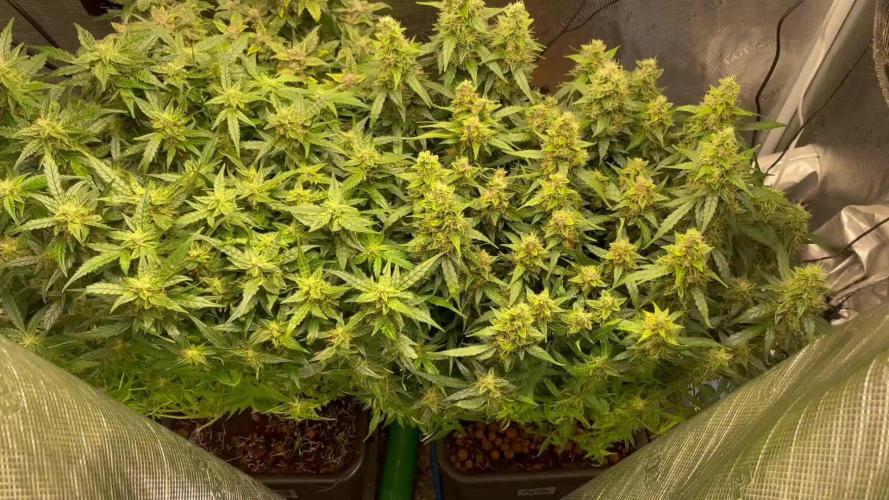
Growing this purple was easy Going most of the way, Only drawback was she grew so big it was hard anchoring her down in the basket from the tilts, but once she was down she put on a show. Her heavy Buds were thick, hard oozing resin was potent and sticky I quickly scooped up some falling Trichomes from beneath my tray Loaded my chamber 220c and 8hrs later I finished my day.Probably could have taken half that time had i not loaded that first bowl then the next....... 😎 Just a tad over 12 Oz on my quest to hit 1 pound per plant. Some exciting Donated Seeds Coming My way. Stay Tuned Find out who they are and What I'm growing next, Going to be some exciting shit. Thanks for following😍



Likes
11
Share


@sam_doze
Follow
There it is . My Red poison auto Original and My other seeds by bulk packs.
Totally three plants of weed.
oh yeah baby
My cellphone did that

Likes
10
Share


@GrowingInPeru
Follow
Buena variedad y pega fuerte se siente como si te derritieses es una sensación muy buena 😎pero me gusto mucho cultivarla este cultivo esta a base de pura agua con nada de PK ni NPK. OG Kush Auto excelente trabajo

Processing
Likes
7
Share




Likes
15
Share

@Oims_Finest
Follow
Servus all✌️
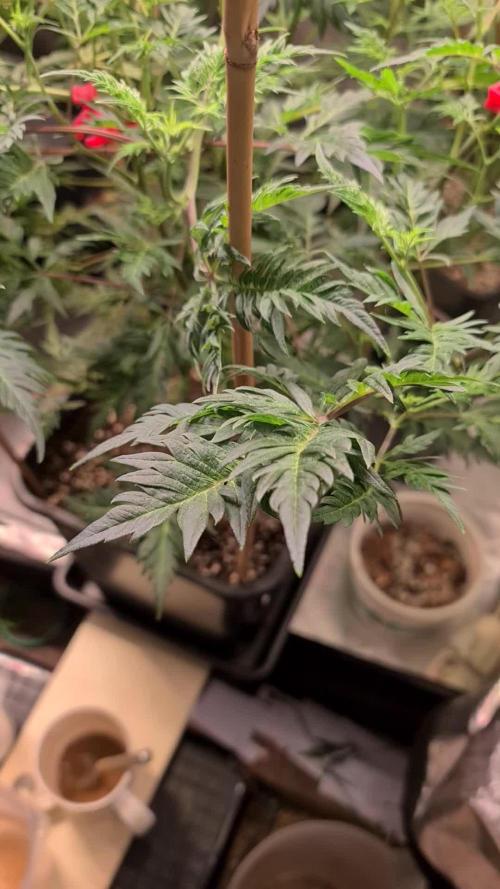
6 weeks of flowering are done. This wasn't the best run I have to admit, but we're entering the last chapter of this turn.
The Strawberry Guava will finish first. Buds are big and dense and covered in Trichs. The S1 line definitively took a more sativa-dominant Cultivar for pollination. Former plants had been clearly more on the indica side and had a different terpene Profile..
The Dulce de Papaya on the other Hand will reach the 10 weeks Mark. Buds are also tight and trippin in Trichs but due to her relatively short internodial distance and dense growth, maybe I'll have to harvest twice to give the third and fourth stage a little more time to mature.
That's all for the week, rest are the daily routines.
Have a good one!
Oim.

Likes
37
Share


@LaGrassaFarm
Follow
En esta semana quiero destacar el frio que han sufrido las plantas.
La Matabi sufrió sobrefertilización (y creo que sucedió porque) debido al frio, la planta chupa mas nutrientes que agua.
Regué con los productos órganicos de Gotek
El día 24 fueron transplantadas a maceteros finales de 7 litros.

Likes
15
Share


@OrganikTek
Follow
This week was very hot.
They stressed a lot some heat stress and some fan stress that came up to uptake look down.
The weedding cake was that must sofer. Shr was still recovering from that led issue...and she gets direct sun light in the hottest hour.
Black cream in the other hand sofer a lot with fan stress bleaching the leafs in direct contact.
Couskush its a beautifull lady and growing nice.
Bomberry is late but showing some promissing buds.
Chears BrotherHood

Likes
16
Share


@HegauHillsFarmers_M11
Follow
Tag 1 - Beginn der 1 Woche.
Die Pflanze wurde bisher nur mit Wasser besprüht und die Erde angefeuchtet.

Likes
32
Share


@LSnake
Follow
During this first week of vegetative growth, the seedling has slightly stretched more than expected, but this is not a problem since when I transfer it into the larger pot, I will bury the stem. 🌱
I haven't started giving nutrients yet because, as already mentioned, the substrate I use has them for the first few weeks, in fact the leaves seem to me to be a nice bright green. ✔️
I proceeded to mount a small fan on the side of the tent to create recirculation of air and make the stems of the seedlings take some strength. 💨
For now the main tent is occupied by the flowering phase of other plants so for the first few weeks I will leave the seedlings in the closet with smallest led light. 💡
(link below) ⬇️⬇️⬇️
https://www.amazon.it/gp/product/B08P2G1VQW/ref=ppx_yo_dt_b_asin_title_o05_s02?ie=UTF8&th=1

Likes
10
Share

@Enochian
Follow
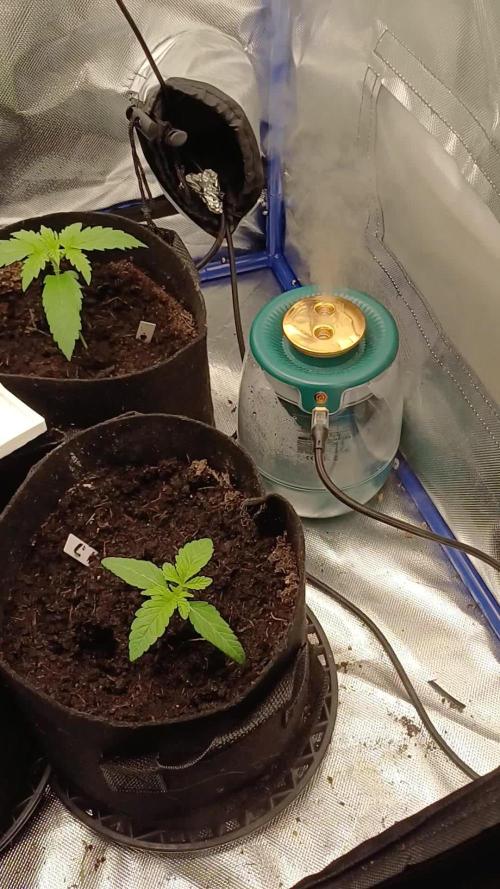
A slow start but they finding their pace now. Added another light to this tent. 150 to 200W all in. Temp is steady but humidity low so added a humidifier. Temp 24/25 humidity 50 and VPD around 1 to 1.2. Not much to say for this week. Onwards and upwards as they say.


