
Likes
Comments
Share


@Nookandplant42o
Follow
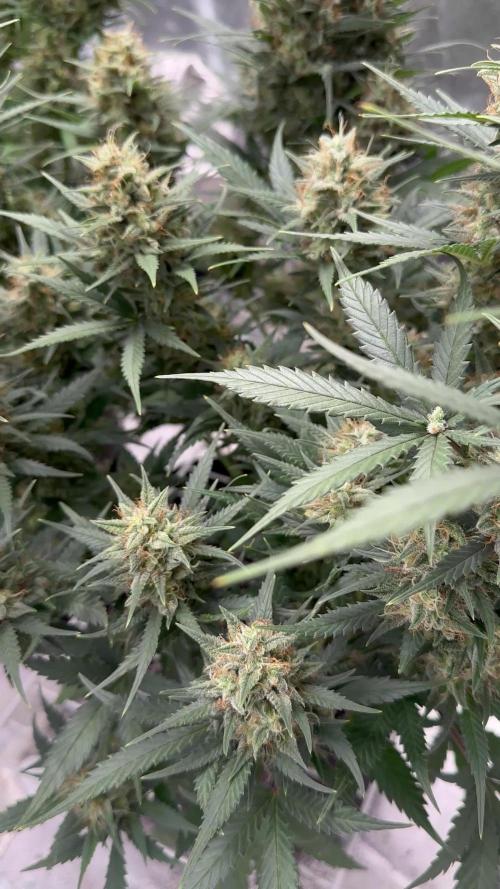
An immediate feeling of high something relaxing in the eyes, the body becomes active for activities or work. Brings Up Old Thoughts Reflection Watching movies is a great thing to stay focused and better save something sweet to eat. Undoubtedly, the high comes with hunger, something good even for those who have a lack of appetite. Strong sweet and citrus aroma, mild flavor bringing a light guava sweetness. 🤗


Likes
32
Share


@Chucky324
Follow
Hello All. I took a lot of pictures. Hope you don't mine, but I had fun. I think everyone likes to see large harvest pictures.
It all started back in early January when I took clones of my favorite plants. It was a cold winter here this year, for these parts. So it was mid March when I got the plants out in the greenhouse. The spring was damp and cold too. I found powdery mildew in the garden about 2 weeks before I found it in the greenhouse. I got it on the Skunkberry and the Burmberry, But not on either Amnesia Lemon or the Sister Amnesia Lemon. I was very pleased about that :) I found some spider mites in the last week and a half. I decided to turn up the fans instead of spray. Yes they still spread but very slowly when they can't spin their webs. I didn't find many when I harvested.
Everything else went well this season. I found a male Dr. Atomic Northern Lights that I liked. So I'll try to make some seeds with the Amnesia Lemon, Skunkberry and the Burmberry. I'm trying to fatten up the Burmberry. I'm interested to see if the Amnesia Lemon gets fatter buds and carries the P.M. resistance to the seeds, I'm hoping.
The tall Sister Amnesia lemon in the middle did cause a drop of production from the plants on either side of it. They were in more shade. Something to work on for next year :)
The Skunkberry had the most P.M. I used a new produce that I'm pleased with, it's White Wash frequency altered water. Knocks the P.M. right out. I found that if you put a large tray under where you are spraying you can catch the run off. I could use it a couple of times with no change in effectiveness. It must be the Scottish in me. I try to reuse or recycle as much as possible. Cuts costs, and help make me feel like I'm doing good and helping the planet.
My feeding schedule was: I had a 15 gallon half barrel and pump with hoses and nozzles. I filled the barrel with nutrient solution and watered by minuets, 15 for clod days and 25 or 30 minuets on hot days.
After 3 or4 days I added water when the solution got low. Mixed new solution once a week, and cleaned the barrel and pump. I also took the hose in the greenhouse and soaked them till run off once a week and measured the ph. I saw a few fungus gnats, but the spiders and nematodes (from my compost I added when I mixed soil) sure help to keep the numbers down.
I like to put my buds in a paper bag to dry and cure. Inside I hang the buds for 3 days before putting the buds in paper bags. But it was so hot in the green house that 2 days was more that enough before putting the buds in the paper bags. The bags sat in the greenhouse for 3 days and then went in to the basement to finish. The old hippies told me that they use to put their buds to cure in the middle of a bushel of straw. I seems that the drying buds gives off a gas, that when trapped around the buds helps to take away the bitterness and raunchiness' of the uncured buds. The bags also help in wicking away the moisture of the drying buds, just like the straw did. After a week I check to see if it is dry enough. If the buds are dense the bag might need to be rehung for a few days to finish. I prefer a dryer bud. I like to hear a light crunch when I put a bud in my pipe. I like to hear a light crunch when I put the bud in a grinder.
> Amnesia Lemon- Plant #1 North plant=343 g.
>Amnesia Lemon - Plant #2 South plant=397 g.
> Sister Amnesia Lemon - Middle Tall Plant=401 g. Winner :)
> Skunkberry - Southern Middle Plant=316 g.
> Burmberry - Plant #1 North Plant=239 g.
> Burmberry - Plant #2 South Plant=294 g.
> Total= 1990 g. or 71 oz. or 4.4 lbs.
In Conclusion: This was my best grow ever! Big thanks to Barneys farm, for great seeds. I've got LSD started and I will try that in the greenhouse next year, 5/5 for mold and pest resistance. I'm very happy with the results. I was concerned because I have 2 rental houses behind me and one of them had a big backyard party at my week 5 of flowering. You could smell the grow by then and I was hoping I wasn't going to get ripped off. I looked through the fence a few days later and saw about 12 large plant pots, growing cannabis. I'm very happy. Cheers Chuck.
> November 3 Added pictures of the seeds I made this summer.

Likes
Comments
Share


Likes
51
Share


@MadeInGermany
Follow
Info:
Unfortunately, I had to find out that my account is used for fake pages in social media.
I am only active here on growdiaries.
I am not on facebook instagram twitter etc All accounts except this one are fake.
Flowering day 36
since time change
to 12/12 h.
Hey guys :-) .
We're halfway there and the buds are developing well.
Unfortunately I couldn't do anything about Tripse because the buds are too wide to spray the plant completely.
I have set up new blue boards and hope that you will get through to the end without major damage.
In the vegi tent there is already a lot of prey so that the stupid tripse are finally gone.
This week I watered the lady once with Clean Fruits so that 10% drain came out again 👍.
Today watering was normal again (for nutrients see table above).
Otherwise everything was cleaned and checked again.
Stay healthy 🙏🏻
A thank you for this wonderful strain goes out to
Herzog
https://instagram.com/herzog030?utm_medium=copy_link
and the Exotic Seeds team
You can buy this Nutrients at :
https://greenbuzzliquids.com/en/shop/
With the discount code: Made_in_Germany you get a discount of 15% on all products from an order value of 100 euros.
You can buy this Strain at :
https://www.exoticseed.eu/
Type:
Herz Og
☝️🏼
Genetics:
Larry OG X Kosher Kush
Indica 60 % / Sativa 40 %
👍
Vega lamp:
2 x Todogrow Led
Quantum Board 100 W
💡
Bloom Lamp :
2 x Todogrow Led
Cxb 3590 COB 3500 K 205W
💡💡☝️🏼
Soil :
Canna Coco Professional +
☝️🏼
Nutrients :
Green Buzz Liquids :
Organic Grow Liquid
Organic Bloom Liquid
Organic more PK
More Roots
Fast Buds
Humic Acid Plus
Growzyme Big Fruits
Clean Fruits
Cal / Mag
Organic Ph - Pulver
☝️🏼🌱
Water: Osmosis water mixed with normal water (24 hours stale that the chlorine evaporates) to 0.2 EC. Add Cal / Mag to 0.4 Ec Ph with Organic Ph - to 5.8 - 6.4


Likes
110
Share


@FatnastyzBudz
Follow
1-16
standard feed.
Cal/mag, Grow, Voodoo for roots.
PH 5.9 ppm 312 80ml.
1-17
Same feed, but with runoff.
in PH 5.9 ppm 317
runoff 5.9 380
1-19
ph 5.8 ppm 347
runoff PH 5.6 ppm 371

Likes
88
Share


@DogDoctorOfficial
Follow
🌾 Harvest Day — The Grand Finale of the Eternity Grow Cup 🌾
Days 72–73 | Trimmed on May 25 | Posted May 27
What a journey this has been — and what a finish. These five incredible Runtz phenos have now completed their cycle, and today, we celebrate the final stage of their flowering life: the Harvest.
We sent the girls into darkness on Day 70, allowing them a full 48+ hours of rest and reset. The dark period was just a bit longer, truth be told, because time… it flows as it must. This extended dark time helps increase resin production, allowing the trichomes to mature just that final bit more.
On Days 72 and 73, we harvested them with care and reverence.
Each plant was hung upside down, whole, in a perfectly controlled 60% humidity environment for 13 full days. Before hanging, we gently removed only the fan leaves, leaving all trichome-rich sugar leaves in place — a natural armor for the delicate resin glands during drying. Why do we do this? Because those sugar leaves help protect the essential oils and terpenes, preserving potency, flavor, and aroma for the smoothest experience later on.
🌿 The Dry Room & The Trichome Guardians
Throughout the drying, we used a moisture meter to monitor the moisture content in the stems. Once it dropped to around 12–13%, we knew it was time. This tool is a simple but game-changing ally in ensuring a perfect dry — not too fast, not too slow.
We then trimmed everything by hand over a 6.5-hour focused session. Armed with trim bins and good energy, we collected an abundance of glistening trichome heads in the process — a golden bonus from these resin-packed beauties. The leaves themselves told a story: deep purples, near-black shades, autumn fades and metallic tones — just stunning.
Each girl was trimmed in order:
#5 → #4 → #3 → #2 → #1,
revealing dense, chunky buds all the way from top to bottom. Not a single pop-corn bud among them — only rock-solid nugs, heavyweight champions in every sense.
📦 Cure Begins – Grove Bags & Glass Jars
Once trimmed, the buds were tucked carefully into Grove Bags and glass jars, each stabilized at around 61% RH. The Grove Bags handle the microclimate beautifully, keeping humidity between 58–61%, perfect for preserving all that hard-earned quality.
We’re now opening the jars daily, monitoring aroma and feel. This part of the process — the cure — is where the soul of the flower truly comes to life.
☀️ UV, Reds & The Perfect Run
Part of what made this run so special was the precision in light spectrum. 40% whites, full reds, UV and IR, and the girls responded like royalty. The UV pushed trichome development to the max. The deep reds gave us thickness, color, and weight. All of it under ThinkGrow Model Ones powered through the Trolmaster ecosystem — everything syncing in harmony.
This run was stable, lush, expressive — a grower’s dream. To my eyes, this was a perfect run.
⚖️ Final Yield: 1,302 Grams (1.3 kg)
In a 4x4 tent — that’s just 1.2m x 1.2m for metric friends — we pulled in 1,302 grams of flower, not even counting the buds that were taken for filming, photos, or “quality control testing” along the way. 😉
Dense. Loud. Sticky. Resinous.
🌿 The Hidden Half: A Tribute to the Roots
In every grow, there’s a part we don’t always see — a part that lives underground, quietly holding everything together. The roots. And this time, I wanted to honor them too.
When we unpotted the plants after harvest, we were met with massive, dense root systems, completely filling the Autopot trays. These roots were vibrant, white and healthy, looking like noodles in a thick herbal soup — a true sign of vitality. The Autopots system, combined with the Aptus Holland Clean Program and Plagron Green Sensation, made sure they had the perfect environment to expand, absorb, and thrive. The PRO-MIX soil was the perfect foundation — light, fluffy, with excellent aeration. It all worked in harmony.
After unpotting, I carefully washed every root system, removing all soil to prepare them for the next chapter of their story. Now, they’re hanging and drying — and will be left to cure for at least one month, possibly more, in a dry, dark, and well-ventilated space.
But why keep the roots?
Because cannabis roots hold ancient value — both medicinal and ritualistic. Though they don’t contain cannabinoids like THC or CBD, they are rich in alkaloids, triterpenoids, sterols, and other therapeutic compounds that can be anti-inflammatory, analgesic, antifungal, and calming.
Medicinal Benefits of Cannabis Roots:
• Friedelin – known for liver protection and anti-inflammatory effects
• Pentacyclic triterpenoids – believed to support immune and anti-tumor functions
• Alkaloids – some studies suggest pain-relief and muscle-soothing properties
• High levels of fiber and tannins – excellent for digestive and skin applications
🍵 Root Medicine — Ways to Use Dried Roots:
Once fully dried (they should snap like twigs, not bend), they can be gently crushed, powdered, or infused:
🌿 Cannabis Root Tea
Soothing & Detoxifying
• 1 tablespoon of dried, ground roots
• 3 cups of filtered water
• Simmer gently (do not boil) for 20–30 minutes
• Add a bit of ginger or lemon for taste
• Sip warm, especially good for menstrual discomfort, inflammation, and general relaxation
🍲 Healing Root Soup Base
Brothy & Nourishing
• Add a handful of dried roots into a veggie broth or bone broth
• Simmer for 2+ hours
• Strain before serving
• This adds a subtle earthy tone and allows the healing properties to infuse your meal
Topical Root Cream or Balm
Great for sore muscles or irritated skin
• Infuse roots in olive oil or coconut oil (low heat, 2–3 hours)
• Strain and mix with beeswax to form a balm
• Add essential oils like lavender or eucalyptus
• Apply to temples, joints, or sore areas
🛁 Root Soak Bath
Perfect for grounding and full-body relief
• Bundle dried roots in muslin or cheesecloth
• Steep in hot bathwater for 15 minutes before entering
• Let the soak draw out toxins and ease tension
⸻
The roots are more than just the anchor of the plant. They are its memory, its foundation, its quiet miracle. By using them, we honor the entire lifecycle — nothing is wasted, and everything has a purpose.
This part of the process is new for many growers, and I truly encourage anyone reading this to try saving and reusing the roots. Dry them, process them gently, and let them offer you one final gift.
Much love to Aptus Holland, Plagron, Autopots, and PRO-MIX — this wouldn’t have been possible without their harmony working underground while the beauty bloomed above.
🌱 The Gift That Keeps Giving: Reusing the Soil
As we say goodbye to one incredible season, we begin quietly preparing for the next. But not everything gets thrown away. In this garden, nothing is wasted. Just like the roots, the soil gets another life.
After each harvest, I carefully remove the remaining roots and break up the soil. I inspect it, rejuvenate it with compost and beneficial microbes when needed, and most importantly, I repurpose it — giving it a second life in my outdoor veggie garden.
Why do I do it?
Because this soil has already done something extraordinary. It has supported life, held moisture, breathed air, balanced nutrients, and fed plants that became medicine. It’s not just dirt — it’s a living ecosystem. And to throw it away would be to ignore its potential.
In my veggie garden, this recycled soil now nurtures cucumbers, tomatoes, courgettes, and so many other little miracles waiting to unfold. It’s a beautiful way of continuing the cycle, taking all the energy and intention that was once used to grow cannabis and transferring it into growing food. 🌞🍅🥒
🌾 The Benefits of Reusing Soil:
• Sustainability — less waste, less environmental impact
• Cost-effective — no need to constantly buy fresh medium
• Soil memory — rich in organic material, microbial life, and structure
• Nutrient potential — amended soil still holds value for many plants
• A deeper connection — a way to honor the entire cycle of growth
When we reuse our soil, we’re not just being resourceful — we’re believing in tomorrow. We’re trusting that what we’ve built can be rebuilt. That what has been used can become useful again. That from what seems like an ending, something new can always emerge.
And maybe that’s the most powerful message of all in this journey:
Planting is believing in tomorrow. 🌍🌱
Every seed in the ground is a little act of faith.
So as this season comes to a close, the first tomatoes have been planted. The cucumbers are reaching for the sun. The courgettes are settling in. And the same soil that once gave us dense, resinous flowers is now feeding the vegetables that will grace the table.
From harvest to hope — the cycle continues. And it’s beautiful.
🎉 The Final Touches
Fun fact:
• Trimmed on May 25
• Photo shoot on May 26
• This report: May 27
• Dry Bud Exclusive Photo Set: Coming soon
Stay tuned — the next upload will be something special, just in time before the Eternity Grow Cup closes on May 31st.
⸻
💚 Thank You
To Zamnesia — your genetics were nothing short of extraordinary.
To GrowDiaries, for hosting such a powerful space for community.
To everyone following this journey, your support, love, and kind words fuel this project and keep the spirit alive.
Let’s keep pushing boundaries, together.
With roots deep in the earth and eyes on the stars — the next chapter begins soon.
Much Growers love always,
🌱 Dog Doctor Official 🌱
Genetics - Runtz https://www.zamnesia.com/6000-zamnesia-seeds-runtz-feminized.html
Nutrients - Plagron https://plagron.com/en/hobby
- Aptus Holland https://aptus-holland.com/
Controls - Trol Master https://www.trolmaster.eu/
LED - https://www.futureofgrow.com/en
LED - https://www.thinkgrowled.com
Soil - https://www.promixgardening.com/en
Germination - Cannakan https://cannakan.com/?srsltid=AfmBOopXr-inLXajXu3QFgKXCXXos4F1oEvScjMKIB5MR5dk8-GJ-F49
DOGDOCTOR 15% off
Smoking Papers - https://ziggioriginal.com/
Terpene saver - https://grovebags.com/
As always thank you all for stopping by, for the love and for it all , this journey of mine wold just not be the same without you guys, the love and support is very much appreciloved and i fell honored with you all in my life
With true love comes happiness Always believe in your self and always do things expecting nothing and with an open heart , be a giver and the universe will give back to you in ways you could not even imagine so
As always, this is shared for educational purposes, aiming to spread understanding and appreciation for this plant. The journey with nature is one of discovery, creativity, and respect. Let’s celebrate it responsibly and continue to learn and grow together!
Growers Love To you All 💚
#EternityGrowCup #RuntzHunt #GrowersLove #CannabisCommunity #AptusHolland #ProMixSoil #TrolMaster #Zamnesia #Plagron #ZiggiPapers #Grovebags


Likes
3
Share


Likes
Comments
Share


@GrowOpsAnonymous
Follow
The girls are stretching nicely. Noticing more vigorous growth with the AutoPots. The timer is the issue with the EasyFeed. I'm trying 1 min every 3 hours, but then I have to be sure to turn it off at lights out. An 8 hour schedule would be great, but 1 min on isn't enough and 3 mins on is too much. Because the timer is battery operated, a secondary time cannot be added. I really like the system and am trying hard to dial it in. I think allowing to dryback could be superior over the AP system, but if I'm unable to prove it, who cares.
I've experienced plant #2 being unhappy due to under/over feed8ng twice this week.
Likes
4
Share

@Growstopher
Follow
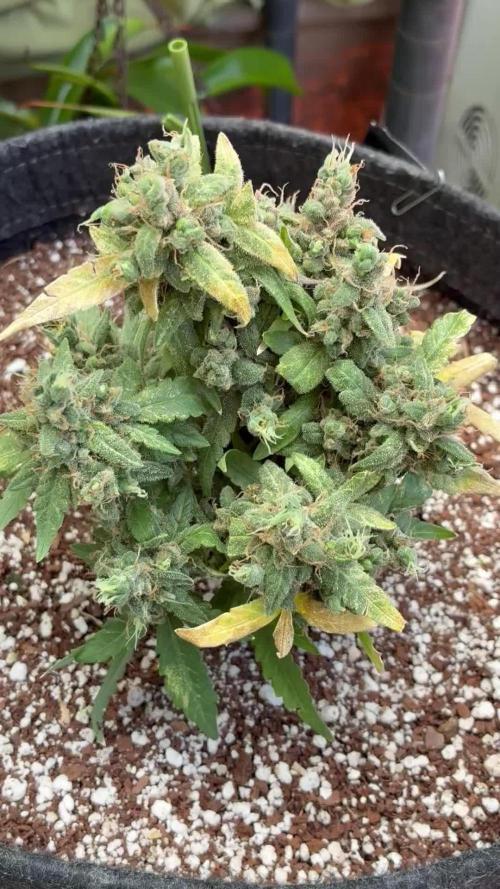
7.14.25. Harvest was 7.13. Glad this grow is over time to finish up!
Wet bud was 20.5 pretty much my smallest harvest ever! Bud looks decent is sticky and smells pungent a lot like gorilla glue. Will starting next grow in month or 2!
Thanks for checking out grow!
Processing
Likes
5
Share


@EKWCR
Follow
After 1 week of flush the plant start to fade gently, i hope that gonna be good before harvest. I think my additives tend to keep my plant green, both contain seaweed extract and are slow release.
There is a little bit of nice fox tailing.


Likes
3
Share


@undermink
Follow
I started cutting most of the fan leaves today. She looks good and I can see buds beginning to grow :) She really has giant fan leaves and massive stems... In case you're wondering: the scrogging net makes no sense at all since there was no space left to do anything with it :) It's just there for the other plants...


Likes
24
Share


@AsNoriu
Follow
Day 15. Girls got dried up again, but i transplanted them !!! Now in one day they stretched, happy and all will go as diamond ! Think i lost one week at the end of grow with all those hiccups ...
Pots 30 liters, were topped up with Biobizz All mix soil 80% and Biobizz Worm Castings 20% , each girl got 600 ml of water.
Big pots sorted low humidity too , now i have too high even, but exhaust is sorting excess..
Light is working well, but ... coverage for 3 plants is impossible, so for veg i still with help of pot rotation will manage, later ill plug one of my quantum boards as extra.
For two plants TS1000 would be perfect in veg, for flower still its one plants light.
Money wise its a huge grab ! Less than 100£ for 150W with dimmer ... Honestly impressed with it , maybe next week i wont mention it , but .... ;)))
Tent is doing her job too, perfect size for 2-3 plants, even 6 inch fan fitted perfectly !
Chocolopez going well, all damage left behind. Really want to taste final product, have only good memories with this lineage.
Happy Growing !!!

Likes
2
Share


@Weedwithwes
Follow
Great smell and beautiful buds with black and purple leafs.
Has a super gassy funk with a slight fruity pebble smell on the backend.
Likes
Comments
Share


@Indoorpharmer
Follow
Week 8 is the final flush. They’ll get 1 tsp per gallon of ph’d water for the rest of their lives. They’ll get chopped whenever the trichomes appear mostly cloudy with a little bit of amber.
Likes
7
Share


@OG_NordGrow
Follow
Neue Woche Leute
3.5
Luftfeuchtigkeit heute leider zu hoch gegangen wegen außen Einflüsse (Fenster auf). Abluft Anlage angeschmissen und alles geregelt. Auf den Fotos sieht man leicht ein gewölbte Blätter. Mache mir da aber keine Sorgen.
Likes
9
Share


@D33jW
Follow
🌱 OG Lemonade - Week 5 of Flowering Update 🌱
This week, I focused on gradually lowering both temperature and humidity to optimize
the late flowering stage. Additionally, I switched the light cycle to 11/13 to reduce DLI and encourage faster ripening.
The main cola is really starting to stand out, looking thick and promising—definitely shaping up to be an impressive top bud.
The aroma is insane! A powerful mix of gas and citrus, creating an incredibly fresh and intense terpene profile. This strain is living up to its name, and I can't wait to see how it develops in the coming weeks!
🌞 Light schedule: 11/13
🌱 PPFD: 800 µmol/m²/s
💧 VPD: ~1.4 kPa
Now, it's all about maintaining perfect conditions and letting this beauty pack on weight and resin in the final stretch!

Likes
5
Share


@XaXaXa
Follow
Girls getting bigger, color looks good, everything on point at this time
Feeding every 2-3 days with 1.2-1.3EC
380PPFD - 25DLI
Nothing much to say, I’m just happy that I managed problems I had
